· Home Cleaning · 14 min read
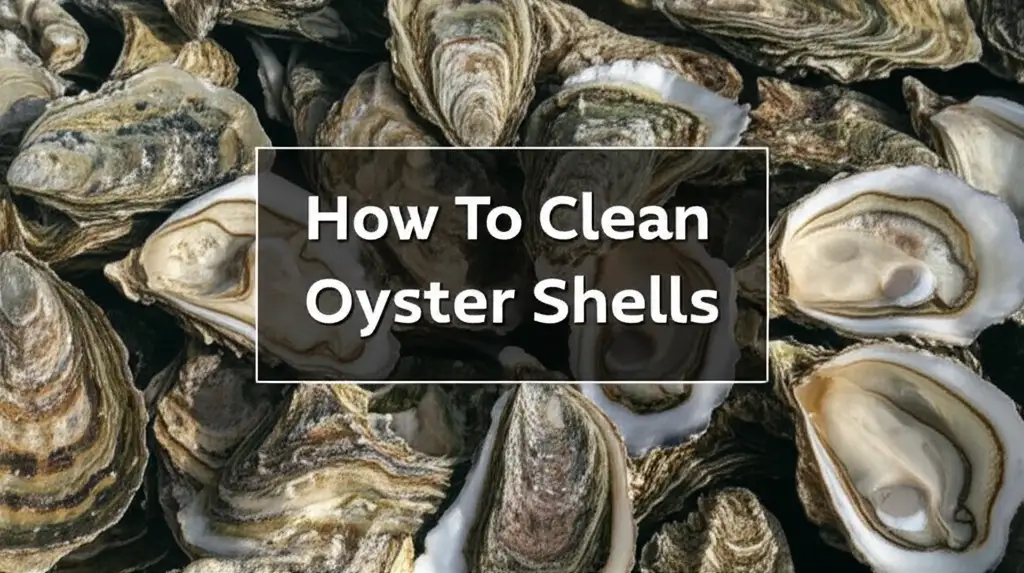
How To Clean Oyster Shells

Clean Oyster Shells: Your Complete Guide
Ever found beautiful oyster shells and wished you could transform them into stunning home decor or craft pieces? Many people collect these natural treasures, but they often come with dirt, grime, or even lingering odors. Knowing how to properly clean oyster shells is the first step to unlock their full potential. It ensures they are hygienic, odor-free, and ready for your next project.
This guide will walk you through every step of cleaning oyster shells, from the initial rinse to final preservation. We cover various methods, including both traditional and eco-friendly options. You will learn how to remove tough stains, sanitize shells, and prepare them for display. My goal is to make your shell cleaning process simple and rewarding. Get ready to turn those raw finds into sparkling keepsakes.
Takeaway
Cleaning oyster shells properly ensures they are safe, odor-free, and ready for use.
- Rinse first: Remove loose dirt and debris with plain water.
- Soak deeply: Use a water or bleach solution to loosen stubborn grime.
- Scrub well: A brush removes barnacles, algae, and calcified bits.
- Sanitize completely: Bleach or boiling kills bacteria and eliminates odors.
- Dry thoroughly: Prevent mildew and lingering smells with proper drying.
- Preserve for crafts: Polish or seal shells for lasting beauty and protection.
To clean oyster shells, first rinse them under running water to remove loose debris. Next, soak them in a bleach-water solution or boil them to kill bacteria and loosen stubborn matter. Scrub away any remaining barnacles or dirt with a stiff brush. Finally, rinse them thoroughly and allow them to air dry completely.
Initial Cleaning: Removing Loose Debris from Oyster Shells
The very first step in cleaning oyster shells is to address the surface dirt. You will find sand, mud, and loose organic matter clinging to them. This initial rinse removes the easiest bits. It also helps you see the true condition of each shell. I always start with this stage to prevent larger messes later on.
Begin by putting on a pair of gloves. This protects your hands from sharp edges or any lingering bacteria. Place your collected oyster shells in a large bucket or tub. Fill it with plain water, preferably warm water, as it helps loosen dirt better than cold. Swirl the shells around in the water.
Take each shell out individually. Rinse it under a strong stream of running water. You can use a garden hose if you have many shells. Use a stiff brush, like a utility brush or an old toothbrush, to gently scrub away any visible dirt or sand. Focus on both the inside and outside surfaces.
This step removes the superficial grime. It prepares the shells for deeper cleaning methods. Do not worry about perfect cleanliness at this point. The goal is to get rid of anything that easily washes away. This makes the next stages more effective. I find this initial rinse quite satisfying as the shells start to reveal their natural beauty.
Deep Cleaning Oyster Shells: Soaking Techniques
After the initial rinse, deep cleaning begins with soaking. Soaking helps loosen any remaining stubborn material on the oyster shells. This includes dried-on mud, small bits of organic matter, and even some smaller barnacles. There are a few options for soaking, depending on the shell’s condition and your preferences.
For generally clean shells with just a bit of grime, a simple freshwater soak works well. Place shells in a bucket and cover them completely with water. Let them soak for several hours, or even overnight. This softens any hardened deposits, making them easier to scrub off. I often add a splash of dish soap to the water for extra cleaning power.
If the shells have more persistent dirt or a faint odor, a mild bleach solution can be used. This method will also start the sanitization process. Mix one part bleach with nine parts water in a well-ventilated area. Submerge the shells in this solution. Make sure they are fully covered.
The soaking time can vary. For lightly soiled shells, 1-2 hours might be enough. Heavily soiled shells could benefit from a soak of up to 24 hours. Check the shells periodically. Once the debris appears loose, remove them from the soaking solution. Be sure to rinse them very well before moving on. Soaking is a simple but vital step for getting your oyster shells truly clean. This method also works well for other types of shells, much like how you would clean conch shells or other large shell finds.
Tackling Tough Stains: Removing Barnacles and Algae from Shells
Some oyster shells come with more than just dirt. They might have barnacles, stubborn algae, or calcified deposits. These elements require a more direct approach after soaking. It is important to remove them for a truly clean and smooth shell surface. I have found that a combination of physical and chemical help works best here.
First, use a sturdy tool to gently pry off barnacles. A butter knife, a dental pick, or even a small screwdriver can work. Be careful not to chip the shell itself. Apply gentle pressure from the base of the barnacle. They often pop right off once you find the right angle.
For algae or stubborn dark spots, a stiff brush is your best friend. A wire brush can be very effective on the rough outer surface. For the smoother inside, an old toothbrush or a scrub brush works well. You might need to apply some elbow grease. For very persistent algae or dark mold-like spots, a solution of vinegar or a very dilute bleach mixture can help. Apply it directly to the spot. Let it sit for a few minutes. Then scrub it hard.
Sometimes, a light sanding with fine-grit sandpaper can remove calcified spots without harming the shell’s overall structure. Always work in a well-ventilated area, especially if you use any cleaning agents. Rinse the shells thoroughly after scrubbing. This removes any loosened debris and cleaning solution. If you find significant mold-like growth, a dedicated approach to how to clean mold with vinegar might be helpful before deeper cleaning. This ensures you kill any organic matter.
Sanitizing and Whitening Oyster Shells with Bleach
After removing physical debris, the next step is often to sanitize and whiten your oyster shells. This makes them safe for handling and gives them a bright, clean appearance. Bleach is a common and effective choice for this purpose. It kills bacteria and helps lighten any discoloration.
When working with bleach, safety is key. Always use gloves and work in a well-ventilated area. Mix a solution of one part bleach to nine parts water. For example, if you use one cup of bleach, add nine cups of water. Use a plastic container or bucket for this. Avoid metal containers, as bleach can react with them.
Carefully place your scrubbed oyster shells into the bleach solution. Make sure they are fully submerged. The soaking time depends on how dirty or discolored the shells are. For most shells, 1 to 2 hours is enough. For very yellowed or heavily soiled shells, you might extend the soak to 24 hours. Do not leave them in bleach for too long. Excessive bleach exposure can make shells brittle.
Once soaking is complete, remove the shells from the solution. Rinse each shell thoroughly under running water. Rinse for several minutes to remove all traces of bleach. Any remaining bleach can continue to affect the shell’s integrity or cause irritation. Place the rinsed shells in a clean bucket of plain water. Let them soak for another hour. This helps remove any last chemical residue. You are now ready for the drying stage.
Eco-Friendly Ways to Clean Oyster Shells: Vinegar and Boiling Methods
If you prefer to avoid harsh chemicals like bleach, several eco-friendly methods can still help you clean oyster shells effectively. Vinegar and boiling are two popular options. They are great for sanitizing and removing organic matter naturally. I often use these methods for shells I plan to use in crafts.
Vinegar Soaking: Vinegar is a mild acid that can dissolve calcified deposits and organic material. It also helps eliminate odors. To use vinegar, mix equal parts white vinegar and water in a container. Submerge your oyster shells completely in this solution. Let them soak for 24 hours, or even longer for very dirty shells. You might see some bubbling, which means the vinegar is working to break down deposits.
After soaking, remove the shells and scrub them with a stiff brush. This will remove any loosened debris. Rinse them very well under running water. Vinegar can leave a slight smell, so a good rinse is important. This method is similar to how you might clean shells with vinegar of other types, making it a versatile option.
Boiling Method: Boiling is an excellent way to sanitize shells and remove any lingering organic material. This is particularly useful if the shells still have bits of oyster meat or other soft tissues. Place your shells in a large pot and cover them with water. Bring the water to a rolling boil. Let them boil for about 10-15 minutes.
Be careful when handling hot shells. Use tongs to remove them from the pot. Let them cool down completely. Once cool, any remaining organic matter should be soft and easy to scrape off. Boiling is a safe and effective way to ensure your shells are clean and odor-free without chemicals.
Drying and Curing Clean Oyster Shells
Proper drying is a critical step in the oyster shell cleaning process. If shells are not dried completely, they can develop mildew or retain a musty odor. This step ensures your shells are stable and ready for any future use. I always make sure my shells are completely dry before storage or display.
After rinsing your shells thoroughly, spread them out on a clean towel or drying rack. Choose a sunny, well-ventilated area for air drying. Sunlight helps to further sanitize the shells and can bleach them naturally. Depending on humidity levels and shell thickness, air drying can take anywhere from a few hours to a couple of days. Ensure shells are not touching each other too much. This allows air to circulate around them.
For a faster drying method, you can use a low-temperature oven. Place shells on a baking sheet, making sure they are in a single layer. Set your oven to the lowest possible temperature, usually around 200°F (93°C). Bake for about 30 minutes to an hour. Check them periodically. Do not use high heat, as it can damage the shells or cause them to crack.
Once the shells feel completely dry to the touch, let them sit in an open area for a few more days. This curing period helps dissipate any residual odors that might be trapped within the shell’s pores. It also allows any internal moisture to fully evaporate. A well-dried and cured shell will be odorless and ready for your next project.
Polishing and Sealing Oyster Shells for Craft Projects
Once your oyster shells are thoroughly cleaned and dried, you might want to enhance their appearance. Polishing and sealing can give them a beautiful shine and protect them for various craft projects. This final step transforms them into true decorative pieces. I love how a simple polish can bring out the natural colors.
For a natural luster, you can apply a small amount of mineral oil to the shells. Pour a few drops onto a soft cloth. Rub the oil evenly over the shell’s surface. The oil will deepen the colors and give the shell a subtle sheen. This is a great choice if you prefer a less glossy finish. It is also safe for shells that might come into contact with food, like for serving dishes, if the mineral oil is food-grade.
If you desire a more durable and glossy finish, consider using a clear sealant. Craft stores sell various clear sealants or varnishes suitable for shells. A spray-on clear coat is often the easiest to apply. Hold the can about 6-8 inches away from the shell. Apply thin, even coats. Allow each coat to dry completely before applying the next. Follow the product instructions for drying times and multiple coats.
Sealing protects the shells from dust, moisture, and wear. It also locks in their clean state and prevents future odors. You can choose finishes from matte to high-gloss. Consider how you will use the shells before choosing a sealant. A high-gloss finish works well for decorative items. A more natural finish might be better for rustic decor.
Safe Handling and Disposal of Oyster Shell Cleaning Waste
Cleaning oyster shells involves certain materials and waste products. Knowing how to handle these safely and dispose of them responsibly is important. This protects you, your home, and the environment. I always prioritize safety and proper disposal during any cleaning project.
When handling uncleaned shells, always wear thick gloves. Oyster shells can have sharp edges. They may also carry bacteria or other organisms. Gloves protect your hands from cuts and contaminants. After handling, wash your hands thoroughly with soap and water.
The water used for initial rinsing can often be poured down the drain. This water typically contains sand and loose dirt, which are generally safe for plumbing. However, if you used very muddy water, consider pouring it into a garden bed. This prevents drain clogs.
Cleaning solutions, especially those containing bleach, require careful disposal. Never pour bleach solutions directly into natural waterways. This can harm aquatic life. The best way to dispose of a bleach solution is to dilute it further with water. Then pour it down a household drain. Ensure the area is well-ventilated during this process. This allows it to mix with other wastewater in the sewage system. If you used vinegar solutions, these are generally safe to pour down the drain without further dilution. Vinegar is eco-friendly.
Any organic waste, such as removed barnacles or bits of tissue, should be placed in a sealed bag and put in your regular trash. This prevents odors and discourages pests. By following these guidelines, you can ensure your shell cleaning process is safe and responsible.
FAQ Section
How long does it take to clean oyster shells?
The total time to clean oyster shells varies based on their initial condition. A basic rinse and soak might take a few hours. For heavily soiled shells requiring multiple soaks and scrubbing, the process could extend over one to two days, including drying time. Allow ample drying time for best results.
Can you put oyster shells in the dishwasher?
I do not recommend putting oyster shells in the dishwasher. The high heat and strong detergents can damage the shells, making them brittle or causing them to chip. They can also leave a residue. Hand-cleaning methods are safer and more effective for preserving the shells’ integrity and appearance.
Do oyster shells smell after cleaning?
Properly cleaned and dried oyster shells should not smell. Lingering odors usually mean not all organic matter was removed. They might also indicate incomplete drying. If a smell remains, repeat the sanitizing and extended drying steps. Ensure shells are completely dry to prevent musty odors.
What can I do with cleaned oyster shells?
Cleaned oyster shells are versatile for crafts and decor. You can use them for jewelry dishes, candle holders, or mosaic art. They make great embellishments for picture frames or mirrors. Many people also use them as unique garden decorations or as drainage in potted plants.
Is it safe to handle raw oyster shells?
Handling raw oyster shells can be safe with precautions. Always wear thick gloves to protect against sharp edges and potential bacteria. Wash your hands thoroughly with soap and water after handling. Avoid touching your face or eyes. Proper cleaning removes any risks for future use.
How do I remove the ‘oyster’ smell completely?
To remove the oyster smell completely, ensure all organic tissue is gone. Boil the shells for 10-15 minutes or soak them in a bleach-water solution (1 part bleach to 9 parts water) for several hours. Rinse thoroughly. Then, allow them to air dry completely for several days in a well-ventilated area.
Conclusion
Cleaning oyster shells transforms raw beach finds into beautiful treasures for your home or crafts. We have explored every necessary step, from the initial rinse to the final polish. You now understand how to effectively remove dirt, barnacles, and odors using various methods. Whether you choose bleach for sanitization or vinegar for an eco-friendly approach, patience and thoroughness are key.
Remember to prioritize safety during the cleaning process. Always wear gloves and ensure proper ventilation, especially when using cleaning agents. Once your clean oyster shells are dry and cured, their natural beauty shines through. They are then ready for any creative project you envision. So, go ahead, gather those shells, and start your cleaning journey today. You will love the stunning results of your efforts.
- oyster shells
- shell cleaning
- DIY crafts
- home decor
- natural cleaning
- beach finds


