· Exterior Cleaning · 20 min read
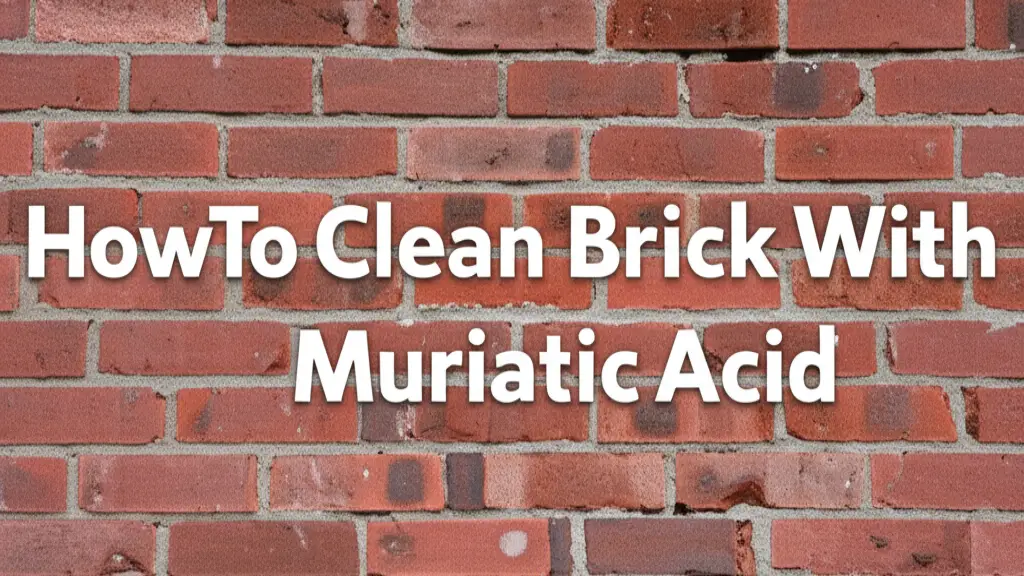
How To Clean Paint Of Bricks
Revive Your Brickwork: How to Clean Paint Off Bricks Effectively
Discovering unwanted paint on your beautiful brick surfaces can be frustrating. Maybe a stray brush stroke during a home renovation, or perhaps an old, peeling coat of paint is detracting from your home’s curb appeal. I understand the desire to restore that classic, natural brick look. Cleaning paint off bricks does not need to be a difficult task. This guide will walk you through various effective methods. We will cover everything from assessing the paint and brick type to choosing the right tools and techniques. You will learn how to safely and efficiently remove paint, restoring your brickwork’s original charm. Let’s get started on bringing your brick surfaces back to life.
Takeaway
- Assess Paint and Brick: Identify paint type and brick condition before choosing a method.
- Start Gently: Begin with manual scraping or wire brushing for loose paint.
- Use Chemical Strippers Carefully: Select appropriate products and test on a small area.
- Pressure Wash Responsibly: Use the correct pressure and nozzle to avoid damage.
- Consider Professionals: For large areas or stubborn paint, professional help saves time and prevents errors.
- Protect and Seal: Clean thoroughly and consider sealing bricks after paint removal.
Removing paint from bricks typically involves a multi-step process. First, identify the paint type and brick condition. Then, select a method, starting with gentle manual scraping or wire brushing. For stubborn paint, use a chemical stripper or a pressure washer with caution. Always test methods in a small, hidden area first.
Initial Assessment and Preparation for Brick Paint Removal
Before you begin the actual cleaning process, you must conduct a thorough assessment. This step ensures you choose the most effective and safest method for your specific situation. Incorrect methods can damage your bricks or mortar joints. I always recommend taking time for this crucial first stage. This preparation saves you time and effort later on.
Identifying Paint Type
The type of paint on your bricks greatly influences the removal method. Different paints respond to different solvents and techniques. Latex or water-based paints are generally easier to remove than oil-based paints. I find that latex paint often softens with water or mild solutions. Oil-based paints, however, require stronger chemical strippers. You can often determine the paint type by rubbing a cotton ball dipped in rubbing alcohol on a small, inconspicuous area. If the paint transfers to the cotton ball, it is likely latex. If not, it is probably oil-based. Knowing this helps you pick the right remover.
Understanding Brick Condition
Examine the condition of your bricks and mortar. Older bricks can be softer and more porous. They are more susceptible to damage from harsh chemicals or high-pressure washing. Mortar joints, especially in older homes, can also be fragile. Using too much force or strong chemicals can erode them. I always look for signs of crumbling, cracks, or loose mortar. If the bricks are soft or deteriorating, you must use gentler methods. This careful inspection prevents costly repairs down the road.
Essential Safety Precautions
Safety must be your top priority when cleaning paint off bricks. You will likely use chemicals or powerful tools. Always wear appropriate personal protective equipment (PPE). This includes safety glasses or goggles to protect your eyes from splashes and debris. Chemical-resistant gloves are essential for protecting your hands. A respirator or face mask prevents you from inhaling fumes, especially when using strong strippers. Long sleeves and pants shield your skin. Ensure good ventilation if working indoors or in an enclosed space. I always make sure a water source is nearby for quick rinsing if chemicals get on my skin.
Protecting Surrounding Areas
Before applying any cleaning agents or using tools, protect nearby surfaces. Cover windows, doors, plants, and adjacent walkways with plastic sheeting. Use painter’s tape to secure the plastic. This prevents accidental splashes or overspray from damaging other parts of your property. If using chemical strippers, ensure the run-off does not contaminate your garden or drain into storm sewers. You can use old towels or absorbent materials to collect excess liquid. This preparation step keeps your work area clean and prevents damage to surrounding landscaping or structures.
Gentle Approaches: Manual Scraping and Wire Brushing
When facing paint on bricks, I always recommend starting with the least aggressive methods first. This approach minimizes the risk of damage to your brickwork. Manual scraping and wire brushing are excellent starting points. They work best on loose, peeling, or flaky paint. These methods require patience and careful application.
The Scraping Method for Loose Paint
Manual scraping is effective for paint that has already begun to detach from the brick surface. I use a stiff wire brush, a paint scraper, or a chisel for this task. Select a tool that allows you to apply pressure without gouging the brick. Hold the scraper at a low angle. Gently push and scrape away the loose paint. Work in small sections. Avoid digging into the brick or mortar. This method is slow but offers good control. It removes the superficial layers, preparing the surface for further cleaning if needed. I find it satisfying to see the flakes of paint come off.
Wire Brushing Techniques for Stubborn Spots
For more stubborn paint spots, a wire brush can be very useful. Choose a stiff-bristled wire brush. You can find them at any hardware store. Some brushes come with an attached handle for better grip. Brush vigorously over the paint spot. Use circular motions or brush in the direction of the brick. The bristles help abrade the paint without excessive force on the brick itself. Be mindful of the mortar joints. Wire brushing too aggressively can damage them. If the paint does not come off easily, do not force it. Move on to a different method. I often combine scraping with wire brushing for the best results.
Chemical Strippers: Choosing and Applying the Right Product
When manual methods are not enough, chemical paint strippers become necessary. These products break down the paint’s bond with the brick surface. Choosing the correct type and applying it properly is crucial. Improper use can lead to brick discoloration or damage. Always read the product instructions carefully before starting.
Types of Chemical Paint Removers
Several types of chemical paint removers exist, each with different active ingredients. I always consider the paint type and brick sensitivity when choosing.
- Alkaline Strippers: These are often caustic and work well on oil-based paints. They can be strong, so they require careful handling and neutralization.
- Solvent-Based Strippers: Products with methylene chloride or NMP (N-methyl-2-pyrrolidone) are very effective on many paint types. However, they have strong fumes and require excellent ventilation.
- Biodegradable/Eco-Friendly Strippers: These newer formulations are safer for the environment and often contain citrus or soy extracts. They work slower but are less harsh. I prefer these for most DIY projects due to their lower toxicity.
Always perform a patch test in an inconspicuous area. This test confirms the stripper will not damage or stain your specific type of brick. Different bricks react differently to chemicals. This simple step prevents major issues. For more insights on cleaning similar porous surfaces, you might find this article on how to clean paint off concrete helpful, as the principles of chemical application are similar.
Application and Dwell Time Best Practices
Applying chemical stripper correctly ensures its effectiveness. Use a thick layer of the stripper. I typically apply it with a brush or roller. Ensure the entire painted area is covered evenly. Avoid thin spots. The stripper needs sufficient contact time to work. The “dwell time” varies by product and paint type. Read the manufacturer’s instructions for recommended times. It can range from 30 minutes to several hours. For thicker paint layers, sometimes an overnight application works best. Cover the applied stripper with plastic sheeting to prevent it from drying out. This keeps the chemicals active longer. Do not let the stripper dry on the brick. This makes removal much harder.
Neutralizing and Rinsing Procedures
After the dwell time, the paint should be soft and pliable. Use a scraper or stiff brush to remove the softened paint. Work gently. Do not scratch the brick. Once the bulk of the paint is off, the brick surface needs proper cleaning. Most chemical strippers require neutralization. This stops the chemical reaction and prevents residue. Some products come with a specific neutralizer. Others suggest rinsing with water or a mild acid solution, like diluted vinegar. Always follow the product’s neutralization instructions.
After neutralization, thoroughly rinse the brick with water. A garden hose with a spray nozzle works well. Ensure all chemical residue and paint particles are removed. Any remaining chemicals can continue to react or leave unsightly stains. I often use a stiff brush with water during rinsing to help remove any last bits. Ensure the area is well-ventilated during and after this process.
Pressure Washing: Effective Rinsing and Cautionary Measures
Pressure washing can be a fast and effective way to remove paint from bricks, especially after using a chemical stripper. However, it requires extreme caution. High pressure can severely damage bricks and mortar joints. I always advise starting with the lowest pressure setting. Gradually increase it only if necessary. This method is about finesse, not brute force.
Setting the Right Pressure and Nozzle Type
The key to safe pressure washing on bricks is using the correct settings. I recommend starting with a wide-angle nozzle, such as a 25-degree or 40-degree tip. These tips spread the water stream over a larger area. This reduces the direct impact on the brick surface. Begin with a lower PSI (pounds per square inch) setting, typically around 500-1000 PSI. For softer or older bricks, even lower pressure might be needed. Test the pressure in an inconspicuous area first. Observe how the brick reacts. If paint comes off without damaging the brick or mortar, you have found a good starting point. Never use a zero-degree (red) nozzle. This concentrated stream is far too powerful for brickwork.
Proper Technique for Even Paint Removal
Hold the pressure washer wand at a consistent distance from the brick surface, usually 6-12 inches. Move the wand in sweeping, overlapping motions. Work from top to bottom to allow dirty water to run off. Do not linger in one spot. Prolonged exposure to high-pressure water can erode the mortar. It can also pit the bricks. Maintain a steady pace to ensure even paint removal. Watch closely to see if the paint lifts. If it does not, you might slightly increase the pressure or try a different nozzle. However, always prioritize the safety of your brickwork. I make sure to keep a good grip on the wand, as the pressure can make it jump around.
Risks of High Pressure
Using excessive pressure or the wrong nozzle type carries significant risks for brick surfaces. You can:
- Damage Mortar Joints: High pressure can blast away the mortar, weakening the wall structure.
- Erode Bricks: Especially softer or older bricks can be pitted, spalled (surface flakes off), or even crumble. This damage is irreversible.
- Force Water into Walls: Too much pressure can drive water deep into the brick, leading to moisture issues inside the home. This can cause mold growth or structural damage over time.
- Leave Streaks: Uneven pressure washing can leave visible streaks on the brick. This happens when some areas are cleaned more aggressively than others.
I only use pressure washing as a final rinse or for very tough paint spots after chemical application. It should be a tool for careful finishing, not for initial aggressive paint removal. If you are unsure, it is better to use a garden hose with a spray nozzle or a stiff brush for rinsing instead.
Specialized Methods: Sandblasting and Professional Help
For extensive paint removal projects or extremely stubborn paint, specialized methods might be considered. Sandblasting is one such technique. However, it comes with significant risks when applied to brick. In many cases, consulting or hiring a professional cleaner is the safest and most effective option. I always weigh the benefits against the potential damage and cost.
When to Consider Sandblasting (Abrasive Blasting)
Sandblasting, or abrasive blasting, involves propelling abrasive materials at high speed onto a surface. This method effectively removes tough paint layers. It is very fast. However, I strongly advise against sandblasting for most brick surfaces. Bricks, especially older ones, are porous and relatively soft. Sandblasting can cause irreversible damage:
- Surface Erosion: The abrasive action grinds away the brick’s outer protective layer. This exposes the softer, inner material.
- Increased Porosity: Damaged bricks become more porous. This makes them more susceptible to water penetration, efflorescence, and freeze-thaw damage.
- Altered Appearance: The natural texture and color of the brick can be permanently altered. It often leaves a dull, “sanded” look.
- Mortar Damage: Mortar joints are even softer than bricks. They can be severely damaged, requiring costly repointing.
I only recommend sandblasting as an absolute last resort, and only for very hard, dense bricks. Even then, it should be done by an experienced professional. This professional must use the correct abrasive media and very low pressure. For almost all residential brick, sandblasting is too aggressive.
Benefits of Hiring a Professional Brick Cleaner
For large-scale projects, historical homes, or when paint is proving impossible to remove, hiring a professional brick cleaner is often the best course of action. Professionals bring several advantages:
- Expertise: They have specialized knowledge of different brick types, paint compositions, and removal techniques. They can accurately assess the situation.
- Specialized Equipment: Professionals use industrial-grade equipment. This includes specific chemical strippers, low-pressure washing systems, and sometimes specialized abrasive blasting equipment designed for masonry.
- Safety Compliance: They are trained in handling hazardous chemicals and operating powerful machinery safely. They follow environmental regulations regarding chemical disposal.
- Efficiency: Professionals can complete the job much faster than a DIY approach. This saves you time and effort.
- Guaranteed Results: Many professionals offer guarantees on their work. This gives you peace of mind.
- Minimizing Damage: A professional is less likely to damage your brickwork. They know how to achieve effective paint removal without compromising the integrity or appearance of your bricks.
While hiring a professional incurs a cost, it can prevent expensive damage and ensure a high-quality finish. For me, the peace of mind is often worth the investment, especially when dealing with a valuable asset like brickwork.
Post-Cleaning Care and Sealing Your Bricks
Once the paint is successfully removed, your job is not entirely finished. Proper post-cleaning care ensures the longevity and appearance of your brickwork. This step involves thorough rinsing, inspection, and possibly applying a protective sealer. I always view this as the final polish to a job well done.
Thorough Rinsing and Drying
After all paint and chemical residues are gone, a thorough rinse is essential. Use a garden hose with a good spray nozzle. Rinse the entire area meticulously. Start from the top and work your way down. Ensure no chemical residue or paint flakes remain. Any leftover chemicals can continue to react with the brick. They can cause discoloration or deterioration over time. After rinsing, allow the bricks to dry completely. This might take several days, depending on the weather and humidity. Proper drying is crucial before any further steps. It ensures that moisture does not get trapped.
Inspecting for Residual Paint or Damage
Once the bricks are dry, perform a detailed inspection. Look closely for any remaining paint specs or streaks. Sometimes, a tiny bit of paint might stubbornly cling to the brick texture. If you find any, you can try a targeted application of a mild chemical stripper or light scrubbing with a wire brush. Also, inspect for any damage to the bricks or mortar. Check for pitting, spalling, or crumbling. If you notice any significant damage, consult a masonry professional for repair options. Addressing minor issues early can prevent them from becoming major problems. I like to walk around the area, looking from different angles to spot anything I missed.
Applying a Breathable Brick Sealer
Applying a breathable brick sealer is an optional but highly recommended step. A sealer provides an extra layer of protection for your newly cleaned brickwork.
- Water Repellency: Sealers make the bricks more resistant to water penetration. This helps prevent efflorescence (white salt deposits) and moisture-related damage.
- Stain Protection: They create a barrier against future stains, including accidental paint spills.
- Easier Cleaning: Sealed bricks are generally easier to clean in the future.
- Preserves Appearance: A good sealer helps maintain the natural look of the brick. Ensure you choose a “breathable” sealer. This allows moisture vapor to escape from inside the brick. Non-breathable sealers can trap moisture, leading to internal damage. I apply sealer with a low-pressure sprayer or a roller. Follow the manufacturer’s instructions for application rate and drying time. This step truly helps protect your investment.
Addressing Common Challenges and Troubleshooting
Cleaning paint off bricks can present unique challenges. Sometimes, the paint is very old, or it gets into hard-to-reach spots. Knowing how to troubleshoot these common issues helps you achieve a cleaner finish. I have faced these problems myself, and I can tell you that patience is key.
Removing Old, Multiple Layers of Paint
Old paint, especially if applied in multiple layers, is notoriously difficult to remove. It bonds very strongly to the brick over time. For such cases, a single application of chemical stripper might not be enough. I often recommend a two-pronged approach:
- Repeat Chemical Application: Apply the chemical stripper, let it dwell, and scrape away the first layer. Then, immediately apply another layer of stripper to the remaining paint. This second application can penetrate deeper.
- Extended Dwell Time: For very old, thick layers, extending the dwell time of the chemical stripper can be effective. Consider covering the treated area with plastic sheeting. This prevents the stripper from drying out prematurely. Let it work overnight. This allows the chemicals more time to break down the hardened paint.
- Combination of Methods: You might need to combine chemical stripping with manual scraping and then a low-pressure rinse. Be persistent but gentle. Do not increase the pressure or force unnecessarily.
Dealing with Paint on Mortar Joints
Paint on mortar joints can be a particular headache. Mortar is softer and more porous than brick. It can absorb paint deeply. Aggressive cleaning methods can easily damage the mortar, leading to cracks or crumbling.
- Gentle Scraping: For paint on mortar, I use a small, narrow scraper or a wire brush with fine bristles. Work very carefully along the mortar lines.
- Targeted Chemical Application: Apply a small amount of chemical stripper directly to the painted mortar. Use a small brush or cotton swab. This minimizes contact with the surrounding brick. Allow it to dwell, then gently scrape or brush away.
- Rinse Carefully: When rinsing, use a low-pressure stream of water. Avoid directly blasting the mortar joints. You can even use a sponge and bucket for a very controlled rinse.
- Repointing if Damaged: If mortar gets damaged during the process, it will need repointing. This involves removing the old mortar and replacing it with new. This is a job that sometimes requires a professional mason.
Preventing Efflorescence After Cleaning
Efflorescence is a white, powdery deposit that can appear on brick surfaces. It happens when water moves through the brick, dissolves salts within it, and then evaporates, leaving the salts on the surface. Cleaning bricks, especially with water-based methods, can sometimes lead to efflorescence. It brings out these salts.
- Thorough Rinsing: As mentioned, thoroughly rinse the bricks after cleaning. Remove all chemical residue. This reduces the chance of introducing new salts.
- Proper Drying: Allow bricks to dry completely. This minimizes trapped moisture.
- Identify Water Source: If efflorescence occurs, check for persistent moisture issues. Leaky gutters, poor drainage, or rising damp can all contribute. Address these underlying problems first.
- Vinegar Solution: For mild efflorescence, I often use a solution of white vinegar and water (1 part vinegar to 5-10 parts water). Scrub the area with a stiff brush. Rinse thoroughly afterward. This can help dissolve the salts. For general cleaning solutions that might involve vinegar, you can refer to insights on how to clean mold with vinegar. While mold is different from efflorescence, the principles of using vinegar as a mild acidic cleaner are similar.
- Breathable Sealer: Applying a breathable sealer, as discussed, can help reduce water absorption. This lessens the likelihood of future efflorescence.
These troubleshooting tips help you handle the more challenging aspects of paint removal. Remember, persistence and the right technique often lead to success.
FAQ Section
Can I use a household cleaner to remove paint from bricks?
Household cleaners are generally too mild to effectively remove paint from bricks. They may work on very fresh, thin paint spots. However, they are not strong enough for dried or multiple layers of paint. You will need specialized paint removers. These are formulated to break down paint bonds on porous surfaces.
Is it safe to pressure wash old bricks?
Pressure washing old bricks is not generally safe. Old bricks are often softer and more porous than new ones. High pressure can cause irreversible damage. It can pit the surface, erode mortar joints, and force water deep into the masonry. If you must use a pressure washer, use a very low PSI setting (under 1000 PSI) and a wide-angle nozzle.
How long does it take to remove paint from bricks?
The time it takes to remove paint from bricks varies greatly. It depends on the size of the area, the type of paint, and how old it is. A small spill might take an hour. A large wall with multiple layers could take days or even weeks. Chemical strippers require dwell time. Each step needs to be done carefully.
What type of paint is easiest to remove from bricks?
Latex or water-based paint is generally the easiest to remove from bricks. These paints tend to be less adhesive than oil-based paints. They often respond well to milder chemical strippers or even hot water and scrubbing if fresh. Oil-based paints require stronger solvents and more effort.
Will removing paint damage my bricks?
Removing paint can damage bricks if done improperly. Using harsh chemicals, excessive scrubbing, or high-pressure washing can etch the surface, erode mortar, or cause spalling. Always test your chosen method in an inconspicuous area. Start with the gentlest method first. This minimizes the risk of damage.
When should I call a professional?
You should call a professional brick cleaner for large painted areas, historical brickwork, or if you encounter very stubborn paint. Professionals have the experience, specialized tools, and safety training. They can assess the brick condition accurately. They ensure paint removal without causing damage.
Conclusion
Cleaning paint off bricks is a project that requires careful planning, patience, and the right approach. We have explored various methods, from gentle manual scraping to powerful chemical strippers and pressure washing. I hope this guide gives you the confidence to tackle your project. Remember, start with a thorough assessment of your brick and paint type. Prioritize safety by wearing the correct protective gear. Begin with the least aggressive cleaning method. Only escalate to stronger techniques if absolutely necessary.
Whether you are dealing with a small spill or an entire painted wall, the goal is to restore your brickwork’s original beauty. Proper post-cleaning care, including thorough rinsing and possibly sealing, helps maintain that refreshed look for years to come. By following these steps, you can successfully clean paint off bricks. Your efforts will enhance your property’s appeal and preserve the integrity of your masonry. Your brickwork deserves to shine, and with these tips, you can make it happen.
- brick cleaning
- paint removal
- masonry cleaning
- DIY paint removal
- exterior paint