· Wild Edibles · 17 min read
How To Clean Pheasant Back Mushrooms

Preparing Pheasant Back Mushrooms: A Cleaning Guide
Finding pheasant back mushrooms, also known as Dryad’s Saddle, is a true delight for any forager. These unique fungi, often smelling faintly of cucumber or watermelon rind, offer a wonderful texture and flavor to many dishes. However, before you can enjoy them, you must know how to clean pheasant back mushrooms properly. This crucial step ensures they are free from dirt, debris, and unwelcome guests.
My guide will walk you through the entire process. We will cover everything from identifying fresh specimens to preparing them for your kitchen. Getting your mushrooms perfectly clean makes all the difference in their taste and safety. Let’s make sure your foraged treasures are ready for delicious meals.
Takeaway:
- Handle pheasant back mushrooms gently to prevent bruising.
- Prioritize dry cleaning methods like brushing and wiping.
- Use minimal water only when absolutely necessary for stubborn dirt.
- Thoroughly inspect each mushroom for bugs and debris.
- Trim tough stems and any old, rubbery parts before cooking.
To clean pheasant back mushrooms, gently brush away loose dirt with a soft brush or cloth. Wipe surfaces with a damp paper towel to remove stubborn debris. Avoid soaking them in water to maintain their texture and flavor. Trim off any tough or damaged sections before cooking.
Understanding Pheasant Back Mushrooms (Dryad’s Saddle)
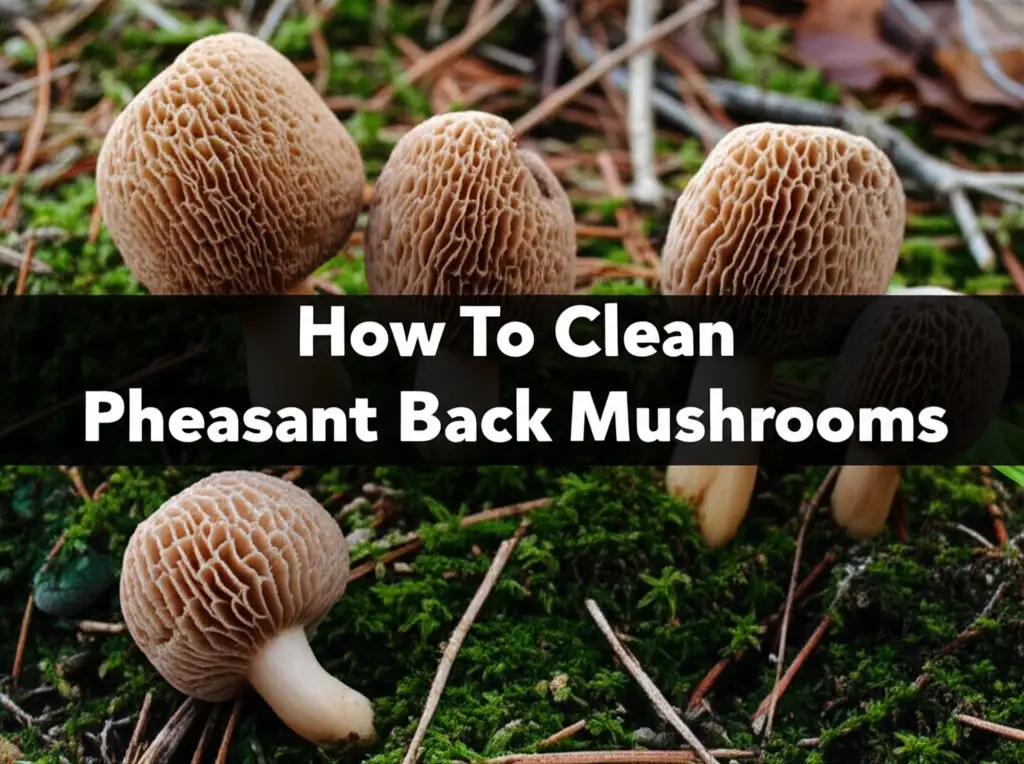
Pheasant back mushrooms are truly distinct. They get their name from the scaly, patterned cap that resembles a pheasant’s plumage. You typically find them growing on dead or dying hardwood trees in spring and early summer. Their scent is often a fresh, almost fruity aroma, reminiscent of watermelon rind or cucumber, which helps in identification.
The texture of these mushrooms changes with age. Younger pheasant backs are tender and pliable, while older ones can become quite tough and leathery, especially near the stem and outer edges. Knowing this helps you decide which parts to keep and which to discard during the cleaning process. Proper cleaning is important for safety and for the best culinary experience.
Identifying Fresh Specimens
When you are foraging, always look for young, firm pheasant back mushrooms. Their caps should feel supple, not rigid or brittle. The underside, which has pores instead of gills, should be white or light cream in color. If the pores are yellow and large, the mushroom is likely older and may be too tough.
A fresh pheasant back mushroom will also have a pleasant, mild aroma. Avoid any mushrooms that smell sour, moldy, or unpleasant. These signs indicate spoilage, and such mushrooms should not be collected or eaten. Picking fresh specimens makes the cleaning process much easier.
Why Proper Cleaning Matters
Cleaning your pheasant back mushrooms is more than just about aesthetics. Wild mushrooms grow in natural environments, meaning they can collect a lot of dirt, leaves, and even small insects. Eating these unwanted bits would not be very pleasant. Proper cleaning removes these contaminants.
It also helps to preserve the mushroom’s delicate flavor and texture. Soaking mushrooms in water, for example, can make them soggy and dilute their taste. My goal is always to keep the mushrooms as close to their natural, delicious state as possible. Clean mushrooms cook better and taste fantastic.
Essential Tools for Cleaning Pheasant Back Mushrooms
Having the right tools makes the task of cleaning pheasant back mushrooms much easier and more effective. You do not need anything fancy or expensive. Most of these items are likely already in your kitchen. Gathering them beforehand will streamline your cleaning process.
The right tools help you remove dirt gently without damaging the delicate mushroom flesh. Using soft materials prevents bruising or tearing the cap. This careful approach helps maintain the mushroom’s quality before cooking. I always lay out my tools on a clean surface before starting.
- Soft Brush: A mushroom brush with soft bristles is ideal. You can also use a clean, soft toothbrush or a pastry brush. This tool is perfect for gently sweeping away loose dirt and debris.
- Damp Cloths or Paper Towels: Keep a few clean, damp cloths or sturdy paper towels handy. These are excellent for wiping down surfaces and removing stubborn dirt that a brush cannot dislodge.
- Paring Knife: A small, sharp paring knife is essential for trimming. You will use it to cut away tough stems, damaged spots, or any parts that are too old or bug-eaten.
- Colander or Wire Rack: After cleaning, you might want a colander or wire rack. This allows air to circulate around the mushrooms if they are slightly damp, helping them dry off completely. This step is important if you plan to store them for a short period.
Make sure your tools are clean before you begin. This prevents cross-contamination. A clean workspace ensures the mushrooms stay clean once you start handling them. These simple tools are your best friends in preparing your foraged finds.
Step-by-Step Guide to Cleaning Pheasant Back Mushrooms
Cleaning pheasant back mushrooms requires a gentle touch and careful attention. The goal is to remove all debris without waterlogging the mushrooms. I always approach this task with patience, knowing that a properly cleaned mushroom tastes far better. This method ensures your foraged finds are pristine.
Start by setting up a clean work area. A large cutting board or a clean countertop works well. Lay out your tools and prepare a discard bowl for unwanted bits. Now, let’s get those pheasant backs ready for cooking.
The Dry Cleaning Method (Preferred)
This is my preferred method for cleaning pheasant back mushrooms because it preserves their texture. Water can make mushrooms absorb liquid, making them soggy. Dry cleaning helps maintain their firm bite. This method is usually enough for lightly soiled specimens.
- Initial Brush: Pick up one mushroom at a time. Use your soft brush to gently brush away any loose dirt, leaves, or pine needles from the cap and the pore surface. Brush in one direction, moving from the center of the cap outwards.
- Wipe Down: For any dirt that remains, take a slightly damp cloth or paper towel. Gently wipe the entire surface of the mushroom. Do not scrub hard; a light wiping motion is all you need. Change your cloth or paper towel frequently as it gets dirty.
- Inspect Thoroughly: Turn the mushroom over and inspect all sides. Pay close attention to the pores and the area where the stem meets the cap. Dirt and small insects can hide in these crevices. Use the tip of your knife or a small brush to dislodge anything stuck.
When to Use Minimal Water
Sometimes, mushrooms are very dirty, covered in sticky mud or heavy soil. In these cases, a quick rinse might be unavoidable. However, it is important to be quick and efficient. My aim is always to minimize water contact.
- Quick Rinse: If absolutely necessary, hold the mushroom under a very gentle stream of cool water for a few seconds. Do not let it soak. A quick, directed spray can dislodge stubborn dirt.
- Immediate Drying: As soon as you rinse a mushroom, gently pat it dry with a clean paper towel. You want to remove as much surface moisture as possible right away. Place it on a clean, dry surface, like a wire rack, to air dry further if needed. Ensure they are completely dry before storage or cooking.
Inspecting for Unwanted Guests
Wild mushrooms often host small insects or larvae. This is natural and usually harmless, but you want to remove them. My approach is to be thorough but not overly squeamish.
- Visual Check: Look closely at the pore surface and inside any cracks or crevices. Small white larvae are sometimes present.
- Trimming: If you find a bug hole or a section that looks eaten, simply trim that part away with your paring knife. You do not need to discard the whole mushroom.
- Gentle Encouragement: Sometimes tapping the mushroom lightly on your work surface can make small bugs emerge. A quick brush can then remove them.
Trimming and Preparing Pheasant Back Mushrooms for Cooking
Once your pheasant back mushrooms are clean, the next step is to prepare them for cooking. This involves trimming away undesirable parts and slicing them for your recipes. The age of the mushroom heavily influences how much trimming is needed. Younger mushrooms require less work.
I always consider the texture. The cap is generally the most tender part. Stems can vary greatly in toughness. Preparing them properly ensures an enjoyable eating experience.
- Removing Tough Stems: Pheasant back mushroom stems can be very fibrous and woody, especially in older specimens. I usually cut off the entire stem right at the cap. If a small part of the stem near the cap is still tender, you can keep it. Otherwise, discard the tough, woody base.
- Pore Layer Considerations: The underside of pheasant back mushrooms has a porous layer. In very young mushrooms, these pores are small and firm, often white or cream. They add a nice texture and can be left on. As the mushroom ages, the pores become larger, more defined, and sometimes yellowish. They can also become slimy or rubbery. If they are large, yellow, and soft, I recommend scraping them off gently with your knife or a spoon. This improves the mushroom’s texture and mouthfeel.
- Slicing Techniques: How you slice your pheasant back mushrooms depends on your recipe.
- Thin Slices: For quick cooking methods like sautéing or stir-fries, I prefer thin slices. This exposes more surface area, allowing for better browning and flavor development.
- Larger Chunks: If you are adding them to stews, soups, or roasting them, larger chunks might be more suitable. They will hold up better during longer cooking times.
- Cut against the grain of the mushroom cap for the best texture.
Dealing with Common Cleaning Challenges
Even with the best foraging practices, you might encounter some challenges when cleaning your pheasant back mushrooms. They grow in the wild, after all. Knowing how to handle these situations will save you time and frustration. My goal is to make sure every mushroom you prepare is top quality.
Sometimes, mushrooms are particularly dirty, or you might find more bugs than usual. Do not worry; there are simple solutions for these common issues. A little extra care can make a big difference in the final result.
Very Dirty Mushrooms: If your mushrooms are caked with mud or heavy soil, resist the urge to dunk them in water.
- Heavy Brushing First: Start by using your stiffest brush to remove as much dry dirt as possible. You might need to be a bit more firm here, but still gentle enough not to damage the mushroom.
- Targeted Damp Wiping: Use a very damp cloth or paper towel to wipe down heavily soiled areas. Rinse and wring out your cloth often.
- Quick, Directed Rinse (Last Resort): Only if dirt is truly embedded, give the affected area a very quick rinse under a gentle stream of cool water. Immediately pat dry. Lay the mushroom on a clean, dry surface, perhaps on a wire rack, to ensure it dries completely before you store or cook it.
Bugs: Techniques for Removal: Finding small insects or larvae is common in wild mushrooms. They are generally harmless but not desirable.
- Mechanical Removal: Use your brush to sweep away any visible bugs. Small tweezers can also be helpful for picking out stubborn ones.
- Tapping and Waiting: Sometimes, bugs will crawl out if you leave the mushroom on a clean surface for a short period. Tap the mushroom gently on your work surface. The vibrations can encourage insects to emerge.
- Trimming Affected Areas: If you see tunnels or areas that look heavily munched on, simply cut away those specific sections with your paring knife. The rest of the mushroom is still good to eat.
Mushrooms That Are Too Old/Tough: Sometimes, you might accidentally pick an older specimen.
- Check the Pores: As mentioned before, if the pores are very large, yellow, and soft, it is best to scrape them off. They can become slimy and unpleasant when cooked.
- Feel the Texture: Pinch the cap. If it feels rubbery, woody, or very rigid, it might be too tough. The edges and the stem tend to get tough first.
- Taste Test (Raw, Small Bit): You can cautiously taste a tiny raw piece. If it is overwhelmingly bitter or has an unpleasant flavor, discard it. For most wild mushrooms, cooking is essential, but a tiny raw taste can sometimes inform about extreme bitterness or spoilage.
- When to Discard: If a mushroom smells bad, is slimy all over, or is completely waterlogged and mushy, it is best to discard it. Safety comes first.
Remember, patience and a methodical approach will help you overcome these common cleaning hurdles. Your effort will be rewarded with delicious, clean mushrooms. Maintaining a clean kitchen environment is also vital when working with foraged foods. Use appropriate cleaning solutions for your countertops and tools. For instance, a simple solution can make your surfaces spotless. You can learn how to clean with vinegar and baking soda effectively for general kitchen hygiene.
Storing Your Cleaned Pheasant Back Mushrooms
Proper storage of your cleaned pheasant back mushrooms is essential to maintain their freshness and flavor. You have put in the effort to clean them; now, ensure they last until you are ready to cook. My method helps extend their shelf life in the refrigerator.
Mushrooms do not last forever, but with the right care, you can enjoy them for a few days. Proper storage also prevents mold growth and preserves their unique texture. Never store them in an airtight container immediately after cleaning, especially if they have any moisture.
Refrigeration: This is the best short-term storage method.
- Paper Bag Method: Place your cleaned, dry pheasant back mushrooms in a paper bag. A brown paper bag allows them to breathe, preventing moisture buildup. Fold the top of the bag loosely.
- Crisper Drawer: Store the paper bag in the crisper drawer of your refrigerator. The crisper drawer provides a stable, cool environment.
- Shelf Life: Properly stored, pheasant back mushrooms typically last 3-5 days in the refrigerator. Always check for signs of spoilage (sliminess, strong odor, dark spots) before cooking.
Freezing: For longer storage, freezing is an excellent option. Freezing preserves mushrooms for several months. I always cook my mushrooms before freezing to maintain their quality.
- Cook First: Slice your cleaned pheasant back mushrooms and sauté them in a pan with a little butter or oil until they are cooked through and have released their liquid.
- Cool Completely: Allow the cooked mushrooms to cool down completely before freezing.
- Portion and Freeze: Place the cooled mushrooms in freezer-safe bags or airtight containers. Remove as much air as possible to prevent freezer burn.
- Label: Label the bags or containers with the date.
- Shelf Life: Frozen, cooked pheasant back mushrooms can last for 6-12 months.
Drying: Another excellent long-term preservation method is drying. This concentrates their flavor.
- Slice Thinly: Slice the mushrooms thinly for faster and more even drying.
- Dehydrator or Oven: Use a food dehydrator set to a low temperature (around 100-120°F / 40-50°C) or a very low oven with the door slightly ajar.
- Store Dry: Once completely brittle, store the dried mushrooms in airtight containers away from light and heat.
- Rehydrate: To use, rehydrate them in warm water for 20-30 minutes before adding to your recipes.
Choosing the right storage method ensures you can enjoy your pheasant back mushrooms long after your foraging adventure.
Culinary Uses and Recipe Inspiration
Once you have successfully cleaned and prepared your pheasant back mushrooms, it is time for the fun part: cooking them! These unique mushrooms offer a distinctive flavor and texture that makes them a wonderful addition to many dishes. Their cucumber-like scent often fades during cooking, leaving a rich, earthy mushroom flavor.
I find that their versatility allows for both simple and complex culinary applications. Experiment with them to discover your favorite ways to enjoy this foraged treat.
- Sautéed Simplicity: This is often the best way to appreciate their flavor. Slice the mushrooms thinly and sauté them in butter or olive oil with a little garlic, salt, and pepper. Cook until golden brown and tender. They make a fantastic side dish or a topping for toast.
- Stir-Fries and Soups: Pheasant back mushrooms hold their shape well, making them ideal for stir-fries. Add them to your favorite vegetable and protein stir-fry for an earthy depth. They also make an excellent addition to clear broths or creamy mushroom soups, where their texture can shine.
- Omelets and Scrambles: Elevate your breakfast or brunch by adding sautéed pheasant back mushrooms to your eggs. Their mild flavor blends perfectly with cheesy omelets or fluffy scrambled eggs.
- Pasta Dishes: Incorporate sliced pheasant back mushrooms into pasta sauces. They pair wonderfully with creamy sauces or simple olive oil and garlic preparations. Their texture provides a satisfying bite alongside your pasta.
- Roasting: For a deeper flavor, toss larger chunks of pheasant back mushrooms with olive oil, herbs (like thyme or rosemary), salt, and pepper. Roast them in a hot oven until tender and slightly caramelized. This brings out their earthy notes beautifully.
- Pickling: If you have an abundance, pickling is a great way to preserve them and create a tangy condiment. Slice them thinly and use your favorite pickling brine. Pickled pheasant backs are excellent with sandwiches or as an appetizer.
Remember, these mushrooms cook relatively quickly, especially when sliced thinly. Do not overcook them, or they may become too soft. Enjoy the unique taste of your freshly cleaned and prepared pheasant back mushrooms!
FAQ Section
1. Can you wash pheasant back mushrooms under running water?
You should generally avoid washing pheasant back mushrooms under running water. This mushroom, like many others, can absorb a lot of water quickly. Soaking makes them soggy and dilutes their delicate flavor. Instead, use a dry brush or a slightly damp cloth to clean them effectively.
2. How do you know if a pheasant back mushroom is too old to eat?
An old pheasant back mushroom often has large, yellow, and rubbery pores on its underside. The cap may also feel tough, rigid, or leathery, especially at the edges. Additionally, a strong, unpleasant, or sour odor indicates spoilage, and such mushrooms should be discarded.
3. What part of the pheasant back mushroom do you eat?
You primarily eat the cap of the pheasant back mushroom. The stems can be very tough and fibrous, especially in older specimens, and are usually discarded. In very young and tender mushrooms, a small portion of the stem closest to the cap might be edible.
4. How long can pheasant back mushrooms be stored after cleaning?
Cleaned and properly dried pheasant back mushrooms can be stored in a paper bag in the refrigerator’s crisper drawer for 3-5 days. For longer storage, you can cook and then freeze them for several months, or dehydrate them.
5. Are pheasant back mushrooms safe to eat raw?
No, you should always cook pheasant back mushrooms before eating them. Like many wild mushrooms, raw consumption can cause digestive upset or other adverse reactions. Cooking ensures they are safe to eat and improves their texture and flavor.
6. Do all pheasant back mushrooms have a cucumber smell?
Most fresh pheasant back mushrooms (Dryad’s Saddle) have a distinctive, pleasant aroma often described as resembling cucumber or watermelon rind. This characteristic smell is a good indicator for identification. The scent may be less noticeable in very old or very young specimens.
Conclusion
Learning how to clean pheasant back mushrooms correctly is a crucial step in enjoying these wonderful wild edibles. We have covered everything from selecting fresh specimens to the meticulous process of brushing, wiping, and trimming. By avoiding excessive water and focusing on careful inspection, you ensure your foraged dryad’s saddle remains firm, flavorful, and free from unwanted debris. This proper preparation is not just about cleanliness; it directly impacts the culinary quality of your dishes.
My advice is always to prioritize gentleness and thoroughness in your cleaning routine. Remember that a little effort upfront leads to a much more enjoyable experience in the kitchen. Now that you know how to clean pheasant back mushrooms, you are ready to transform your wild finds into delicious meals. Happy foraging, and I encourage you to share your favorite pheasant back mushroom recipes and cleaning tips with us!
- pheasant back mushrooms
- cleaning mushrooms
- dryad's saddle
- wild mushroom preparation
- foraging
- edible mushrooms
- mushroom care
- mushroom cooking


