· Home Cleaning · 14 min read
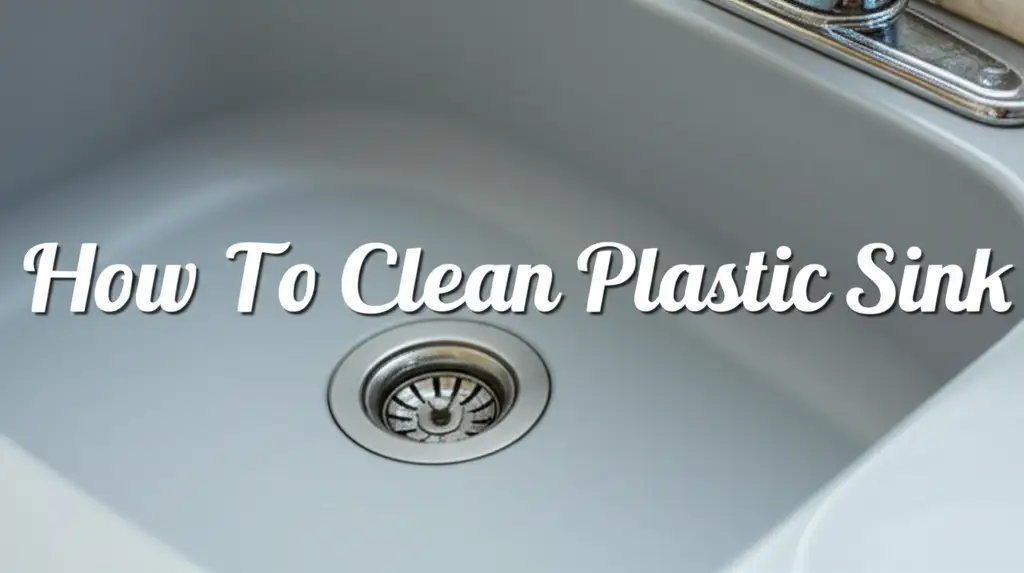
How To Clean Plastic Sink
Achieve a Sparkling Clean Plastic Sink
Is your plastic sink looking a bit dull or stained? Plastic sinks are practical and common in many homes. They are lightweight and often affordable. However, they can also show dirt, stains, and scratches more easily than other materials. Keeping them clean is important for hygiene and appearance. Learning how to clean plastic sink surfaces correctly makes a big difference.
This guide will help you restore your plastic sink’s shine. We will cover daily cleaning routines and methods for tackling tough stains. You will learn about safe cleaning agents and tools. We will also discuss how to prevent future damage. By the end, your plastic sink will look new again. Let’s get your sink sparkling.
Takeaway
- Use gentle, non-abrasive cleaners on plastic sinks.
- Address spills and stains quickly to prevent permanent marks.
- Regular daily cleaning is key for maintaining shine.
- Baking soda and vinegar are effective, safe cleaning agents.
- Avoid harsh chemicals and abrasive scrubbers to prevent damage.
Cleaning a plastic sink involves using mild detergents and soft cloths. For tougher stains, a paste of baking soda and water works well. Always rinse the sink thoroughly after cleaning. This removes all cleaner residue. Regular care prevents stains and discoloration.
Understanding Your Plastic Sink: Types and Vulnerabilities
Plastic sinks are popular for good reasons. They are lightweight and often more affordable than ceramic or metal options. You find them in utility rooms, laundry areas, or even some kitchens. Most plastic sinks are made from acrylic or polypropylene. These materials are durable but have specific cleaning needs.
Acrylic plastic sinks have a smooth, glossy surface. They are quite resistant to impact. However, they can scratch more easily than you might think. Polypropylene sinks are generally tougher. They resist chemicals better and are often used in demanding environments. Both types can stain from food, dyes, or harsh cleaning products. They can also dull over time from abrasive cleaners or hot water. Knowing your sink’s material helps you choose the right cleaning method. Always check the manufacturer’s care instructions if you have them.
Plastic surfaces are also prone to discoloration. Over time, sunlight or certain chemicals can cause yellowing. This is especially true for white plastic sinks. Acidic foods like tomato sauce or coffee can also leave marks. Abrasive cleaners cause tiny scratches. These scratches then trap dirt and make the sink look dull. Understanding these vulnerabilities helps you clean smarter. You can keep your plastic sink looking good for many years.
Gathering Your Arsenal: Essential Tools and Eco-Friendly Cleaners
Cleaning your plastic sink starts with having the right supplies. You do not need many items. The key is to choose gentle products. Harsh chemicals or abrasive scrubbers can damage plastic. They might leave scratches or cause discoloration. We want to avoid that.
Here is a list of essential tools:
- Soft cloths or sponges: Microfiber cloths work very well. They absorb dirt without scratching.
- Non-abrasive brush: A soft-bristled brush is good for corners and grout lines.
- Rubber gloves: Protect your hands from cleaning solutions.
For cleaners, focus on mild and eco-friendly options. These are safe for your sink and for you.
- Dish soap: A few drops of regular dish soap are excellent for daily cleaning.
- Baking soda: This is a natural abrasive and deodorizer. It lifts stains gently.
- White vinegar: Vinegar breaks down mineral deposits and grime. It also helps kill bacteria.
- Lemon juice: Lemon juice is a natural whitener and adds a fresh scent.
- Hydrogen peroxide (3% solution): Good for tough stains and brightening yellowed plastic.
Avoid using cleaners with ammonia or chlorine bleach too often. They can break down plastic over time. Abrasive powders or steel wool pads are also bad choices. They will scratch the surface. Using the right tools and cleaners protects your sink. It keeps it looking new for longer. Always test new cleaners on a hidden spot first. This ensures no adverse reactions happen.
Daily Habits for a Sparkling Plastic Sink: Preventative Care
Maintaining a clean plastic sink is easy with a daily routine. This simple step prevents grime buildup and stubborn stains. It saves you time and effort in the long run. Think of it as a small investment for a continuously clean sink. I always recommend these habits to my friends.
Here is a quick daily cleaning routine:
- Rinse After Each Use: After washing dishes or using the sink, rinse it thoroughly with water. This washes away food particles and soap residue.
- Wipe Down: Use a soft cloth or sponge to wipe the entire sink basin. A few drops of dish soap on the cloth can help. This removes any lingering grease or dirt.
- Dry the Sink: Use a dry cloth to wipe the sink dry. This prevents water spots and mineral buildup, especially in hard water areas. Water spots are very noticeable on plastic.
These steps take only a few minutes. They stop stains from setting in. They also keep your sink shiny and fresh. Neglecting daily cleaning allows food and liquids to sit. This leads to stains and discoloration. Hard water deposits can also accumulate. Regular wiping stops these problems before they start. It keeps your plastic sink looking its best. This preventative care is the backbone of easy sink maintenance. It means less deep cleaning later.
Tackling Common Stains: A Spotless Plastic Sink Guide
Plastic sinks can get a variety of stains. Food spills, hard water, and even general use cause marks. Knowing how to clean plastic sink stains is important. Different stains require different approaches. We want to remove the stain without harming the plastic. For more general advice on stain removal from plastic, you can read our guide on how to clean stains on plastic.
Removing Food and Beverage Stains
Food and beverage stains are common. Coffee, tea, tomato sauce, or fruit juices can leave marks. Act fast when spills happen.
- Immediate Rinse: Rinse the stain with water as soon as possible.
- Dish Soap Scrub: Apply a few drops of dish soap to a soft sponge. Gently scrub the stained area.
- Baking Soda Paste: For tougher stains, make a paste with baking soda and a little water. Apply the paste to the stain. Let it sit for 15-30 minutes. Gently scrub with a soft brush or sponge. Rinse thoroughly. This usually lifts most organic stains.
Banishing Hard Water Marks
Hard water leaves mineral deposits. These look like white, chalky spots. They are very common around faucets and drains.
- White Vinegar Solution: Mix equal parts white vinegar and water in a spray bottle.
- Spray and Wait: Spray the solution on the hard water marks. Let it sit for 15-30 minutes. For severe buildup, let it sit longer.
- Scrub and Rinse: Scrub with a soft brush or sponge. The vinegar helps dissolve the minerals. Rinse with water. For comprehensive sink cleaning tips, check out our article on how to clean kitchen sink. You can also learn how to clean the specific parts of your sink like the faucet by reading our guide on how to clean sink faucet.
Restoring Yellowed or Dull Plastic
Plastic sinks can yellow or dull over time. This happens due to sunlight, chemicals, or trapped dirt.
- Hydrogen Peroxide Method: Pour a small amount of 3% hydrogen peroxide onto the affected area.
- Let it Sit: Let the hydrogen peroxide sit for a few hours or even overnight. You can cover the area with plastic wrap to prevent it from drying out.
- Rinse: Rinse the sink well with water. Hydrogen peroxide helps break down the compounds causing yellowing.
- Sunlight Exposure: For persistent yellowing, you can try placing the sink in direct sunlight after applying hydrogen peroxide. The UV rays activate the peroxide. This is an advanced method and should be done carefully.
Always rinse your sink thoroughly after using any cleaner. This removes all residues and helps maintain the plastic’s integrity. Consistent attention to these stain removal techniques keeps your plastic sink looking new.
Deep Cleaning Your Plastic Sink: Beyond the Surface
Sometimes, daily cleaning is not enough. Your plastic sink needs a deep clean. This is when you tackle grime, mold, and odors. Deep cleaning ensures hygiene and extends your sink’s life. It reaches areas daily cleaning misses. This makes a big difference in overall appearance and smell.
Conquering Mold and Mildew
Mold and mildew can grow in damp environments. Your plastic sink is a prime spot. They appear as black, green, or pinkish spots. It is important to remove them quickly. For more details on this topic, you can read our guide on how to clean mold off plastic. Also, mold can sometimes grow in less visible areas, so it’s good to know how to clean mold under sink for comprehensive hygiene.
- Vinegar Spray: Mix equal parts white vinegar and water in a spray bottle. Spray the moldy areas generously.
- Soak Time: Let the vinegar solution sit for at least an hour. Vinegar kills most mold species.
- Scrub Gently: Use a soft brush or sponge to scrub away the mold.
- Baking Soda Paste: For stubborn mold, apply a baking soda paste on top of the vinegar. Scrub again.
- Rinse Well: Rinse the sink thoroughly with clean water. Ensure all mold and cleaner residue are gone.
- Preventive Measures: Keep the sink dry after use. Ensure good ventilation in the room.
Unclogging and Deodorizing the Drain
A smelly drain affects the entire kitchen or utility room. Clogs cause bad odors and slow drainage.
- Boiling Water (Carefully!): Pour a kettle of boiling water down the drain. Do this carefully with plastic sinks. Very hot water can sometimes affect plastic over time, so ensure it drains quickly. This helps loosen grease and buildup.
- Baking Soda and Vinegar: Pour half a cup of baking soda down the drain. Follow with one cup of white vinegar.
- Fizz and Wait: The mixture will fizz. This reaction helps break down clogs and deodorize. Let it sit for 15-30 minutes.
- Flush: Flush the drain with hot water. Repeat if necessary.
- Regular Maintenance: Pour hot water down the drain weekly. This prevents buildup and keeps odors away. You can also occasionally use the baking soda and vinegar method as a preventative measure.
Deep cleaning addresses problems beyond simple dirt. It keeps your plastic sink hygienic and extends its lifespan. Remember to be gentle with your plastic surfaces. Similar materials like plastic bathtubs and showers benefit from similar cleaning approaches. You might find useful tips in articles about how to clean plastic bathtub or how to clean plastic shower.
Restoring Shine and Preventing Scratches in Plastic Sinks
After cleaning, you want your plastic sink to shine. You also want to prevent new scratches. Plastic surfaces can lose their luster over time. They can also show minor abrasions. There are ways to improve appearance and protect the surface.
To restore shine:
- Mineral Oil Rub: After cleaning and drying your sink, apply a small amount of mineral oil to a soft cloth.
- Buff the Surface: Gently rub the oil over the entire sink surface.
- Wipe Excess: Wipe away any excess oil with a clean, dry cloth. This adds a subtle sheen and helps repel water. It makes the sink appear brighter.
To prevent scratches:
- Use a Sink Mat: Place a rubber or silicone sink mat at the bottom of your plastic sink. This creates a barrier. It protects the sink from heavy pots, pans, and utensils.
- Avoid Abrasive Cleaners and Tools: Never use steel wool pads, scouring powders, or harsh scrubbers. These will inevitably scratch the plastic. Stick to soft cloths and sponges.
- Be Gentle with Utensils: Avoid dragging knives or other sharp objects across the sink surface. Place them down gently.
- Rinse Thoroughly: Small grit or food particles can cause scratches when wiped. Always rinse loose debris before wiping.
For minor scratches already present:
- Buffing Compounds: Some auto plastic scratch remover compounds can work on plastic sinks. Apply a tiny amount to a soft cloth. Gently rub in circular motions. Then wipe clean. Test in an inconspicuous area first.
- Toothpaste: Non-gel white toothpaste can act as a mild abrasive. Apply a small dab to a soft cloth. Rub gently into the scratch. Rinse and dry. This often reduces the appearance of very fine scratches.
Regular care and careful handling are key. They keep your plastic sink looking its best. A shiny, scratch-free sink brightens your entire space.
What NOT to Use: Avoiding Damage to Your Plastic Sink
Knowing what to use is important. Knowing what not to use is equally vital for a plastic sink. Certain cleaners and tools can cause irreversible damage. This includes scratching, dulling, discoloration, or even melting the plastic. Protecting your sink starts with understanding these no-go items. I have seen many sinks ruined by improper cleaning products.
Here is a list of things to avoid:
Abrasive Cleaners:
- Scouring Powders: These contain fine particles that will scratch and dull the plastic surface.
- Steel Wool Pads or Rough Scrubbers: These cause deep scratches. These scratches then trap dirt, making the sink harder to clean and appear permanently dirty.
- Pumice Stones: Absolutely avoid these. They are far too harsh for plastic.
Harsh Chemicals:
- Acetone or Nail Polish Remover: Acetone can dissolve or severely damage many types of plastic. It will leave a sticky residue or permanent marks.
- Strong Bleach Solutions (undiluted): While diluted bleach can be used for tough stains, frequent or undiluted use can cause plastic to yellow, become brittle, or even crack over time. Bleach reacts with some plastics.
- Ammonia-based Cleaners: These can degrade certain plastics, leading to dullness or cloudiness.
- Solvent-based Cleaners: Paint thinner, strong degreasers, or industrial solvents will likely damage the plastic surface.
Extremely Hot Water (Direct and Prolonged): While pouring hot water down the drain is usually fine, continuously exposing the plastic sink basin to extremely hot water (e.g., leaving a pot of boiling water directly in the sink for an extended period) can cause warping or stress cracks, especially in thinner plastics.
Sharp Objects: Avoid cutting directly on the sink surface. Knives or sharp tools will leave permanent gouges.
Always read the labels of any cleaning products. If it says “not safe for plastic” or “use with caution on painted/delicate surfaces,” it is best to avoid it. When in doubt, stick to mild dish soap, baking soda, and vinegar. These are safe and effective for almost all plastic sinks. Your plastic sink will thank you for this careful approach.
Frequently Asked Questions
How often should I clean my plastic sink?
For best results, rinse and wipe your plastic sink daily. This prevents basic buildup. A light cleaning with dish soap can be done every other day. Deep cleaning, targeting stains and odors, should happen once a week or every two weeks. This keeps the sink hygienic and bright.
Can I use bleach on a plastic sink?
Use bleach with caution on plastic sinks. Diluted bleach (1 part bleach to 10 parts water) can remove tough stains. However, frequent or undiluted use can cause plastic to yellow and become brittle over time. Test in an inconspicuous area first. Rinse very well after use.
How do I remove stubborn scratches from a plastic sink?
For minor scratches, try a non-gel white toothpaste or a plastic polishing compound. Apply a small amount to a soft cloth. Rub gently in small circles. Rinse and dry the area. Deeper scratches might require professional repair or may be permanent. Prevention is key.
Why does my plastic sink turn yellow?
Plastic sinks can turn yellow due to exposure to sunlight, certain chemicals, or dyes from food and beverages. Over time, some plastics naturally degrade and discolor. Regular cleaning and avoiding harsh chemicals can slow this process. Hydrogen peroxide can help brighten yellowed plastic.
Is baking soda safe for plastic sinks?
Yes, baking soda is very safe for plastic sinks. It is a gentle abrasive and an excellent deodorizer. You can use it as a paste with water to scrub away stains. It is effective without causing scratches. It is also an eco-friendly choice.
Can I pour boiling water down a plastic sink drain?
You can pour boiling water down a plastic sink drain carefully. Do not let boiling water sit in the sink basin for long. This can sometimes warp or damage the plastic over time. Ensure the water flows quickly down the drain. This helps prevent clogs and odors.
Conclusion
Keeping your plastic sink clean is simpler than you think. It just needs the right approach. We covered everything from daily wiping to tackling tough stains. Remember to use gentle cleaners and soft tools. This protects the plastic surface from scratches and discoloration. Baking soda and vinegar are your best friends here.
A clean plastic sink makes a big difference in your home. It looks fresh and promotes hygiene. By following these tips, you can extend your sink’s life. You will keep it looking as good as new for years. Start your regular cleaning routine today. Enjoy a sparkling clean plastic sink every day.
- plastic sink cleaning
- remove sink stains
- sink maintenance