· Cleaning Tips · 17 min read
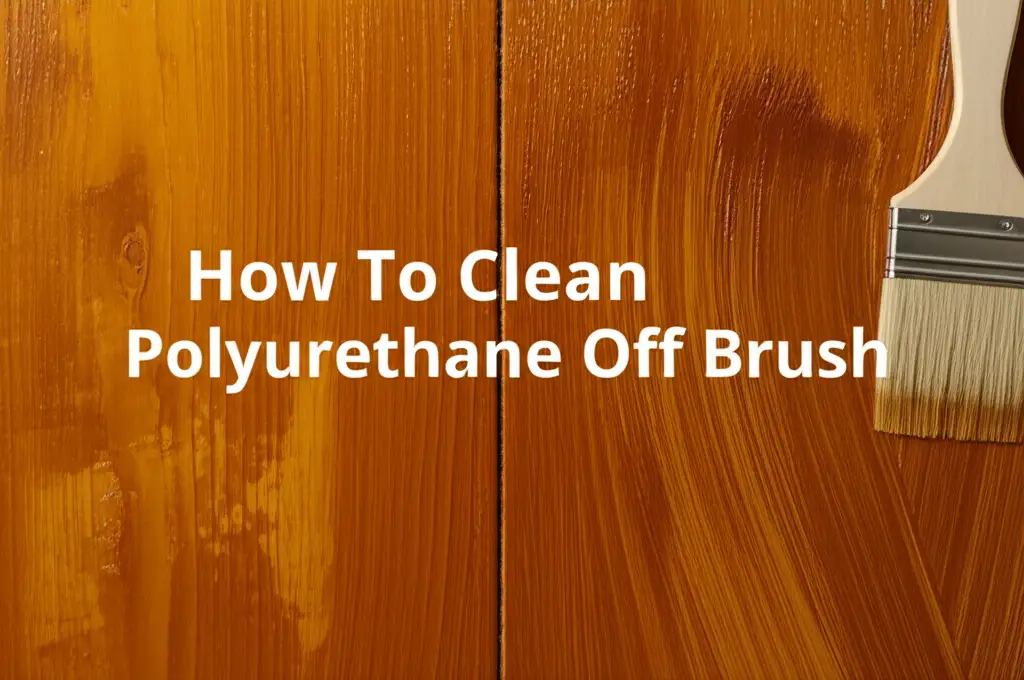
How To Clean Polyurethane Off Brush
How To Clean Polyurethane Off Brush Safely
You just finished a project, and your brushes are stiff with polyurethane. It happens to everyone. Cleaning polyurethane from brushes can seem daunting, especially if it dries. But a clean brush lasts longer and performs better. You can bring your favorite tools back to life. This guide will show you exactly how to clean polyurethane off brush tools, step by step.
We cover methods for wet and dried polyurethane. We also discuss essential tools and safety measures. You will learn to properly care for your brushes. Let’s get your brushes looking new again.
Takeaway
- Act fast: Clean brushes immediately after use for best results.
- Choose the right solvent: Mineral spirits or lacquer thinner work for oil-based poly; warm soapy water for water-based.
- Protect yourself: Always wear gloves and eye protection when cleaning with solvents.
- Condition brushes: Use brush conditioner to maintain bristles after cleaning.
To clean polyurethane off a brush, first remove excess product by scraping. Then, for wet polyurethane, use the appropriate solvent: mineral spirits or lacquer thinner for oil-based, or warm soapy water for water-based. For dried polyurethane, soak the brush in a stronger solvent like lacquer thinner or paint stripper, then work out the hardened material.
Understanding Polyurethane Types and Their Cleaning Needs
Polyurethane is a durable finish. It protects wood and other surfaces. There are two main types of polyurethane. Each type needs a different cleaning approach. Knowing your polyurethane type is the first step in successful brush cleaning.
Oil-Based Polyurethane
Oil-based polyurethane is very popular. It gives a rich, amber finish. This type dries slowly. It also needs strong solvents for cleaning. Brushes used with oil-based polyurethane require careful attention. Mineral spirits are a common choice for cleaning these brushes. Lacquer thinner is another strong option. It works well for stubborn, dried polyurethane. Always ensure good ventilation when using these solvents. They can produce strong fumes. Proper disposal of used solvents is also important. I always keep a dedicated container for dirty spirits. This makes it easier to recycle or dispose of them later.
Water-Based Polyurethane
Water-based polyurethane is different. It dries quickly. It also has less odor. This type is easier to clean. You often only need soap and water. Warm, soapy water is usually enough for fresh, wet brushes. Water-based polyurethane is eco-friendlier than oil-based. It is also safer to work with. If the water-based polyurethane has dried, it becomes more difficult to remove. A stronger cleaner might be necessary in those cases. However, starting with soap and water is always best. This often saves you from harsher chemicals. I find cleaning water-based poly brushes to be much simpler. It truly simplifies the clean-up process after a project.
Essential Tools and Materials for Brush Cleaning
Having the right tools makes cleaning easier. You will need a few basic items. These tools help you clean effectively and safely. Preparing your workspace is also key.
Basic Cleaning Supplies
Gather your cleaning agents first. For oil-based polyurethane, you need mineral spirits or lacquer thinner. For water-based, just warm water and soap will do. Dish soap works fine for this purpose. You will also need several old containers. These are for soaking and rinsing brushes. Glass jars or metal cans are ideal. They are durable and reusable. Never use plastic containers with strong solvents; they can melt. A wire brush or comb is also helpful. These tools help to loosen dried paint and separate bristles. I always have a dedicated brush comb ready. It truly helps to keep the bristles neat.
Safety Gear
Safety is important when handling chemicals. Always wear chemical-resistant gloves. Nitrile or neoprene gloves protect your skin. Safety glasses are also a must. They shield your eyes from splashes. Work in a well-ventilated area. Open windows or use a fan. This reduces fume inhalation. If working indoors, consider a respirator. It offers extra protection from strong odors. Proper ventilation prevents headaches and dizziness. I learned this the hard way once. Now, I never skip these safety steps. Your health is always a priority.
Workspace Setup
Set up your cleaning station outside if possible. This provides the best ventilation. If you must work indoors, choose a garage or workshop. Lay down old newspapers or drop cloths. This protects your surfaces from spills. Keep paper towels or rags handy for wiping. A small bucket or tray helps contain any drips. Have all your containers ready. Label them clearly: “dirty solvent,” “rinse solvent,” etc. This keeps everything organized. A well-prepared space makes the cleaning process smooth. It also minimizes mess and stress. I always clean up my painting area thoroughly. It makes starting the next project much easier.
Step-by-Step Guide for Cleaning Wet Polyurethane Off Brushes
Cleaning a brush immediately after use is ideal. Wet polyurethane is much easier to remove. Acting fast prevents the polyurethane from hardening. This saves your brushes from damage.
For Oil-Based Polyurethane
When working with oil-based polyurethane, immediate action is best. First, remove as much excess polyurethane as possible. Wipe the brush against the rim of the can. You can also scrape it on newspaper. Next, pour mineral spirits into a cleaning container. Swish the brush around in the spirits. Work the bristles against the bottom and sides of the container. This helps release the polyurethane. Repeat this step in a second container with fresh spirits. Continue until the bristles feel clean. The spirits should run clear. Finally, rinse the brush under warm, running water. Add a little soap to help break down any remaining residue. Squeeze out excess water. Gently shape the bristles. You can find more tips on removing stubborn stains from brushes here: how to clean stain off a brush.
For Water-Based Polyurethane
Cleaning water-based polyurethane brushes is straightforward. Immediately after use, scrape off excess polyurethane from the brush. Use the edge of the can or a piece of cardboard. Then, rinse the brush thoroughly under warm, running water. Work the bristles with your fingers. This helps flush out the polyurethane. Next, apply a small amount of dish soap to the bristles. Work it into a lather. Rub the brush against the palm of your hand. This action cleans deep into the brush head. Rinse again until the water runs clear. Make sure all soap is gone. Squeeze out the excess water gently. Reshape the brush bristles. Hang the brush to dry or lay it flat. Drying it properly prevents mildew and maintains brush shape. This simple method saves your brushes very well.
How to Tackle Dried Polyurethane on Brushes
Dried polyurethane is tough. It can seem impossible to remove. But with the right approach, you can still save your brushes. This process takes more time and stronger solvents.
Using Lacquer Thinner
Lacquer thinner is a powerful solvent. It is effective on dried oil-based polyurethane. Pour a small amount of lacquer thinner into a metal container. Submerge the bristles of the hardened brush. Do not let the thinner soak the ferrule. The ferrule is the metal band holding the bristles. Soaking the ferrule can weaken the glue. Let the brush soak for several hours. For very hard polyurethane, let it soak overnight. The thinner will soften the polyurethane. After soaking, work the brush against the bottom of the container. Use a brush comb or wire brush to remove the softened material. Repeat the soaking and scrubbing if needed. Rinse the brush in fresh lacquer thinner. Finally, wash the brush with warm, soapy water. This removes all thinner residue. I find this method quite effective for reclaiming old brushes.
Considering Paint Stripper
For extremely stubborn, dried polyurethane, paint stripper might be necessary. Paint stripper is very strong. Use it with extreme caution. Always read the product instructions first. Apply the stripper directly to the dried polyurethane on the bristles. Do not apply it to the ferrule. Let it sit for the recommended time. The polyurethane will begin to bubble or soften. Use a stiff brush or a putty knife to scrape off the softened material. Work slowly and carefully. This method can be harsh on brush bristles. It is a last resort for valuable brushes. After removing the polyurethane, wash the brush thoroughly. Use plenty of warm, soapy water. Rinse until all stripper residue is gone. Condition the bristles afterward. This helps restore their flexibility. Sometimes, you need strong methods to save good tools.
Alternative Methods (for less severe cases)
Sometimes, you do not need harsh chemicals. For slightly dried polyurethane, a simple method can work. Hot vinegar can soften some dried finishes. Heat white vinegar in a pot. Do not boil it. Submerge the brush bristles in the hot vinegar. Let it soak for 15-30 minutes. The heat and acidity can help break down some polyurethane. Another option is a commercial brush cleaner. Many brands offer specialized cleaners. These are less harsh than lacquer thinner but stronger than soap. Follow their instructions carefully. These methods are gentler on brushes. They are good for polyurethane that is not completely rock-hard. You can even try some methods for cleaning brushes without strong spirits: how to clean stain off brush without mineral spirits. These alternative methods can be surprisingly effective for light buildup.
Proper Brush Care After Cleaning
Cleaning is only half the battle. Proper care after cleaning extends the life of your brushes. This step ensures your brushes stay in good condition for future projects. Neglecting this can ruin even the best cleaning efforts.
Conditioning Bristles
After cleaning, bristles can become dry. They might lose their shape. Conditioning them helps. Apply a small amount of brush conditioner. You can find this at paint stores. If you do not have conditioner, use hair conditioner. Work it into the bristles. Let it sit for a few minutes. Then, rinse thoroughly with clean water. This step restores flexibility. It also prevents bristles from becoming brittle. A well-conditioned brush paints more smoothly. It also holds its shape better. I always take this extra step. It truly makes a difference in brush longevity.
Reshaping and Drying
After conditioning, reshape the brush head. Use your fingers to gently mold the bristles. Bring them back to their original form. A brush comb can help with this. Next, dry the brush properly. Hang it upside down if possible. This prevents water from seeping into the ferrule. Water in the ferrule can loosen the glue. If hanging is not an option, lay the brush flat. Ensure air circulates around the bristles. Avoid drying brushes upright in a container. This traps water in the ferrule. Proper drying prevents mildew. It also keeps the brush from losing its shape. A perfectly shaped brush makes any painting job easier. Remember, a dry brush is a happy brush.
Storage Tips
Store your clean, dry brushes properly. Use a brush roll or a designated brush box. This protects the bristles from damage. Avoid storing brushes jammed into a container. This bends the bristles permanently. For long-term storage, wrap brushes in paper or plastic. This keeps dust off the bristles. Store them in a dry place. Humidity can promote mold growth. Proper storage maintains the brush’s integrity. It ensures they are ready for your next project. Good storage habits prolong the life of your valuable tools. I keep my best brushes in individual sleeves. This extra care pays off.
Common Mistakes to Avoid When Cleaning Polyurethane Brushes
Cleaning brushes seems simple. But some common mistakes can ruin your tools. Avoiding these errors saves your brushes and your time. Learn from common pitfalls.
Not Cleaning Immediately
One major mistake is delaying the cleaning process. Polyurethane, especially oil-based, dries fast. Once dry, it becomes much harder to remove. Always clean your brushes right after you finish painting. Even a few minutes can make a difference. If you must pause, wrap the brush in plastic wrap. This keeps air away from the bristles. Immediate cleaning saves you from a lot of hard work. It also prevents polyurethane from bonding tightly to the bristles. I always clean up as soon as the last stroke is done. It makes life much easier.
Using the Wrong Solvent
Using the wrong cleaner can damage your brushes. Water-based polyurethane needs water and soap. Using mineral spirits on it is unnecessary. It can even make cleanup harder. Oil-based polyurethane needs stronger solvents. Using only water on it will not work. Always match the solvent to the polyurethane type. Check the product label if unsure. This saves you frustration. It also protects your brush bristles from harsh, unnecessary chemicals. Using the right solvent ensures effective cleaning. It also keeps your brushes in good shape. Sometimes, a simpler solution is the correct one.
Improper Drying and Storage
How you dry and store brushes matters. Drying brushes upright can trap water. This water can weaken the glue in the ferrule. It leads to shedding bristles. Storing brushes with bent bristles causes permanent damage. Always dry brushes upside down or flat. Store them where bristles are protected. Avoid throwing them into a drawer with other tools. This can bend and fray the bristles. Proper drying prevents mold and maintains brush shape. Correct storage protects the bristles from physical damage. These steps are crucial for brush longevity. My best brushes last years because of these habits.
Skipping Safety Precautions
Working with solvents requires safety. Skipping gloves or eye protection is a big mistake. Solvents can irritate skin and eyes. Inhaling fumes is also dangerous. Always ensure good ventilation. Wear gloves and safety glasses. If working with strong chemicals, use a respirator. Your health is more important than a clean brush. Never rush safety steps. A little caution goes a long way. This protects you from harmful chemical exposure. It also creates a safer work environment. I cannot stress enough how important safety gear is.
Troubleshooting Stubborn Polyurethane Residue
Sometimes, even after proper cleaning, some residue remains. This can be frustrating. But there are still ways to deal with stubborn spots. Do not give up on your brush yet.
Repeated Soaking and Agitation
For persistent residue, repeat the soaking process. Soak the brush in the appropriate solvent again. This time, extend the soaking period. For dried oil-based polyurethane, use lacquer thinner. For water-based, try a strong brush cleaner designed for dried latex. After soaking, agitate the brush vigorously. Work the bristles against a textured surface. A wire brush cleaner or a dedicated brush comb helps. This mechanical action dislodges the softened polyurethane. You might need to do this several times. Patience is key with stubborn residue. Often, just a bit more time and effort is all it takes.
Using a Brass Brush or Pick
For very small, hardened clumps, careful manual removal works. A brass brush is gentler than steel. Use it to scrub the affected bristles. A small pick or awl can remove tiny bits. Be very careful not to damage the bristles. Work slowly and precisely. This method targets specific areas. It avoids harsh chemicals on the whole brush. This is effective for minor spots. It helps salvage brushes that are almost clean. I sometimes use a toothpick for tiny specks. It works surprisingly well.
Final Cleaning Steps
After removing all visible polyurethane, perform a final wash. Use warm, soapy water. This removes any remaining solvent or residue. Rinse thoroughly until the water runs clear. Condition the bristles as usual. Reshape the brush. Dry it properly. Sometimes, brushes require multiple cleaning cycles. Do not rush the process. A clean, conditioned brush is worth the effort. It will perform like new on your next project. Persistence pays off when it comes to saving your valuable brushes.
Maintaining Your Brushes for Longevity
Proper maintenance extends your brush’s life. It keeps them ready for any project. Simple habits make a big difference. Think of it as an investment in your tools.
Regular Cleaning Habits
Make cleaning a habit. Clean brushes immediately after every use. This prevents polyurethane from drying. It saves you from hard work later. Even if you plan to use the same brush soon, a quick rinse is beneficial. Rinse it thoroughly with water for water-based poly. For oil-based, a quick swish in mineral spirits helps. This simple step keeps bristles soft. It also prevents buildup over time. Regular cleaning is the single most important maintenance step. It ensures your brushes are always in top condition. I never put a brush down without cleaning it. This rule has saved me countless brushes.
Proper Storage
How you store your brushes matters. Always store brushes flat or hanging. Never store them on their bristles. This bends and damages them permanently. Use a brush roll or individual sleeves. This protects bristles from dust and physical damage. Keep brushes in a dry, room-temperature environment. Avoid extreme heat or cold. Humidity can cause mold growth. Proper storage prevents bristles from fraying or bending. It maintains the brush’s original shape. This makes them perform better when you use them. A well-stored brush is a pleasure to use.
Conditioning and Reshaping
After every deep clean, condition your brushes. Use brush conditioner or even hair conditioner. This replenishes moisture. It keeps bristles soft and flexible. Always reshape the brush head. Use your fingers to bring bristles back together. This maintains the brush’s original form. It also helps prevent splaying. Conditioning and reshaping are vital. They ensure your brush performs as intended. They also prevent premature wear. I condition my best brushes regularly. It keeps them feeling new. These practices will make your brushes last for years.
FAQs About Cleaning Polyurethane Off Brushes
Q1: Can I use paint thinner instead of mineral spirits for oil-based polyurethane?
A1: Yes, paint thinner is similar to mineral spirits. It effectively cleans wet oil-based polyurethane from brushes. Both work by dissolving the oil-based resin. Always ensure good ventilation when using either solvent. Follow safety precautions like wearing gloves and eye protection.
Q2: How do I clean a brush if the polyurethane is completely dry and hard?
A2: For completely dried polyurethane, a stronger solvent is needed. Lacquer thinner or a specialized paint stripper are effective options. Soak the bristles in the solvent, avoiding the ferrule. Let it soak for several hours or overnight. Then, work out the softened polyurethane using a brush comb.
Q3: Will acetone damage my paint brushes?
A3: Acetone is a very strong solvent. It can be effective on polyurethane, but it can also be harsh on natural bristles and glues. Use it cautiously and for short periods. Always test it on a small, inconspicuous area first. Rinse the brush quickly and thoroughly after using acetone.
Q4: How do I dispose of used polyurethane cleaning solvents?
A4: Never pour used solvents down the drain. Collect used mineral spirits or lacquer thinner in a sealed, labeled container. Allow any paint solids to settle to the bottom. Then, pour off the clean solvent for reuse. Dispose of the settled sludge and heavily contaminated solvent at a hazardous waste facility. Check local regulations for proper disposal.
Q5: Can I clean polyurethane off a foam brush?
A5: Foam brushes are generally disposable. Their porous nature makes thorough cleaning difficult. If you must clean one, follow the same solvent rules as bristle brushes. Water for water-based poly, mineral spirits for oil-based. However, complete removal is often not possible. It is usually best to discard foam brushes after use with polyurethane.
Q6: How do I prevent polyurethane from drying on my brush during a project break?
A6: During short breaks, wrap the brush tightly in plastic wrap or aluminum foil. This keeps air away from the bristles, preventing drying. For longer breaks, you can suspend the brush in a container of the appropriate solvent (mineral spirits for oil-based, water for water-based). Make sure the bristles are fully submerged but the ferrule is not.
Conclusion
Cleaning polyurethane off your brushes is a necessary task. It ensures your tools last longer and perform better. We explored methods for both wet and dried polyurethane. Remember to always match your cleaning solvent to the polyurethane type. Oil-based needs mineral spirits or lacquer thinner. Water-based cleans up with soap and water. Safety is paramount; always wear gloves and eye protection. Proper care after cleaning, including conditioning and reshaping, extends brush life.
Do not let dried polyurethane ruin your favorite brushes. With the right steps, you can restore them to their former glory. Make a habit of immediate cleaning and good storage. This saves you time and money in the long run. Keep your brushes clean, and they will serve you well for many projects to come. Go ahead and clean that polyurethane off brush tools you thought were lost. You now have the knowledge to do it right. Your brushes will thank you!
- polyurethane removal
- brush cleaning
- paint brush care
- dried polyurethane