· Outdoor Maintenance · 21 min read
How To Clean Pressure Treated Wood
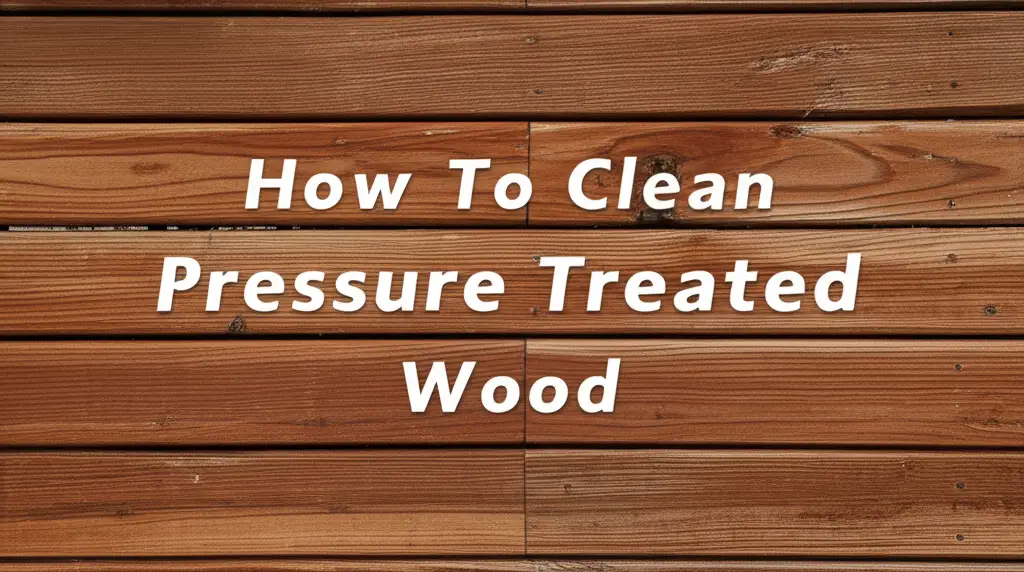
Restore Your Deck: How to Clean Pressure Treated Wood Effectively
Is your beautiful pressure treated wood deck or fence looking a bit tired? Over time, outdoor wood collects dirt, grime, mold, and mildew. These elements make your deck look dull and worn. Knowing how to clean pressure treated wood correctly helps extend its life. This cleaning process also keeps your outdoor spaces looking their best.
I often see decks lose their charm due to neglect. This article gives you a clear path to bring back that original vibrancy. We will discuss why cleaning matters and what tools you need. I will guide you through gentle hand cleaning and effective pressure washing. We will also cover stubborn stain removal and proper aftercare. Get ready to transform your outdoor living area.
Takeaway:
- Regular cleaning preserves pressure treated wood and enhances its appearance.
- Assess your wood for dirt, mold, and stains before choosing a cleaning method.
- Use appropriate tools and cleaners, from soft brushes to specific wood cleaning solutions.
- Clean by hand for gentle results or use a pressure washer safely with low PSI.
- Always protect cleaned wood with a sealer or stain for long-term durability.
To clean pressure treated wood, first assess its condition for dirt, mold, or mildew. Then, select an appropriate cleaner, either a commercial wood cleaner or a DIY solution. Apply the cleaner, scrub the surface, and rinse thoroughly to reveal fresh wood.
Understanding Pressure Treated Wood and Why It Needs Cleaning
Pressure treated wood is popular for outdoor structures like decks, fences, and pergolas. Manufacturers treat this wood with chemicals to resist rot, decay, and insect infestations. This treatment makes the wood highly durable for outdoor use. However, “treated” does not mean “maintenance-free.”
Over time, your pressure treated wood still faces outdoor challenges. Rain, sunlight, and humidity contribute to dirt buildup and organic growth. Algae, mold, and mildew often appear as green or black discoloration. Dirt and grime make the wood look old and neglected. Regular cleaning removes these contaminants. This simple act keeps the wood looking good. It also helps preserve its structural integrity. Neglecting cleaning can shorten the lifespan of your deck or fence.
Common Issues Affecting Pressure Treated Wood
You might notice several issues developing on your outdoor wood surfaces. These problems affect both appearance and longevity. Identifying them helps you choose the right cleaning approach.
- Dirt and Grime: This is the most common issue. Dust, soil, and general environmental debris settle on the wood surface. It forms a dull, grey film. This accumulation makes the wood look dirty and old.
- Algae: Algae often appears as a green, slimy film. It thrives in damp, shaded areas. Algae makes surfaces slippery and unpleasant. It also holds moisture against the wood.
- Mold and Mildew: These fungi show up as black spots or fuzzy patches. They grow in humid conditions. Mold and mildew not only look bad but can also cause wood decay over time. Learning how to clean black mold off wood is essential for this problem.
- Stains: Beyond organic growth, you might encounter other stains. These include rust from metal fasteners or food spills. Even leaves left on the surface can leave dark marks. Different stains need different cleaning approaches. For general advice, see how to clean stains on wood.
Cleaning addresses these specific issues. It prepares the wood for further protection. A clean surface accepts new stains or sealers better. This helps the wood stay protected for years.
Assessing Your Pressure Treated Wood’s Condition
Before you start any cleaning project, take time to inspect your pressure treated wood. This step is important for choosing the best cleaning method. Look closely at the entire surface. Note down any specific problems you find. This helps prevent damage and ensures effective cleaning.
Consider the age of your wood. Older wood may be more brittle. New wood might still have mill glaze. This glaze needs removal before proper sealing. Always check for loose boards or protruding nails. Fix these safety issues first.
Identifying the Type of Dirt and Stains
The type of grime on your wood dictates your cleaning strategy. Different contaminants respond better to certain solutions. A simple visual check tells you a lot.
- General Dirt and Grime: If your wood looks dull and dusty, this is likely general dirt. It often washes away with mild cleaners. This type of buildup happens everywhere. It is common on decks and fences.
- Green Algae: Algae makes surfaces look green and slimy. It often grows in shaded areas. This growth makes the surface slippery when wet. It is easily removed with a cleaner designed for organic growth.
- Black Mold or Mildew: Black spots or fuzzy patches indicate mold or mildew. These need specific treatments. They can penetrate deeper into the wood fibers. Effective removal prevents their return.
- Dark Water Stains: These appear as dark, irregular spots. They result from leaves, pine needles, or standing water. They often need a cleaner with oxalic acid. This brightens the wood.
- Rust Stains: These show as reddish-brown marks. They come from metal furniture or fasteners. These stains require specific rust removers. General cleaning solutions will not work well.
Understanding the specific problems helps you choose the right cleaner. It saves you time and effort. It also prevents using harsh chemicals unnecessarily.
Testing a Small, Inconspicuous Area
Always test your chosen cleaning solution on a small, hidden spot first. This is a critical step. It helps you see how the wood reacts. Different wood types and treatments can respond differently.
Choose an area not easily seen, like under a railing or behind a bush. Apply the cleaner as directed. Wait the recommended time. Rinse it thoroughly. Let the area dry completely. Check for any discoloration, damage, or unwanted reactions. This test prevents mistakes on larger, more visible areas. It ensures you get the results you want without harming your wood. Testing is a simple step that provides big peace of mind.
Essential Tools and Cleaning Solutions for Pressure Treated Wood
Having the right tools and cleaning solutions makes your project much easier. It also ensures the job gets done safely and effectively. You do not need a lot of specialized equipment. Most items are readily available. Prepare everything before you start cleaning. This saves trips to the store.
Your choice of cleaner depends on the severity of the grime. For light dirt, a simple homemade solution works well. For stubborn mold or deep stains, you might need a stronger commercial product. Always read product labels carefully. Follow safety instructions.
Basic Cleaning Tools You Will Need
These are the fundamental items for any pressure treated wood cleaning project. Gather these first.
- Stiff Bristle Brush: A good scrub brush helps loosen dirt and grime. Make sure it has stiff bristles. Avoid wire brushes. They can damage the wood surface.
- Garden Hose with Spray Nozzle: Essential for rinsing off cleaners and loose debris. A strong spray helps remove loosened grime.
- Bucket: You will need a bucket for mixing cleaning solutions. A 5-gallon bucket works well.
- Protective Gear: Always wear safety glasses or goggles. Gloves protect your hands from cleaners. A long-sleeved shirt and pants are also good.
- Drop Cloths or Plastic Sheeting: Use these to protect nearby plants or surfaces from overspray. Lay them down carefully around your work area.
These simple tools form the backbone of your cleaning arsenal. They help you clean safely and efficiently.
Choosing the Right Cleaning Solution
Selecting the correct cleaning solution is key. It determines how effectively you remove specific contaminants. You have a few options, from mild DIY mixes to powerful commercial cleaners.
DIY Cleaning Solutions
- Mild Soap and Water: For light dirt and routine cleaning, a solution of warm water and dish soap works wonders. Mix a few squirts of dish soap into a bucket of water. This is gentle and safe for plants. It is ideal for regular maintenance.
- Oxygen Bleach (Oxygenated Cleaner): This is excellent for mold, mildew, and general grime. Mix according to product instructions. Oxygen bleach cleans without harming plants or discolored wood. It is safer than chlorine bleach for wood. It helps brighten the wood’s natural color.
- Vinegar Solution: A mixture of white vinegar and water (1:1 ratio) helps remove light mold and mildew. It also tackles some minor stains. Vinegar is a natural disinfectant. It is safe for most outdoor wood surfaces. However, for specific concerns like general dirt buildup, refer to tips on how to clean dirt buildup on wood.
Commercial Wood Cleaners
- Deck Cleaners: Many products are specifically formulated for decks. They often contain oxygen bleach or other active ingredients. These cleaners remove dirt, grime, and mildew effectively. Follow the manufacturer’s instructions.
- Wood Brighteners: After cleaning, wood brighteners can restore the wood’s original color. They often contain oxalic acid. This acid neutralizes tannins and removes rust stains. Use them after the main cleaning step.
- Mold and Mildew Removers: For severe mold infestations, dedicated mold removers are very effective. They contain strong active ingredients to kill and remove fungi. Always ensure they are safe for pressure treated wood. Consider these products if you need to tackle stubborn fungal growth, similar to how one might approach cleaning other outdoor wood items, as detailed in guides like how to clean outdoor wood furniture.
Always test any cleaner, DIY or commercial, on an inconspicuous area first. This prevents unexpected damage or discoloration. Proper selection ensures a clean and beautiful result.
Step-by-Step Guide: Cleaning Pressure Treated Wood by Hand
Cleaning your pressure treated wood by hand is a gentle yet effective method. This approach is best for lightly soiled surfaces or for wood that is older and more delicate. It ensures you have full control over the cleaning process. This helps prevent any damage. I find this method very satisfying because you can see the dirt lift away. It also gives you a good workout!
This manual method avoids the potential for damage that a high-pressure washer might cause. It is perfect for routine maintenance. It also suits smaller areas or hard-to-reach spots. You will need your basic cleaning tools and your chosen mild cleaning solution.
Step 1: Prepare the Area
Preparation is key to a smooth cleaning process. This step protects your surroundings and makes the job easier. Take your time here.
- Clear the Surface: Remove all furniture, planters, grills, and other items from your wood surface. This gives you full access. Sweep away any loose debris, leaves, or dirt.
- Protect Nearby Plants and Surfaces: Wet down any surrounding plants with water. This helps dilute any cleaner overspray. Use plastic sheeting or drop cloths to cover delicate shrubs, painted surfaces, or concrete. This protects them from cleaning solutions. Protecting your concrete patio, for instance, is as important as learning how to clean concrete patio without pressure washer itself, ensuring no damage is done.
Step 2: Apply the Cleaning Solution
Once the area is ready, you can apply your chosen cleaner. Be systematic to ensure even coverage.
- Mix Your Solution: If using a DIY solution, mix it in your bucket according to the recipe. For commercial cleaners, follow the product’s mixing instructions.
- Wet the Wood: Lightly pre-wet the wood surface with your garden hose. This helps the cleaner spread evenly. It also prevents the cleaner from drying too quickly.
- Apply the Cleaner: Apply the cleaning solution using a garden sprayer, a mop, or a soft-bristle brush. Work in manageable sections. Start from one end and move across the surface. Ensure the entire section is covered.
Step 3: Scrub the Wood
This is where the magic happens. Scrubbing lifts away the embedded dirt and grime. Put some effort into this step.
- Allow Dwell Time: Let the cleaning solution sit on the wood for the recommended time. This allows it to break down dirt and organic growth. Check the product label for specific dwell times. Usually, it is 10-15 minutes.
- Scrub Thoroughly: Using a stiff-bristle brush, scrub the wood surface following the grain. Apply steady pressure. Work in small sections. Pay extra attention to heavily soiled areas or areas with mold. The scrubbing action helps loosen stubborn grime.
Step 4: Rinse Thoroughly
Rinsing is as important as cleaning. It removes all traces of the cleaning solution and lifted dirt.
- Rinse Carefully: Use your garden hose with a good spray nozzle. Start rinsing from the highest point and work your way down. Ensure all cleaning solution is washed off the wood. Rinse until the water runs clear.
- Check for Residue: Look closely for any remaining suds or cleaner residue. Leftover cleaner can leave streaks or damage the wood. Rinse again if needed. A thorough rinse is vital for a clean finish.
By following these steps, you can effectively clean your pressure treated wood by hand. This method brings back its fresh appearance without harsh chemicals or powerful equipment. Your deck or fence will look refreshed and inviting.
Using a Pressure Washer Safely on Pressure Treated Wood
A pressure washer can clean pressure treated wood quickly and effectively. However, it requires careful handling. High pressure can easily damage wood fibers. This leaves unsightly gouges or fuzzy surfaces. My own experience taught me that caution is paramount here. Always keep the nozzle moving and never too close to the surface. It is a powerful tool, but it demands respect.
This method is ideal for larger areas or heavily soiled surfaces. It saves a lot of manual scrubbing. Just remember, safety and proper technique come first. Using a pressure washer for wood is different from cleaning other materials, like how one might clean vinyl siding with a pressure washer, which can withstand higher pressures.
Choosing the Right Pressure Washer and Nozzle
The right equipment makes a big difference. Selecting the proper pressure washer and nozzle is critical for wood.
- Pressure Washer Type: For most residential cleaning of pressure treated wood, an electric pressure washer (1500-2000 PSI) is often sufficient. Gas-powered units are stronger and may be overkill unless you have a very large area. If using a gas unit, set it to the lowest pressure setting.
- Nozzle Selection: This is the most important part.
- 25-degree (Green) Nozzle: This is the most common and safest nozzle for wood. It provides a fan-shaped spray that is effective for cleaning without being too aggressive.
- 40-degree (White) Nozzle: This nozzle creates an even wider fan. It is great for rinsing or for very light cleaning on delicate surfaces.
- Rotary (Turbo) Nozzle: NEVER use a rotary or turbo nozzle on wood. It delivers a powerful, concentrated spray that will damage the wood surface.
Always choose the widest angle nozzle that effectively removes the dirt. This minimizes the risk of damage.
Safe Pressure Washing Techniques for Wood
Proper technique prevents damage and ensures an even clean. Follow these steps carefully.
- Test a Small Area: Just like with hand cleaning, test your pressure washer on an inconspicuous spot first. Start with the widest nozzle and lowest pressure. Adjust as needed to find the right balance.
- Maintain Distance: Keep the pressure washer nozzle at least 12-18 inches away from the wood surface. Closer distances increase the risk of damage. You can move closer slowly if the dirt is not coming off, but always maintain a safe distance.
- Even Strokes: Use long, even, overlapping strokes. Work with the grain of the wood. Do not stop in one spot. This prevents uneven cleaning and “tiger stripes” on your wood.
- Work in Sections: Clean one board or a small section at a time. This helps you manage the water flow and prevents the cleaner from drying on the wood.
- Rinse Thoroughly: After cleaning a section, rinse it completely before moving to the next. This washes away loosened dirt and cleaning solution.
Common Pressure Washing Mistakes to Avoid
Avoiding these mistakes will save you a lot of headaches and potential damage.
- Using Too High PSI: The most common mistake. Stick to 1000-1200 PSI for most pressure treated wood. Some newer, harder wood might handle slightly more, but always test.
- Using a Zero-Degree Nozzle: This highly concentrated stream will cause irreversible damage to wood. It can carve lines into the surface.
- Holding the Nozzle Too Close: This also leads to gouging and splintering. Maintain a safe distance.
- Stopping Mid-Stroke: Keep the nozzle moving continuously. Stopping in one spot creates a concentrated blast that damages the wood.
- Spraying Against the Grain: Always spray with the grain. Spraying against it can lift wood fibers and splinter the surface.
By following these safety guidelines, you can use a pressure washer to revitalize your pressure treated wood effectively. It will look clean and new again.
Tackling Stubborn Stains: Mold, Mildew, and More on Pressure Treated Wood
Sometimes, general cleaning is not enough. Pressure treated wood can develop stubborn stains that need specific attention. These include deep-set mold, unsightly mildew, and other common marks. It is frustrating to see these persist after a good wash. But with the right approach, you can remove them. I once had a deck covered in black mold. It seemed impossible to clean, but targeted treatment made a huge difference.
Understanding the stain type is the first step. Each stain responds best to a particular cleaning agent. Using the wrong product can be ineffective or even harmful. Always wear proper protective gear during this process.
Removing Mold and Mildew Effectively
Mold and mildew are common issues, especially in damp, shaded areas. They appear as black spots or fuzzy patches. They can make your wood look old and unhealthy.
- Oxygen Bleach Cleaner: For most mold and mildew, an oxygen bleach cleaner is your best friend. It penetrates the wood to kill the fungi without harming the wood’s lignin. Mix the oxygen bleach product according to the manufacturer’s directions.
- Application: Apply the solution generously to the affected areas. You can use a garden sprayer or a brush. Allow it to sit for 15-30 minutes. This dwell time lets the cleaner work its magic.
- Scrub and Rinse: Use a stiff-bristle brush to scrub the moldy areas. Apply good pressure. You will see the mold lifting away. Rinse thoroughly with a garden hose or a low-pressure setting on your pressure washer. Make sure all residue is gone. For persistent black mold, revisit how to specifically clean black mold off wood.
Dealing with Dark Water Stains and Tannin Bleed
Dark water stains often come from leaves, acorns, or other organic matter left on the wood. Tannin bleed happens when the natural tannins in the wood leach out and leave dark spots, especially around fasteners.
- Oxalic Acid Wood Brightener: Oxalic acid is highly effective for these types of stains. It reacts with the tannins and iron, neutralizing them and restoring the wood’s color. Purchase a commercial wood brightener containing oxalic acid.
- Application: Follow the product instructions for mixing and application. Apply it evenly to the stained areas. You might see the stains disappear almost instantly.
- Dwell and Rinse: Let the brightener sit for 10-15 minutes. Then, scrub lightly with a brush. Rinse the wood thoroughly with clean water. This step can dramatically improve the appearance of discolored wood.
Eliminating Grease and Oil Stains
Grease and oil stains, often from barbecues or spills, can be tricky. They penetrate the wood fibers.
- Degreasing Cleaner: Start with a heavy-duty degreaser or a commercial deck cleaner designed for oil stains. These products help break down the oil.
- Application: Apply the degreaser directly to the stain. Let it sit for the recommended time. You might need to let it soak for a longer period.
- Scrub and Rinse: Use a stiff brush to scrub the stain vigorously. This helps lift the oil. Rinse the area thoroughly with hot water if possible, as heat helps emulsify grease. You might need to repeat this process several times for stubborn stains. For lighter dirt, recall strategies from how to clean dirt buildup on wood, which can sometimes overlap with initial grease removal efforts.
Always remember to test any specialized stain remover on a hidden spot first. This ensures it does not cause discoloration or damage. Persistence and the right product will get those stubborn stains out, leaving your pressure treated wood looking pristine.
Post-Cleaning Care: Protecting Your Pressure Treated Wood
Cleaning your pressure treated wood is a significant first step. However, the work does not stop there. To maintain its fresh look and ensure its longevity, proper post-cleaning care is essential. This involves allowing the wood to dry completely and then applying a protective finish. Skipping these steps leaves your wood vulnerable to the elements. I always tell people that sealing is like putting on a raincoat for your deck. It keeps everything out.
A well-maintained deck or fence not only looks better but also lasts many more years. It resists future dirt, mold, and moisture. This saves you time and money on future repairs or replacements. Think of it as an investment in your outdoor living space.
Drying Time for Pressure Treated Wood
Before applying any finish, the wood must be completely dry. This is a crucial step. Applying a sealer or stain to damp wood can trap moisture. This leads to peeling, bubbling, and premature failure of the finish. It can also encourage mold or mildew growth under the new coating.
- Allow Ample Drying Time: After cleaning, pressure treated wood needs time to dry out thoroughly. This can take anywhere from 48 hours to several days, or even longer, depending on your climate.
- Factors Affecting Drying:
- Humidity: High humidity slows drying.
- Temperature: Warmer temperatures speed up drying.
- Sunlight: Direct sunlight helps evaporation.
- Air Circulation: Good airflow around the wood promotes faster drying.
- Wood Saturation: If you used a lot of water or cleaned very thoroughly, it will take longer to dry.
- Moisture Test: You can perform a simple moisture test. Sprinkle a few drops of water on the wood surface. If the water beads up, the wood is still too wet. If it soaks in quickly, it is ready for a finish.
Do not rush this step. Patience here saves you from future headaches.
Sealing or Staining Your Pressure Treated Wood
Once your wood is completely dry, it is time to apply a protective finish. You have two main options: a clear sealer or a semi-transparent stain. Both offer protection, but they provide different aesthetics.
Applying a Clear Sealer
A clear sealer protects the wood while letting its natural grain show through. It creates a water-repellent barrier.
- Benefits: It protects against moisture, UV damage, and fungal growth. It maintains the wood’s original look.
- Application: Use a brush, roller, or sprayer for application. Apply an even coat. Avoid puddling. Always follow the manufacturer’s instructions for number of coats and drying times between coats.
- Maintenance: Clear sealers usually need reapplication every 1-3 years. Check your wood annually.
Applying a Semi-Transparent Stain
A semi-transparent stain adds color while still allowing some wood grain to be visible. It combines protection with enhanced aesthetics.
- Benefits: It offers UV protection, moisture resistance, and mildew inhibitors. It can refresh the color of aging wood. It lasts longer than clear sealers.
- Color Selection: Choose a color that complements your home and landscape. Test a small area first to ensure you like the shade.
- Application: Apply with a brush, roller, or stain pad. Work in small sections, moving with the wood grain. Ensure even coverage. Avoid lap marks by maintaining a wet edge.
- Maintenance: Semi-transparent stains typically last 3-5 years. They provide longer-lasting color and protection.
Regardless of whether you choose a sealer or a stain, proper application is key. Always read and follow the product’s instructions. A well-applied finish protects your pressure treated wood from the elements. It keeps it looking beautiful for many years to come. This final step completes your wood restoration project.
Common Mistakes to Avoid When Cleaning Pressure Treated Wood
Cleaning pressure treated wood seems simple. However, small errors can lead to big problems. These mistakes can damage your wood or give you poor results. I have seen decks ruined by improper cleaning methods. Learning what not to do is as important as knowing what to do. This section highlights common pitfalls. Avoid these to ensure your cleaning project goes smoothly and safely. Your wood will thank you for it.
Using Chlorine Bleach
Many people think bleach is a universal cleaner. For pressure treated wood, avoid chlorine bleach. While it kills mold and mildew, it comes with significant downsides.
- Damages Wood Fibers: Chlorine bleach can break down the lignin in wood. This makes the wood fibers brittle and fuzzy. It can lead to premature decay.
- Strips Color: It can remove the natural color of the wood. It leaves a faded, unnatural look.
- Harmful to Plants and Environment: Chlorine bleach is harsh on surrounding vegetation. It can also harm aquatic life if it runs into water sources.
- Leaves Residue: It leaves a salt residue that can attract moisture. This can lead to further problems.
Instead, opt for oxygen bleach-based cleaners. They are much safer and more effective for wood.
Applying Too Much Pressure with a Pressure Washer
This is perhaps the most common and damaging mistake. A pressure washer is powerful. Too much pressure can easily ruin your wood.
- Gouging and Splintering: High PSI (pounds per square inch) or a narrow nozzle can carve lines into the wood. It can lift wood fibers. This damage is permanent.
- Fuzzy Wood: Using too much pressure or holding the nozzle too close leaves the wood surface looking fuzzy. This rough texture holds dirt easily. It also makes sealing difficult.
- Removing Treatment: Excess pressure can strip away the wood’s surface. This can reduce the effectiveness of the pressure treatment over time. This exposes the wood to decay.
Always use a wide-angle nozzle (25 or 40 degrees) and keep the pressure below 1200 PSI. Maintain a consistent distance from the surface.
- pressure treated wood cleaning
- deck cleaning
- wood maintenance
- outdoor wood care
- mold removal wood

