· Gardening · 19 min read
How To Clean Pumpkin Seeds For Planting
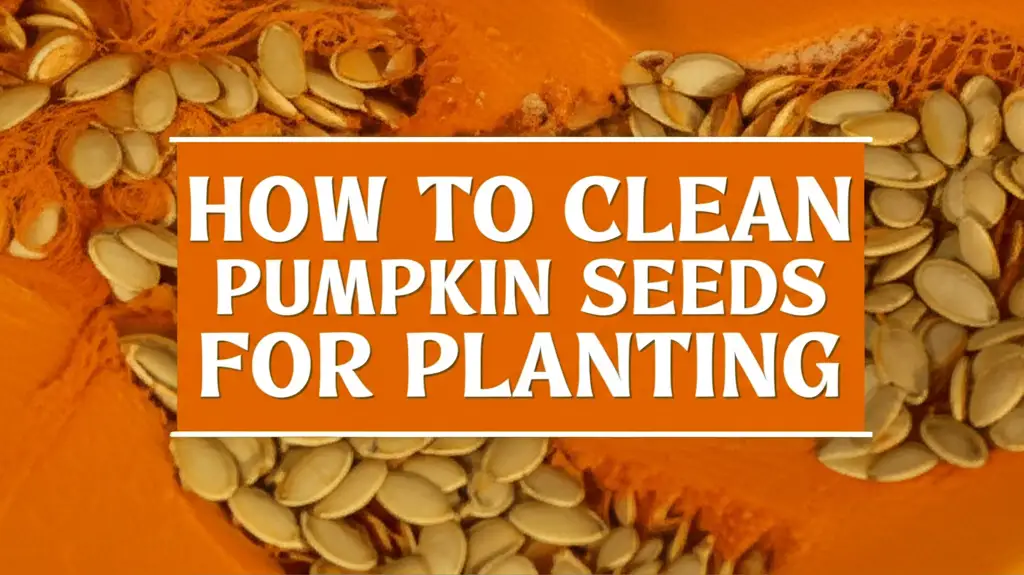
Mastering How To Clean Pumpkin Seeds For Planting: Your Ultimate Guide
Autumn brings delicious pumpkins and the promise of new life. Many gardeners dream of growing pumpkins from their own harvest. To do this, you must know how to properly clean pumpkin seeds for planting. This simple step ensures strong, healthy plants next season.
Cleaning pumpkin seeds removes pulp and sugars. These substances can cause mold or inhibit germination. With the right cleaning and storage, your saved seeds can sprout into vibrant new plants. This guide will walk you through every step. We will cover collecting, cleaning, drying, and storing your valuable pumpkin seeds. Get ready to cultivate your own pumpkin patch from scratch!
Takeaway
- Separate pumpkin seeds from all pulp and stringy material immediately after harvest.
- Rinse seeds thoroughly under cool, running water to remove sticky residue.
- Consider a fermentation step for superior cleanliness and disease resistance.
- Dry seeds completely on a non-stick surface in a cool, well-ventilated area, avoiding direct heat or sunlight.
- Store dried seeds in airtight containers in a cool, dark, and dry place for optimal viability.
To clean pumpkin seeds for planting, first separate them from the pulp. Rinse the seeds thoroughly under cool water until they are free of any stringy material or sticky residue. Then, spread them on a non-stick surface to dry completely in a well-ventilated area before storing. This simple process prevents mold and ensures good germination.
Why Proper Cleaning of Pumpkin Seeds Matters for Success
Cleaning pumpkin seeds seems like a small step. However, it holds great importance for successful planting. Pumpkin seeds come encased in a sticky, sugary pulp. This pulp contains sugars and inhibitors that stop the seed from sprouting inside the pumpkin. If you plant seeds with this pulp still attached, several problems can occur.
Firstly, the residual pulp is a breeding ground for mold and fungi. These pathogens can quickly destroy your seeds, making them unusable. Mold growth can also spread to other seeds in storage. Proper cleaning removes this food source for harmful organisms. It helps your seeds stay healthy and viable. Just as keeping surfaces clean prevents mold in your home, removing pulp prevents mold on your seeds. You can learn more about tackling mold in different areas of your home by checking out resources like how to clean mold off of wood furniture.
Secondly, the sugars in the pulp can inhibit germination. Nature designed seeds to stay dormant until conditions are right. The pulp signals the seed to remain inactive. Removing it tells the seed it is time to wake up when planted. A clean seed is a ready seed. This greatly improves your germination rates.
Finally, clean seeds are easier to store long-term. Residual moisture and pulp lead to spoilage. Dry, clean seeds remain viable for several years. This means you can save seeds from a particularly good pumpkin. You can plant them in future seasons. Investing time in cleaning pumpkin seeds pays off with a bountiful harvest. It ensures you have high-quality seeds ready for planting when spring arrives.
Essential Tools for Cleaning Pumpkin Seeds Effectively
Gathering the right tools makes the pumpkin seed cleaning process smooth. You likely have most of these items in your kitchen already. Having everything ready before you start saves time and effort. A clean workspace is key, much like preparing any surface before cleaning it thoroughly. For general cleaning tasks, many find that a combination of how to clean with vinegar and baking soda works wonders, and while not directly applied to seeds, this same philosophy of simple, effective cleaning applies to your tools.
Here is a list of what you will need:
- Sharp Knife: For cutting open the pumpkin. A large, sturdy knife works best.
- Large Spoon or Scoop: To easily remove the seeds and stringy pulp from inside the pumpkin. An ice cream scoop or a sturdy serving spoon works well.
- Large Bowls: You will need at least two. One bowl is for collecting the initial seed and pulp mixture. The second bowl is for rinsing the seeds under water.
- Colander or Mesh Sieve: Essential for rinsing the seeds. The holes must be small enough to prevent seeds from escaping. A fine mesh sieve is ideal for smaller seeds.
- Paper Towels or Clean Cloths: For patting excess moisture from the seeds before drying. You can also use them to line your drying surface.
- Non-Stick Drying Surface: This is critical. Options include parchment paper, wax paper, a baking sheet, old window screens, or even a ceramic plate. Avoid using regular paper towels for the final drying. They can stick to the seeds.
- Optional: Air Circulator (Fan): A small fan can help speed up the drying process. Make sure it provides gentle airflow.
- Optional: Jar with Lid: If you plan to use the fermentation method (discussed later), you will need a jar. A quart-sized Mason jar is perfect.
- Labels and Markers: For labeling your dried seeds with the pumpkin variety and date. This helps you keep track of your seed collection.
Choosing the right pumpkin also helps. Select mature, healthy pumpkins. Heirloom varieties are best for seed saving. Hybrid varieties may not grow true to type from saved seeds. Make sure the pumpkin is free of disease or rot. A healthy parent plant gives you the best chance for healthy seeds.
Step-by-Step Guide: How to Separate and Rinse Pumpkin Seeds
Once you have your tools ready, you can begin the process of cleaning pumpkin seeds for planting. This phase focuses on carefully separating the seeds from the pumpkin’s internal material and giving them their first wash. Accuracy in these steps is vital for good results.
Cutting and Scooping
First, place your pumpkin on a stable surface. Use your sharp knife to carefully cut the pumpkin. You can cut it in half or cut a large lid off the top, similar to carving for Halloween. Once open, you will see the fibrous strands and seeds inside. Use your large spoon or scoop to scrape out all the seeds and stringy pulp into one of your large bowls. Try to get as much material out as possible. Ensure no seeds remain stuck to the pumpkin walls.
Pulp Separation: Initial Manual Cleaning
Now comes the messy part. Fill the bowl with the seeds and pulp with cool water. Use your hands to gently agitate the mixture. The good, viable seeds will usually sink to the bottom. The stringy pulp and light, non-viable seeds will float to the top. Swirl the water around. You will see the pulp begin to separate from the seeds. Reach in and physically remove as much of the large pieces of pulp as you can. This manual separation is crucial for getting rid of most of the sticky mess. It prevents clumping later on.
Thorough Rinsing
Once you have removed the bulk of the pulp, carefully pour the remaining water, seeds, and smaller bits of pulp into your colander or mesh sieve. Place the colander under cool, running water. Use your fingers to gently rub the seeds against the mesh of the colander. This action helps to dislodge any remaining sticky residue or small pieces of pulp clinging to the seeds. Continue rinsing until the water running through the seeds is clear. The seeds should feel slick but not sticky. They should easily separate from each other. Think of it like a thorough rinse you might give a component to ensure it’s completely clean, just as you would ensure your shower head is clean by using methods like how to clean shower head with vinegar to remove all buildup. This meticulous rinsing ensures your pumpkin seeds are truly clean.
After rinsing, give the colander a few gentle shakes to remove excess water. You can also pat the seeds lightly with a clean paper towel. Do not rub too hard, as this can damage the seeds. The goal is to remove surface water before the drying process begins. These steps prepare your seeds for the next crucial stage: drying.
The Fermentation Method: An Advanced Technique for Cleaner Seeds
For truly clean pumpkin seeds with improved viability, consider the fermentation method. This technique mimics natural processes and helps break down stubborn pulp. It also inhibits the growth of seed-borne diseases. While it adds an extra step and a few days to the process, many experienced seed savers swear by its benefits. This method is especially useful for seeds that are very slimy or hard to clean manually. It creates an environment that prevents undesirable fungal growth, similar to how proper ventilation and cleaning can prevent mold from forming on various surfaces. Understanding how to manage environments to prevent issues, such as learning how to clean mold off of wood furniture, shares a common principle with managing the seed fermentation process to inhibit fungal pathogens.
Here is how to perform the fermentation method:
Step 1: Prepare the Mixture
After manually separating most of the pulp and giving the seeds a quick rinse (as described in the previous section), place the seeds into a glass jar. A quart-sized Mason jar works well. Fill the jar with water, ensuring there is at least an inch or two of space above the seeds. The water should completely cover the seeds.
Step 2: Ferment the Seeds
Loosely cover the jar with a lid. Do not seal it tightly. This allows gases to escape. Place the jar at room temperature, away from direct sunlight. Let the mixture sit for 1-4 days. The exact time depends on the temperature and how much pulp remains. You will notice a cloudy film forming on top of the water. Small bubbles may appear, and the mixture might even smell slightly sour. This is a sign that fermentation is occurring. The beneficial microbes are breaking down the gelatinous sac around the seeds. They are also inhibiting harmful pathogens.
Step 3: Monitor and Skim
Check the jar daily. The goal is for the pulp to float to the top, forming a scum, and for the viable seeds to sink to the bottom. If mold starts to form on top, that is a sign the fermentation is ready or has gone on too long. You should skim off any mold or scum that forms on the surface. The water may become quite murky.
Step 4: Final Rinse and Dry
Once the pulp has separated and the viable seeds are at the bottom, it is time for the final rinse. Carefully pour off the murky water and floating pulp, leaving the seeds in the jar. Fill the jar with fresh, cool water, swirl, and pour off again. Repeat this several times until the water remains clear. Then, pour the clean seeds into a fine-mesh colander. Rinse them thoroughly under cool, running water one last time. Rub the seeds gently to ensure all traces of the fermentation residue are gone. The seeds should feel completely clean and non-sticky. Pat them dry with paper towels to remove excess surface moisture. They are now ready for the critical drying stage.
This fermentation process results in exceptionally clean seeds. It also boosts their natural resistance to common seed-borne diseases. This leads to higher germination rates and stronger seedlings.
Drying Pumpkin Seeds Properly for Long-Term Storage
Cleaning your pumpkin seeds is only half the battle. Proper drying is perhaps the most crucial step for successful long-term storage and high germination rates. If seeds are not completely dry, they can easily succumb to mold, rot, or even sprout prematurely in storage. Think of it like preserving any other item; moisture is the enemy of longevity.
Here’s how to ensure your pumpkin seeds are perfectly dry:
Choose the Right Drying Surface
After rinsing and patting your seeds dry, spread them out in a single layer on a non-stick surface. Good options include:
- Parchment paper: Excellent non-stick quality.
- Wax paper: Also good, but can sometimes stick slightly if seeds are very wet initially.
- Window screens: If you have old window screens, these are ideal. They allow air circulation from below and above.
- Baking sheets: Line them with parchment or wax paper to prevent sticking.
- Ceramic plates or glass dishes: Work well for smaller batches.
Avoid using regular paper towels or newspaper directly. Seeds can stick to them, and when you try to remove them, you might damage the seed coat.
Select the Right Location
The drying location is as important as the surface. Choose a spot that is:
- Cool: Extreme heat can kill the embryo inside the seed. Avoid placing seeds in direct sunlight, on top of radiators, or in a hot oven.
- Dry: Humidity is the enemy. A dry room is essential.
- Well-ventilated: Good air circulation helps remove moisture quickly. A room with an open window or a gentle fan blowing indirectly on the seeds is perfect.
- Out of direct sunlight: Sunlight can be too hot and uneven, potentially cooking the seeds or causing them to dry too quickly and crack.
The Drying Process
Spread the seeds thinly in a single layer. Do not pile them up. This allows maximum air exposure to each seed. Gently stir or turn the seeds once or twice a day. This helps expose all surfaces to the air and prevents them from sticking to the drying surface or each other. Depending on humidity and temperature, drying can take anywhere from a few days to two weeks. Be patient.
Test for Dryness
You will know your pumpkin seeds are fully dry when they pass the “snap test.” Pick up a seed and try to bend it. If it bends, it is not dry enough. If it snaps cleanly in half, it is perfectly dry. You should also be able to easily rub any remaining papery bits off the seeds. They should feel hard, not rubbery or soft. If there is any doubt, give them a few more days. It is always better to over-dry slightly than to under-dry. Properly dried seeds are robust and ready for storage.
Storing Cleaned Pumpkin Seeds for Optimal Viability
Once your pumpkin seeds are perfectly dry, the next critical step is proper storage. Storing seeds correctly ensures they remain viable for as long as possible, ready to sprout when you decide to plant them. Improper storage can quickly ruin all your hard work, leading to mold, spoilage, or simply a loss of germination power.
The key to optimal seed storage boils down to three main factors: cool, dark, and dry.
Choose the Right Containers
Selecting the right container is crucial for maintaining a stable environment for your seeds.
- Paper Envelopes or Paper Bags: These are excellent choices for short to medium-term storage (1-2 years). Paper allows for slight air circulation, which is beneficial if there is any minuscule residual moisture. Ensure they are plain paper, not glossy or plastic-coated.
- Glass Jars with Tight-Fitting Lids: For longer-term storage (2+ years), glass jars are superior. They offer an airtight seal, protecting seeds from humidity and pests. If you use jars, make absolutely certain your seeds are bone dry before sealing them. Any trapped moisture will lead to mold.
- Airtight Plastic Containers: Similar to glass jars, these also provide an airtight seal. Again, dryness is paramount.
Avoid storing seeds in plastic bags for long periods, especially if there’s any chance of moisture. Condensation can build up inside, ruining your seeds.
Ideal Storage Conditions
Replicate nature’s perfect seed vault environment:
- Cool Temperature: Aim for a consistent temperature between 35°F and 50°F (2°C and 10°C). A refrigerator or a cool, unheated basement or closet is ideal. Avoid extreme temperature fluctuations, as these can stress the seeds.
- Darkness: Light can degrade seeds over time. Store containers in a dark place, such as inside a cupboard, drawer, or opaque container.
- Low Humidity: This is perhaps the most important factor after complete drying. Humidity causes seeds to absorb moisture, which can trigger germination too early or promote fungal growth. If you live in a very humid climate, consider adding a desiccant pack (like silica gel packets) to your airtight containers. Make sure the desiccant does not touch the seeds directly.
Labeling is Essential
Always label your seed containers immediately after storage. Include the following information:
- Pumpkin Variety: (e.g., ‘Atlantic Giant’, ‘Sugar Pie’)
- Date Harvested/Stored: (e.g., ‘Fall 2024’)
- Any Notes: (e.g., ‘fermented’, ‘from largest fruit’)
Proper labeling helps you keep track of your seed inventory and prevents confusion in future planting seasons.
Shelf Life of Pumpkin Seeds
When cleaned and stored correctly, pumpkin seeds can remain viable for a surprisingly long time. Generally, pumpkin seeds maintain good germination rates for 4-6 years. Some well-stored seeds can even sprout after 10 years or more, though germination rates will likely decline. Regular testing of older seeds can help you decide if they are still worth planting.
Preparing Cleaned Pumpkin Seeds for Planting: Germination Tips
You have successfully cleaned, dried, and stored your pumpkin seeds. Now the exciting part begins: preparing them for planting and watching them sprout! Even the cleanest seeds need the right environment to germinate. Understanding these final steps helps ensure a successful start for your pumpkin patch.
Timing Your Planting
Pumpkin seeds need warm soil to germinate and grow. Do not plant them too early in the spring. Wait until all danger of frost has passed in your area. Soil temperatures should consistently be above 60°F (15°C), ideally closer to 70°F (21°C). Planting too early can lead to seeds rotting in cold, wet soil.
Pre-Soaking Seeds (Optional but Recommended)
While not strictly necessary, pre-soaking pumpkin seeds can speed up germination. It softens the tough outer seed coat, allowing water to penetrate more easily.
- Method: Place your cleaned, dried pumpkin seeds in a bowl of warm (not hot) water for 12-24 hours before planting. Do not soak for too long, as this can drown the embryo.
- Benefit: Many gardeners report faster sprouting times with pre-soaked seeds. This can give your young plants a head start.
Choosing Your Planting Method
You can start pumpkin seeds directly in the garden or indoors for a head start.
- Direct Sowing: Once soil temperatures are warm enough, plant 2-3 seeds per hill. Create a small mound (hill) about 12 inches in diameter. Plant seeds 1 inch deep. Space hills 6-10 feet apart, depending on the variety’s mature size.
- Starting Indoors: If you have a short growing season, start seeds indoors 3-4 weeks before your last frost date. Use biodegradable pots (like peat pots or newspaper pots). This reduces transplant shock, as you can plant the entire pot directly into the ground. Plant one seed per pot, 1 inch deep.
Soil and Sunlight Requirements
Pumpkin plants are heavy feeders and need plenty of sunlight.
- Soil: They thrive in rich, well-draining soil with a pH between 6.0 and 6.8. Amend your soil with plenty of compost or well-rotted manure before planting.
- Sunlight: Choose a location that receives full sun, at least 6-8 hours of direct sunlight per day.
Watering and Care
After planting, keep the soil consistently moist but not waterlogged. Water deeply when the top inch of soil feels dry. Once seedlings emerge, thin them to the strongest 1-2 plants per hill. Provide regular feeding with a balanced fertilizer as the plants grow.
By following these planting tips, your meticulously cleaned and stored pumpkin seeds have the best chance to grow into a thriving patch. You will enjoy the reward of home-grown pumpkins.
FAQ Section
Q1: Can I plant seeds directly from a carving pumpkin from the store?
Yes, you can plant seeds from a store-bought carving pumpkin. However, most store-bought pumpkins are hybrid varieties. This means the seeds might not grow “true to type.” The resulting pumpkins might look different or not produce as well as the parent plant. For reliable results, use seeds from open-pollinated or heirloom pumpkins.
Q2: How do I know if my pumpkin seeds are viable after cleaning and storage?
A simple float test can give an indication. Place seeds in a glass of water. Viable seeds usually sink to the bottom. Non-viable seeds (empty or damaged) will float. For a more accurate test, perform a germination test. Place 10 seeds between damp paper towels, put them in a plastic bag, and keep them warm. Check for sprouts after a few days.
Q3: How long do cleaned pumpkin seeds last in storage?
When properly cleaned, thoroughly dried, and stored in a cool, dark, dry, and airtight environment, pumpkin seeds can remain viable for 4 to 6 years. Some seeds might even sprout after 10 years, though their germination rate will likely decrease over time.
Q4: What if my pumpkin seeds have mold before I even clean them?
If you find mold on your pumpkin seeds inside the pumpkin or immediately after scooping them out, it is best to discard the heavily molded ones. For lightly molded seeds, you can try cleaning them meticulously using the fermentation method. This helps eliminate pathogens. However, if the mold is extensive, it is safer to discard the batch to prevent spreading disease to other seeds or soil.
Q5: Do pumpkin seeds need stratification before planting?
No, pumpkin seeds generally do not require cold stratification. This process, which mimics winter conditions, is usually needed for seeds from temperate climates that need a chill period to break dormancy. Pumpkin seeds germinate best in warm soil. Pre-soaking them in warm water is often more beneficial than stratification.
Q6: Can I use a food dehydrator to dry pumpkin seeds?
It is not recommended to use a food dehydrator or oven to dry pumpkin seeds for planting. High heat can kill the embryo inside the seed, destroying its viability. Air drying at room temperature in a well-ventilated area is the safest and most effective method. This allows for slow, gentle drying without damaging the seed’s ability to sprout.
Conclusion
Cleaning pumpkin seeds for planting is a foundational step in successful gardening. It transforms a simple kitchen byproduct into the promise of a bountiful future harvest. By following the meticulous steps outlined here—from initial separation and thorough rinsing to advanced fermentation, careful drying, and proper storage—you ensure your seeds are in prime condition.
Remember, healthy, clean seeds are the cornerstone of strong, productive plants. The effort you invest in correctly cleaning pumpkin seeds for planting directly impacts your germination rates and the overall success of your garden. Embrace this rewarding process; it connects you deeply with the cycles of nature. Now, go forth, clean those seeds, and prepare for a season of vibrant growth and delicious pumpkins, all grown from your own diligent efforts. Happy planting!
- pumpkin seeds
- seed cleaning
- planting guide
- garden tips
- harvesting
- seed saving