· Home Cleaning · 19 min read
How To Clean Raid Off Floor
Easily Clean Raid Off Your Floor: A Complete Guide
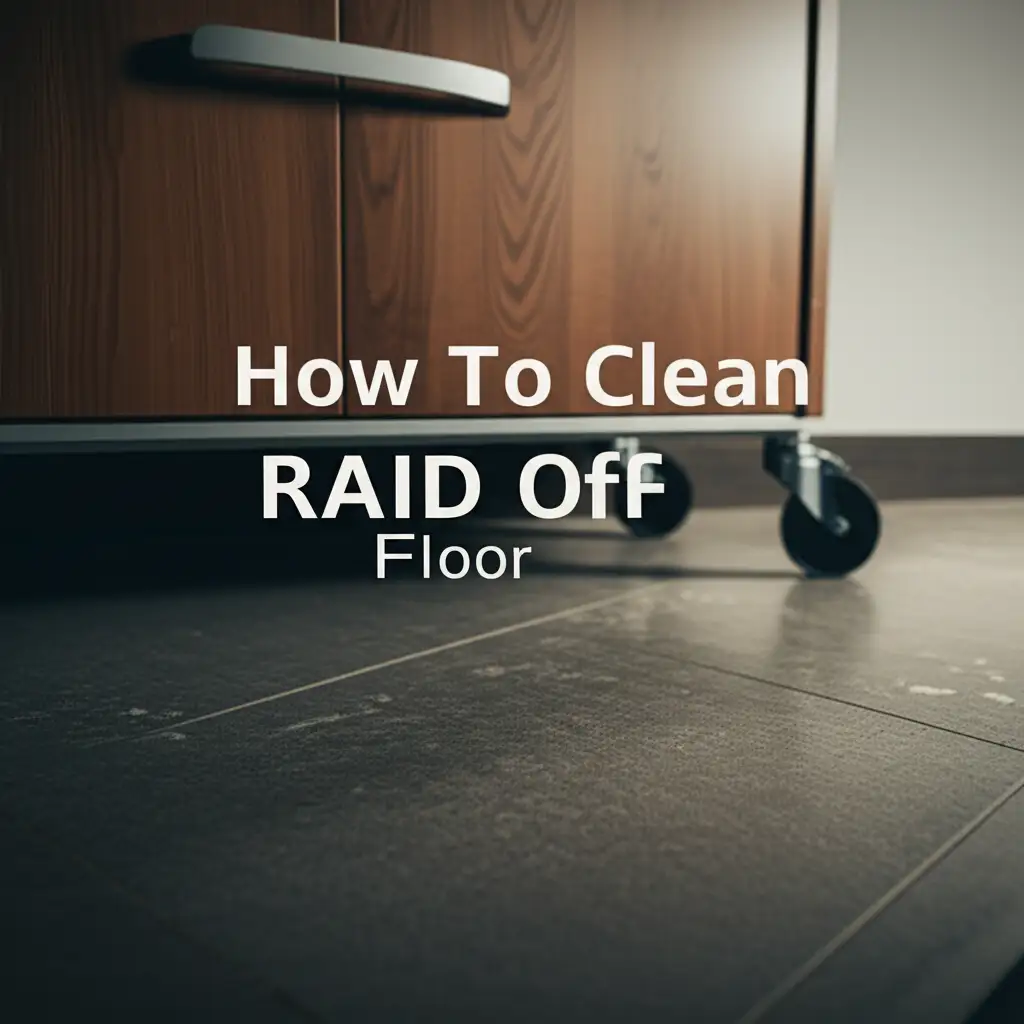
Accidental spills happen. Maybe you were targeting a rogue spider, or perhaps the can slipped from your hand. Suddenly, you have a sticky, sometimes oily, mess of Raid on your floor. It is important to know how to clean Raid off floor surfaces quickly and safely. This common household mishap can leave behind unpleasant residues and odors. We understand the frustration of finding that sticky film or a lingering smell.
Do not worry. Cleaning up insecticide residue is manageable with the right approach. This article will guide you through the process step-by-step. We will cover essential tools, suitable cleaning agents, and specific techniques for different floor types. We will also discuss how to handle stubborn stains and odors. My goal is to help you restore your floors to their clean, safe state.
Takeaway
- Safety First: Always wear gloves and ensure good ventilation.
- Act Quickly: Fresh spills are easier to clean.
- Match Cleaner to Residue: Dish soap, rubbing alcohol, or commercial degreasers work for different types of Raid residue.
- Consider Floor Type: Wood, tile, concrete, and vinyl each require specific care.
- Address Odors: Use baking soda or vinegar to neutralize lingering smells.
Raid residue is often oily or sticky. You can clean Raid off floor surfaces by first blotting up excess liquid. Then, use a mild dish soap solution or rubbing alcohol for most hard floors. Always test your cleaning solution in an inconspicuous area first to prevent damage.
Understanding Raid Residue and Its Impact
Raid is a common household insecticide. It works by targeting pests quickly. However, sometimes it lands on your floor instead of its intended target. When Raid spills, it leaves behind a residue. This residue can feel sticky or oily. The exact consistency depends on the specific Raid product. Some formulas contain petroleum distillates, which contribute to the oily feel. Others might have polymers that create a sticky layer.
The residue is not just an eyesore. It can attract more dirt and dust. This makes the floor look dirtier faster. The chemical components in Raid also mean you should approach cleaning with caution. You do not want skin contact or to inhale too many fumes. Ventilation is very important during cleanup. Always open windows and doors to let fresh air circulate. Protecting your hands with gloves is also a good idea. This prevents skin irritation from the chemicals.
Cleaning Raid quickly is important. The longer the residue sits, the harder it can be to remove. It may dry and bond more strongly with the floor surface. Old stains might even require stronger cleaning agents. Also, pets or small children might come into contact with the residue. Quick cleanup reduces this risk. This is similar to how you would approach how to clean bug spray off floor. The principles of safety and quick action remain the same.
Essential Tools and Cleaning Agents You Will Need
Before you start cleaning, gather all your supplies. Having everything ready makes the process smoother and more efficient. The right tools and cleaners can make a big difference. They help ensure you remove the Raid residue completely. You will need a variety of items to tackle the sticky mess. Some of these you likely already have in your home.
Here is a list of essential items:
- Protective Gloves: Always wear rubber or nitrile gloves to protect your skin from chemical exposure.
- Paper Towels or Absorbent Cloths: Use these to blot up excess Raid and wipe surfaces. They are disposable, which is helpful for chemical cleanup.
- Scrub Brush or Old Toothbrush: These are useful for scrubbing stubborn spots or getting into grout lines.
- Spray Bottle: A spray bottle allows you to apply cleaning solutions evenly.
- Buckets: You will need one for your cleaning solution and another for rinse water.
- Clean Rags or Microfiber Cloths: These are for applying cleaners and wiping surfaces clean.
- Mop (Optional): For larger spills, a mop can help, but sometimes spot cleaning is better. For tips on how to clean floor without mop, check out our other guides.
For cleaning agents, consider these options:
- Dish Soap: A gentle, effective degreaser. Mix a few drops with warm water. This works well for most fresh, sticky residues.
- Rubbing Alcohol (Isopropyl Alcohol): Excellent for dissolving oily residues. It evaporates quickly. Test this in a hidden spot first, especially on delicate floors.
- White Vinegar: A natural acid that can help break down some residues and neutralize odors. Mix with equal parts water.
- Baking Soda: A mild abrasive and odor absorber. You can make a paste with water for tough stains.
- Commercial Degreaser or All-Purpose Cleaner: For very heavy or dried-on oily spills, a stronger commercial cleaner designed for degreasing may be necessary. These are often used when you are dealing with how to clean oil spill on floor situations. Always follow product instructions for safety and effectiveness.
Having these items on hand ensures you are prepared for any type of Raid spill. Choose your cleaning agent based on the floor type and the nature of the residue.
Step-by-Step Guide for Hard Floors (Tile, Vinyl, Laminate)
Hard floors like tile, vinyl, and laminate are common surfaces for spills. Luckily, they are generally durable and respond well to cleaning Raid. The key is to act quickly and use the right technique. You want to remove the sticky residue without damaging the floor’s finish. I have cleaned many such spills myself, and this method works reliably.
Here is a step-by-step process:
- Safety First: Put on your protective gloves. Ensure the area is well-ventilated by opening windows or turning on a fan. Safety is paramount when dealing with chemical residues.
- Blot Up Excess Raid: Use paper towels or old rags to gently blot any liquid Raid. Do not rub, as this can spread the residue. Just absorb as much as you can. Dispose of these contaminated materials carefully.
- Prepare Cleaning Solution:
- For most fresh spills: Mix a few drops of mild dish soap with warm water in a spray bottle. This creates a gentle degreasing solution.
- For tougher, dried, or oily residues: You might use a 50/50 solution of white vinegar and water. Alternatively, rubbing alcohol can dissolve oily components very well.
- Always test your chosen solution on an inconspicuous area first. This ensures it does not harm your floor’s finish.
- Apply and Let Sit: Spray your cleaning solution directly onto the Raid residue. For stubborn spots, let the solution sit for 5-10 minutes. This gives it time to break down the sticky or oily film. Do not let it dry on the surface.
- Gently Scrub: Use a clean cloth, sponge, or soft-bristled brush to gently scrub the affected area. Work in small circular motions. For grout lines on tiled floors, an old toothbrush can be very effective. This method is similar to how you would clean stubborn marks off various surfaces. For specific guidance on how to clean ceramic floor tiles or how to clean vinyl floor planks, these gentle scrubbing techniques apply.
- Wipe and Rinse: Use a separate clean, damp cloth to wipe away the cleaning solution and dissolved residue. Rinse your cloth frequently in clean water. You might need to do this several times to remove all traces. Ensure no soapy or chemical residue remains on the floor.
- Dry the Area: Immediately dry the cleaned area with a clean, dry cloth. This prevents water spots and ensures no lingering moisture harms your floor. For laminate floors, quick drying is especially important to prevent water damage.
- Address Lingering Stickiness or Stains: If a sticky film remains, repeat the process. If it is an oily stain, a dab of rubbing alcohol on a clean cloth can often remove it. For tough, discolored stains, a paste of baking soda and water applied for 15-20 minutes might help. Gently scrub and rinse.
Following these steps will help you effectively clean Raid off your hard floors. Remember, patience and proper technique yield the best results.
Cleaning Raid from Wood Floors: Special Considerations
Wood floors add warmth and beauty to any home. However, they require a gentler touch, especially when cleaning chemical spills like Raid. Unlike tile or vinyl, wood can be sensitive to excess moisture and harsh chemicals. My experience tells me that patience and the right products are crucial here. You want to avoid warping, staining, or damaging the finish.
Here are the special considerations and steps for cleaning Raid off wood floors:
- Immediate Action is Key: Wood floors are more absorbent than other hard surfaces. Blot up any liquid Raid immediately using paper towels. Press firmly but do not rub. You want to absorb as much as possible before it penetrates the wood.
- Choose Your Cleaner Carefully:
- Mild Dish Soap Solution: This is usually the safest starting point. Mix just a few drops of gentle dish soap with warm water. Make sure the solution is only slightly sudsy. Too much soap can leave a dull film.
- Mineral Spirits (for oily residues on finished wood): For stubborn, oily Raid residues, a small amount of mineral spirits on a cloth can be effective. This is only for sealed wood floors. Always test in an inconspicuous area first. Mineral spirits can strip some finishes if not used carefully. Avoid using them on unsealed or waxed wood.
- Avoid Harsh Chemicals: Do not use abrasive cleaners, strong acids (like undiluted vinegar), or ammonia-based products. These can strip the finish, discolor the wood, or leave permanent marks.
- Limit Water Exposure: Water is the biggest enemy of wood floors. Your cloth should be damp, not dripping wet. Excess water can cause wood to swell, warp, or buckle.
- Gentle Application and Cleaning:
- Dip a clean, soft cloth into your chosen cleaning solution. Wring it out thoroughly. The cloth should be barely damp.
- Gently wipe the area with the Raid residue. Work in small sections. Do not flood the area.
- For sticky spots, lightly scrub with the damp cloth. If the residue is stubborn, you might need to repeat the application and wiping.
- Rinse (Minimal Water): Use another clean, soft cloth dampened with plain water. Wring it out very well. Wipe the cleaned area to remove any soap or cleaner residue. Again, use as little water as possible.
- Immediate Drying: This step is critical for wood floors. Immediately dry the area thoroughly with a clean, dry microfiber cloth. Buff the area gently until it feels completely dry to the touch. This prevents water damage and streaks.
- Buffing and Re-conditioning (Optional): Once dry, if the area looks dull, you can buff it with a clean, dry cloth to restore some shine. If your wood floor has a specific finish that requires re-conditioning after cleaning, apply a wood-safe conditioner according to its instructions.
Cleaning Raid from wood floors requires a delicate hand and careful product selection. By following these steps, you can remove the unwanted residue without harming your beautiful wood surfaces.
Tackling Raid on Concrete and Garage Floors
Concrete floors, especially in garages or basements, are tough surfaces. However, their porous nature means they can absorb spills quickly. Raid residue on concrete can be particularly challenging due to its oily components. It can create a slippery hazard and leave a dark, difficult-to-remove stain. From my experience with garage cleanups, a robust approach is needed here.
Here is how to effectively clean Raid off concrete and garage floors:
- Safety First: Wear heavy-duty gloves and eye protection. Ensure the area is well-ventilated. Concrete floors in garages often lack good airflow. Open garage doors and windows.
- Contain the Spill (If Fresh): If the Raid is still liquid, immediately pour an absorbent material over it. Cat litter, sawdust, or sand work well. This soaks up the liquid and prevents it from spreading further or soaking deeper into the concrete. Let it sit for 15-30 minutes, then sweep it up and dispose of it properly.
- Choose Your Cleaning Agent:
- Heavy-Duty Degreaser: This is your best bet for oily Raid residue on concrete. Automotive degreasers or concrete cleaners are designed to break down oil and grease effectively. Follow the product’s specific instructions for mixing and application.
- Dish Soap and Hot Water: For lighter or fresh spills, a strong solution of dish soap and very hot water can work. The hot water helps to emulsify the oils.
- Tri-Sodium Phosphate (TSP): For very stubborn, old stains, TSP is a powerful cleaner. Use it with extreme caution, wearing full protective gear (gloves, eye protection, long sleeves). It is a strong chemical.
- Application and Scrubbing:
- Wet the Area (Optional, for some degreasers): Some degreasers work better on a slightly wet surface. Check your product instructions.
- Apply the Cleaner: Pour or spray your chosen cleaner directly onto the Raid stain.
- Allow Dwell Time: Let the cleaner sit on the stain for the recommended time, usually 10-20 minutes. This allows the chemicals to penetrate and break down the residue. Do not let it dry on the concrete.
- Vigorous Scrubbing: This is where the hard work comes in. Use a stiff-bristled brush, a push broom with stiff bristles, or even a power scrubber for larger areas. Scrub the stain vigorously. You want to agitate the cleaner into the pores of the concrete. This is a common step when you are trying to figure out how to clean garage concrete floor.
- Rinse Thoroughly: Use a garden hose or a pressure washer to rinse the area thoroughly. Make sure all cleaning solution and dissolved residue are washed away. You might need to use a squeegee to push the water away, especially if there is no drain. Ensuring all residue is removed is critical, much like when learning how to clean oil off garage floor or how to clean garage floor oil stains.
- Repeat if Necessary: For old, deeply embedded stains, you may need to repeat the application and scrubbing process multiple times. Concrete is porous, so stains can sink deep.
- Dry the Floor: Allow the floor to air dry completely. Good ventilation will speed up the process.
Cleaning Raid from concrete floors requires strong cleaners and good old-fashioned elbow grease. But with the right technique, you can get your garage or basement floor looking clean again.
Removing Stubborn Stains and Lingering Odors
Even after cleaning the visible Raid residue, you might find two lingering problems: a stubborn stain or an unpleasant chemical odor. These issues can be frustrating, but they are often treatable. My experience with various household cleanups has taught me that persistence and the right approach make all the difference.
Tackling Stubborn Stains
Some Raid formulas can leave a discoloration or a particularly sticky spot that resists initial cleaning. Here is how to address them:
- Identify the Stain Type: Is it a dark, oily mark? Or a sticky, slightly discolored patch? Knowing this helps choose the right method.
- Baking Soda Paste (for oily/sticky stains on hard, non-porous floors):
- Mix baking soda with a small amount of water to create a thick paste.
- Apply the paste directly onto the stain. Make sure the stain is completely covered.
- Let the paste sit for several hours, or even overnight. This allows the baking soda to absorb oils and break down the residue.
- Once dry, use a stiff brush or a plastic scraper to gently remove the hardened paste.
- Wipe the area clean with a damp cloth and then dry thoroughly. This method is also useful when learning how to clean floor grout without scrubbing as the paste can penetrate small crevices.
- Rubbing Alcohol (for oily residues on appropriate surfaces):
- Dampen a clean cloth with rubbing alcohol.
- Gently blot and wipe the stain. Do not rub vigorously, especially on delicate finishes.
- The alcohol helps dissolve oily components.
- Test in an inconspicuous area first, as alcohol can affect some finishes.
- Commercial Spot Remover: For very persistent stains, you might need a commercial spot remover designed for the specific floor type. Always read the label and follow instructions carefully. Test it in a hidden area first.
Eliminating Lingering Odors
The smell of Raid can be strong and unpleasant. It can linger in the air and on surfaces long after the spill is cleaned. Proper odor removal is crucial for a fresh-smelling home.
- Ventilation is Key: The most important step for odor removal is ventilation. Keep windows open for several hours, or even days if possible. Use fans to circulate air and push out stale, chemical-laden air.
- White Vinegar Solution:
- Mix equal parts white vinegar and water in a spray bottle.
- Lightly mist the cleaned floor area. Do not saturate, especially on wood.
- The vinegar’s acetic acid neutralizes many odors.
- Let it air dry. The vinegar smell will dissipate as it dries, taking the Raid odor with it.
- Baking Soda (for absorbing odors):
- Sprinkle a generous layer of dry baking soda over the affected floor area.
- Leave it for several hours, or overnight if the odor is very strong. Baking soda is a natural odor absorber.
- Vacuum or sweep up the baking soda thoroughly.
- You can repeat this process if the odor persists.
- Activated Charcoal: Small bowls of activated charcoal placed near the affected area can also absorb odors from the air. This works passively over time.
- Coffee Grounds: Similar to baking soda, a shallow bowl of fresh coffee grounds can absorb odors in a small area. This is a temporary solution.
Addressing stubborn stains and odors requires extra effort. But by using these targeted methods, you can ensure your floor is not only clean but also free from any lingering reminders of the spill.
Preventive Measures and Best Practices
Cleaning up Raid from your floor can be a hassle. The best approach is to prevent spills in the first place. Taking a few simple precautions can save you time and effort. I always recommend thinking ahead to avoid future headaches. These preventive measures are not just for Raid, but for any chemical or messy substance you use around the house.
Here are some best practices to avoid Raid spills and similar messes:
- Read Product Instructions Carefully: Before using any insecticide, take a moment to read the label. Understand how to properly hold, spray, and store the product. This helps prevent accidents stemming from misuse.
- Clear the Area Before Spraying: Before you start spraying, clear the immediate area around your target pest. Move furniture, rugs, and anything else that could be accidentally sprayed or stained. This creates a clear work zone. If you are cleaning an area rug on a hardwood floor, for example, move it out of the way before spraying near it.
- Aim Carefully and Use Controlled Sprays: When spraying, aim precisely at the pest. Avoid sweeping motions that could send chemicals onto your floor or other surfaces. Use short, controlled bursts rather than continuous sprays. This minimizes overspray.
- Protect Nearby Surfaces: For targeted spraying, consider covering adjacent floor areas with old newspapers, cardboard, or plastic sheeting. This creates a barrier that catches any overspray. It is much easier to discard a sheet of plastic than to clean an entire floor.
- Always Wear Protective Gear: I cannot stress this enough. Gloves protect your hands from accidental contact. Eye protection is also wise, especially when spraying at odd angles. This reduces the risk of direct exposure.
- Ensure Good Ventilation During Use: When using any spray chemical indoors, always ensure excellent ventilation. Open windows and doors. Use fans to create cross-ventilation. This disperses fumes and helps any airborne particles settle less on your surfaces.
- Store Raid Safely and Securely: After use, replace the cap tightly on the Raid can. Store it upright in a cool, dry place. Keep it out of reach of children and pets. Do not store it near heat sources or open flames. Proper storage prevents accidental tip-overs or leaks.
- Dispose of Empty Cans Properly: Once a can is empty, follow local regulations for disposal. Do not just toss it in the regular trash. Many aerosols require special disposal. This prevents environmental contamination.
- Immediate Cleanup of Any Spills: If a spill does occur, no matter how small, clean it up immediately. The longer Raid sits on the floor, the harder it is to remove. Fresh spills are almost always easier to tackle. Having cleaning supplies readily accessible can speed up this process.
By implementing these preventive measures, you can significantly reduce the chances of encountering a Raid spill on your floor. A little foresight goes a long way in maintaining a clean and safe home environment.
FAQ Section
Q1: Is Raid residue dangerous to pets or children?
A1: Yes, Raid residue can be harmful if ingested or if there is prolonged skin contact. Its chemicals are designed to kill insects. Always clean up spills immediately. Keep pets and children away from the area until it is completely dry and free of residue. Good ventilation also helps to dissipate any fumes, making the area safer more quickly.
Q2: Can I use bleach to clean Raid off my floor?
A2: No, you should not use bleach to clean Raid. Mixing bleach with certain chemicals, including those in insecticides, can create dangerous fumes. Bleach can also damage many floor types. Stick to the recommended cleaning agents like dish soap, rubbing alcohol, or appropriate degreasers for safety and effectiveness.
Q3: How do I remove the sticky feeling left by Raid?
A3: The sticky feeling often comes from the oily or polymeric components in Raid. For hard floors, a solution of dish soap and warm water, or rubbing alcohol, works well to break down this residue. Scrub gently and rinse thoroughly. For concrete, a degreaser is most effective. Ensure complete removal of the residue and dry the floor well.
Q4: Will Raid stain my floor permanently?
A4: Raid usually does not cause permanent stains on non-porous surfaces like sealed tile or vinyl if cleaned promptly. On porous surfaces like unsealed concrete or unfinished wood, it can leave a discoloration if it penetrates deep before cleaning. Act quickly to prevent absorption. Stubborn stains might require specific spot treatments.
Q5: What if I don’t know my floor type?
A5: If you are unsure about your floor type, always err on the side of caution. Start with the mildest cleaning solution, such as diluted dish soap. Test it in a hidden, inconspicuous area first. Observe for any discoloration, dulling, or adverse reactions. If safe, proceed with gentle application. For unknown types, avoiding harsh chemicals is always a good practice.
Q6: How long does the Raid smell last after cleaning?
A6: The lingering smell of Raid depends on ventilation and the thoroughness of cleaning. With good ventilation and proper cleanup, the smell should dissipate within a few hours to a day. For stubborn odors, use odor absorbers like baking soda or white vinegar solutions. Continue ventilating the area until the smell is gone.
Conclusion
Cleaning Raid off your floor does not have to be a major chore. By understanding the nature of the residue and applying the right techniques, you can effectively restore your floors. Remember, safety always comes first. Wear gloves and ensure the area is well-ventilated during the entire cleaning process. My hope is that these guidelines make the task straightforward for you.
We covered the importance of quick action, the essential tools and cleaning agents, and specific methods for hard floors, wood, and concrete. From initial blotting to tackling stubborn stains and lingering odors, you now have a comprehensive plan. Prevention is also key. Taking simple steps like aiming carefully and protecting nearby surfaces can save you a lot of effort in the future. Follow these tips to confidently clean Raid off floor surfaces and maintain a pristine, safe living space. Your clean floors will thank you!
- Raid residue
- floor cleaning
- insecticide stain
- sticky floor
- home cleaning tips
- pest spray cleanup
- floor care

