· Outdoor Furniture Care · 19 min read
How To Clean Resin Chairs
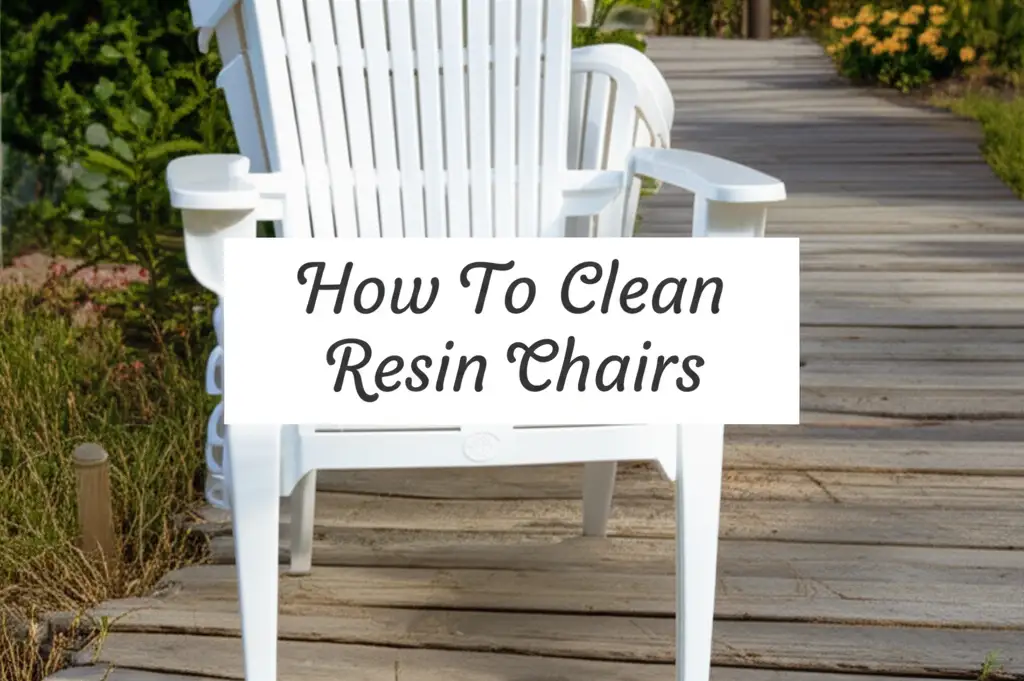
Restore Your Resin Chairs: A Complete Cleaning Guide
Your outdoor resin chairs offer comfort and style in your backyard. They are durable and often lightweight. However, like all outdoor items, resin chairs collect dirt, grime, and environmental buildup. Over time, exposure to sun and rain can make them look dull or stained. Nobody wants dingy outdoor furniture.
Keeping these chairs clean ensures they look good and last longer. A simple cleaning routine can prevent common issues like mildew or discoloration. Knowing how to clean resin chairs properly makes all the difference. This guide provides steps and tips to restore your chairs. We will cover everything from basic cleaning to tackling tough stains. You will learn to keep your resin furniture looking its best.
Takeaway
- Regular Cleaning: Use mild soap and water for routine maintenance.
- Stain Removal: Tackle specific stains like mold, mildew, or food marks with targeted solutions.
- Restoration: Bring back shine using polish or wax designed for plastic.
- Protection: Store chairs properly and use covers to prevent damage.
- Preventive Care: Clean spills quickly and avoid harsh chemicals.
To clean resin chairs, mix warm water with mild dish soap. Wipe down all surfaces using a soft cloth or sponge. For stubborn dirt, use a soft brush. Rinse chairs thoroughly with clean water. Let them air dry completely before use or storage. This process removes surface grime and keeps your chairs looking fresh.
Understanding Your Resin Chairs: Types and Basic Care
Resin chairs are a popular choice for outdoor living. They are known for being strong and weather-resistant. Most resin chairs are made from polypropylene, a type of plastic. This material resists rust and fading. It handles different weather conditions well.
However, resin chairs still need proper care. Sun exposure can cause them to become brittle or discolored over time. Dirt, dust, and pollen settle on the surfaces. Mold and mildew can grow in damp conditions. Understanding your chair’s material helps you choose the right cleaning methods. Proper care extends the life of your furniture. My goal is to keep my outdoor space looking inviting.
Different Types of Resin Finishes
Resin chairs come in various finishes. Some have a smooth, glossy surface. Others mimic wicker or wood with textured finishes. Each finish might require slightly different care. A smooth finish is easier to wipe clean. Textured surfaces can trap more dirt.
For textured chairs, you might need a soft brush. This helps reach into the crevices. Always test new cleaning products on a hidden spot first. This ensures the cleaner does not damage the finish. Your chairs will thank you for the gentle approach.
Why Regular Cleaning Matters
Regular cleaning is crucial for resin chairs. It prevents dirt buildup from becoming permanent. Frequent cleaning stops mold and mildew growth. These can cause unsightly stains and smells. It also helps prevent the chair material from breaking down.
A quick wipe-down every few weeks can save you much effort later. This proactive approach maintains the chair’s appearance. It also protects your investment. I always feel better about sitting on clean outdoor furniture.
Essential Tools and Cleaning Solutions for Resin Chairs
Having the right tools makes cleaning your resin chairs easy. You do not need many specialized items. Most things you already have at home. Gather your supplies before you start. This saves time and effort during the cleaning process.
Using gentle cleaning solutions is important. Harsh chemicals can damage the resin material. They can also strip away protective layers. Always opt for mild, non-abrasive cleaners. This approach protects your chairs and ensures their longevity. I find that simple solutions work best for most cleaning jobs.
Basic Cleaning Supplies
Start with the essentials for a general clean. These items are safe for most resin types. They remove common dirt and grime effectively. You can easily find them in your home or at any store.
Here is a list of what you need:
- Bucket: To hold your cleaning solution.
- Warm Water: Helps dissolve dirt and soap.
- Mild Dish Soap: Gentle but effective for cutting grease and grime.
- Soft Cloths or Sponges: Non-abrasive tools for wiping surfaces.
- Soft Bristle Brush: Useful for textured surfaces or stubborn spots.
- Garden Hose: For rinsing the chairs thoroughly.
- Microfiber Towels: For drying, if you prefer not to air dry.
These basic supplies tackle most everyday cleaning tasks. They are safe for the resin. They keep your chairs looking fresh without harshness.
Recommended Cleaning Solutions
Beyond basic soap and water, a few other solutions work well. These are for more specific cleaning challenges. Always dilute solutions as directed. This prevents damage to your chairs.
Consider these options:
- Vinegar Solution: Mix equal parts white vinegar and water. This is excellent for mild mold, mildew, and general grime. Vinegar is natural and effective. For more tips on using vinegar, see How to Clean Shower with Vinegar.
- Baking Soda Paste: Mix baking soda with a little water to form a paste. Apply it to stubborn stains. Let it sit, then scrub gently. Baking soda is a mild abrasive.
- Oxygen Bleach (Non-Chlorine): For tough stains or yellowing, a diluted oxygen bleach solution can work. Follow product instructions carefully. Always test in an inconspicuous area first. This helps restore brightness.
- Commercial Plastic Cleaner: Some products are specifically made for outdoor plastic furniture. Read labels to ensure they are safe for resin. Choose options that protect against UV damage.
Avoid using abrasive cleaners, steel wool, or scouring pads. These can scratch the resin surface. Scratches make chairs look dull and can trap more dirt. My personal rule is to always start with the mildest cleaner.
Routine Cleaning: Keeping Your Resin Chairs Spotless
Routine cleaning is the backbone of good resin chair maintenance. It prevents dirt and grime from building up. This keeps your chairs looking inviting all season long. You do not need to spend a lot of time on this. A quick clean every few weeks works wonders.
Think of it as a small investment in the longevity and appearance of your outdoor space. Consistent care avoids bigger cleaning problems later. I find that making it part of my regular outdoor chores keeps things simple. It prevents stress.
Step-by-Step for Regular Cleaning
Follow these simple steps for routine cleaning. They are easy to do and highly effective. This method safely removes dust, pollen, and light dirt.
- Remove Loose Debris: First, shake off any loose leaves, dust, or dirt from the chairs. You can use a soft brush or a damp cloth for this.
- Prepare Cleaning Solution: Fill a bucket with warm water. Add a few drops of mild dish soap. Stir until suds form.
- Wipe Down Chairs: Dip a soft cloth or sponge into the soapy water. Wipe down all surfaces of the resin chairs. Pay attention to armrests and seat areas. These collect the most dirt. For textured areas, use a soft bristle brush to gently scrub.
- Rinse Thoroughly: Use a garden hose to rinse the chairs completely. Make sure to wash away all soap residue. Soap left behind can attract more dirt.
- Air Dry: Let the chairs air dry in a sunny spot. Ensure they are fully dry before stacking or covering them. This prevents mildew growth.
This routine cleaning takes minimal time. It makes a big difference in maintaining your chairs. I usually do this on a sunny afternoon.
Frequency of Routine Cleaning
The frequency depends on several factors. Consider how often you use your chairs. Think about the local environment.
- Weekly: If your chairs are in a high-traffic area. If they are under trees that drop pollen or leaves.
- Bi-weekly: For average use and moderate environmental exposure. This is a good general guideline.
- Monthly: If your chairs are under a covered patio. If they see minimal use.
Adjust the schedule based on what you observe. If your chairs look dirty, clean them. Regular checks help you decide.
Tackling Stubborn Stains on Resin Chairs
Sometimes, routine cleaning is not enough. Resin chairs can develop stubborn stains. These include mold, mildew, rust, or food spills. These stains require a more focused approach. Do not worry; most stains are removable. You just need the right technique and product.
Always address stains as soon as you notice them. This prevents them from setting in. Older stains are harder to remove. I always keep specific stain removers handy for quick action.
Removing Mold and Mildew
Mold and mildew thrive in damp, shady conditions. They appear as black, green, or gray spots. They can be unsightly and harmful. Removing them promptly is important. For more guidance on mold, see How to Clean Mold with Vinegar.
Here is how to tackle mold and mildew:
- Vinegar Solution Method:
- Mix equal parts white vinegar and water in a spray bottle.
- Spray the affected areas generously.
- Let the solution sit for 15-30 minutes. The vinegar breaks down mold spores.
- Scrub with a soft brush or sponge. Work the solution into the stains.
- Rinse thoroughly with a hose.
- Oxygen Bleach Method (for severe cases):
- Mix oxygen bleach (non-chlorine) according to package directions with water.
- Apply the solution to the moldy areas.
- Let it sit for 10-15 minutes. Do not let it dry on the surface.
- Scrub gently.
- Rinse extensively with clean water. Ensure no bleach residue remains.
- Wear gloves and eye protection when using bleach.
Mold and mildew can be persistent. You might need to repeat the process. Ensuring the chairs dry completely after cleaning helps prevent recurrence. For mold on other surfaces, check out How to Clean Mold off Walls.
Addressing Rust Stains
Rust stains can appear if metal items sit on your resin chairs. This might be from screws, tools, or other patio items. Rust can be tricky but is often removable.
Try these steps for rust:
- Lemon Juice and Salt Paste:
- Sprinkle salt on the rust stain.
- Squeeze fresh lemon juice over the salt to form a paste.
- Let it sit in the sun for 1-2 hours. The sun enhances the stain-lifting power.
- Scrub gently with a soft brush.
- Rinse well with water.
- Commercial Rust Remover (for plastics):
- Look for a rust remover specifically safe for plastics or outdoor furniture.
- Follow the product instructions carefully.
- Always test in an hidden area first.
- Rinse the area thoroughly after application.
Avoid using harsh acid-based rust removers. These can corrode or discolor your resin.
Removing Food and Drink Stains
Barbecues and outdoor meals often lead to spills. Food, grease, or drink stains can be common. Act fast to clean these.
- Mild Dish Soap and Warm Water: For most food and drink stains, a stronger concentration of mild dish soap and warm water works. Scrub the area with a sponge.
- Baking Soda Paste: For oily or colored stains (like ketchup or wine), create a paste with baking soda and water. Apply it to the stain. Let it sit for 10-15 minutes. Gently scrub and then rinse.
- Rubbing Alcohol: For ink marks or sticky residue, apply rubbing alcohol to a clean cloth. Dab the stain gently. Do not rub too hard. Rinse afterward.
Clean food spills immediately. This prevents them from drying and setting into the resin. Quick action makes stain removal much easier.
Restoring Shine and Preventing Future Damage
Once your resin chairs are clean, you might notice they look a bit dull. Over time, UV rays and weather can diminish their original shine. Restoring this luster enhances their appearance. More importantly, it adds a layer of protection. This helps prevent future damage.
Think of it as giving your chairs a protective shield. This step is not just about looks. It is about prolonging the life of your furniture. I always feel a sense of accomplishment when my chairs look brand new again.
Bringing Back the Luster
After a deep clean, you can bring back the shine. This makes your chairs look almost new. There are a few effective ways to do this.
- Plastic Restorer or Polish:
- Products exist specifically for restoring plastic. These can fill in micro-scratches. They also create a smooth, shiny surface.
- Apply the product according to its instructions. Usually, you apply a small amount. Then you buff it with a clean, soft cloth.
- This provides a noticeable improvement in shine.
- Automotive Wax (Non-Abrasive):
- A non-abrasive car wax can also work on resin chairs. It creates a protective layer. This layer repels water and dirt. It also adds a nice sheen.
- Ensure the wax is safe for plastic. Apply a thin coat to the clean, dry chair.
- Let it haze, then buff it off with a clean microfiber cloth.
- This provides UV protection too.
Do not use abrasive polishes. These can scratch the surface. Always ensure the chairs are completely dry before applying any polish or wax.
Protecting Your Resin Chairs
Prevention is key to keeping your resin chairs in top condition. Simple habits can significantly reduce wear and tear. They also minimize the need for heavy cleaning.
Here are ways to protect your chairs:
- Use Outdoor Furniture Covers: When chairs are not in use, especially during off-seasons or extended periods, cover them. Covers protect against UV rays, rain, dust, and pollen. This is especially true if you are storing them outside.
- Apply UV Protectant Spray: Some sprays offer UV protection for plastics. These can help prevent yellowing and brittleness caused by sun exposure. Reapply them periodically as directed.
- Store Indoors During Extreme Weather: If possible, bring your chairs indoors during harsh winters or very stormy weather. This prevents cracking or fading from extreme temperatures.
- Clean Spills Immediately: Do not let food or drink spills sit on the chairs. Wipe them up right away. This prevents stains from setting in.
- Avoid Placing Hot Items Directly: Do not put hot pots or pans directly on the chair surface. Use coasters or mats. Heat can warp or melt the resin.
- Lift, Don’t Drag: When moving chairs, lift them instead of dragging them. Dragging can cause scratches and wear on the feet. This simple action preserves the chair’s integrity.
Implementing these protective measures extends the life of your resin chairs. It ensures they remain a beautiful part of your outdoor space for years. My aim is always to prevent problems rather than fix them later.
Deep Cleaning and Winter Storage for Resin Chairs
Deep cleaning your resin chairs once or twice a year is beneficial. This removes accumulated grime and prepares them for storage or heavy use. It is different from routine cleaning. Deep cleaning addresses embedded dirt and prepares the surface for protection.
Proper storage during winter is equally important. Cold temperatures and moisture can damage resin over time. Taking steps to store them correctly prolongs their life. This ensures they are ready for use when warm weather returns.
When to Deep Clean
- Before Storage: Deep clean chairs before putting them away for winter. This prevents dirt and grime from sitting on the surface for months.
- After Winter Storage: Clean them thoroughly when bringing them out for spring. This removes any dust or dampness from storage.
- Annually/Bi-Annually: Depending on exposure and use, a deep clean once or twice a year is a good practice. This maintains their overall condition.
Deep Cleaning Steps
Deep cleaning goes beyond surface wiping. It ensures a thorough cleanse.
- Pre-Rinse: Hose down the chairs to remove loose dirt and dust.
- Apply Stronger Solution:
- For general deep cleaning, use a stronger solution of mild dish soap and warm water. Or use a white vinegar solution (1:1 vinegar to water).
- Spray or apply the solution liberally to all surfaces.
- Use a Soft Brush: Use a soft-bristle brush to scrub all parts of the chair. Pay extra attention to crevices, textured areas, and underneath surfaces. This helps lift embedded dirt.
- Target Specific Stains: If you notice any stubborn mold, mildew, or rust stains, apply the specific treatments mentioned earlier. Allow solutions time to work.
- Thorough Rinse: Rinse the chairs extensively with a garden hose. Ensure all cleaning solution is washed away. Any residue can attract new dirt or cause streaking.
- Inspect and Repeat: Check the chairs for any missed spots. Repeat the process if necessary.
- Dry Completely: Allow the chairs to air dry completely. Ensure no moisture remains. This is crucial before storage.
Preparing for Winter Storage
Storing resin chairs correctly protects them from harsh winter elements. Improper storage can lead to cracks, discoloration, or mold growth.
- Clean Thoroughly: As mentioned, deep clean the chairs first. Ensure they are bone dry before storage. Moisture leads to mold.
- Apply Protectant: If you have a plastic protectant spray or wax, apply it before storage. This adds a layer of defense against environmental damage.
- Indoor Storage (Ideal):
- The best option is to store chairs indoors. A garage, basement, or shed works well.
- Stack chairs carefully if they are stackable. This saves space.
- Avoid storing them near heat sources or chemicals.
- Outdoor Storage (If Necessary):
- If indoor storage is not possible, choose a sheltered spot. Under a covered patio or porch is better.
- Use high-quality, waterproof outdoor furniture covers. Ensure the covers are breathable to prevent moisture buildup.
- Elevate chairs slightly off the ground. This helps prevent moisture accumulation underneath. You can use wood blocks.
- Secure covers tightly so wind does not blow them off.
Proper winterization ensures your resin chairs emerge fresh in spring. My outdoor furniture always looks better after careful winter storage.
Advanced Tips for Specific Resin Chair Issues
Resin chairs are generally low maintenance. Still, you might encounter specific issues. These go beyond basic dirt or common stains. Knowing how to handle them keeps your chairs looking their best. These tips address less common, but important, problems.
I have found that proactive knowledge saves time and prevents bigger problems. It is about understanding the material. It helps to choose the right solution.
Addressing Scuff Marks and Minor Scratches
Resin chairs can get scuff marks or minor scratches. This often happens from moving them or accidental bumps. While deep scratches are hard to fix, minor ones are manageable.
- Magic Eraser (Melamine Foam):
- Dampen a Magic Eraser (melamine foam sponge).
- Gently rub the scuff mark in small circular motions.
- This acts as a micro-abrasive. It helps lift the scuff.
- Use light pressure to avoid dulling the finish.
- Rinse the area with water afterward.
- Toothpaste (Non-Gel):
- Apply a small amount of non-gel white toothpaste to a soft cloth.
- Gently rub the scratch or scuff. Toothpaste has mild abrasives.
- Buff the area until the mark diminishes.
- Wipe clean with a damp cloth.
- Plastic Polish/Restorer:
- As mentioned before, plastic polish can also help. It fills in tiny scratches. It evens out the surface.
- Apply as directed for restoration.
For deeper scratches, professional repair might be needed. However, these methods work for surface imperfections.
Dealing with Discoloration or Yellowing
Over time, especially with prolonged sun exposure, white or light-colored resin chairs can yellow. This is due to UV degradation. Reversing severe yellowing can be challenging. However, you can improve it.
- Oxygen Bleach Soak (for removable parts or small items):
- If a chair part is detachable, you can try soaking it. Use a solution of oxygen bleach and water.
- Follow product instructions for concentration and soak time.
- This can help whiten the plastic.
- Rinse thoroughly afterward.
- Automotive Whitening Compounds:
- Some automotive plastic restoration products are designed to whiten aged plastic.
- Research products carefully. Ensure they are safe for outdoor use and for your specific resin type.
- Apply according to the instructions. They often involve a multi-step process.
- Preventative Measures:
- The best approach is prevention. Use UV protectant sprays regularly.
- Store chairs in the shade. Use covers when not in use.
- This significantly slows down the yellowing process.
Removing Paint or Sap Residue
Accidental paint splatters or sticky tree sap can land on chairs. These need specific removal methods.
- For Fresh Paint:
- If paint is still wet, wipe it off immediately with a damp cloth.
- Use soap and water.
- For Dry Paint:
- Gently scrape off larger paint blobs with a plastic scraper. Avoid metal.
- Apply mineral spirits or paint thinner to a cloth. Dab the painted area. Do not rub vigorously.
- Test in an inconspicuous area first. Some thinners can dull resin.
- Rinse the area thoroughly with soap and water after the paint is removed.
- For Tree Sap:
- Rub the sap with a little rubbing alcohol or hand sanitizer on a cloth.
- The alcohol helps dissolve the sap.
- Gently scrape any softened sap.
- Wash the area with soap and water afterward.
- Another option for sap is to use an ice cube to harden it. Then gently scrape it off.
Always be gentle with resin surfaces. Strong chemicals can react with the plastic. Test new solutions in a hidden spot. My chairs have survived many outdoor incidents with these tips.
FAQ Section
Can you use bleach on resin chairs?
You should generally avoid chlorine bleach. It can be too harsh for resin. Chlorine bleach can weaken the plastic over time. It can also cause discoloration, especially on colored chairs. Oxygen bleach (non-chlorine bleach) is a safer alternative for tough stains like mold or severe yellowing. Always dilute it properly and rinse thoroughly.
How do you remove scuff marks from resin chairs?
For light scuff marks, you can use a melamine foam sponge, often known as a Magic Eraser. Dampen it and gently rub the scuff in a circular motion. Another option is to use a non-gel white toothpaste applied with a soft cloth. Gently rub, then rinse. For deeper marks, a plastic polish might help minimize their appearance.
How often should I clean my resin chairs?
The frequency depends on use and exposure. For general cleanliness, aim for a routine wash every 2-4 weeks. If your chairs are under trees, or if you use them daily, weekly cleaning might be better. A deep clean should happen at least once or twice a year, especially before and after winter storage.
What causes resin chairs to turn yellow?
Resin chairs, especially white ones, turn yellow mainly due to prolonged exposure to ultraviolet (UV) rays from the sun. The UV radiation degrades the plastic over time. This process breaks down chemical bonds in the material. This causes the characteristic yellowing. Lack of regular cleaning can also contribute by allowing dirt to embed.
Can I pressure wash resin chairs?
You can pressure wash resin chairs, but use caution. Set the pressure washer to a low-pressure setting. Keep the nozzle a good distance from the chair surface. High pressure can damage the resin. It can strip finishes or etch the material. A garden hose with a spray nozzle is usually sufficient and safer for most cleaning tasks.
How do you store resin chairs in winter?
First, deep clean and dry your chairs completely. Store them indoors if possible, in a garage, basement, or shed. Stack stackable chairs to save space. If storing outdoors, use high-quality, breathable, waterproof covers. Elevate them off the ground slightly. This protects them from freezing temperatures and moisture damage.
Conclusion
Keeping your resin chairs clean makes your outdoor space more enjoyable. It also extends the life of your furniture. We covered simple routine cleaning with soap and water. We looked at tackling stubborn issues like mold, mildew, and rust stains. We also explored ways to restore shine and protect your chairs. These steps are easy to follow.
Remember, consistent care is important. Regular cleaning prevents problems from becoming worse. Using the right tools and solutions protects the resin material. Protecting your chairs from sun and harsh weather helps them last for years. Now you know how to clean resin chairs effectively. Go ahead, give your outdoor furniture the care it deserves. Enjoy your beautifully clean and well-maintained resin chairs!
- resin chairs
- cleaning outdoor furniture
- plastic furniture care
- patio chair cleaning
- outdoor cleaning
- furniture maintenance
- garden furniture