· Cleaning Tips · 13 min read
How To Clean Resin Out Of Silicone Cups
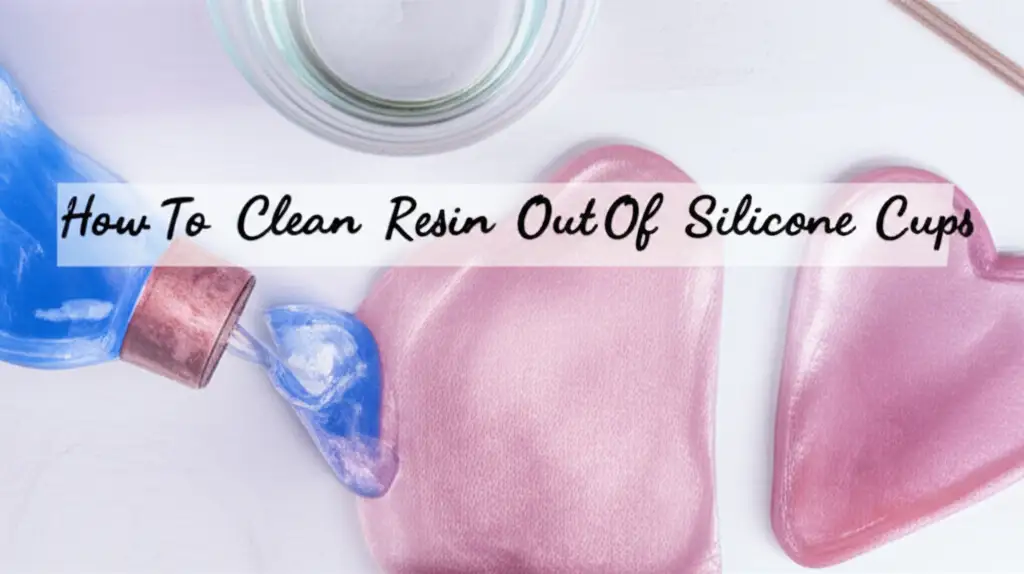
How To Clean Resin Out Of Silicone Cups
Working with resin is a rewarding craft. It allows you to create beautiful, custom pieces. However, a common challenge many crafters face is how to clean resin out of silicone cups. These reusable cups are essential tools. Keeping them clean ensures your resin projects remain neat and your tools last a long time. Dirty cups can affect future resin pours. They can also make your workspace less organized.
I know how frustrating it is to deal with sticky or hardened resin. This article offers clear, simple steps. We will cover methods for both uncured and cured resin. You will learn about the right tools and cleaning agents. We also share tips to maintain your silicone cups. By the end, you will confidently tackle any resin mess. Your silicone cups will stay clean and ready for your next creation.
Takeaway
- For Uncured Resin: Wipe immediately with paper towels, then use rubbing alcohol or acetone.
- For Cured Resin: Freeze the silicone cup, then peel the hardened resin away.
- Preventive Care: Always wipe cups before resin fully cures and store them clean.
Quick Answer
To clean resin out of silicone cups, first remove as much uncured resin as possible with a paper towel. Then, use rubbing alcohol or acetone for any remaining sticky residue. For cured resin, freeze the cup overnight; the hardened resin will become brittle and easily peel away from the flexible silicone.
Understanding Resin Types: Cured vs. Uncured
When you work with resin, you deal with two main states: uncured and cured. Each state needs a different cleaning approach. Knowing the difference saves you time and effort. It also helps protect your silicone cups.
Uncured resin is still liquid or sticky. It has not fully hardened. This is the resin you pour, mix, and color. It feels wet to the touch. This state is easier to clean if you act fast. Fresh spills are simpler to manage. Time is key when dealing with uncured resin. It has not bonded strongly with the silicone.
Cured resin is hard and solid. It has completed its chemical reaction. This means it is no longer sticky. It feels like plastic. Once resin cures, it becomes much more difficult to remove. It adheres firmly to surfaces. You cannot just wipe it away. Different methods are needed for cured resin messes. Understanding these differences helps you choose the correct cleaning technique. This ensures your silicone cups stay in good condition for many uses.
Essential Tools and Supplies for Resin Cleanup
Having the right tools makes cleaning resin easier. You need specific items for safe and effective cleanup. Gather these supplies before you start your resin project. Being prepared saves you from sticky situations. It also helps prevent damage to your silicone cups.
First, you will need paper towels or old rags. These are good for wiping away uncured resin. They absorb the liquid before it hardens. Disposable items are best for this. You do not want to spread resin onto reusable cloths. Next, rubbing alcohol (isopropyl alcohol) is a crucial cleaner. It helps dissolve uncured resin. A higher percentage of alcohol works better. You can find this at most drugstores. How to clean with vinegar and baking soda are great general cleaners, but alcohol is better for resin.
Acetone is another powerful solvent. It is often found in nail polish remover. Use pure acetone for stubborn uncured resin. Be careful, though, as it can be strong. Always test it on a small, hidden area of your silicone cup first. Not all silicone reacts the same way. You may also need plastic scrapers or spatulas. These help gently lift away hardened resin. Avoid using metal tools. Metal can scratch or damage the silicone. Gloves are also important. They protect your hands from resin and cleaning chemicals. A freezer is essential for removing cured resin. Finally, a trash can helps you dispose of resin waste properly.
Cleaning Uncured Resin from Silicone Cups
Cleaning uncured resin immediately is the best way to keep your silicone cups pristine. This method relies on quick action. It prevents the resin from hardening and bonding. I always advise cleaning as soon as you finish pouring.
First, grab some paper towels. Wipe out as much liquid resin as you can. Get rid of the bulk of the material. Be thorough. Do not let any large puddles remain. This step reduces the amount of solvent you need. It also makes the next steps easier.
Next, apply rubbing alcohol to a clean paper towel. Wipe down the inside of the silicone cup. The alcohol helps dissolve the sticky residue. You might need to rub a bit. Repeat this step until the cup feels clean. If some residue remains, try a cotton swab for small spots. For very stubborn, sticky spots, a small amount of pure acetone on a rag can work wonders. Be careful with acetone. Use it sparingly. It is strong. After cleaning, wash the cup with soap and water. This removes any chemical residue. Let it air dry completely. This method works well for resin you catch early.
Removing Cured Resin from Silicone Cups: The Freezing Method
Sometimes, you miss a spot, or resin cures inside your cups. Do not worry. The freezing method is a simple and effective way to remove cured resin from silicone cups. It uses the properties of silicone and resin to your advantage. Silicone remains flexible even when cold. Cured resin, however, becomes brittle. This difference allows for easy removal.
First, ensure your silicone cup is completely dry. Any moisture can make the process less effective. Place the cup, with the cured resin inside, into your freezer. Leave it there for several hours. Overnight is usually best. The goal is to make the resin very cold. This causes it to shrink slightly and become fragile. It loses its flexibility.
Once the cup is thoroughly frozen, take it out. The resin inside will feel hard and brittle. Gently flex the silicone cup. Bend it inwards and outwards. You will hear cracks as the resin breaks away. The cured resin should separate easily from the silicone. Peel out the broken pieces. Use a plastic scraper for any smaller bits. Do not use metal. Metal can damage the silicone surface. This method usually leaves your silicone cup clean. It is ready for your next project.
Advanced Techniques for Stubborn Cured Resin
Even the freezing method might not get every last bit of cured resin. For those extra stubborn pieces, you need more focused techniques. These methods require a bit more care. They help ensure your silicone cups stay in top condition. I have used these when a tiny fleck just would not come off.
One option is hot water immersion. Heat can make cured resin slightly more flexible. It also helps silicone expand a tiny bit. Boil some water. Pour the hot water into a heat-safe container. Submerge your silicone cup in the hot water for a few minutes. Make sure the water is hot, but not so hot it melts the silicone. After a few minutes, remove the cup carefully. Wear gloves to protect your hands. While the cup is still warm, try to peel or scrape the resin away. The slight warmth might soften the resin just enough. Be gentle.
Another technique involves soaking in rubbing alcohol or acetone (with caution). For very thin layers or sticky residue, a prolonged soak can sometimes help. Fill the silicone cup with rubbing alcohol. Let it sit for an hour or two. The alcohol can slowly work at the bond. For extremely tough spots, a short soak in pure acetone might be necessary. But this comes with a big warning: test a small, hidden area of your silicone cup first. Acetone can degrade some types of silicone over time. It can make them sticky or brittle. Only use it as a last resort. Rinse thoroughly with soap and water after any advanced cleaning. This removes all chemical traces. For general stubborn messes, sometimes cleaning agents for how to clean baked-on grease from pans can be surprisingly effective due to their degreasing power, but for resin specifically, stick to alcohol or freezing.
Preventive Measures: Keeping Your Silicone Cups Clean
Prevention is key to prolonging the life of your silicone cups. It is much easier to prevent resin from curing than to remove it. A few simple habits can save you a lot of cleaning time. I always follow these steps myself.
First, clean immediately after use. This is the single most important rule. As soon as you finish pouring resin, wipe out any excess liquid. Use a paper towel to absorb the majority of the uncured resin. The less resin left in the cup, the less you have to worry about curing. This quick wipe-down takes seconds. It makes a huge difference.
Second, use barrier methods if possible. Some crafters apply a thin layer of cooking oil or a release agent inside their silicone cups. This creates a non-stick surface. It can make cured resin easier to pop out. However, be cautious. Too much oil can interfere with your resin cure. It can also leave a residue on your finished pieces. Test this method before using it on important projects. Consider using different cups for different resin types. This prevents cross-contamination.
Finally, store cups properly. After cleaning and drying, store your silicone cups away from dust and direct sunlight. Sunlight can degrade silicone over time. Dust can stick to any leftover residue. A clean storage container or bag works well. These simple steps ensure your cups are always ready. They will serve you well for many resin projects to come. Remember, a clean cup is a happy cup. Many cleaning tasks can be simplified with proper care, just like learning how to clean a ceiling benefits from specific tools and techniques.
Maintaining Your Silicone Cups for Longevity
Taking good care of your silicone cups extends their lifespan. Proper maintenance goes beyond just cleaning. It involves handling and storage practices. These steps ensure your cups remain flexible and non-stick. I find that consistent care truly pays off.
Firstly, avoid sharp objects. Never use metal scrapers, knives, or other sharp tools on your silicone cups. Even a small scratch can damage the non-stick surface. This makes resin more likely to stick in the future. It can also tear the silicone. Always opt for plastic or silicone tools when working inside the cups. A plastic spatula is ideal for mixing.
Secondly, wash with mild soap and water regularly. Even after removing resin, a thorough wash is beneficial. Use a gentle dish soap and warm water. This removes any lingering residues or oils. It also keeps the silicone fresh. Rinse completely to ensure no soap film remains. Soap residue can affect future resin pours. Allow the cups to air dry fully before storing them. This prevents mold or mildew growth.
Thirdly, store them correctly. Do not stack heavy items on top of your silicone cups. This can distort their shape. Store them flat or in a way that maintains their original form. Keep them in a clean, dry place. Protect them from extreme temperatures. Both very hot and very cold environments can affect silicone’s integrity over time. A cabinet or drawer works well. By following these maintenance tips, your silicone cups will remain valuable tools for years. They will help you create beautiful resin pieces every time. Just as it’s important to care for your resin tools, remembering how to clean a washing machine with baking soda and vinegar ensures your larger cleaning appliances last longer too.
FAQ Section
Q: Can I put my silicone cups in the dishwasher to clean resin? A: It is generally not recommended for cured resin. Dishwashers might not effectively remove cured resin. The high heat can also degrade some silicone types over time. For uncured resin, manual cleaning with alcohol or acetone is faster and more effective. Handwashing with soap and water is best for longevity after resin removal.
Q: What if resin cures on the outside of my silicone cup? A: The freezing method works for resin on the outside too. Simply freeze the cup as usual. Then, gently flex and peel the cured resin off. For very small, thin spots, a bit of rubbing alcohol and rubbing might help dissolve it if it’s not fully cured.
Q: Is it safe to use acetone on all silicone cups? A: Acetone is strong. While it works well for uncured resin, it can be harsh on some silicone types. Always test a small, hidden spot first. Prolonged exposure can make some silicone sticky or brittle over time. Use it sparingly and rinse well afterward.
Q: How do I remove sticky residue from silicone cups after cleaning? A: If a sticky residue remains after cleaning, it might be an uncured resin film or a reaction with your cleaner. Try wiping again with fresh rubbing alcohol. A wash with warm water and dish soap, followed by a good rinse, usually removes any lingering stickiness from cleaning agents.
Q: Can I use cooking oil to prevent resin from sticking in the first place? A: Yes, a very thin layer of cooking oil or a resin release agent can help prevent resin from sticking. However, use it cautiously. Too much oil can interfere with the resin’s cure or leave a residue on your finished piece. Test this method before using it on important projects.
Q: How do I know if my resin is fully cured and safe to handle for cleaning? A: Resin is fully cured when it is hard to the touch and no longer sticky or tacky. It should feel like solid plastic. The cure time depends on the specific resin type, temperature, and humidity. Always check your resin product’s instructions for exact cure times before cleaning.
Conclusion
Keeping your silicone cups clean is simple with the right techniques. We have explored how to clean resin out of silicone cups effectively. Remember to act fast with uncured resin using paper towels and rubbing alcohol. For cured resin, the freezer is your best friend. It makes stubborn pieces brittle and easy to peel. Advanced methods like hot water or careful acetone use can tackle the toughest spots.
Beyond cleaning, proactive measures are important. Always wipe cups immediately after use. Consider barrier methods if appropriate. Store your cups properly. Avoid sharp objects and wash them regularly with mild soap. By following these steps, you extend the life of your valuable crafting tools. Your silicone cups will stay clean, flexible, and ready for your next exciting resin project. Invest a little time in care, and enjoy beautiful resin creations for years to come. Start cleaning your cups the right way today and see the difference!
- Resin Cleaning
- Silicone Care
- Craft Cleanup