· Outdoor Cleaning · 20 min read
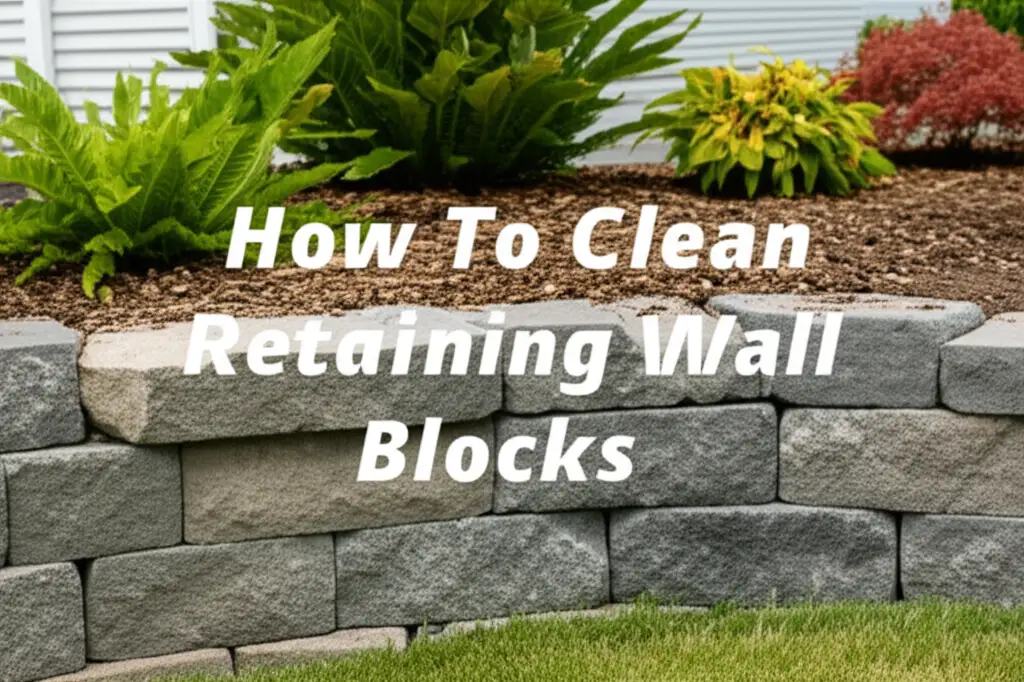
How To Clean Retaining Wall Blocks
Reclaiming Your Yard: How To Clean Retaining Wall Blocks
Is your retaining wall starting to look drab? A dirty retaining wall can detract from your beautiful yard. Over time, these important structures collect dirt, grime, mold, and algae. Cleaning retaining wall blocks improves curb appeal. It also protects your investment.
This guide provides simple steps to restore your retaining wall. We will discuss various cleaning methods. You will learn about the right tools and products. We will cover common stains like mold and efflorescence. By the end, you will know exactly how to clean retaining wall blocks. Your wall will look new again.
Takeaway:
- Gather necessary tools and safety gear before starting.
- Always test cleaning solutions on a small, hidden area.
- Address different stains with specific cleaning methods.
- Consider pressure washing for large or very dirty walls.
- Regular maintenance prevents future heavy buildup.
To clean retaining wall blocks, first remove loose debris. Then, apply a suitable cleaner based on the stain type, such as bleach for mold or vinegar for efflorescence. Scrub the blocks thoroughly and rinse with water, considering a pressure washer for deep cleaning.
Understanding Your Retaining Wall: Materials and Common Issues
Your retaining wall is a vital part of your landscape. It holds back soil. It also adds aesthetic value. Most retaining walls use concrete blocks or natural stone. These materials are durable. However, they are also porous. This means they can absorb moisture. This absorption leads to common cleaning problems.
Understanding these materials helps you clean them properly. Concrete blocks are common. They are affordable and easy to install. Natural stone walls offer a unique look. Both can face similar issues. Identifying the problem first saves time and effort. Knowing the material helps select the correct cleaner.
Common Issues Affecting Retaining Wall Appearance
Several factors contribute to a dirty retaining wall. Exposure to the elements is the main cause. Rain, sun, and wind affect the wall’s surface. These conditions encourage certain growths. Understanding these issues helps you choose the right cleaning strategy.
- Algae and Mold Growth: These are green or black slimy patches. They thrive in damp, shaded areas. Algae and mold are very common on retaining walls. They make surfaces slippery. They also look unsightly.
- Efflorescence: This appears as a white, powdery substance. It happens when water moves through masonry. The water brings salt to the surface. The water evaporates, leaving the salt behind. Efflorescence is common on concrete blocks.
- Dirt and Grime: General dirt and dust accumulate over time. Rain splashes dirt from the ground onto the wall. This creates a dull, dirty appearance. This is often the easiest problem to fix.
- Rust Stains: These orange-brown marks come from metal objects. Sprinkler heads, garden tools, or rebar can cause them. Rust stains can be tough to remove.
- Mildew: Similar to mold, mildew is usually white or gray. It is a fungal growth. Mildew also prefers damp, humid conditions. It can spread quickly on porous surfaces.
Each problem requires a specific approach. Using the wrong method can damage the wall. It can also be ineffective. Knowing the material helps with the cleaning. For example, some strong cleaners can etch natural stone. They might be fine for concrete. Always check the cleaning product’s label.
Essential Tools and Safety Gear for Effective Cleaning
Before you begin cleaning retaining wall blocks, gather your tools. Having everything ready saves time. It also makes the job smoother. Proper safety gear is also important. Cleaning agents can be harsh. Water can make surfaces slippery. Protecting yourself is a priority.
Make a checklist of items you will need. This ensures you do not forget anything. Some tools are basic household items. Others are more specialized. Renting equipment like a pressure washer is an option. This saves money if you only need it for one job.
Necessary Tools for Retaining Wall Cleaning
Having the right tools makes the task easier. They help remove dirt and stains effectively. A good scrub brush is fundamental. A garden hose is also essential for rinsing.
- Stiff-bristle brush: This is crucial for scrubbing away dirt and growth. Choose a brush with durable bristles.
- Garden hose with spray nozzle: Essential for rinsing and pre-wetting the wall. A strong jet helps remove loose debris.
- Buckets: Needed for mixing cleaning solutions. Have at least two buckets.
- Safety glasses/goggles: Protect your eyes from splashes and debris. This is very important when using chemicals.
- Rubber gloves: Protect your hands from cleaning agents. Choose sturdy, chemical-resistant gloves.
- Old clothes: Wear clothing you do not mind getting dirty or potentially stained.
- Pressure washer (optional but recommended): Speeds up the process. It is effective for large areas or tough stains. Use caution with pressure washers.
- Plastic sheeting/tarps: Protects nearby plants from cleaning solutions. Lay them down at the base of the wall.
Importance of Safety Gear
Never skip safety gear. Cleaning chemicals can irritate skin or eyes. Pressure washers are powerful tools. They can cause injury if not used correctly. Always read product labels for safety instructions.
- Eye Protection: Goggles or safety glasses shield your eyes. Splashes of cleaner or flying debris can cause serious harm.
- Hand Protection: Rubber gloves prevent skin contact with chemicals. They also protect against abrasions from scrubbing.
- Footwear: Wear non-slip, closed-toe shoes. Wet surfaces are slippery. Good traction prevents falls.
- Respiratory Protection (if needed): If using strong chemicals or bleach, a respirator might be necessary. This protects your lungs from fumes. Ensure good ventilation.
- Work Safely: Do not rush the job. Take breaks as needed. If working on a ladder, ensure it is stable. Avoid working alone if possible when using heavy machinery.
Being prepared with the right tools and safety gear makes cleaning your retaining wall a safe and successful project.
Basic Steps for General Retaining Wall Cleaning
Let us get started on cleaning retaining wall blocks. For general dirt and grime, a simple approach works best. This method is effective for maintaining your wall. It also prepares the surface for more intense cleaning if needed. Follow these steps for a clean, refreshed retaining wall.
Regular basic cleaning prevents tough stains from forming. It is an important part of outdoor maintenance. A clean retaining wall enhances your home’s appearance. It keeps your landscape looking tidy.
Step-by-Step Guide
This process removes loose dirt and light buildup. It is a good starting point for any cleaning project.
- Clear the Area: First, remove any plants, furniture, or decorations near the wall. This gives you clear access. It also protects your belongings from water and cleaning solutions.
- Remove Loose Debris: Use a stiff brush or broom to sweep away loose dirt. Brush off leaves, cobwebs, and other debris. This step prevents mud from forming. It also makes the next steps more effective.
- Pre-Rinse the Wall: Use your garden hose to thoroughly wet the entire wall. A strong spray helps dislodge surface dirt. This also helps to hydrate the wall’s surface. Wetting prevents cleaning solutions from drying too fast.
- Prepare a Mild Cleaning Solution: For basic cleaning, a simple mix often works. Combine warm water with a few drops of dish soap in a bucket. This mild solution helps break down surface grime. You can also use a dedicated masonry cleaner. Always follow the product’s instructions for mixing.
- Apply and Scrub: Apply the cleaning solution to a small section of the wall. Use a stiff-bristle brush to scrub the blocks. Work from the top of the wall downwards. This prevents dirty water from running over clean areas. Apply firm, circular motions. Focus on areas with visible dirt.
- Rinse Thoroughly: After scrubbing a section, rinse it immediately with the garden hose. Make sure to remove all traces of the cleaning solution. Leftover soap can leave streaks or attract more dirt. Continue this process section by section until the entire wall is clean.
- Inspect and Repeat: Once dry, inspect the wall. Look for any missed spots or remaining dirt. Repeat the scrubbing and rinsing process if necessary. Sometimes, a second pass is needed for a truly clean finish.
This basic method is gentle on your retaining wall. It is suitable for regular upkeep. For tougher stains like mold or efflorescence, you will need more specialized methods. However, this basic clean lays the groundwork. It removes the superficial grime.
Tackling Stubborn Stains: Mold, Algae, and Mildew
Mold, algae, and mildew are common culprits for unsightly retaining walls. They thrive in damp, shaded environments. These growths not only look bad but can also make surfaces slippery. Addressing them requires specific cleaning agents. Do not worry; there are effective ways to remove them.
Always wear protective gear when dealing with these stains. A simple mix of household items can often do the trick. For very stubborn cases, you may need a commercial product. The key is to break down the organic growth.
Removing Green Algae and Black Mold
Algae and mold are persistent. They cling to porous surfaces. A strong cleaning solution is needed to kill them. This prevents them from growing back quickly.
- Bleach Solution: Mix one part household bleach with three parts water. Bleach is a powerful disinfectant. It kills mold and algae effectively.
- Application: Apply the solution to the affected areas using a spray bottle or a brush.
- Dwell Time: Let the solution sit for 15-20 minutes. This allows the bleach to work.
- Scrub and Rinse: Scrub the area with a stiff brush. You will see the green or black disappear. Rinse thoroughly with a garden hose. Make sure no bleach residue remains. Bleach can harm plants. Protect nearby greenery with plastic sheeting.
- For more specific tips on tackling mold, you can review how to clean mold with vinegar. While vinegar is gentler, bleach offers stronger action for severe mold on outdoor surfaces.
- Commercial Mold & Mildew Removers: Many products are designed specifically for outdoor mold. These often contain bleach or other active ingredients.
- Follow Directions: Always read and follow the manufacturer’s instructions carefully. These products can be strong.
- Ventilation: Ensure good airflow. Work on a non-windy day.
- Test First: Test on an inconspicuous area first. This ensures the product does not stain or damage your blocks.
Dealing with Mildew and Other Organic Growth
Mildew often appears as fuzzy white or gray patches. Like mold, it needs moisture to grow. The cleaning approach is similar to mold and algae.
- Vinegar Solution: For a natural option, use undiluted white vinegar. Vinegar is acidic. It can kill many types of mold and mildew.
- Application: Spray vinegar directly onto the mildewed areas.
- Dwell Time: Let it sit for at least 30 minutes. You can even let it sit for an hour.
- Scrub and Rinse: Scrub with a brush and rinse well. Vinegar is safe for plants in dilute forms. However, direct spray on plants is not recommended.
- Vinegar is also excellent for general cleaning. You might find some useful applications in articles like how to clean shower with vinegar. While the context is different, the principles of using vinegar as a cleaner are consistent.
- Oxygen Bleach Cleaners: These are safer for plants than chlorine bleach. They are effective on organic stains.
- Mixing: Mix oxygen bleach powder with water according to package directions.
- Apply and Wait: Apply the solution. Let it sit for a few hours or overnight for tough stains.
- Scrub and Rinse: Scrub the area and rinse thoroughly. Oxygen bleach works by releasing oxygen. This lifts stains and kills organic growth.
Remember to re-apply treatments if growth reappears. Regular inspection and cleaning can prevent severe outbreaks.
Removing Efflorescence and Rust Stains
Beyond organic growths, two other common and stubborn stains on retaining wall blocks are efflorescence and rust. Each requires a specific type of cleaner to be effectively removed. These stains can be particularly frustrating because they are mineral-based. Standard cleaners often have little effect on them.
Patience is key when dealing with these types of stains. Multiple applications or stronger cleaners may be necessary. Always prioritize safety and test cleaners first.
Tackling Efflorescence (White Powdery Stains)
Efflorescence is a natural phenomenon. It happens when mineral salts in masonry come to the surface. Water dissolves these salts. As the water evaporates, it leaves a white, powdery residue. This is common on concrete and brick.
- Dry Brush First: Start by dry brushing the efflorescence. Use a stiff-bristle brush. Sometimes, this alone can remove a significant amount of the powder. This prevents it from turning into a paste when wet.
- Vinegar Solution (Mild Cases): For light efflorescence, a solution of white vinegar and water can work.
- Mix: Combine equal parts white vinegar and water.
- Apply: Spray or brush the solution onto the efflorescence.
- Scrub: Let it sit for 10-15 minutes. Then, scrub vigorously with a stiff brush.
- Rinse: Rinse the wall thoroughly with clean water. Repeat if necessary.
- Muriatic Acid (Severe Cases - Use with Extreme Caution): Muriatic acid is very strong. It is effective for severe efflorescence. However, it is highly corrosive. It can damage plants and skin. It can also etch concrete if not used correctly.
- Dilution: Always dilute muriatic acid. Mix one part acid with ten parts water. ALWAYS add acid to water, never water to acid.
- Protection: Wear heavy-duty rubber gloves, eye protection, and a respirator. Ensure good ventilation. Protect nearby plants with plastic sheeting.
- Application: Apply the diluted solution to a small area using a plastic brush.
- Scrub and Rinse Immediately: Scrub briefly. Then, rinse immediately and thoroughly with large amounts of water. Do not let it sit for long periods. Neutralize the area after rinsing with a baking soda solution (1 cup baking soda per gallon of water) if concerned.
- Professional Help: Consider hiring a professional for muriatic acid use. Their experience ensures safety and effectiveness.
Removing Rust Stains
Rust stains typically appear as reddish-brown marks. They often come from metal objects resting on or near the wall. Fertilizer containing iron can also cause rust stains. These stains can penetrate deep into porous blocks.
- Specialized Rust Removers: Many commercial rust removers are available. They are formulated to dissolve iron oxides without damaging the underlying material.
- Product Selection: Choose a rust remover specifically designed for concrete or masonry. Avoid products made for metal, as they can be too harsh.
- Test Area: Always test the product on an inconspicuous area first. This checks for any discoloration or etching.
- Application: Follow the manufacturer’s instructions. Apply the remover to the stain. Let it dwell for the recommended time.
- Scrub and Rinse: Scrub the stain with a brush. Rinse thoroughly with clean water. Multiple applications may be needed for old or deep stains.
- Lemon Juice and Salt (Mild Rust): For small, fresh rust spots, a natural remedy can work.
- Mix: Create a paste using lemon juice and salt.
- Apply: Apply the paste directly to the rust stain.
- Dwell Time: Let it sit for a few hours. The acidity of the lemon juice helps break down the rust.
- Scrub and Rinse: Scrub the area with a brush. Rinse well with water.
- Oxalic Acid (Stronger Alternative to Lemon Juice): Oxalic acid is found in some commercial rust removers. It is effective for rust stains.
- Availability: Can be bought as a powder. Mix with water to form a paste or solution.
- Caution: Use gloves and eye protection. It is safer than muriatic acid but still requires care.
- Process: Apply, let sit, scrub, and rinse thoroughly.
Remember that thorough rinsing is crucial for both efflorescence and rust removal. This removes the dissolved minerals and cleaners. This prevents new stains or damage. For stubborn paint stains that may occur on concrete retaining walls, you can find specific guidance on how to clean paint off concrete. The methods are different but involve dissolving and scrubbing similar to rust removal.
The Power of Pressure Washing Retaining Wall Blocks
Pressure washing is a highly effective way to clean retaining wall blocks. It uses high-pressure water to blast away dirt, grime, mold, and algae. For large walls or deeply embedded stains, a pressure washer saves significant time and effort. However, it requires careful handling.
Incorrect use of a pressure washer can damage your retaining wall. It can chip blocks or erode mortar joints. Always use the right technique and nozzle. Start with lower pressure and increase it if needed.
When to Use a Pressure Washer
A pressure washer is ideal for:
- Large Retaining Walls: Manual scrubbing can be exhausting for big walls.
- Heavy Buildup: For thick layers of dirt, mold, or algae, a pressure washer cuts through it quickly.
- Deeply Ingrained Stains: The force of the water helps dislodge stubborn particles.
Safe and Effective Pressure Washing Techniques
Using a pressure washer effectively is a skill. Follow these tips to get the best results without damage.
- Choose the Right Pressure:
- PSI (Pounds per Square Inch): For concrete or stone retaining walls, a pressure washer with 1500-2000 PSI is usually sufficient. Avoid very high-pressure settings (above 2500 PSI) for general cleaning, as they can cause damage.
- Nozzle Selection: Use a wide-angle nozzle (25-degree or 40-degree) for general cleaning. These nozzles disperse the water over a larger area. They reduce the risk of etching or damage. A rotary nozzle (turbo nozzle) is powerful for tough spots but use with extreme caution.
- Maintain Distance:
- Hold the spray wand at least 12-18 inches away from the wall. This distance reduces the impact force.
- You can move closer for stubborn areas, but do so gradually.
- Use Consistent Strokes:
- Always use sweeping, overlapping strokes. Move the wand in a consistent motion. Avoid lingering in one spot. Lingering can leave marks or damage the surface.
- Work from the top down. This lets dirty water flow down already cleaned areas.
- Pre-Treat if Necessary:
- For heavy mold or algae, apply a cleaning solution first. Use a mold killer or bleach solution. Let it sit for a few minutes.
- Some pressure washers have detergent tanks. You can use a compatible cleaning solution through the washer’s low-pressure nozzle (black nozzle).
- After applying cleaner, switch to a higher pressure nozzle and rinse thoroughly.
- Protect Surroundings:
- The high pressure can splash dirt and water. Cover nearby plants, windows, and outdoor furniture with plastic sheeting.
- Be aware of runoff. Direct the dirty water away from flowerbeds or drains.
- Safety First:
- Wear safety glasses and closed-toe shoes. Pressure washers can cause serious injury.
- Never point the nozzle at people, pets, or electrical outlets.
- Always read the pressure washer’s manual before use.
Pressure washing can transform a dirty retaining wall. It reveals the true color and texture of the blocks. Used correctly, it is a powerful cleaning tool. Always test a small, hidden area first. This confirms the pressure and technique will not cause damage.
Choosing the Right Cleaning Products and Natural Solutions
Selecting the correct cleaning product is essential. The best choice depends on the type of stain and the material of your retaining wall blocks. Some products are highly effective but can be harsh. Others are gentle and environmentally friendly. Finding the right balance ensures a clean wall without damage.
Always read product labels. Pay attention to safety warnings and application instructions. A little research prevents costly mistakes.
Commercial Cleaning Products
Many commercial cleaners target specific stains. They offer strong cleaning power for stubborn issues.
- General Purpose Masonry Cleaners: These products are designed for concrete, brick, and stone. They remove dirt, grime, and light organic growth.
- Benefits: Safe for most masonry surfaces. Easy to use.
- Usage: Mix with water, apply with a brush or sprayer, scrub, and rinse.
- Mold and Mildew Removers: These typically contain bleach or other powerful biocides. They kill and remove mold, algae, and mildew.
- Benefits: Highly effective on organic growth.
- Usage: Apply, let sit, scrub, and rinse. Always protect nearby plants.
- Efflorescence Removers: These are acidic solutions. They dissolve mineral deposits.
- Benefits: Specifically formulated for white powdery stains.
- Usage: Use with caution. Always dilute according to instructions. Protect skin and eyes.
- Rust Removers: These products contain oxalic acid or other chelating agents. They lift iron stains from porous surfaces.
- Benefits: Effective for stubborn rust.
- Usage: Apply to stain, let dwell, scrub, and rinse. Avoid contact with metal.
Natural and Environmentally Friendly Solutions
For those who prefer not to use harsh chemicals, several natural alternatives exist. These are often safer for the environment, pets, and plants.
- White Vinegar:
- Uses: Excellent for mild mold, mildew, and efflorescence. It is also good for general dirt.
- Application: Use undiluted for stronger effect. Mix with water for lighter cleaning. Spray or brush on, let sit, scrub, and rinse.
- Benefits: Non-toxic, biodegradable, widely available, and inexpensive.
- Baking Soda:
- Uses: A mild abrasive cleaner. Good for light stains and general scrubbing. Can neutralize odors.
- Application: Make a paste with water. Apply to stained areas. Scrub with a brush. Rinse thoroughly.
- Benefits: Gentle, non-toxic, and safe for most surfaces.
- Oxygen Bleach (Sodium Percarbonate):
- Uses: A safer alternative to chlorine bleach for mold, algae, and other organic stains. It releases oxygen to lift stains.
- Application: Mix powder with warm water to activate. Apply to the wall. Let it soak for several hours or overnight. Scrub and rinse.
- Benefits: Color-safe, environmentally friendly, and less harmful to plants than chlorine bleach.
- Dish Soap and Water:
- Uses: Perfect for basic, routine cleaning of dirt and grime.
- Application: Mix a few drops of dish soap in a bucket of warm water. Apply with a brush, scrub, and rinse.
- Benefits: Very gentle, cheap, and always on hand.
Always test any cleaner, commercial or natural, on a small, hidden area first. This ensures it does not discolor or damage your specific retaining wall blocks. Different materials react differently to various chemicals. Choosing the right product makes your cleaning efforts more effective and safer.
Maintaining Your Retaining Wall Blocks for Lasting Cleanliness
Cleaning your retaining wall blocks is a big step. Keeping them clean is even better. Regular maintenance prevents heavy buildup. It saves you time and effort in the long run. A well-maintained retaining wall boosts your home’s curb appeal year-round.
Prevention is often easier than a full-scale cleaning operation. Simple habits can make a huge difference. Think about what causes the dirt and stains in the first place. Then, take steps to minimize those issues.
Tips for Ongoing Maintenance
These practices help keep your retaining wall looking its best. They reduce the frequency of deep cleaning.
- Regular Brushing and Rinsing:
- Once every few months, give your retaining wall a quick once-over. Use a stiff broom or brush to sweep away loose dirt and leaves.
- Follow up with a rinse from your garden hose. This prevents dirt from bonding to the blocks. It removes early signs of algae or mildew.
- Control Plant Growth Near the Wall:
- Keep plants, shrubs, and trees trimmed back from the wall. Overhanging branches create shade and trap moisture. This encourages mold and algae growth.
- Roots can also cause structural damage over time. Maintain a clear space.
- Improve Drainage Around the Wall:
- Poor drainage is a major cause of efflorescence and mold. Ensure water drains away from the base of the wall.
- Check for clogged weep holes or drainage pipes within the wall structure. Clear them if needed. This reduces moisture buildup inside the wall.
- Consider adding a French drain or improving landscape grading if water consistently pools near the wall.
- Seal the Retaining Wall (Optional):
- Applying a clear, breathable masonry sealer can protect your blocks. Sealers make the surface less porous.
- This makes it harder for water to penetrate. It reduces the chance of efflorescence, mold, and stains.
- Choose a sealer designed for retaining wall blocks or concrete. Always apply according to the manufacturer’s instructions. Reapply every few years.
- Address Stains Promptly:
- Do not let small stains become big problems. If you see a patch of mold or a rust spot, clean it right away.
- Early intervention makes stains much easier to remove. Use the specific cleaning method for the stain type.
- Mind Your Sprinkler System:
- Ensure sprinkler heads are not spraying directly onto the retaining wall. Constant wetting can lead to persistent algae, mold, and mineral deposits.
- Adjust sprinkler heads to water only the intended areas.
- Avoid Metal Contact:
- Do not store metal garden tools or furniture against the wall. This prevents rust stains.
- Be mindful of fertilizers containing iron. Sweep up any granules that fall on the wall immediately.
By adopting these simple maintenance practices, your retaining wall blocks will stay clean and attractive for many years. Regular care extends the life of your wall. It also preserves your landscape’s beauty. A little effort now saves a lot of work later.
Frequently Asked Questions (FAQ)
Q1: How often should I clean my retaining wall blocks?
You should clean your retaining wall blocks at least once a year. For walls in damp or shaded areas, twice a year is better. Regular spot cleaning of mold or dirt as it appears prevents larger issues. This keeps the wall looking good and reduces the need for intense cleaning.
Q2: Is it safe to use bleach on retaining wall blocks?
Yes, it is generally safe to use a diluted bleach solution (1 part bleach to 3 parts water) on concrete or stone retaining wall blocks. Bleach is effective for killing mold and algae. Always test on a small area first. Protect nearby plants, and rinse thoroughly after cleaning to remove all residue.
Q3: Can I use a regular garden
- retaining wall cleaning
- outdoor maintenance
- block cleaning
- mold removal
- algae removal
- efflorescence
- pressure washing