· Kitchen & Cleaning · 17 min read
How To Clean Ribbon Fish
How to Clean Ribbon Fish Like a Professional
Preparing fresh seafood at home can seem like a daunting task, especially when it comes to unique species like the ribbon fish. This long, slender fish, also known as hairtail, offers delicate flesh and a rich flavor, making it a favorite in many coastal cuisines. However, its distinct shape and silvery skin require specific cleaning methods. You might wonder how to clean ribbon fish effectively without making a mess or wasting valuable meat. I understand this concern. This guide will help you.
Learning how to clean ribbon fish correctly ensures you get the most out of your catch. It removes undesirable parts, improves taste, and makes cooking easier. Many people avoid whole fish due to the cleaning process. But I can tell you, it is simpler than you think. This article breaks down every step, from selecting the right tools to filleting the fish. We will cover essential hygiene practices. We will also discuss common mistakes to avoid. Get ready to prepare ribbon fish with confidence. You will create delicious meals from this ocean treasure.
Takeaway
- Gather Tools First: Have a sharp knife, cutting board, and gloves ready before starting.
- Handle Gently: Ribbon fish flesh is delicate; avoid rough handling during cleaning.
- Gut Thoroughly: Make a precise incision to remove all internal organs cleanly.
- Rinse Carefully: Wash the fish inside and out under cold water to remove blood and debris.
- Consider Scaling: Decide if scaling is necessary based on cooking method and skin texture.
- Maintain Hygiene: Clean your workspace and tools immediately after processing fish.
To clean ribbon fish, start by rinsing it under cold water. Use a sharp knife to make a small incision along its belly from the vent to the gills. Carefully remove all internal organs and the dark bloodline. Rinse the cavity thoroughly. Trim fins and tail as desired. Your fish is now ready for cooking or further preparation like filleting.
Getting to Know Ribbon Fish: A Brief Primer
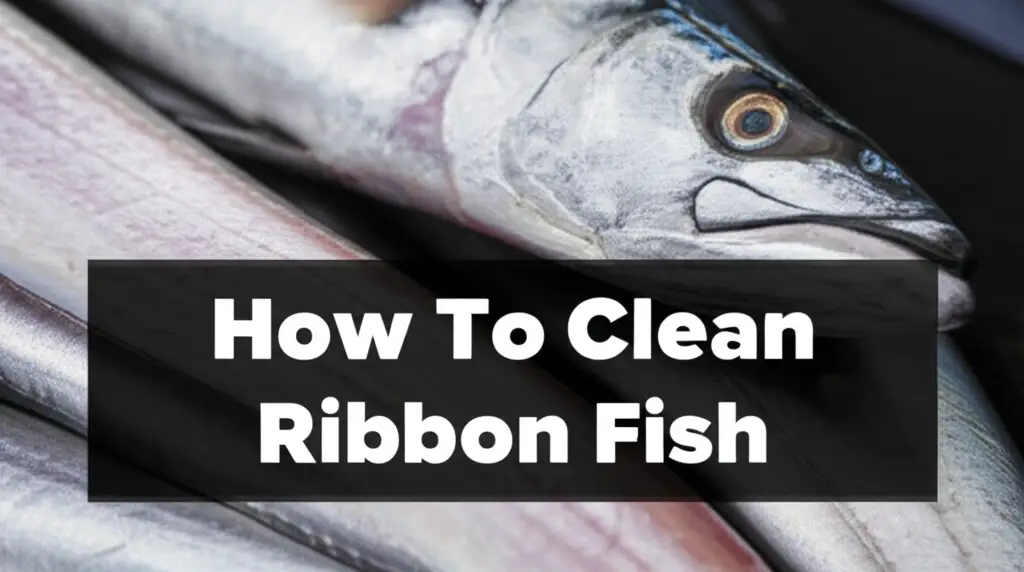
Ribbon fish, or cutlassfish, is a distinct marine species. It has a long, flattened body with a silvery, iridescent skin. These fish live in warm and temperate waters worldwide. They are popular in many Asian countries for their sweet taste and tender flesh. Understanding the ribbon fish’s unique anatomy helps in the cleaning process. Its body is long and ribbon-like, hence its name. It typically lacks scales or has very small, easily removable ones. This simplifies one step of cleaning compared to other fish.
The skin of a ribbon fish is very thin. It can tear easily. This means gentle handling is very important. It has sharp teeth, so be careful when handling its head. Its long shape also means you might need a longer cutting board. Most ribbon fish are sold whole. This makes cleaning them at home a common task for home cooks. Knowing these features helps you approach the cleaning task with confidence. It prepares you for what to expect.
Ribbon fish offers excellent nutritional benefits. It is a good source of protein and Omega-3 fatty acids. Cleaning it properly preserves these benefits and ensures food safety. Improper handling can introduce bacteria or degrade the fish’s quality. I always make sure my fish is firm and smells fresh before I start. This ensures a great final dish. Remember, a fresh fish is easier to clean and tastes much better.
Setting Up for Success: Essential Tools and Workspace Prep
Before you begin to clean ribbon fish, gather all your necessary tools. Proper tools make the job easier and safer. A well-organized workspace also contributes to efficient cleaning. I find that having everything in place before I start prevents interruptions. This makes the process much smoother. You do not want to stop mid-way to search for a knife.
Necessary Cleaning Equipment
- Sharp Fillet Knife: A sharp, flexible fillet knife is crucial. It helps make clean cuts. A dull knife will tear the flesh. This makes the cleaning harder.
- Sturdy Cutting Board: Choose a large cutting board. A non-slip surface is best. This keeps the fish stable. Wood or plastic boards work well.
- Kitchen Shears: These are useful for trimming fins and tail. They offer more control than a knife for these parts.
- Gloves: Wear disposable gloves. They improve grip on the slippery fish. They also protect your hands from odors and potential cuts.
- Large Bowl or Sink: You need a container for fish waste. A clean sink for rinsing is also essential.
- Plenty of Cold Water: Fresh, cold running water is vital for rinsing the fish.
- Paper Towels or Clean Cloths: These are for drying the fish and cleaning up spills.
Setting Up Your Workspace
Prepare your cleaning area carefully. Cover your counter with old newspapers or a large plastic bag. This makes cleanup easier. Place your cutting board on top. Ensure good lighting. You need to see clearly to make precise cuts. Keep a trash can or compost bin nearby for immediate disposal of guts and trimmings. A clean workspace prevents cross-contamination. It also makes the whole process more pleasant. Always clean your tools and surfaces thoroughly after use. For general kitchen clean-up after handling raw food, you might find tips on cleaning stubborn residues useful, for instance, on how to clean bottom of pan. This helps maintain a hygienic cooking environment.
The Core Process: Step-by-Step Gutting and Initial Cleaning
Now we get to the main part: how to clean ribbon fish’s internal organs. This is a critical step. Removing the guts properly ensures the fish tastes clean. It also prevents spoilage. Do this carefully but confidently. My goal is always to be efficient and clean.
Initial Rinse and Handling
First, hold the ribbon fish under cold running water. Rinse its entire body thoroughly. This removes any loose slime, dirt, or debris from its surface. Use your hands to gently rub its body. Remember, ribbon fish can be slippery. Hold it firmly but avoid squeezing it too hard. Excessive pressure can damage its delicate flesh. After rinsing, place the fish on your prepared cutting board. Position the fish so its belly faces you.
Making the Incision for Gutting
Identify the vent, which is a small opening near the tail end of the belly. Hold the fish securely with one hand. With your other hand, take your sharp fillet knife. Make a shallow cut along the fish’s belly. Start from the vent and extend the cut up towards the head. Stop the incision just before you reach the gills. The cut should be deep enough to open the body cavity. Be careful not to cut too deep. You do not want to pierce the internal organs, especially the gallbladder. A ruptured gallbladder can release bitter fluids. These can taint the fish’s flesh.
Removing Internal Organs
Once the belly is open, gently open the cavity with your fingers. You will see the internal organs inside. Start from the head end. Carefully pull out all the organs. They should come out in one mass if done correctly. Look for the kidney line, a dark red line running along the spine inside the cavity. Scrape this away using the tip of your knife or a spoon. This dark line contains blood and can give the fish a stronger, less pleasant taste if left in. Be thorough here.
Thorough Internal Rinsing
After removing all organs and the kidney line, hold the fish under cold running water again. Direct the water flow into the opened belly cavity. Use your fingers to scrub the inside gently. Ensure all traces of blood and debris are washed away. Rinse both the inside and outside of the fish. This step is crucial for cleanliness and taste. A well-rinsed fish is a happy fish. This part of the process is similar to cleaning other fish, for example, when learning how to clean whiting fish, you also focus on thorough gutting and rinsing. This ensures your fish is ready for the next steps.
Refining Your Ribbon Fish: Scaling, Trimming, and Rinsing
After gutting, you have a cleaner fish. Now, you refine it further. This involves deciding on scaling and trimming non-edible parts. These steps prepare the fish for cooking. They enhance its presentation and make it easier to eat.
To Scale or Not to Scale?
Ribbon fish have very small scales, almost imperceptible. Sometimes they have no scales at all. For most cooking methods, you do not need to scale ribbon fish. The skin is thin and cooks up well. However, if you prefer, you can lightly scrape the skin with the back of your knife. Do this under running water. Move from tail to head. This removes any remaining scales or slime. I rarely scale my ribbon fish. I find it unnecessary for the texture and taste. It also saves time. This choice depends on your personal preference and how you plan to cook the fish.
Trimming Fins and Tail
Ribbon fish has a long dorsal fin running along its back. It also has a pointed tail. These parts are generally not eaten. You can trim them for better presentation and easier handling. Use your kitchen shears or a sharp knife. Carefully cut off the dorsal fin. Follow its base along the top of the fish. Also, trim the pectoral fins, located behind the gills. For the tail, you can cut off the very tip. This makes the fish easier to fit into pans or serving dishes. This step is optional but recommended for a neat appearance.
Final External Rinse and Drying
After any scaling or trimming, give the entire fish one last rinse under cold water. Pay attention to any areas where you made cuts. Ensure no small bits of fin or debris remain. Once thoroughly rinsed, pat the ribbon fish dry with paper towels. Drying the fish is important. Excess moisture can make the fish steam instead of sear when cooking. This prevents a crispy skin or a good crust. A dry fish also absorbs marinades and seasonings better. Place the dried fish on a clean plate or tray. It is now ready for filleting or cooking whole. This final rinse helps guarantee the fish is pristine before cooking.
Advanced Preparation: Filleting Ribbon Fish for Culinary Delights
Filleting ribbon fish takes practice. However, it results in beautiful, boneless portions. These fillets are versatile for many dishes. Ribbon fish has a central bone structure. This makes filleting relatively straightforward. I often fillet larger ribbon fish for stir-fries or grilling. This method enhances the eating experience.
Understanding Ribbon Fish Anatomy for Filleting
Before you start, visualize the bone structure. A ribbon fish has a strong backbone running down its center. There are also smaller pin bones extending from the spine into the flesh. Your goal is to separate the meat from these bones. The thinness of the fish means your cuts need to be precise. You want to maximize meat yield. A very sharp, flexible fillet knife is essential here.
The Filleting Technique
- Head Removal (Optional but Recommended for Fillets): If you plan to fillet, cutting off the head is often the first step. Place the fish on its side. Make an angled cut behind the gills, down to the backbone. Cut through the backbone. Then, flip the fish and repeat on the other side. This removes the head cleanly.
- First Fillet Cut: Place the headless fish on its side on the cutting board. Start your knife at the tail end, just above the backbone. Make a shallow cut along the spine, moving your knife towards the head. Keep the knife blade flat against the bones. Use long, smooth strokes.
- Separating the Fillet: Continue cutting, separating the meat from the backbone. Work your way from the spine outwards. Angle your knife slightly downwards as you go. This ensures you get all the meat. When you reach the rib cage area, cut over the bones. You can also cut around them. This separates the first fillet. Lift the fillet away.
- Second Fillet: Flip the fish over. Repeat the process on the other side. You will now have two separate fillets. The backbone and head (if still attached) are left behind.
Removing Pin Bones and Skin (Optional)
Ribbon fish fillets may have small pin bones. You can feel them by running your finger along the center of the fillet. Use fish tweezers or needle-nose pliers to pull these out. Pull them at the angle they entered. The skin on ribbon fish is edible. Many people cook it with the skin on for crispiness. However, if you prefer skinless fillets, carefully slide your knife between the skin and the flesh. Start from the tail end. Hold the skin firmly. Angle your knife slightly towards the skin. This ensures you leave no meat behind.
Post-Cleaning Care: Storage, Hygiene, and Preventing Spoilage
After you clean ribbon fish, proper handling and storage are crucial. This ensures its freshness and safety. Neglecting these steps can lead to spoilage. It can also contaminate your kitchen. I always prioritize post-cleaning care. It makes a big difference.
Immediate Storage Tips
Once cleaned, ribbon fish is ready for immediate cooking. If you plan to cook it within a few hours, place it in a bowl. Cover it with plastic wrap. Keep it in the coldest part of your refrigerator. For longer storage, proper packaging is key.
- Refrigeration: Wrap the cleaned fish tightly in plastic wrap or foil. Then, place it in an airtight container. This prevents odors from spreading. It also keeps the fish from drying out. Store it in the coldest part of your fridge, usually the bottom shelf. Use within 1-2 days.
- Freezing: For longer storage, freeze the fish. Wrap individual fish or fillets in plastic wrap. Then, place them in freezer bags. Squeeze out excess air before sealing. You can also place the wrapped fish in a container. This prevents freezer burn. Frozen ribbon fish can last up to 3 months. Thaw frozen fish in the refrigerator overnight before cooking. Never thaw at room temperature.
Post-Cleaning Kitchen Hygiene
Cleaning up after handling raw fish is as important as cleaning the fish itself. Raw fish can spread bacteria. Proper sanitation prevents cross-contamination.
- Wash All Tools: Immediately wash all knives, cutting boards, shears, and bowls. Use hot, soapy water. For cutting boards, especially porous ones, consider a sanitizing spray. You can use a diluted bleach solution or vinegar spray. For more general cleaning advice, explore tips on how to clean with vinegar, it’s a versatile cleaner.
- Clean Surfaces: Wipe down all countertops and sink areas. Use a clean cloth or sponge with a disinfectant cleaner. Do not forget faucet handles and cabinet knobs.
- Dispose of Waste: Bag all fish guts and trimmings tightly. Dispose of them immediately. This prevents odors and pests.
- Wash Hands Thoroughly: Wash your hands with soap and hot water for at least 20 seconds. Do this after touching raw fish and after cleanup. This is crucial for food safety. Maintaining a clean kitchen after fish preparation protects your health. It also keeps your home smelling fresh.
Common Mistakes and Expert Tips for Cleaning Ribbon Fish
Even with a step-by-step guide, mistakes can happen. Knowing common pitfalls helps you avoid them. I have made some of these mistakes myself in the past. Learning from them improves your technique. Here are some errors to watch for when you clean ribbon fish. I also share some expert tips to help you become a pro.
Common Errors to Avoid
- Using a Dull Knife: This is a major mistake. A dull knife makes cuts difficult. It can tear the delicate fish flesh. This leads to ragged edges and wasted meat. Always use a very sharp knife.
- Cutting Too Deep During Gutting: Piercing the internal organs, especially the gallbladder, releases bitter fluids. These can ruin the taste of the fish. Be shallow and precise with your belly incision.
- Not Removing the Kidney Line: The dark bloodline along the spine can impart a strong, sometimes metallic flavor. If you do not scrape it out thoroughly, it affects the final dish.
- Rough Handling: Ribbon fish has delicate skin and flesh. Squeezing too hard or being rough can bruise the fish. This impacts its texture and appearance. Handle it gently throughout the process.
- Neglecting Post-Cleaning Hygiene: Failing to clean your workspace and tools immediately risks bacterial contamination. It also leaves lingering fish odors. Cleanliness is paramount.
Expert Tips for Better Results
- Chill Your Fish: A very cold fish is firmer and easier to handle. Before cleaning, keep the ribbon fish on ice or in the coldest part of your fridge.
- Work Under Running Water (Sometimes): For initial rinsing and internal cleaning, working under a gentle stream of cold water helps wash away debris quickly. This keeps your cutting board cleaner.
- Consider Quantity: If you have many ribbon fish to clean, work in batches. Clean a few, rinse, then clean the next batch. This maintains a cleaner environment.
- Save Trimmings for Stock: If you are adventurous, fish heads and bones (excluding guts) from other fish can make a flavorful fish stock. While ribbon fish bones are thin, they can still add flavor.
- Practice Makes Perfect: The first time you clean ribbon fish, it might feel awkward. Do not get discouraged. Each time you practice, your technique will improve. You will gain speed and precision.
By avoiding these mistakes and applying these tips, you will clean ribbon fish like a seasoned pro. Your efforts will lead to better-tasting meals and a cleaner kitchen.
FAQ Section
Q1: Do I need to scale ribbon fish?
Ribbon fish usually have very small or no scales. For most cooking methods, like frying or grilling, you do not need to scale them. The skin is thin and edible, often becoming crispy when cooked. If you prefer, a light scrape with the back of a knife can remove any remaining tiny scales or slime.
Q2: What is the dark line inside the fish cavity?
The dark line inside the fish cavity along the spine is the kidney line or bloodline. It contains clotted blood. This part can give the fish a stronger, sometimes bitter taste if not removed. Always scrape it out thoroughly with your knife tip or a spoon during the gutting process for a cleaner flavor.
Q3: How do I store cleaned ribbon fish?
Store cleaned ribbon fish in the coldest part of your refrigerator, wrapped tightly in plastic wrap or placed in an airtight container. Use it within 1-2 days. For longer storage, wrap individual fish or fillets well and freeze for up to 3 months. Thaw slowly in the fridge before cooking.
Q4: Can I eat the skin of ribbon fish?
Yes, the skin of ribbon fish is thin and perfectly safe to eat. Many people enjoy it, especially when cooked until crispy. If you prefer, you can remove the skin, but it is not necessary for most recipes. Its edibility is a benefit of this fish.
Q5: What kind of knife is best for cleaning ribbon fish?
A sharp, flexible fillet knife is ideal for cleaning ribbon fish. Its flexibility allows you to follow the contours of the fish and backbone for clean, precise cuts. A sharp blade prevents tearing the delicate flesh. Kitchen shears are also useful for trimming fins and tails.
Q6: How long does it take to clean a ribbon fish?
The time it takes to clean a ribbon fish depends on your experience. For a beginner, it might take 5-10 minutes per fish. With practice, you can clean one in just a few minutes. Factors like size and whether you are filleting also influence the time needed.
Conclusion
Cleaning ribbon fish might seem challenging at first. But, with the right tools and techniques, it becomes a simple and rewarding task. We have walked through every step, from preparing your workspace to handling the fish’s delicate structure. You now understand how to clean ribbon fish efficiently. You can gut it thoroughly, rinse it properly, and even fillet it for boneless portions. Mastering these skills not only gives you fresh, delicious seafood. It also connects you more deeply with your food preparation.
Remember the key takeaways. Always prioritize hygiene, use sharp tools, and handle the fish gently. These practices ensure the best flavor and texture in your cooked ribbon fish. Do not shy away from this unique and tasty fish. Embrace the cleaning process. Each time you prepare it, you will gain more confidence and skill. Go ahead, get your hands wet, and enjoy the delicious results of your perfectly cleaned ribbon fish! Happy cooking!
- ribbon fish cleaning
- how to prepare fish
- gutting fish guide
- fish filleting tips
- seafood preparation