· Home Appliance Care · 20 min read
How To Clean Safety First Humidifier
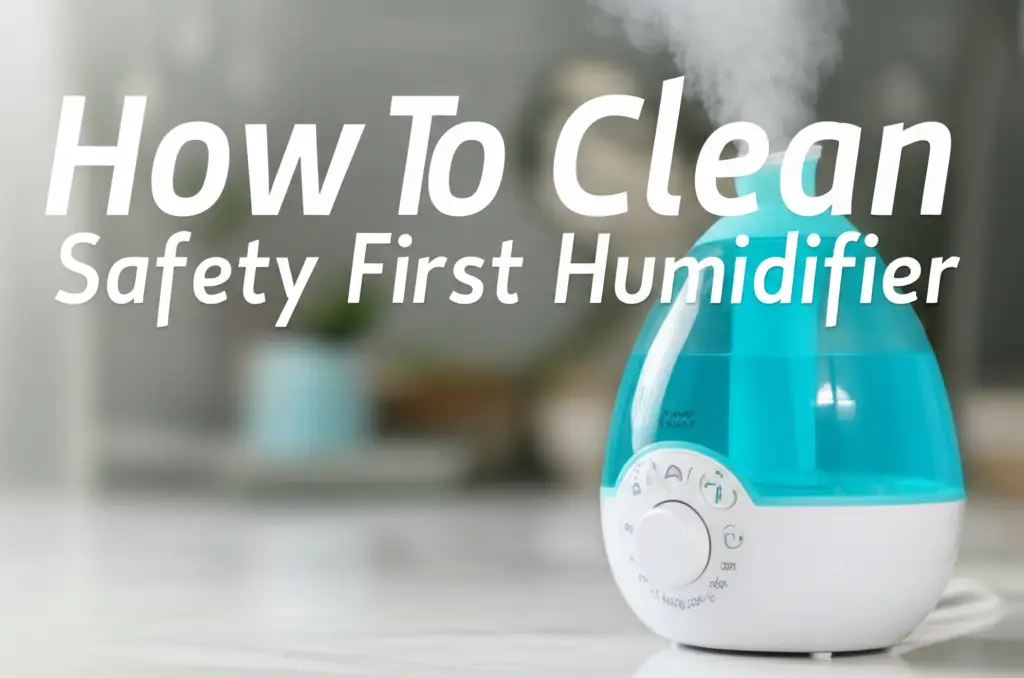
Clean Your Safety First Humidifier for Healthy Air
Humidifiers add much-needed moisture to your home’s air. This is great for your skin, sinuses, and even your houseplants. However, these machines can become breeding grounds for bacteria and mold if you do not clean them often. You must clean your Safety First humidifier regularly to keep your home air safe and fresh.
In this guide, I will show you how to clean your Safety First humidifier with easy steps. We will cover daily rinses, weekly wipes, and deep monthly cleans. You will learn about essential cleaning supplies and ways to fight stubborn buildup. Keep reading to ensure your humidifier runs well and provides clean, healthy air for your family.
Takeaway
- Clean daily: Rinse and refill your humidifier with fresh water.
- Clean weekly: Wipe down all surfaces and the water tank.
- Deep clean monthly: Disassemble and soak parts in vinegar to remove mineral buildup and mold.
- Use distilled water: Avoid tap water to reduce mineral deposits.
- Replace filters: Follow manufacturer guidelines for filter changes.
Quick Answer
To clean your Safety First humidifier, empty the water tank daily and refill with fresh water. Weekly, wipe down all surfaces. Monthly, deep clean by soaking the tank and base with a vinegar and water solution. Scrub away any residue, rinse all parts thoroughly, and let them air dry before reassembly.
Why Regular Humidifier Cleaning Matters for Health
Humidifiers can greatly improve your indoor air quality. They add moisture to dry air, which helps with dry skin, stuffy noses, and sore throats. However, a dirty humidifier can make you sick instead of healthy. I want to explain why regular cleaning is very important for these devices.
Water stands in a humidifier tank for long periods. This standing water creates a perfect environment for bacteria and mold to grow. When the humidifier runs, it sends these tiny organisms into your air. Breathing in mold spores or bacteria can cause respiratory problems. It can also worsen allergies or asthma. For example, if you have mold in your humidifier, it can cause symptoms like coughing or sneezing. You can find more information on how to clean mold with vinegar if you discover it.
Regular cleaning stops this growth. It ensures that only clean water vapor goes into your home. This protects your health and keeps the air pure. A clean humidifier also works better and lasts longer. It prevents mineral buildup from hard water. This buildup can clog parts and reduce the machine’s efficiency. Using proper cleaning methods also helps prevent dangerous black mold. If you see black mold, you might also want to read about how to clean mold with bleach for severe cases. Make sure to clean your Safety First humidifier often for the best air quality.
Gathering Your Essential Cleaning Supplies
Before you start cleaning your Safety First humidifier, you need to gather a few simple items. Having everything ready makes the process easy and quick. You probably have most of these supplies at home already. Using the correct tools and solutions ensures a thorough and safe clean.
Here is a list of the basic cleaning supplies you will need:
- Distilled White Vinegar: This is your best friend for cleaning humidifiers. Vinegar breaks down mineral deposits and kills mold and bacteria. It is a natural and safe disinfectant for appliances. I always keep a large bottle on hand for various cleaning tasks.
- Soft-Bristle Brush or Old Toothbrush: These tools help you scrub away buildup in tight spots. They are gentle enough not to scratch plastic parts. You can use an old toothbrush for small crevices.
- Microfiber Cloths or Soft Rags: These are great for wiping surfaces. They soak up water well and do not leave lint behind. Always have a few clean cloths ready.
- Mild Dish Soap: A small amount of dish soap can help clean greasy residues. It is useful for general washing of the humidifier parts. Just a drop or two is enough.
- Clean Water: You will need plenty of fresh water for rinsing. Rinsing thoroughly is very important to remove all cleaning solutions.
- Optional: Hydrogen Peroxide (3% solution): This can be used as an alternative disinfectant. It helps kill germs without leaving harsh residues. It is a good option if you prefer not to use vinegar.
- Optional: Bleach (for severe mold): Use bleach only as a last resort for very stubborn mold growth. Dilute it properly and rinse extremely well. Be careful when handling bleach.
Always unplug your humidifier before you start cleaning. Safety comes first when working with electrical appliances and water. Put on gloves if you have sensitive skin, especially when using vinegar or bleach. With these supplies ready, you are set to make your Safety First humidifier sparkle.
Daily and Weekly Humidifier Cleaning Steps
Keeping your Safety First humidifier clean does not have to be a big chore. Simple daily and weekly routines help prevent serious buildup. These regular steps save you time and keep your air healthy. I find that consistent small efforts make a huge difference in the long run.
Daily Maintenance
Every day, you should take a few minutes to care for your humidifier. This simple routine stops mold and bacteria from taking hold. It also ensures you always have fresh water for humidification.
- Empty the Water Tank: Do not let water sit in the tank overnight or for long periods. Standing water is a prime spot for germs to grow. I always empty out any leftover water.
- Rinse the Tank: Give the water tank a quick rinse with fresh tap water. Swish the water around and pour it out. This removes any loose mineral dust or film.
- Refill with Fresh Water: Fill the tank with clean, fresh water. Using distilled water is best to prevent mineral buildup. Tap water often contains minerals that turn into white dust. I use distilled water whenever possible.
These daily steps take less than five minutes. They are crucial for maintaining a clean and effective humidifier.
Weekly Cleaning
Once a week, you need to do a slightly deeper clean. This routine targets the areas that touch water regularly. It helps keep your Safety First humidifier running efficiently.
- Unplug and Disassemble: First, unplug the humidifier for safety. Then, take apart any removable parts like the water tank, base, and trays. Check your manual for specific disassembly instructions.
- Clean the Tank and Base: Mix a solution of equal parts distilled white vinegar and water. Pour this mixture into the water tank and let it sit for 20-30 minutes. For the base, soak a cloth in the vinegar solution and wipe down all water-contacting surfaces. The vinegar helps break down mineral deposits and kills germs.
- Scrub and Rinse: Use a soft-bristle brush or an old toothbrush to scrub inside the tank and base. Pay attention to any slimy film or white crust. I make sure to get into all corners. Rinse all parts thoroughly under cool running water until the vinegar smell is gone. Rinsing well is important to remove all cleaning residue.
- Wipe Dry: Dry all parts with a clean microfiber cloth or let them air dry completely before reassembling. This prevents immediate re-growth of mold.
By following these daily and weekly steps, you will keep your Safety First humidifier in top condition. This ensures it provides clean, moist air without spreading harmful germs.
Deep Cleaning Your Safety First Humidifier
Even with daily and weekly cleaning, mineral deposits and hidden mold can build up over time. This means you need to deep clean your Safety First humidifier about once a month. A thorough deep clean ensures your humidifier works its best and keeps your air truly healthy. This process tackles the tough stains and buildup that regular cleaning might miss.
Monthly Deep Cleaning Process
I follow these steps for a complete monthly cleaning:
Preparation and Disassembly:
- Always unplug the humidifier first. Safety is key.
- Disassemble every removable part. This includes the water tank, base, mist nozzle, filter (if applicable), and any trays. Refer to your Safety First manual if you are unsure how to take it apart. Lay out all the pieces on a clean towel.
Vinegar Soaking for Descaling:
- For the Water Tank: Pour 1-2 cups of undiluted distilled white vinegar into the empty tank. Swish it around to coat the bottom and sides. Add enough water to fill the tank to about half its capacity. Let it sit for at least 30 minutes. For heavy mineral buildup, I let it soak for a few hours or even overnight. This acid helps dissolve hard water deposits.
- For the Base and Smaller Parts: For the base, fill it with enough undiluted vinegar to cover the bottom and any areas with mineral buildup. Place smaller, removable parts (like the mist nozzle or filter cover) into a basin or bowl. Pour undiluted vinegar over them until they are submerged. The vinegar works to break down the tough mineral crust. You can also use vinegar for cleaning in other areas, such as when you clean a shower with vinegar.
Scrubbing and Cleaning:
- After soaking, drain the vinegar solution from all parts.
- Use a soft-bristle brush or an old toothbrush to scrub all internal surfaces of the tank and base. Pay extra attention to any white crusty areas or slimy spots. The vinegar will have loosened most of the buildup, making scrubbing easier.
- For the smaller parts, use the toothbrush to gently scrub any crevices or hard-to-reach areas. If your Safety First humidifier has a filter, check the manufacturer’s guidelines for cleaning or replacement. If it’s a permanent filter, gentle brushing with water might be enough. For disposable filters, it’s usually time to replace it. For general filter cleaning, you can review resources like how to clean an Aprilaire humidifier filter for ideas, even if it’s a different brand.
Thorough Rinsing:
- This step is very important. Rinse all components thoroughly under cool running water. Continue rinsing until you cannot smell any vinegar. Any lingering cleaning solution can be harmful when the humidifier runs. I always rinse each part multiple times to be sure.
- Ensure water flows through all small openings and nozzles to clear any loosened debris.
Drying and Reassembly:
- Wipe all parts dry with a clean microfiber cloth.
- Alternatively, allow all pieces to air dry completely on a clean towel before putting the humidifier back together. Ensuring parts are dry prevents immediate mold re-growth.
- Once dry, reassemble your Safety First humidifier according to your user manual.
A deep clean ensures that your humidifier operates efficiently and dispenses clean, healthy moisture. It also extends the lifespan of your appliance. This effort is well worth the clean air you will breathe.
Tackling Stubborn Mold and Mineral Buildup
Sometimes, you might find more than just light film in your humidifier. Stubborn mold or thick mineral buildup can be a challenge. These issues need a bit more attention during your cleaning process. I have learned the best ways to tackle these common humidifier problems.
Removing Mold
Mold growth often appears as black, green, or pink slimy spots. This is a health risk. Here is how I deal with mold:
- Pre-Soak with Vinegar: If mold is visible, start by soaking the affected parts in undiluted distilled white vinegar. Let them sit for at least an hour, or even overnight for severe cases. Vinegar is a natural mold killer and helps loosen the spores. Many people use vinegar to clean mold off silicone seals too, which is common in humidifiers.
- Scrub Thoroughly: After soaking, use a stiff brush or an old toothbrush to scrub away the mold. Pay close attention to corners and crevices where mold loves to hide. Ensure you remove all visible traces.
- Hydrogen Peroxide Treatment (Optional): For persistent mold, you can use a 3% hydrogen peroxide solution. After the vinegar soak and scrub, rinse the parts. Then, pour hydrogen peroxide into the tank and let it sit for 10-15 minutes. It creates oxygen bubbles that lift mold and sanitize.
- Bleach Solution (Last Resort): If mold is still present after vinegar and hydrogen peroxide, a diluted bleach solution can be used. Mix one teaspoon of bleach with one gallon of water. Soak affected parts for 10 minutes. Rinse extremely well multiple times with clean water. Bleach is harsh and can damage some plastics if left too long. I only use this when other methods fail. Remember, bleach is very effective at cleaning mold with bleach but requires careful handling.
- Rinse, Rinse, Rinse: This is the most important step after using any strong cleaning agent. Rinse all parts multiple times with fresh water until there is no smell of the cleaner left. You do not want these chemicals to be aerosolized into your air.
Dealing with Mineral Buildup (White Dust)
Mineral buildup, often called “white dust,” comes from hard water. It looks like a white, chalky residue. This can clog humidifier parts and reduce efficiency.
- Vinegar is Key: Distilled white vinegar is excellent for breaking down mineral deposits. For light buildup, the monthly deep cleaning soak with vinegar is enough.
- Extended Soaking: For heavy white crust, increase the soaking time. I sometimes let parts sit in undiluted vinegar for several hours or overnight. The longer the soak, the more the minerals dissolve.
- Physical Removal: After soaking, use your soft-bristle brush or toothbrush to scrape off any remaining mineral crust. A plastic scraper can also help for very stubborn spots, but be careful not to scratch the surface.
- Repeat if Needed: If the first soak does not remove all buildup, repeat the vinegar soaking and scrubbing process. Persistence pays off when dealing with hard water stains.
- Prevent Future Buildup: The best way to prevent severe mineral buildup is to use distilled water. Distilled water has no minerals, so it leaves no white dust. Using a demineralization cartridge, if your Safety First model supports it, can also help.
By being proactive and using these methods, you can keep your Safety First humidifier free of mold and mineral buildup. This ensures it provides clean, healthy moisture for your home.
Maintenance Tips for a Healthier Humidifier
Cleaning your Safety First humidifier is important, but proper maintenance goes beyond just scrubbing. A few simple habits can greatly improve your humidifier’s performance and longevity. These tips help keep your air clean and reduce your cleaning efforts in the future. I have found these practices make a big difference in the long run.
- Use Distilled Water: This is arguably the most important tip. Tap water contains minerals that create “white dust.” This white dust is actually mineral residue. It settles on surfaces around your humidifier and clogs the machine itself. Distilled water has no minerals, so it eliminates this problem entirely. I always use distilled water in my humidifier to avoid mineral buildup.
- Empty Water When Not in Use: If you are not using your humidifier for a few hours or longer, always empty the water tank. Do not let water sit and become stagnant. Stagnant water is a perfect breeding ground for bacteria and mold. It takes only a few seconds to pour out the old water.
- Proper Placement: Place your humidifier on a hard, flat, water-resistant surface. Avoid placing it on carpet or near absorbent materials. The mist or condensation can damage furniture or flooring. Also, ensure it is not directly against a wall, allowing for good airflow around the unit.
- Replace Filters Regularly: Many Safety First humidifiers come with filters. These filters trap impurities and minerals. Check your humidifier’s manual for the recommended filter replacement schedule. Neglecting filter changes can lead to reduced mist output and dirty air. A clogged filter makes the machine work harder and can spread contaminants.
- Store Properly During Off-Season: When you put your humidifier away for the warmer months, ensure it is completely clean and dry. Store it in a cool, dry place. Putting away a damp humidifier will lead to mold growth before you use it again. I always do a full deep clean before storing mine.
- Avoid Adding Anything to the Water: Do not put essential oils, medications, or water softeners directly into the water tank unless the manufacturer states it is safe. These can damage the humidifier’s components. They can also create harmful airborne particles. Stick to clean water for optimal operation.
- Monitor Your Home’s Humidity Levels: Use a hygrometer to keep track of your home’s humidity. Aim for 30-50% humidity. Too much humidity can encourage mold growth in your home, not just in the humidifier. Adjust the humidifier settings as needed to stay within this range.
By following these maintenance tips, you ensure your Safety First humidifier operates efficiently and safely. You will breathe easier knowing the air you are humidifying is clean and healthy.
Troubleshooting Common Humidifier Issues
Even with regular cleaning, you might run into some common issues with your Safety First humidifier. Most problems are easy to fix with a little know-how. I will share some typical issues and their quick solutions. Knowing these can save you a call to customer service or a trip to buy a new unit.
Humidifier Not Producing Mist:
- Check Water Level: Is the water tank empty? Your humidifier needs water to make mist. I always check the water level first.
- Power Connection: Is the unit properly plugged in? Is the power button on? Sometimes it is a simple power issue.
- Mineral Buildup: Mineral deposits can clog the transducer or mist nozzle. This stops mist production. A deep clean, as described earlier, is usually the fix. Pay extra attention to the oscillating disc or heating element.
- Filter Check: If your model has a filter, it might be clogged. Check your manual for filter replacement or cleaning.
- Fan Operation: Some humidifiers have a fan. Listen if you hear the fan running. If not, the motor might have a problem.
White Dust Around the Humidifier:
- Hard Water: This is almost always caused by minerals in your tap water. These minerals become a fine white powder when the water evaporates.
- Solution: Switch to distilled water. Distilled water has no minerals, so it produces no white dust. This is the simplest and most effective solution. You can also use demineralization cartridges if your model supports them.
Bad Smell Coming from Humidifier:
- Mold/Bacteria: A musty or rotten smell points to mold or bacteria growth. This happens when water sits for too long or cleaning is not thorough enough.
- Solution: Perform a deep clean immediately using vinegar or hydrogen peroxide. Ensure you scrub every surface that touches water. Rinse very well.
- Old Water: Always empty and refill the water tank daily. Do not let water sit in the tank for more than 24 hours.
Water Leaking from the Humidifier:
- Improper Assembly: The tank or other parts might not be seated correctly. Take the humidifier apart and reassemble it carefully, ensuring all seals are tight.
- Cracks: Inspect the water tank and base for any cracks. Even a small hairline crack can cause leaks. If you find a crack, the part or unit may need replacement.
- Overfilling: Do not fill the tank past the “Max Fill” line. Overfilling can lead to leaks.
- Damaged Seal: The rubber seal on the water tank cap or base might be worn or damaged. Check it for tears or deformities. A damaged seal needs replacement.
Humidifier Making Loud Noises:
- Mineral Buildup: Mineral buildup can sometimes cause a rattling or gurgling sound. The buildup can interfere with moving parts. A deep clean can resolve this.
- Fan Issues: If it is a fan-based humidifier, the fan might be hitting something or the motor is wearing out.
- Loose Parts: Check for any loose components inside the unit.
By understanding these common problems and their solutions, you can keep your Safety First humidifier running smoothly. Regular cleaning is the best defense against most of these issues.
When to Consider Replacing Your Humidifier
While cleaning and maintenance can extend your Safety First humidifier’s life, there comes a time when replacement is the best option. No appliance lasts forever. Knowing when to let go can save you frustration and ensure your home air stays clean. I have faced this decision myself a few times.
Here are signs it might be time to replace your humidifier:
- Persistent Mold or Mildew: If, despite your best cleaning efforts, mold continues to reappear very quickly or cannot be fully removed, it is a sign. Mold spores might be embedded in parts you cannot reach or clean effectively. Continuing to use such a humidifier means constantly releasing mold into your air. This is a serious health concern.
- Reduced Mist Output: If your humidifier is no longer producing much mist, even after thorough cleaning and filter replacement, its efficiency is compromised. The internal components, like the ultrasonic nebulizer or heating element, might be failing. This means it is not doing its job of adding moisture to the air.
- Strange Noises: While some noises are normal, new, loud, or grinding sounds often point to a dying motor or fan. These issues are typically not repairable for consumer-grade humidifiers.
- Leaks That Won’t Stop: If your humidifier starts leaking water regularly, and you have checked for improper assembly or simple cracks in the tank, it might have internal damage. Seals can degrade over time. Leaks can damage your floors or furniture and pose an electrical hazard.
- Excessive Mineral Buildup (Irreversible): Sometimes, mineral deposits are so severe they have permanently damaged the internal components, even after a deep vinegar soak. If the white crust simply will not come off, the unit’s performance will suffer greatly.
- Age of the Unit: Humidifiers generally last a few years with proper care. A typical lifespan for a consumer humidifier is 3-5 years. If your Safety First humidifier is older than this and showing any of the above signs, replacement is a good idea. Newer models often have improved features and energy efficiency.
- Odor Despite Cleaning: If a foul odor persists even after multiple deep cleans and using distilled water, it is a strong indicator of unremovable bacterial or mold contamination. You do not want to be breathing that in.
When you notice these issues, it is smart to weigh the cost of a new humidifier against the health risks and reduced effectiveness of an old one. Investing in a new Safety First humidifier can ensure you continue to enjoy healthy, humidified air without worry.
Frequently Asked Questions
How often should I clean my Safety First humidifier?
You should empty and rinse your Safety First humidifier’s water tank daily. A more thorough weekly cleaning involves wiping down all surfaces. A deep clean, including soaking parts in vinegar, should be done at least once a month. This schedule prevents mold and mineral buildup effectively.
Can I use bleach to clean my Safety First humidifier?
You can use bleach for very stubborn mold in your Safety First humidifier as a last resort. Mix one teaspoon of bleach per gallon of water. Soak affected parts for only 10 minutes. Rinse all components extremely well multiple times afterward to remove all traces of bleach. Bleach is harsh and requires careful handling.
What causes white dust from my humidifier?
White dust comes from minerals in your tap water. When the humidifier vaporizes water, these minerals are released into the air as a fine, white powder. To prevent this, use distilled water in your Safety First humidifier. Demineralization cartridges can also help if your model supports them.
Is it safe to leave water in the humidifier overnight?
No, it is not safe to leave water in your Safety First humidifier overnight. Standing water creates a perfect environment for bacteria and mold to grow quickly. Always empty any remaining water from the tank daily. Refill it with fresh, clean water before each use to ensure healthy operation.
- humidifier cleaning
- Safety First maintenance
- appliance care
- mold prevention
- healthy air

