· Home Cleaning · 19 min read
How To Clean Shower Tile

Restore Shine: How To Clean Shower Tile Effectively
Is your shower tile looking dull? Do soap scum and grime cover its surface? Many people face the challenge of keeping their shower tiles sparkling clean. A dirty shower can feel less inviting. It can also harbor mold and mildew. This makes maintaining a clean shower important for health and comfort.
I understand the frustration of stubborn stains. I know you want simple, effective ways to restore your shower’s shine. This guide provides practical steps and powerful techniques. You will learn how to clean shower tile thoroughly. We cover everything from daily care to deep cleaning methods. We discuss specific tile types. We address common problems like hard water stains and mold. You will discover natural and commercial cleaning options. By the end, you will have a clear plan for a cleaner, healthier shower space.
Takeaway:
- Identify your shower tile type for safe cleaning.
- Gather necessary tools like brushes, sponges, and protective gear.
- Use specific methods for soap scum, hard water, and mold.
- Choose between natural solutions like vinegar and baking soda or commercial cleaners.
- Implement a regular maintenance routine to prevent future buildup.
Cleaning shower tile requires specific tools and methods. You need to understand the type of tile you have. This prevents damage. Use appropriate cleaners for different stains like soap scum or mold. Regular cleaning and proper ventilation help keep your tiles looking new.
Understanding Your Shower Tile: Types and Care Needs
Cleaning shower tile begins with knowing your tile type. Different tiles require different care. Using the wrong cleaner can cause damage. We want to protect your investment. Let me explain the common types and their needs.
Ceramic and Porcelain Tiles
Ceramic and porcelain tiles are common in showers. They are durable. They resist water well. These tiles are generally non-porous. This means they do not absorb liquids easily. You can use a wider range of cleaners on them. Mild abrasive cleaners are usually safe. Stronger acidic or alkaline cleaners can also work for tough stains. Always test a small hidden area first. This ensures no damage occurs. You can find more specific advice on cleaning these types of tiles. For detailed information, check out our guide on how to clean ceramic tile shower or our tips for how to clean porcelain tile.
Natural Stone Tiles (Marble, Travertine, Granite)
Natural stone tiles add elegance to any shower. Marble, travertine, and granite are beautiful choices. However, they are porous. This means they absorb liquids. They also react badly to acidic cleaners. Vinegar, lemon juice, and many commercial bathroom cleaners can etch or dull natural stone. Always use pH-neutral cleaners for these surfaces. Seal natural stone tiles regularly. Sealing helps prevent water penetration and staining. If you have travertine, learn more about how to clean travertine tile to keep it safe. Avoid abrasive brushes on natural stone. They can scratch the surface.
Glass Tiles
Glass tiles create a modern look. They are non-porous. They are easy to clean. However, glass can show streaks and water spots easily. Abrasive cleaners or harsh scrubbing can scratch the surface. Use non-abrasive cleaners designed for glass or mild detergents. A squeegee is a great tool for glass tiles. It removes water after each shower. This prevents water spots. Always wipe glass tiles dry for a streak-free shine.
Sealing Tiles and Grout
Many tiles, especially natural stone, benefit from sealing. Grout lines always need sealing. Grout is porous. It absorbs water, dirt, and mold spores. Sealing creates a barrier. This barrier repels water and stains. It makes cleaning easier. Re-seal grout every 6-12 months. Natural stone may need sealing every 1-2 years. Follow the sealant manufacturer’s instructions.
Essential Tools and Supplies for Shower Tile Cleaning
Having the right tools makes cleaning shower tile much easier. It also makes the process more effective. You do not need a lot of specialized equipment. Most items are easy to find. Gather these supplies before you begin. This helps you work efficiently.
Basic Cleaning Tools
- Spray Bottles: These are perfect for mixing and applying cleaners. You can label them for different solutions.
- Microfiber Cloths: Use these for wiping down surfaces. They are non-abrasive and absorb well. They help achieve a streak-free finish.
- Sponges: Choose non-scratching sponges. They are good for general scrubbing. Look for ones with a scrub pad on one side.
- Stiff-Bristled Brush: A stiff brush is essential for grout lines. Make sure its bristles are not too harsh for your tile type. An old toothbrush can work for small areas.
- Squeegee: This tool is excellent for removing water from tile and glass. Use it after every shower. It helps prevent water spots and soap scum.
- Bucket: A bucket holds your cleaning solution. It is useful for rinsing tools.
- Empty Bucket or Bin: Keep this handy for dirty rags or for mixing solutions.
Protective Gear
Protecting yourself is important. Cleaning agents can irritate skin or eyes. Mold spores can also be harmful.
- Rubber Gloves: Always wear gloves. They protect your hands from chemicals. They also keep your hands clean.
- Safety Goggles: Protect your eyes from splashes. This is especially important when using strong cleaners.
- Ventilation: Open windows or turn on the exhaust fan. Good airflow reduces exposure to fumes.
Cleaning Agents and Solutions
You will need various cleaning agents. Some are natural. Others are commercial products.
- White Vinegar: A powerful natural cleaner. It dissolves soap scum and hard water stains. Do not use on natural stone.
- Baking Soda: A mild abrasive. It works well for scrubbing and deodorizing. Mix it with water to form a paste.
- Hydrogen Peroxide: Good for killing mold and mildew. It also helps brighten grout.
- Dish Soap: A gentle degreaser. Mix it with water for light cleaning.
- Oxygen Bleach: A non-chlorine bleach. It brightens grout and tackles tough stains. It is generally safer than chlorine bleach for colored grout.
- Commercial Tile and Grout Cleaners: Many products are available. Choose one specific to your tile type and stain problem. Look for pH-neutral options for natural stone.
- Stone Cleaner/Sealer: If you have natural stone, you need special cleaners. Use a stone-safe cleaner. Re-apply sealer as needed.
Having these items ready makes the cleaning process smooth. You can tackle any shower tile cleaning challenge.
Tackling Common Shower Tile Problems: Soap Scum and Hard Water
Shower tiles often face two main enemies: soap scum and hard water stains. These issues make your shower look dirty. They can also be tough to remove. I will share effective strategies to eliminate them.
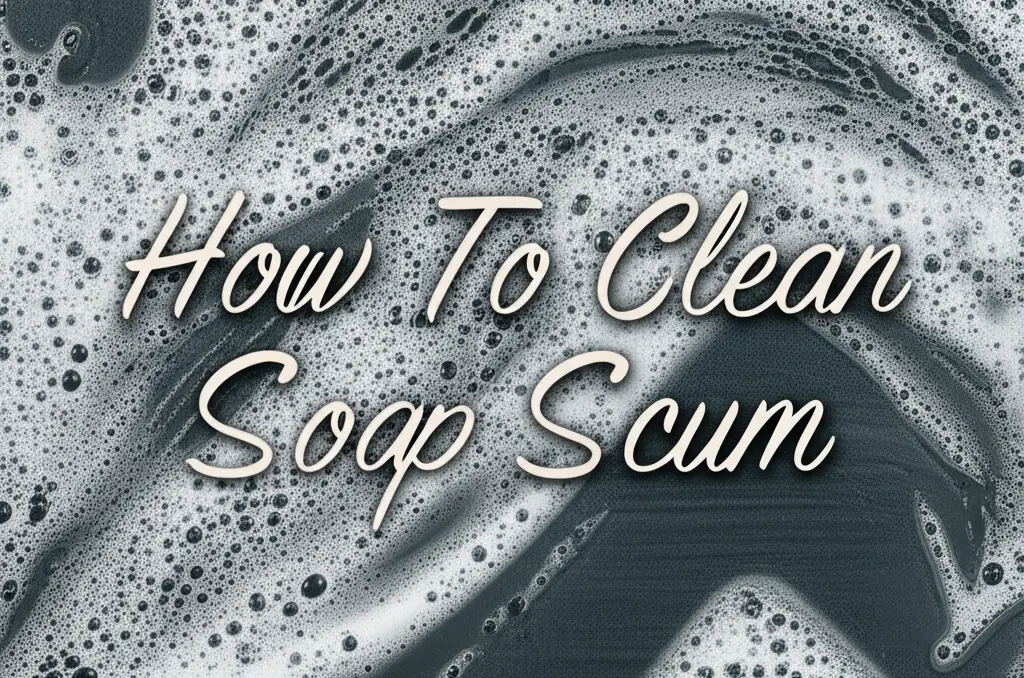
Eliminating Soap Scum Buildup
Soap scum forms when minerals in water mix with soap. It leaves a dull, whitish film. This film can be greasy. It builds up quickly. Here is how to clean shower tile affected by soap scum.
- Vinegar Solution: White vinegar is very effective. It dissolves the alkaline minerals in soap scum. Mix equal parts white vinegar and warm water in a spray bottle. Spray the entire tiled surface. Let it sit for 15-30 minutes. The acidity breaks down the scum. Then, scrub with a brush or sponge. Rinse thoroughly with water. Remember, avoid vinegar on natural stone. For a deep dive into using vinegar for showers, read our guide on how to clean shower with vinegar.
- Baking Soda Paste: For tougher soap scum, try a baking soda paste. Mix baking soda with a little water. Create a thick paste. Apply this paste directly to the scum. Let it sit for 10-15 minutes. Scrub with a non-abrasive brush. The baking soda acts as a gentle abrasive. It helps lift the scum without scratching the tile. Rinse well.
- Dish Soap and Water: For lighter soap scum, use dish soap. Mix a few drops of dish soap with warm water. Apply it with a sponge. Dish soap helps cut through the grease in the scum. Scrub gently. Rinse clean. This method is good for regular maintenance.
- Commercial Soap Scum Removers: Many products are available for heavy buildup. Choose one safe for your tile type. Always follow product instructions carefully. These products often contain strong chemicals. Ensure good ventilation.
Removing Stubborn Hard Water Stains
Hard water stains look like white, chalky deposits. They are mineral deposits left behind when water evaporates. These stains are particularly common in areas with hard water. They cling tightly to surfaces.
- Vinegar Soak: Vinegar works wonders on hard water stains too. Its acidity breaks down mineral deposits. Apply undiluted white vinegar to the stains. Let it sit for several hours or even overnight for severe stains. Cover the area with vinegar-soaked paper towels to keep it wet. Scrub with a stiff brush or a non-scratch pad. Rinse thoroughly. Again, avoid this on natural stone.
- Lemon Juice: Lemon juice is another natural acidic option. It is milder than vinegar. Use it for lighter stains. Apply fresh lemon juice. Let it sit for 15-30 minutes. Scrub and rinse.
- Baking Soda and Vinegar Combination: This method creates a fizzing action. This fizz helps lift stubborn stains. First, spray vinegar on the affected area. Then, sprinkle baking soda over it. Let the mixture foam for a few minutes. Scrub the area. Rinse completely. This is a powerful duo.
- Commercial Hard Water Stain Removers: For very old or thick hard water stains, commercial products might be necessary. Look for removers specifically designed for hard water. Read labels carefully. Ensure the product is safe for your tile type. Always wear gloves and eye protection. Follow all safety warnings.
Addressing soap scum and hard water stains promptly saves effort. Regular cleaning prevents them from becoming major problems.
Deep Cleaning Shower Grout: Eradicating Grime and Mold
Grout lines are often the dirtiest part of a shower. They are porous. They trap dirt, soap scum, and moisture. This creates a perfect environment for mold and mildew. Cleaning grout is essential for a truly clean shower. It also improves hygiene. Let me guide you through effectively cleaning your grout.
Understanding Grout and Its Vulnerabilities
Grout is a mixture of cement, sand, and water. It fills the spaces between tiles. It is typically porous. This means it can absorb water. It also absorbs dirt, soap, scum, and mold spores. Over time, grout can change color. It might turn grey, orange, pink, or black. These color changes usually indicate mold, mildew, or mineral buildup. For specific steps on how to keep your shower grout pristine, explore our dedicated article on how to clean grout in shower.
Grout Cleaning Methods
You can use several methods to clean grout. The best method depends on the level of dirt and type of stain.
- Baking Soda Paste for General Grime:
- Mix baking soda with a little water. Create a thick paste.
- Apply the paste directly to the grout lines.
- Let it sit for 10-15 minutes. This gives the baking soda time to work.
- Scrub the grout lines with a stiff-bristled brush. An old toothbrush works well for small areas.
- Rinse thoroughly with warm water. Baking soda is gentle. It is safe for most grout types.
- Vinegar Solution for Mildew and Soap Scum:
- Mix equal parts white vinegar and water in a spray bottle.
- Spray the grout lines liberally.
- Let it sit for 15-30 minutes. The acidity helps break down mildew and scum.
- Scrub with a grout brush.
- Rinse with clean water. Do not use vinegar if your grout is unsealed or very new. Also, do not mix vinegar with bleach. This creates toxic fumes.
- Hydrogen Peroxide for Mold and Brightening:
- Hydrogen peroxide is a mild bleach. It kills mold and brightens grout.
- Apply 3% hydrogen peroxide directly to the grout. You can use a spray bottle.
- Let it sit for 10-15 minutes.
- Scrub with a grout brush.
- Rinse well. Hydrogen peroxide is safer than chlorine bleach for colored grout. It is also more effective on mold.
- Oxygen Bleach for Tough Stains:
- Oxygen bleach (like OxiClean) is a powerful stain remover. It is chlorine-free.
- Mix oxygen bleach powder with water according to package directions. Form a paste or solution.
- Apply to the stained grout. Let it sit for several hours or overnight.
- Scrub and rinse thoroughly. This works well for stubborn black mold or discolored grout.
- Commercial Grout Cleaners:
- Many commercial products are available. Choose one that targets mold, mildew, or stains.
- Read the product label carefully. Ensure it is safe for your grout and tile type.
- Follow the manufacturer’s instructions for application and safety.
- Always ensure good ventilation.
Addressing Mold in Grout
Mold often appears as black or dark spots on grout. It thrives in damp environments. Effective mold removal is crucial. If you have significant mold issues in your shower, refer to our comprehensive guide on how to clean mold in shower.
- Hydrogen Peroxide: As mentioned, it kills mold effectively.
- Bleach (Caution): For severe mold on white grout, a diluted bleach solution (1 part bleach to 10 parts water) can be used. Apply with a cotton ball or brush. Let it sit for a few minutes. Scrub and rinse thoroughly. Never use bleach on colored grout, as it can strip the color. Never mix bleach with vinegar or ammonia.
- Ventilation: After cleaning, ensure proper ventilation. This helps prevent mold regrowth. Turn on the fan. Open a window.
Grout Sealing
After cleaning, consider sealing your grout. Sealing protects grout from future stains and moisture. It makes cleaning easier. Grout sealers are available at home improvement stores. Apply sealer once the grout is completely dry. Follow the product instructions. Re-seal grout every 6-12 months for best protection.
Natural Cleaning Solutions for Shower Tiles
Many prefer natural cleaning methods. These options use common household ingredients. They are often safer for your family and the environment. They can be very effective for daily cleaning and common shower tile problems. Let me explain how to use these natural solutions.
White Vinegar: The All-Purpose Acetic Acid
White vinegar is a cleaning powerhouse. It is acidic. This acidity makes it excellent for dissolving soap scum and hard water stains. It also has antimicrobial properties. This helps kill mold and mildew.
- For Daily Cleaning: Mix equal parts white vinegar and water in a spray bottle. After each shower, lightly spray the tiles. Wipe with a squeegee or microfiber cloth. This prevents buildup.
- For Soap Scum and Hard Water: Use undiluted white vinegar for tougher stains. Spray it generously on the affected area. Let it sit for 15-30 minutes. The longer it sits, the more it breaks down. Scrub with a non-abrasive sponge or brush. Rinse thoroughly with water.
- Grout Cleaner: For mildewed grout, spray vinegar directly. Let it sit for 15 minutes. Scrub with a grout brush. Rinse well.
Important Note: Do not use vinegar on natural stone tiles like marble, travertine, or granite. The acid will etch and damage the surface. Always test vinegar on a small, inconspicuous area first.
Baking Soda: The Gentle Abrasive and Deodorizer
Baking soda is a mild alkali. It works as a gentle abrasive. This helps scrub away grime without scratching surfaces. It also neutralizes odors.
- For Soap Scum and Stains: Make a paste with baking soda and a little water. Apply the paste to soiled areas. Let it sit for 10-15 minutes. Scrub with a sponge or brush. The gentle abrasive action helps lift stains. Rinse thoroughly.
- For Grout: Create a thicker baking soda paste. Apply it to grout lines. Scrub with a toothbrush or grout brush. The paste helps lift dirt from the porous surface.
- Combined Power: For stubborn stains, use baking soda with vinegar. First, spray the area with vinegar. Then, sprinkle baking soda over the wet surface. The mixture will fizz. This reaction helps break down tough grime. Scrub after a few minutes. Rinse well.
Lemon Juice: The Natural Bleach and Freshener
Lemon juice contains citric acid. It has mild bleaching properties. It leaves a fresh scent.
- For Light Stains and Brightening: Squeeze fresh lemon juice directly onto light stains or dull areas. Let it sit for 10-15 minutes. Scrub gently and rinse. It can help brighten white tiles and grout.
- For Water Spots: Use lemon juice to tackle water spots on glass shower doors and polished tiles. Its acidity helps dissolve mineral deposits.
Caution: Like vinegar, lemon juice is acidic. Avoid using it on natural stone tiles.
Hydrogen Peroxide: The Disinfectant and Mold Killer
3% hydrogen peroxide is a great natural disinfectant. It works well on mold and mildew. It also helps whiten grout.
- For Mold and Mildew: Spray hydrogen peroxide directly onto moldy areas. Let it sit for 10-15 minutes. You will see it bubbling. This means it is working. Scrub with a brush. Rinse thoroughly. Hydrogen peroxide is safer for colored grout than chlorine bleach.
- Grout Brightener: Apply hydrogen peroxide to discolored grout. Let it sit for a while. It will help lighten the grout.
Using these natural cleaners regularly keeps your shower tiles clean. They reduce the need for harsh chemicals. They offer a safe and effective way to maintain a sparkling bathroom.
Commercial Cleaners and Specialized Treatments for Shower Tile
Sometimes, natural cleaners are not enough. For heavy buildup, tough stains, or specific problems, commercial cleaners offer a stronger solution. These products are formulated to tackle difficult issues on shower tiles. Understanding when and how to use them is key.
When to Use Commercial Cleaners
Commercial cleaners are ideal for:
- Severe Soap Scum: Years of buildup may require more aggressive agents.
- Stubborn Hard Water Stains: Very thick mineral deposits might need specialized acid formulas.
- Deep-Set Mold and Mildew: Some mold can penetrate deeply into grout or caulk.
- Specialized Tile Types: Certain tiles, like sealed natural stone, need specific pH-neutral commercial cleaners.
Types of Commercial Cleaners
Commercial cleaners work in different ways. Their effectiveness depends on their chemical composition.
- Alkaline Cleaners: These are good for grease, oils, and general dirt. Many all-purpose bathroom cleaners are alkaline. They dissolve common shower grime.
- Acidic Cleaners: These are powerful against mineral deposits like hard water stains, rust, and efflorescence. They are excellent for dissolving soap scum. Caution: Acidic cleaners are generally not safe for natural stone, unsealed grout, or metal fixtures. Always check the label.
- Enzyme-Based Cleaners: These cleaners use beneficial bacteria to break down organic matter. They are effective for biological stains like mold and mildew. They are often safer for a wider range of surfaces. They work over a longer period.
- Bleach-Based Cleaners: These are very effective at killing mold and whitening surfaces. They are strong disinfectants. Caution: Use only on white grout and tiles. Never mix bleach with other cleaners like ammonia or vinegar. Always ensure excellent ventilation.
- Grout Specific Cleaners: These are formulated to penetrate and clean porous grout lines. Some are acidic, some are alkaline. Always choose one appropriate for your grout’s color and condition.
How to Use Commercial Cleaners Safely and Effectively
- Read Instructions Carefully: Every commercial cleaner has specific directions. Follow them precisely. This ensures effectiveness and safety.
- Test in an Inconspicuous Area: Before applying to the entire shower, test the cleaner. Pick a small, hidden spot. Apply a small amount. Wait the recommended time. Check for any discoloration or damage.
- Ventilation is Crucial: Always work in a well-ventilated area. Open windows. Turn on the exhaust fan. Some cleaners emit strong fumes.
- Wear Protective Gear: Always wear rubber gloves. Safety goggles are also recommended. This protects your skin and eyes from chemical contact.
- Apply and Wait: Spray or apply the cleaner. Allow it to sit for the recommended dwell time. This gives the chemicals time to work. Do not let it dry on the surface.
- Scrub: Use a non-abrasive sponge or brush suitable for your tile type. Scrub to loosen the dissolved grime.
- Rinse Thoroughly: Rinse the cleaned area completely with water. Ensure no cleaner residue remains. Residue can attract more dirt or cause damage over time.
- Avoid Mixing Products: Never mix different commercial cleaners. This can create dangerous chemical reactions or toxic fumes.
Using commercial cleaners can restore badly soiled shower tiles. They provide targeted solutions for tough cleaning problems. Remember to always prioritize safety and follow product guidelines.
Maintaining Your Shower Tiles: Prevention is Key
Cleaning shower tile is important. But prevention is even better. Regular maintenance saves you time and effort in the long run. It also keeps your shower looking fresh. Here are practical steps to keep your tiles cleaner, longer.
Daily Habits for a Cleaner Shower
Small daily actions make a big difference. They stop grime from building up.
- Squeegee After Each Shower: Keep a squeegee in your shower. Use it to wipe down walls and glass doors after every use. This removes water droplets. It prevents hard water spots and soap scum from forming.
- Run the Exhaust Fan: Turn on your bathroom exhaust fan during and after your shower. Let it run for at least 15-20 minutes. This pulls out moisture. It reduces humidity. Lower humidity prevents mold and mildew growth.
- Open a Window: If you do not have an exhaust fan, open a window. This provides natural ventilation. Airflow helps dry out the shower area quickly.
- Wipe Down Surfaces: A quick wipe with a microfiber cloth helps. Wipe the bottom of the shower and lower tiles. This removes standing water and soap residue. For specific tips, see our articles on how to clean bottom of shower and how to clean shower floor.
Weekly Light Cleaning
A weekly quick clean keeps major buildup at bay. It makes deep cleaning less frequent.
- Spray and Wipe: Use a diluted mixture of white vinegar and water (1:1 ratio). Spray it on the tiles and grout. Let it sit for 5-10 minutes. Wipe down with a clean sponge or cloth. Rinse thoroughly. (Remember, avoid vinegar on natural stone.)
- Quick Scrub for Grout: Use an old toothbrush or a small brush. Lightly scrub grout lines with a baking soda paste. This lifts any early grime or mildew before it sets in. Rinse well.
- Check for Soap/Shampoo Bottles: Lift and clean underneath bottles. Soap residue collects here quickly.
Protecting Your Tiles and Grout
Protection adds another layer against dirt and damage.
- Seal Grout Regularly: Grout is porous. It absorbs water and grime. Apply a grout sealer every 6-12 months. This creates a barrier. It repels moisture and stains. It makes cleaning much easier.
- Seal Natural Stone Tiles: If you have marble, travertine, or granite, sealing is vital. Natural stone is very porous. It stains easily. Re-seal these tiles every 1-2 years. Use a penetrating stone sealer. This protects the surface.
- Use Mild Soaps: Consider using liquid body wash instead of bar soap. Bar soap contains talc and fats. These contribute more to soap scum buildup. Liquid soaps rinse away more easily.
- Consider a Water Softener: If you have very hard water, a whole-house water softener can help. It removes minerals from the water. This significantly reduces hard water stains on your tiles and fixtures.
By adopting these maintenance habits, you will notice a significant difference. Your shower tiles will stay cleaner. You will spend less time on deep cleaning tasks. A little effort each day prevents big problems later.
- shower tile cleaning
- grout cleaning
- mold removal
- hard water stains
- cleaning tips
- home maintenance
- bathroom cleaning