· Cleaning Tips · 20 min read
How To Clean Silicone Molds
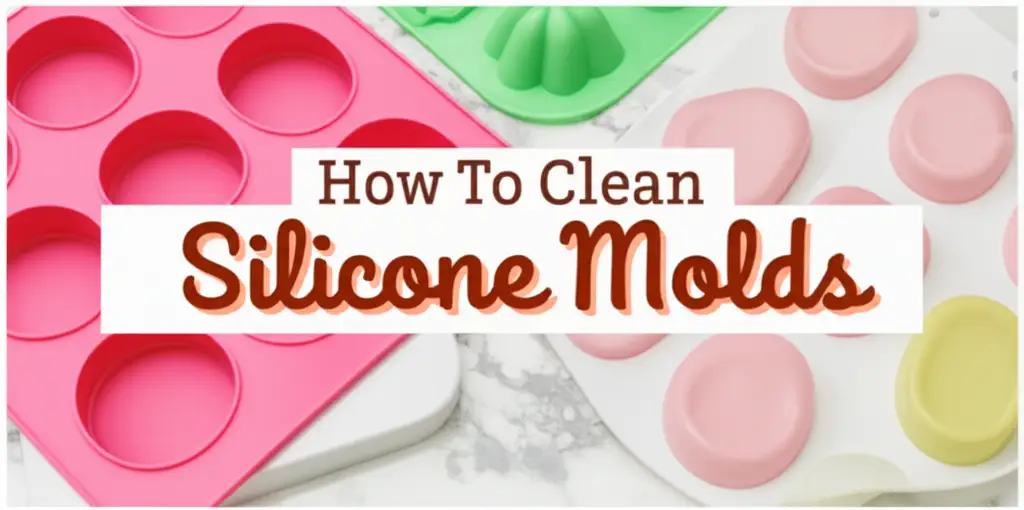
How to Clean Silicone Molds: A Complete Care Guide
Silicone molds are incredibly useful. We use them for baking, crafting, and even making ice cubes. These flexible tools make life easier in the kitchen and craft room. But like all tools, they need proper care. Learning how to clean silicone molds correctly keeps them performing well. It also extends their lifespan. Dirty molds can transfer unwanted flavors or residues. They can even harbor bacteria or mold growth. This article provides a complete guide. We will explore simple washing methods. We will also cover deep cleaning techniques. We will discuss odor removal and specific material care. This information helps you maintain your silicone molds. You can enjoy using them for many years.
Takeaway
Keeping your silicone molds clean is easy. Follow these key steps:
- Wash immediately: Clean molds right after use.
- Use gentle soap: Dish soap and warm water work best.
- Air dry completely: Ensure molds are fully dry before storage.
- Address stubborn issues: Use vinegar, baking soda, or boiling water for tough stains or odors.
- Store properly: Keep molds flat or stacked to maintain shape.
Quick Answer
To clean silicone molds, wash them with warm, soapy water immediately after use, scrubbing gently with a soft sponge. For tougher residues or odors, soak them in a vinegar solution or boil them. Ensure they dry completely before storing to prevent mildew and maintain their non-stick properties.
Understanding Silicone Molds and Their Cleaning Needs
Silicone molds are very popular. Their non-stick surface makes removal easy. They are flexible and durable. People use them for many things. You find them in baking, resin art, soap making, and even for ice. Silicone resists heat and cold well. It does not react with most foods or chemicals.
Despite their non-stick nature, silicone molds still get dirty. Residues from food, resin, or soap can stick. Over time, these residues build up. They can cause the mold to lose its non-stick quality. They can also transfer unwanted tastes or smells. Sometimes, a white film appears on baking molds. This film is often mineral deposits from water or detergent residue. Regular cleaning prevents these problems. It also keeps your molds hygienic. Proper cleaning ensures your molds stay beautiful and functional.
Silicone is porous on a microscopic level. It can absorb oils and odors. This means a mold used for savory muffins might smell like them. Even after washing. This porosity also allows for slight staining. Bright colors from food or dyes can leave marks. Understanding these properties helps us choose the right cleaning methods. We need methods that clean the surface and deep within. This approach maintains the integrity of the silicone. It ensures your molds last for a long time. Caring for your molds properly is an investment. It protects your creations and your health.
Everyday Cleaning: Basic Methods for Silicone Molds
Regular cleaning is the best defense. It prevents residue buildup. It also keeps your silicone molds in top condition. This basic routine works for most uses. It is quick and effective. I use these steps daily after baking.
Hand Washing Your Silicone Molds
Hand washing is gentle and effective. It prevents damage that harsh dishwasher cycles might cause. You need only a few simple items.
- Warm Water: Hot water helps dissolve fats and oils.
- Dish Soap: Choose a mild dish soap. Avoid harsh detergents with strong chemicals.
- Soft Sponge or Cloth: A non-abrasive sponge protects the silicone surface.
Follow these simple steps for hand washing:
- Rinse Immediately: After using the mold, rinse it with warm water. This removes loose particles. It prevents residues from drying onto the surface.
- Apply Soap: Put a small amount of dish soap onto your sponge. You do not need much.
- Gently Scrub: Rub the mold’s surface gently. Pay attention to crevices and detailed areas. Use your fingers to reach small spots.
- Rinse Thoroughly: Rinse the mold under running warm water. Make sure all soap residue is gone. Soap residue can leave a film.
- Inspect: Hold the mold up to the light. Look for any remaining spots or film. If you see any, repeat the scrubbing and rinsing.
- Air Dry: Place the clean mold on a drying rack. Allow it to air dry completely. Or, use a clean cloth to pat it dry. Ensure it is completely dry before storing. This prevents mildew growth.
Using a Dishwasher for Silicone Molds
Many silicone molds are dishwasher safe. This method is convenient for busy people. However, it is important to check the manufacturer’s instructions. Some molds might warp or degrade in a dishwasher. My own experience shows that dishwashers are great for quick cleans.
Consider these tips when using a dishwasher:
- Top Rack Only: Always place silicone molds on the top rack. The bottom rack’s heating element is too close. It can damage the silicone.
- Avoid Strong Detergents: Use a mild dishwasher detergent. Harsh chemicals can sometimes affect silicone over time. They might also leave a white film.
- Rinse Before Loading: Pre-rinse your molds before putting them in the dishwasher. This removes large bits of food or debris. It helps the dishwasher clean more effectively.
- No High Heat Cycles: If your dishwasher has a “sanitize” or “high heat” option, avoid it. Regular wash cycles are sufficient. Excessively high temperatures can shorten the mold’s life.
- Check for Residue: After the cycle, inspect the molds. Sometimes, a white film from hard water or detergent remains. If so, a quick hand rinse can fix it.
While dishwashers offer convenience, hand washing often gives the best results. It provides more control over the cleaning process. It also helps preserve the mold’s non-stick properties longer. For more on specific silicone items, check out how to clean silicone baking mats or how to clean silicone ice trays. These resources offer similar basic cleaning advice tailored to other common silicone products.
Deep Cleaning Silicone Molds: Tackling Stubborn Residues
Sometimes basic washing is not enough. Stubborn residues, sticky films, or even light discoloration can cling to silicone molds. These issues require a more intensive approach. Deep cleaning restores your molds to their original state.
Vinegar and Baking Soda Soak for Residue
Vinegar and baking soda are natural cleaning powerhouses. They work wonders on many household items. Together, they form a mild abrasive and a powerful deodorizer. This combination is safe for food-grade silicone. I often use this method for my baking molds.
Here is how to use them:
- Create a Paste: Mix baking soda with a little water. Make a thick paste.
- Apply to Mold: Spread the paste over the affected areas of the mold. Pay extra attention to any sticky or discolored spots.
- Let Sit: Allow the paste to sit on the mold for 30 minutes to an hour. For very stubborn grime, you can leave it longer.
- Add Vinegar: Pour white vinegar directly onto the baking soda paste. It will fizz and bubble. This reaction helps lift away grime.
- Scrub Gently: Use a soft brush or sponge to scrub the mold. The fizzing action helps loosen residue.
- Rinse Thoroughly: Rinse the mold very well under warm running water. Ensure all baking soda and vinegar are gone.
- Dry Completely: Air dry the mold or pat it dry with a clean cloth.
This method is great for general grime. It also helps with mineral deposits that leave a white film. If your silicone molds have a sticky, oily residue from repeated baking, this solution works wonders.
Boiling for Deep Clean and Sterilization
Boiling is an excellent way to deep clean and sterilize silicone molds. The high heat helps break down oils and kill bacteria. It also helps remove residual odors. This method is simple and effective. It does not involve harsh chemicals.
Here is how to boil your silicone molds:
- Fill a Pot: Choose a large pot. Fill it with enough water to fully submerge your molds.
- Add Molds: Place your silicone molds into the pot. Ensure they are completely covered by water.
- Bring to Boil: Bring the water to a rolling boil.
- Boil for 10-15 Minutes: Let the molds boil for at least 10 minutes. For heavily soiled or odorous molds, boil for up to 15 minutes.
- Carefully Remove: Use tongs to carefully remove the hot molds from the boiling water. Be very careful to avoid burns.
- Wash and Dry: Immediately wash the boiled molds with warm, soapy water. This helps remove loosened residue. Rinse well and let them air dry completely.
Boiling is especially useful for molds used with greasy foods. It helps break down the oils that can absorb into the silicone. It also sterilizes the molds. This gives you peace of mind. For tackling mold growth specifically, boiling can be part of the solution, but for comprehensive information on persistent mold issues on silicone, refer to how to clean mold off silicone.
Removing Odors and Discoloration from Silicone Molds
Silicone molds are porous on a microscopic level. This means they can absorb odors from strong foods. Garlic, onion, or even specific artificial flavors can linger. Over time, molds can also develop discoloration. This might be from food dyes, oils, or prolonged sun exposure. Tackling these issues needs targeted solutions.
Odor Removal Techniques
Lingering odors can be frustrating. They can transfer to your next batch of food or craft. Thankfully, several methods can eliminate these smells. I have personally used these tricks. They work well.
Baking Soda Soak: Baking soda is a natural deodorizer.
- Place your odorous silicone mold in a basin.
- Sprinkle a generous amount of baking soda inside and outside the mold.
- Fill the basin with warm water. Ensure the mold is fully submerged.
- Let it soak overnight, or for several hours.
- Rinse thoroughly with warm water. Then wash with dish soap.
- Air dry completely. This method absorbs unwanted smells effectively.
Sunlight Exposure: UV rays from the sun are natural disinfectants and deodorizers.
- After washing and drying, place your silicone molds outdoors.
- Choose a sunny spot. Lay them flat.
- Leave them in direct sunlight for a few hours.
- Flip them over halfway through for even exposure. The sun’s warmth and UV light help break down odor-causing molecules. This method also helps with minor discoloration. Always ensure the molds are clean before placing them in the sun.
Vinegar Soak: White vinegar is acidic. It neutralizes many odors.
- Mix equal parts white vinegar and warm water in a basin.
- Submerge your silicone molds in the solution.
- Let them soak for 1-2 hours. For strong odors, soak overnight.
- Remove molds and wash them with dish soap.
- Rinse well and air dry. The vinegar smell dissipates as the mold dries.
Addressing Discoloration and Stains
Silicone can absorb pigments. This leads to unsightly stains. Red food dyes, tomato sauce, or even dark spices can leave marks. Here are ways to tackle discoloration:
Lemon Juice and Salt Scrub: This combination provides natural bleaching action.
- Cut a lemon in half.
- Sprinkle salt over the discolored area of the mold.
- Use the lemon half to scrub the salted area. The acid and abrasive salt work together.
- Let the lemon juice and salt sit for 15-30 minutes.
- Wash the mold thoroughly with soap and water. Rinse well. This method is particularly effective for food-based stains.
Hydrogen Peroxide Soak: For stubborn stains, hydrogen peroxide can be very effective. Use a 3% solution.
- Pour hydrogen peroxide into a bowl.
- Submerge the discolored silicone mold.
- Let it soak for a few hours, or overnight.
- Remove the mold. Wash thoroughly with soap and water.
- Rinse completely and air dry. Hydrogen peroxide helps break down pigments. Always test a small, inconspicuous area first. Ensure it does not affect the silicone color itself. This method is also useful for dealing with challenging materials, like how you might clean resin out of silicone cups where pigments can strongly bond.
Prolonged Sunlight Exposure: As mentioned for odors, prolonged sun exposure can also lighten stains. UV rays can break down pigments over time. This method is gentle. It requires patience. Combine it with other cleaning methods for best results. Always remember that prevention is key. Cleaning molds immediately after use helps avoid both odor and discoloration problems.
Dealing with Specific Mold Materials: Resin, Soap, and Food Residues
Silicone molds are versatile. They handle many different materials. Each material leaves a specific type of residue. Knowing how to clean each type makes your task easier. It also protects your molds. I have used molds for all these purposes. Each needs a slightly different touch.
Cleaning Molds Used for Resin
Resin can be tricky. Once cured, it is very hard. This makes cleaning resin molds challenging. You must clean them before the resin cures completely.
- Immediate Action is Key:
- As soon as you pour resin, clean any spills or drips. Use rubbing alcohol or acetone on a paper towel. This dissolves uncured resin quickly.
- After demolding, inspect the mold. If you see any uncured resin, wipe it immediately. Use isopropyl alcohol (IPA). IPA is generally safe for silicone.
- For Cured Residue:
- Cured resin is very hard to remove from silicone. The best approach is prevention.
- If tiny bits of cured resin remain, try gently picking them off with a soft tool. Avoid anything sharp. Sharp tools can scratch or tear the silicone.
- You can try freezing the mold. This makes some resins brittle. Then, flex the mold to pop out the cured pieces.
- Do not use harsh solvents like paint thinner. They can degrade the silicone over time. For more specific information on removing resin from silicone, refer to how to clean resin out of silicone cups.
Cleaning Molds Used for Soap Making
Soap residues are generally oily. They can leave a film. This film can make the mold sticky over time.
- Hot Water and Dish Soap:
- After unmolding soap, rinse the silicone mold immediately. Use very hot water. Hot water helps dissolve oils.
- Add a good amount of dish soap to the mold. Scrub thoroughly with a soft sponge.
- Pay attention to intricate details. Soap residue can hide in small crevices.
- Rinse with hot water until the mold feels clean, not slippery.
- Baking Soda for Oily Residue:
- If a sticky, oily film persists, sprinkle baking soda directly onto the wet mold.
- Rub it with your fingers or a soft cloth. The baking soda acts as a mild abrasive. It absorbs oils.
- Rinse thoroughly.
- Boiling: For a deep clean, boil soap molds. This helps break down stubborn fats and oils. Follow the boiling instructions from the deep cleaning section.
Cleaning Molds Used for Food (Baking, Ice Trays, etc.)
Food residues vary widely. Baking molds can have greasy buildup. Ice molds can develop mineral deposits.
- General Food Residue:
- Rinse molds immediately after use with warm water.
- Wash with dish soap and a soft sponge. Scrub all surfaces well.
- For sticky baked-on food, let the mold soak in hot, soapy water for 15-30 minutes. This softens the residue.
- Then scrub and rinse.
- For Greasy Residue (from baking):
- Use baking soda paste. Apply it to the greasy areas. Let it sit for a while.
- Then scrub and rinse. The baking soda absorbs and helps lift the grease.
- Boiling is also very effective for greasy molds. It breaks down oils. For specific guidance on baking items, consider the tips on how to clean silicone baking mats.
- For Mineral Deposits (from water, common in ice trays):
- A white, cloudy film often forms on ice molds. This is hard water residue.
- Soak the mold in white vinegar. Use full-strength vinegar or a 1:1 vinegar-water solution.
- Let it soak for 30 minutes to an hour. The acid dissolves mineral deposits.
- Scrub with a brush if needed. Rinse thoroughly.
- For more details on ice molds, you can check out how to clean silicone ice trays.
Each material presents unique challenges. But with the right approach, your silicone molds will remain clean and ready for their next use.
Advanced Cleaning Techniques and Prevention Tips for Silicone Molds
Sometimes, regular cleaning is not enough. You might encounter very tough stains or ingrained odors. Or you may want to ensure your molds are truly pristine. Advanced techniques can help. Also, prevention is always better than cure. Following good practices extends the life of your molds.
Sterilizing Silicone Molds
Sterilization is important for food molds. It ensures no bacteria or mold spores remain. This is especially true if molds have been stored incorrectly. Or if they have been in contact with raw ingredients.
Boiling Method (Revisited for Sterilization):
- Submerge your clean silicone molds in a pot of boiling water.
- Ensure they are fully covered.
- Boil for 10-15 minutes. This high heat kills most bacteria and viruses.
- Use tongs to remove them carefully.
- Let them air dry completely on a clean rack. Do not touch them with unwashed hands.
Oven Sterilization (for heat-resistant molds):
- Preheat your oven to 250°F (120°C).
- Place clean, dry silicone molds on a baking sheet.
- Bake for 10-15 minutes.
- Turn off the oven. Let the molds cool inside the oven. Or remove carefully with oven mitts. Always check if your specific mold is safe for these temperatures. Most baking molds are fine.
Dealing with Stubborn White Film
A white film often appears on silicone. This is usually from hard water minerals or dishwasher detergent residue. It makes the mold look dull.
Vinegar Soak and Scrub:
- Fill a basin with equal parts white vinegar and warm water.
- Submerge the affected molds. Let them soak for 30 minutes to an hour.
- Remove the molds. Scrub them with a soft brush or sponge. The vinegar helps dissolve minerals.
- Rinse thoroughly under running water.
- Dry completely.
Baking Soda Paste (for physical removal):
- Make a paste of baking soda and a small amount of water.
- Apply the paste to the white film.
- Rub gently but firmly with a soft cloth. The baking soda acts as a mild abrasive. It helps scrub away the film.
- Rinse well and dry.
Preventing Future Issues
Good habits prevent future cleaning headaches. These tips help keep your molds pristine.
- Clean Immediately After Use: Do not let residues dry and harden. Fresh spills are always easier to clean.
- Rinse with Cold Water Before Hot: For certain food items, especially dairy or starches, rinse with cold water first. Hot water can “cook” these residues onto the silicone.
- Use Proper Release Agents (if applicable): For baking or crafting, if a recipe calls for greasing or flouring, follow it. This prevents sticking and makes cleaning easier. But silicone usually does not need release agents. Only use them if necessary.
- Avoid Abrasive Cleaners: Steel wool or harsh scouring pads will scratch silicone. This can damage the non-stick surface. Always use soft sponges or cloths.
- Store Properly: Store molds flat or stack them carefully. Do not crumple them. This prevents distortion and cracking over time. Keep them in a clean, dry place. A plastic container or drawer works well. This also protects them from dust and pet hair.
- Limit Exposure to Strong Flavors: If you often bake strong-flavored items, consider having dedicated molds for them. This prevents odor transfer to delicate items.
By incorporating these advanced techniques and preventive measures, you extend the life of your silicone molds. You also ensure they are always ready for your next project.
Maintaining and Storing Your Silicone Molds for Longevity
Proper maintenance and storage are crucial. They ensure your silicone molds last for years. Neglecting these steps can lead to damage. It can also cause performance issues. I always follow these guidelines. My molds have lasted a very long time.
Why Proper Storage Matters
Silicone is durable. But it needs care. Improper storage can lead to several problems:
- Loss of Shape: If molds are crumpled or folded tightly, they can permanently lose their original shape. This makes them less effective for detailed projects.
- Tears and Cracks: Constant bending or pressure in a wrong direction can stress the silicone. Over time, this leads to tears or cracks.
- Dust and Debris Accumulation: Unprotected molds collect dust, pet hair, and other debris. This requires extra cleaning before each use.
- Odor Absorption: Silicone can absorb ambient odors from storage areas. Keep them away from strong smells.
- Mold and Mildew Growth: Storing wet or damp molds encourages mold and mildew. This can be difficult to remove and unhealthy.
Best Practices for Storing Silicone Molds
Follow these steps for optimal storage:
- Ensure Complete Dryness: This is the most important step. Molds must be bone dry before storage. Water promotes mold growth. After washing, allow molds to air dry thoroughly. You can also pat them dry with a clean, lint-free cloth.
- Store Flat: Whenever possible, store silicone molds flat. This preserves their original shape. For large molds like baking sheets, lay them flat in a drawer or on a shelf.
- Stack Carefully: For smaller molds, stack them inside each other. This saves space. Ensure they are not squashed. You can place a piece of parchment paper between them. This prevents them from sticking together.
- Use Storage Containers: Clear plastic containers are excellent. They keep molds clean. They also protect them from dust and odors. Bins with lids are ideal for craft molds or ice cube trays.
- Organize by Type: Group similar molds together. Keep baking molds with baking supplies. Store craft molds with craft materials. This helps you find them easily. It also prevents cross-contamination of odors or residues.
- Avoid Sharp Objects: Do not store molds with sharp utensils or tools. These can puncture or scratch the silicone. A scratch can weaken the mold. It can lead to tears.
- Keep Away from Extreme Temperatures and Direct Sunlight: While silicone is heat resistant, prolonged exposure to direct sunlight or extreme temperatures in storage can degrade it over time. Store them in a cool, dry cabinet or drawer.
General Maintenance Tips
- Inspect Regularly: Before and after each use, quickly inspect your molds. Look for any signs of wear, tears, or residue. Catching small issues early prevents bigger problems.
- Clean Immediately: As emphasized throughout this article, clean molds right after use. This prevents food or craft materials from hardening. It makes cleaning much easier.
- Avoid Overfilling: Do not overfill molds. This prevents spills and makes demolding easier. It also reduces mess.
- Use Proper Temperatures: Always respect the manufacturer’s temperature guidelines. Too high heat can degrade the silicone. Too low can make it brittle.
- No Cutting on Molds: Never use knives or sharp objects to cut items while they are in the silicone mold. This will damage the mold surface.
By implementing these maintenance and storage tips, you invest in the longevity of your silicone molds. They will remain flexible, non-stick, and ready for all your creative projects.
FAQ Section
How do I remove a sticky film from silicone molds?
A sticky film usually means oily residue. Mix baking soda with a little water to form a paste. Apply this paste to the sticky areas. Let it sit for 30 minutes. Then, scrub gently with a soft sponge. Rinse thoroughly with warm, soapy water. Boiling the mold for 10-15 minutes can also help break down oils.
Can I put silicone molds in the dishwasher?
Yes, most silicone molds are dishwasher safe. Always place them on the top rack. Use a mild dishwasher detergent. Avoid high-heat or sanitize cycles, as these can potentially shorten the mold’s lifespan over time. Pre-rinsing helps remove larger food particles before dishwashing.
How do I get rid of white cloudy film on silicone molds?
A white film often comes from hard water or detergent residue. Soak the molds in a solution of equal parts white vinegar and warm water for 30 minutes to an hour. The acid in vinegar dissolves mineral deposits. After soaking, scrub with a soft brush and rinse well.
Is it safe to boil silicone molds?
Yes, boiling silicone molds is safe and effective. It helps to deep clean, sanitize, and remove stubborn odors or oily residues. Submerge the molds in boiling water for 10-15 minutes. Use tongs to remove them, then wash with soap and water, and dry completely.
How do I prevent my silicone molds from tearing?
Prevent tearing by avoiding sharp objects. Never use knives or abrasive scrubbers on the mold surface. Do not stretch or twist the molds excessively. Store them flat or stacked gently to maintain their shape. Proper handling and storage significantly extend their life.
How do I remove strong odors from silicone baking molds?
To remove strong odors, soak your molds in a baking soda solution overnight (generous baking soda in warm water). Alternatively, soak them in a white vinegar solution for a few hours. Placing clean molds in direct sunlight for a few hours can also help neutralize absorbed smells.
Conclusion
Keeping your silicone molds clean is essential. It ensures they perform well. It also helps them last longer. We have covered many methods. From simple hand washing to deep cleaning with vinegar and baking soda. We discussed how to tackle tough issues like sticky residues and persistent odors. You now know how to care for molds used with food, resin, or soap.
- silicone mold cleaning
- mold care
- kitchen cleaning
- bakeware cleaning
- resin mold cleaning

