· Kitchen Care · 20 min read
How To Clean Stainless Steel Cups
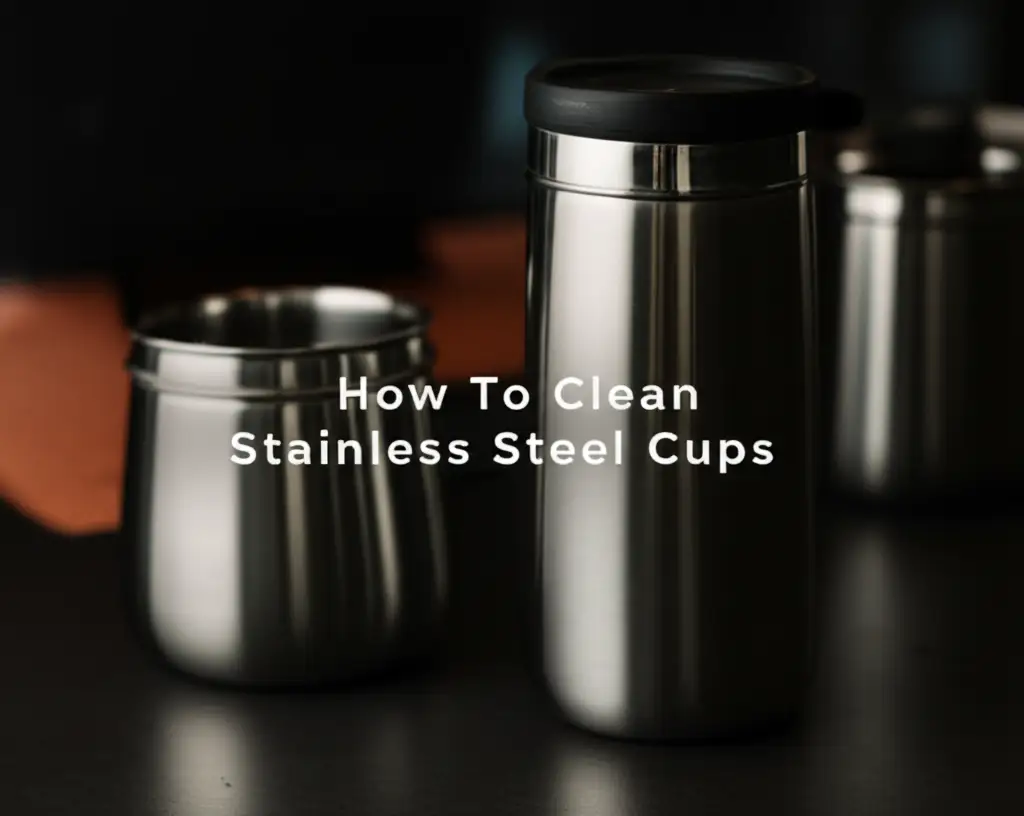
Keep Stainless Steel Cups Clean for Long-Lasting Shine
Stainless steel cups are popular choices. They are durable and keep drinks hot or cold. However, even tough stainless steel cups need regular cleaning. Proper cleaning prevents odors, stains, and germ buildup. It keeps your cups looking new. I find that a clean cup makes my morning coffee taste better.
Many people wonder how to keep their stainless steel cups truly clean. Everyday washing is a start. But coffee residues, tea stains, and hard water spots often remain. These issues need specific cleaning methods. This guide will show you how to clean stainless steel cups effectively. We cover daily care and deep cleaning strategies. You will learn to tackle stubborn stains, remove odors, and restore shine. Get ready to give your stainless steel cups the care they deserve.
Takeaway:
- Wash stainless steel cups daily with warm, soapy water.
- Use baking soda and vinegar for tough stains and odors.
- Address hard water spots with white vinegar or lemon juice.
- Prevent issues by rinsing cups after each use and drying them fully.
- Avoid abrasive scrubbers and harsh chemicals to protect the finish.
Cleaning stainless steel cups involves warm, soapy water for daily washes. For stubborn stains and odors, use a paste of baking soda and water or a vinegar rinse. Regular care keeps cups hygienic and extends their lifespan.
Why Keeping Your Stainless Steel Cups Clean Matters
Maintaining the cleanliness of your stainless steel cups is important. These cups are a part of our daily lives. Many people use them for coffee, tea, or water. Dirty cups can affect your health. They can harbor bacteria.
Stainless steel is resistant to rust and stains, but it is not immune. Over time, beverage residues can build up. This leads to unpleasant odors. It also causes discoloration inside the cup. Imagine sipping your favorite drink from a cup that smells off; it is not a good experience.
Beyond hygiene, cleanliness affects the cup’s lifespan. Accumulated grime can degrade the steel’s finish. This makes the cup less appealing. Regular cleaning preserves the cup’s appearance. It maintains its insulating properties. A well-cared-for cup lasts longer.
Proper cleaning also prevents flavor transfer. If you use the same cup for coffee and then water, the water might taste like coffee. Cleaning removes these lingering flavors. It ensures each drink tastes as it should. Keeping cups clean just makes sense.
It also protects your investment. Stainless steel cups can be expensive. Treating them well means you do not have to replace them often. I always feel better using a cup I know is truly clean. It is a small effort for a big benefit.
Daily Cleaning Routine for Stainless Steel Cups
Starting with a good daily cleaning routine is key. This prevents buildup and keeps your cups fresh. My routine for my own stainless steel cups is simple. It takes only a few minutes each day.
Most stainless steel cups are safe for dishwashers. Using a dishwasher is convenient. Place your cups on the top rack. This protects them from intense heat or strong jets. Hot water and dish soap clean the cup. Be sure to check your cup’s specific care instructions first. Some insulated cups might lose their vacuum seal in a dishwasher.
If handwashing, warm water and dish soap work well. Rinse the cup right after each use. This stops residue from drying. Add a few drops of dish soap. Fill the cup with warm water. Use a soft sponge or a bottle brush to scrub the inside. Pay attention to the bottom and sides. These areas often collect residue.
For lids and straw components, disassemble them. Wash each part separately. Small brushes can help reach tight spots in lids. Many lids have rubber gaskets that need washing. Remove these gaskets and wash them. Food particles can get trapped under them. This causes odors and mold.
After washing, rinse thoroughly with clean water. Make sure no soap residue remains. Soap residue can leave a film. It can also affect drink taste. Then, dry the cup completely. Air drying is fine, but hand drying with a clean cloth prevents water spots. This simple daily effort makes a big difference. It helps your cups stay clean and ready for the next use.
Tackling Common Stains on Stainless Steel Cups
Even with daily washing, stainless steel cups can develop stubborn stains. These often come from coffee, tea, or hard water. These stains can make a cup look dirty, even if it is clean. I have faced these challenges many times with my own cups. There are simple ways to remove them.
Removing Coffee and Tea Stains
Coffee and tea leave dark, brown residues inside cups. These stains cling to the steel surface. My favorite method for these involves baking soda. Baking soda is a gentle abrasive and a powerful deodorizer.
Here is how I do it:
- Make a paste: Mix a few tablespoons of baking soda with a small amount of water. You want a thick paste.
- Apply the paste: Spread the paste inside the stained cup. Focus on the discolored areas.
- Let it sit: Let the paste sit for 15-30 minutes. For very stubborn stains, leave it overnight.
- Scrub and rinse: Use a soft brush or sponge to scrub the paste. The stains should lift away. Rinse the cup thoroughly with warm water.
For extra power, you can add a little white vinegar to the baking soda paste. The fizzing action helps lift stains. If you are dealing with a variety of stubborn spots, this general approach for how to clean stains on stainless steel can provide more ideas. Specifically for tea, knowing how to clean tea stains from stainless steel is very useful.
Eliminating Hard Water Spots
Hard water leaves mineral deposits. These appear as white, cloudy spots or streaks. Vinegar is very effective against these.
Try this method:
- Pour in vinegar: Fill the cup with equal parts white vinegar and water.
- Soak: Let it sit for several hours. For heavy buildup, soak overnight.
- Scrub and rinse: Empty the cup. Use a brush to gently scrub any remaining spots. Rinse well.
Lemon juice can also work as an alternative to vinegar. Its acidity helps dissolve minerals. Squeeze fresh lemon juice into the cup. Add a little water. Let it sit, then scrub and rinse. This method is similar to how you might address hard water stains from stainless steel sink, just on a smaller scale. These methods help restore your cup’s original shine.
Removing Stubborn Odors from Stainless Steel Cups
Sometimes, stainless steel cups develop lingering odors. These smells can come from old coffee, spoiled milk, or other beverages. Even after washing, a stale smell might remain. I know how frustrating this can be. Thankfully, there are simple and effective ways to get rid of these odors.
The Power of Baking Soda
Baking soda is a natural deodorizer. It neutralizes odors instead of just masking them. This makes it perfect for stubborn smells in cups.
Here is how to use it:
- Fill with baking soda: Add 2-3 tablespoons of baking soda to the cup.
- Add hot water: Pour in hot water, almost filling the cup. The baking soda will fizz.
- Let it soak: Let the mixture sit for several hours, or even overnight. This gives the baking soda time to absorb the odors.
- Rinse thoroughly: Discard the mixture. Rinse the cup very well with warm water.
For very strong odors, you can also leave dry baking soda in the cup. Just place a few tablespoons in the cup. Put the lid on if possible. Leave it for a day or two. Then, empty and rinse. This dry method works well for cups not in immediate use.
Vinegar to Neutralize Smells
White vinegar is another powerful odor neutralizer. Its acidic nature breaks down odor-causing molecules. I often use vinegar for particularly stubborn smells.
Follow these steps:
- Pour in vinegar: Fill the cup halfway with white vinegar.
- Add water: Top it off with warm water.
- Soak: Let the solution sit for several hours or overnight.
- Wash and rinse: Pour out the vinegar solution. Wash the cup with dish soap and warm water. Rinse it completely.
The vinegar smell might linger briefly. It disappears as the cup dries. For cleaning various stainless steel items with vinegar, including cups, you can find more tips on how to clean stainless steel appliances with vinegar. This approach works well for cups too.
Lemon and Salt for Freshness
Lemon and salt can offer a fresh scent. Lemon juice is acidic. Salt acts as a gentle abrasive. This combination is great for odors and light stains.
Here is what I do:
- Cut a lemon: Slice a lemon in half.
- Add salt: Sprinkle a generous amount of salt into the cup.
- Scrub: Use the lemon half as a scrubber. Squeeze it gently as you scrub the inside of the cup. The salt helps scrub away residue. The lemon juice neutralizes odors.
- Rinse: Rinse the cup thoroughly with warm water.
These methods help eliminate unpleasant smells. They leave your stainless steel cups smelling clean and fresh.
Deep Cleaning Your Stainless Steel Cups
Sometimes, regular cleaning is not enough. Stainless steel cups can collect stubborn grease, burnt residues, or even rust spots. These issues require a more intensive deep cleaning approach. I have dealt with all these problems in my own kitchen. It is satisfying to restore a cup that seemed beyond help.
Addressing Grease and Oily Residues
Grease can build up, especially if you use your cup for smoothies or oily protein shakes. This sticky film is hard to remove with just soap and water.
Here is an effective method:
- Hot water and dish soap soak: Fill the cup with very hot water. Add a generous amount of dish soap. Let it sit for at least an hour. The hot water helps loosen the grease. The soap breaks it down.
- Baking soda paste scrub: After soaking, drain the water. Make a paste of baking soda and a small amount of dish soap or water. Apply this paste to the greasy areas.
- Scrub thoroughly: Use a sturdy bottle brush or a non-abrasive sponge. Scrub the inside of the cup with the paste. The baking soda provides a gentle abrasive action. This helps lift the grease. Rinse completely with hot water.
For heavier grease, especially if it feels like burnt oil, you might find tips on how to clean grease off stainless steel useful. The principles often apply to cups too. Similarly, if you encounter residues like burnt oil from a stainless steel pan, these methods are also very effective for your cups.
Removing Rust Spots
Rust can appear on stainless steel. This happens when the protective layer is compromised. It can also happen when steel is exposed to harsh chemicals or abrasive scrubbing. Small orange or reddish spots indicate rust. Do not let rust spread.
Try these steps for rust removal:
- Lemon juice and salt: Mix lemon juice with a pinch of salt to form a paste. Apply this directly to the rust spots.
- Let it sit: Let the paste sit for a few minutes. The acid in the lemon juice works to dissolve the rust.
- Gentle scrub: Use a soft cloth or sponge to gently scrub the rust spots. Do not use steel wool or harsh scrubbers, as these can scratch the surface.
- Rinse and dry: Rinse the cup thoroughly. Dry it immediately to prevent new rust.
Another option for rust is white vinegar. Soak a paper towel in white vinegar. Place it directly over the rust spot. Let it sit for a few hours. Then, scrub gently and rinse. For more detailed rust removal techniques, refer to guides on how to clean rust off stainless steel.
Using Baking Soda and Vinegar for a Deep Clean
Combining baking soda and vinegar offers a powerful deep clean. This method helps with stains, odors, and overall grime.
Here is how I use them together:
- Baking soda layer: Sprinkle a generous layer of baking soda inside the cup.
- Vinegar addition: Slowly pour white vinegar into the cup. It will fizz vigorously. This reaction loosens grime.
- Soak and scrub: Let the fizzing action continue for a few minutes. Then, let it soak for at least 30 minutes. Afterward, scrub the inside with a bottle brush.
- Rinse well: Rinse the cup completely with warm water. Ensure all baking soda and vinegar residue is gone.
This deep cleaning strategy helps restore your stainless steel cups. It removes tough problems that daily washing misses. This method is also common for other stainless steel items. Many people use similar approaches when they clean stainless steel pans with baking soda.
Maintaining the Luster of Stainless Steel Cups
Once your stainless steel cups are clean, you want to keep them looking great. Maintaining their shine requires a few simple practices. It is not just about cleaning them when they are dirty. It is about preventing problems. I learned these tips over time, and they really help.
Preventing Stains and Odors
Prevention is always easier than cure. A few habits can drastically reduce issues.
- Rinse immediately: After using your cup, rinse it with water right away. This prevents beverages like coffee or tea from drying and forming stubborn stains.
- Air dry completely: Always ensure your cups are completely dry before storing them. Trapped moisture can lead to odors or even rust over time. Invert the cup on a drying rack or use a clean cloth.
- Avoid leaving liquids: Do not let liquids sit in your cup for extended periods. This is especially true for milk-based drinks or juices. They can spoil and leave behind strong odors and sticky residues.
Polishing and Buffing for Shine
Stainless steel can lose its shine over time. Water spots, fingerprints, and smudges can make it look dull. Polishing helps restore its original luster.
Here are some ways to polish your cups:
- Olive oil: Apply a very small amount of olive oil to a clean, soft microfiber cloth. Wipe the exterior of the cup in the direction of the grain. Then, use a dry part of the cloth to buff it. This creates a protective layer and a beautiful shine.
- Stainless steel cleaner: You can buy commercial stainless steel cleaners. Follow the product instructions carefully. Most require spraying on and then wiping with a soft cloth. These cleaners are good for removing smudges and adding shine.
- Vinegar polish: For a natural option, dampen a microfiber cloth with white vinegar. Wipe down the cup’s exterior. Follow with a dry cloth to buff it. Vinegar removes streaks and leaves a clean finish. This method is effective for maintaining many fingerprint-resistant stainless steel surfaces as well, reducing the need for constant wiping.
What to Avoid
Certain actions and products can damage your stainless steel cups.
- Abrasive scrubbers: Do not use steel wool, abrasive sponges, or harsh scouring pads. These can scratch the stainless steel surface. Scratches not only look bad but can also make the cup more prone to staining and rust.
- Harsh chemicals: Avoid cleaners containing bleach, ammonia, or strong acids. These can discolor or damage the stainless steel. Stick to mild soaps, baking soda, and vinegar.
- Metal utensils: Do not use metal spoons or stirrers inside your cup. They can scratch the inner surface. Opt for plastic, silicone, or wood utensils instead.
By following these maintenance tips, your stainless steel cups will stay clean, shiny, and ready for use for many years.
Advanced Cleaning for Special Cases
While daily and deep cleaning methods cover most needs, some situations require a more specific approach. These might include unusual stains or concerns about sanitization. My experience taught me that being prepared for these special cases keeps my cups in top condition.
Dealing with Discoloration and Heat Tints
Sometimes, stainless steel cups develop rainbow-like discoloration or yellowish tints. This is often due to heat exposure or mineral deposits. These are not permanent and can be removed.
Here’s how I address them:
- Vinegar solution: Mix white vinegar with water in a 1:1 ratio. Fill the cup with this solution.
- Gentle heating (caution!): If safe for your cup, you can gently warm the solution in the cup on a stovetop (only for single-wall, non-insulated cups without plastic parts). Be extremely careful. Do not boil. The warmth helps activate the vinegar.
- Soak and scrub: Let the solution sit for 30 minutes to an hour. Then, use a soft cloth or sponge to gently scrub the discolored areas. The vinegar helps break down the mineral film causing the tint.
- Rinse well: Rinse the cup thoroughly with warm water and dry.
Sanitizing Your Stainless Steel Cups
Sanitizing goes beyond just cleaning. It kills germs and bacteria. This is important, especially if someone has been sick or if you want extra peace of mind.
Methods for sanitization:
- Boiling water (caution!): For single-wall stainless steel cups, boiling water is a simple sanitizer. Fill the cup with boiling water. Let it sit for a few minutes. Then, carefully empty and dry. Never do this with insulated cups, as it can damage the vacuum seal.
- Food-grade hydrogen peroxide: Mix equal parts food-grade hydrogen peroxide (3%) and water. Fill the cup with this solution. Let it sit for 10-15 minutes. Hydrogen peroxide is a powerful germ killer. It breaks down into water and oxygen, leaving no harmful residue. Rinse the cup thoroughly afterward.
- Dishwasher’s sanitize cycle: If your dishwasher has a sanitize cycle, use it. This cycle uses very hot water to kill most bacteria. Ensure your cup is dishwasher-safe.
Removing Stains from the Exterior Surface
While most stains occur inside, the exterior of stainless steel cups can also get marked. Fingerprints are common. Sometimes, food spills or grease can mark the outside.
Tips for exterior cleaning:
- Microfiber cloth and water: For simple smudges or fingerprints, a damp microfiber cloth is often enough. Wipe in the direction of the metal grain. Buff dry with a clean, dry cloth.
- Dish soap solution: For light grease or food spills, mix a drop of dish soap with warm water. Dampen a cloth with this solution. Wipe the exterior. Rinse the cloth and wipe again with plain water. Dry immediately.
- White vinegar spray: For stubborn streaks or greasy spots on the exterior, lightly spray white vinegar onto a microfiber cloth. Wipe the surface. Then, buff dry with a clean, dry cloth. This is a common method for cleaning stainless steel appliances with vinegar, and it works perfectly for cup exteriors too.
These advanced methods help keep your stainless steel cups in pristine condition, inside and out. They ensure hygiene and appearance.
When to Seek Professional Help or Replace Your Cups
Even with the best care, there comes a time when your stainless steel cups might need more than home cleaning. Sometimes, it is better to seek professional help. Other times, replacement is the best option. I know it can be hard to let go of a favorite cup. Understanding when to do so saves you effort.
Signs It’s Time for Professional Cleaning or Repair
Most cup issues are fixable at home. But some damage is beyond DIY.
- Deep scratches or dents: While small scratches are cosmetic, deep scratches can compromise the stainless steel’s protective layer. This makes the cup more prone to rust. Large dents can affect insulation properties of vacuum-sealed cups. Professional repair might be possible for high-value items.
- Persistent rust that spreads: If rust spots keep appearing or spread widely, the cup’s integrity might be compromised. This could be due to a defect in the steel. A professional might offer re-polishing or special treatments.
- Damaged vacuum seal (for insulated cups): Insulated cups keep drinks hot or cold due to a vacuum seal between two walls of steel. If your insulated cup suddenly loses its ability to keep drinks at temperature, the vacuum seal is broken. This cannot be fixed at home. Some manufacturers offer repair services.
Professional services are usually only cost-effective for very expensive, specialized stainless steel cups. For most common cups, replacement is more practical than professional repair.
Signs It’s Time to Replace Your Stainless Steel Cup
Knowing when to replace a cup is important for hygiene and functionality.
- Mold or mildew buildup: If mold or mildew growth is persistent, especially in hard-to-reach areas like lid crevices or inside the insulation layer, it is a health risk. Sometimes, deep cleaning cannot remove it all. If you cannot effectively clean these areas, it is time for a new cup.
- Lingering odors: Even after multiple deep cleaning attempts with baking soda, vinegar, and lemon, some cups retain a foul smell. This might mean the material has absorbed odors deeply. This can also indicate bacteria trapped in unseen micro-fissures.
- Compromised insulation: For insulated cups, if your drink no longer stays hot or cold for its advertised duration, the vacuum seal is gone. The cup will function like a regular single-wall cup. If insulation is important to you, replacement is needed.
- Extensive pitting or corrosion: Pitting is small holes or depressions on the steel surface. This indicates corrosion and can weaken the material. It also makes the cup harder to clean thoroughly.
- Cracked or broken components: If the lid is cracked, the handle is broken, or seals are torn, the cup might not be usable. Replacement parts can sometimes extend life. But if not available, a new cup is needed.
I always consider the cost of my time and cleaning products versus the cost of a new cup. For basic, affordable cups, replacing them is often the most sensible choice when issues become chronic. It ensures you always have a hygienic and functional cup.
FAQs About Cleaning Stainless Steel Cups
Can I put my stainless steel cup in the dishwasher?
Most stainless steel cups are dishwasher safe. Place them on the top rack to avoid extreme heat. However, always check the manufacturer’s instructions. Some insulated cups might lose their vacuum seal or finish when exposed to harsh dishwasher cycles. Hand washing is often safer for these.
How do I remove black spots from my stainless steel cup?
Black spots often indicate mold or deeply embedded stains. Make a paste with baking soda and a little water. Apply it to the spots and let it sit for a few hours or overnight. Scrub with a soft brush, then rinse well. For persistent spots, a vinegar soak may help.
What causes my stainless steel cup to smell bad?
Lingering odors usually come from beverage residues like coffee, tea, or milk. These can trap bacteria. To remove odors, use baking soda and hot water. Let it soak overnight. White vinegar soaks also neutralize smells effectively. Always rinse and dry cups completely after washing.
Is it safe to use bleach on stainless steel cups?
No, avoid using bleach on stainless steel cups. Bleach can cause discoloration, pitting, or rust on stainless steel. It can damage the protective layer of the steel. Stick to milder, safer cleaning agents like dish soap, baking soda, white vinegar, or lemon juice.
How often should I deep clean my stainless steel cup?
Deep clean your stainless steel cup once a month. This is a good general guideline. If you use your cup daily for strong beverages like coffee or protein shakes, or if you notice stains or odors, deep clean more often. Regular daily washing reduces the need for frequent deep cleaning.
Can I use steel wool to clean my stainless steel cup?
Do not use steel wool or abrasive scrubbers on your stainless steel cup. Steel wool can scratch the surface of the stainless steel. These scratches can make the cup look dull. They also create tiny grooves where bacteria can hide. Use soft sponges or bottle brushes instead.
Keep Your Stainless Steel Cups Sparkling Clean
Keeping your stainless steel cups clean is simple. It requires consistent effort. We have explored many ways to clean stainless steel cups. From daily washes to deep cleaning for stubborn issues, you now have the tools. Remember, proper care prevents stains and odors. It ensures your cups last a long time.
My own experience shows that a little prevention goes a long way. Rinsing cups immediately after use saves much scrubbing later. Using natural cleaners like baking soda and vinegar is effective. They are also safe for your cups and your health. These methods help remove coffee stains, tea residues, and hard water spots. They also eliminate lingering smells.
Do not forget the importance of drying your cups completely. This simple step stops water spots and rust. Regular polishing also helps maintain that beautiful shine. By following these tips, your stainless steel cups will always be ready for your next drink. They will be hygienic, odor-free, and look like new. Enjoy your clean cups!
- stainless steel care
- cup cleaning
- stain removal
- eco-friendly cleaning