· Electronics Cleaning · 13 min read
How To Clean Sticky Buttons On Xbox Controller

How To Clean Sticky Buttons On Your Xbox Controller Effectively
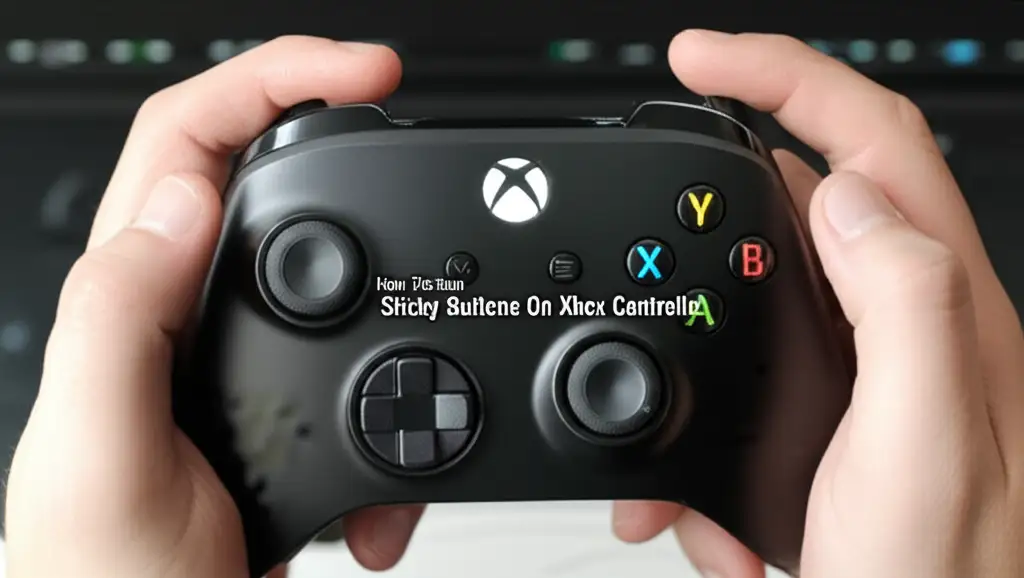
Have you ever settled in for a gaming session, only to find your Xbox controller buttons sticking? It is a frustrating problem. That sticky feeling can ruin your game. It also makes your controller feel old. We all want our gear to work perfectly. Keeping your controller clean is important. This guide will show you how to clean sticky buttons on your Xbox controller.
We will start by looking at what makes buttons sticky. Then, we will gather the right tools. I will walk you through simple surface cleaning. After that, we cover deep cleaning methods. These include carefully opening your controller. We also discuss how to prevent future stickiness. By the end, your Xbox controller will feel new again. You can then get back to smooth, uninterrupted gaming.
Takeaway:
- Identify the cause of sticky buttons to choose the right cleaning method.
- Gather necessary tools like isopropyl alcohol and small screwdrivers.
- Perform surface cleaning for mild stickiness using cotton swabs.
- Consider a deep clean involving disassembly for persistent issues.
- Practice regular preventative care to avoid future stickiness.
To clean sticky buttons on an Xbox controller, gently wipe the button gaps with isopropyl alcohol and a cotton swab for mild stickiness. For tougher grime, carefully disassemble the controller, clean internal components with alcohol, and reassemble it. This removes built-up oils and debris.
Understanding Why Xbox Controller Buttons Get Sticky
Xbox controller buttons often get sticky. This problem happens for several simple reasons. Most of the time, the cause is very common. We use our controllers for many hours. During this time, oil from our skin transfers to the buttons. This body oil mixes with dust and other particles. It creates a sticky film. This film then builds up around the buttons.
Another common reason is spills. Drinks like soda or juice can easily spill onto a controller. Sugary liquids dry into a hard, sticky residue. This residue gums up the button mechanisms. Even small drops cause big problems. Food crumbs are also a culprit. If you eat snacks while playing, tiny bits of food can fall into the button cracks. They combine with moisture and grime. This leads to stickiness.
The environment where you play also matters. Dust and dirt are everywhere. These particles settle on your controller. They get pushed into the small spaces around the buttons. Over time, this accumulation causes friction. It makes buttons lose their smooth action. Regularly cleaning your hands before playing helps reduce this build-up. Proper storage, like keeping your controller in a drawer, also minimizes dust exposure. Understanding these causes helps you clean effectively. It also helps you prevent future stickiness.
Essential Tools for a Successful Xbox Controller Cleaning
Before you start cleaning your Xbox controller, gather your tools. Having everything ready makes the process smoother. The right tools ensure a safe and effective clean. You will need a few key items. First, get a bottle of isopropyl alcohol. Look for 90% concentration or higher. This type of alcohol evaporates quickly. It also leaves no residue. It is safe for electronics.
Next, you will need cotton swabs. These are great for precise cleaning around the buttons. You can also use cotton balls for larger surfaces. Microfiber cloths are essential. They are soft and lint-free. They will not scratch your controller’s surface. A can of compressed air is very useful. It helps blow away loose dust and debris. This is good for hard-to-reach areas.
For a deeper clean, you might need small screwdrivers. Xbox controllers often use Torx T8 or T9 security bits. Some might use Phillips head screws. Check your specific controller model first. A plastic prying tool can also be helpful. It lets you open the controller without damaging the plastic. Finally, a small brush, like a soft toothbrush, can help scrub away stubborn grime. Make sure the brush is clean and dry. These tools help you remove dirt and sticky residue. They prepare your controller for optimal performance.
Simple External Cleaning: Tackling Mild Stickiness
For minor stickiness, external cleaning is often enough. This method is quick and does not require opening your controller. It is great for regular maintenance. First, turn off your Xbox and disconnect the controller. Safety is always important when cleaning electronics. You do not want any power running through the device.
Begin by using compressed air. Hold the can upright. Use short bursts to blow air around each sticky button. This dislodges any loose dust or crumbs. Tilt the controller as you spray. This helps debris fall out. Next, grab your isopropyl alcohol and cotton swabs. Dampen a cotton swab with the alcohol. Do not soak it. Excess liquid can seep into the controller.
Gently wipe around the edges of each sticky button. Press the button down. Then, clean the exposed sides of the button. Rotate the swab often to use a clean section. Pay extra attention to the spaces where the button meets the controller shell. This is where most grime builds up. For general cleaning of the controller surface, you can lightly dampen a microfiber cloth with alcohol. Wipe down the entire controller. Allow all parts to air dry completely. This method removes surface stickiness. It improves button responsiveness without full disassembly. Sometimes, similar methods involving household cleaners can be found for tougher jobs, like how to clean with vinegar and baking soda for general grime, but for electronics, alcohol is much safer.
Deep Cleaning Your Xbox Controller: The Disassembly Method
If surface cleaning does not work, a deep clean is necessary. This involves carefully disassembling your Xbox controller. It lets you access the internal components. Before you start, remember that opening your controller might void its warranty. Proceed with caution. First, remove the battery cover and batteries. Some controllers also have screws hidden under the battery compartment label.
Most Xbox controllers have several screws. These are usually located under the grip handles and sometimes under a sticker. Use your small Torx or Phillips screwdriver to remove these. Place the screws in a safe place, like a small cup. They are tiny and easy to lose. Once all screws are out, use a plastic prying tool or a guitar pick. Gently pry open the controller shell. Start from the seam where the two halves meet. Work slowly around the edges. Do not force it. Wires connect the two halves, so open it carefully.
Once open, you will see the circuit board and button membranes. Take photos as you go. This helps with reassembly later. Identify the sticky buttons. Carefully lift the button caps and the rubber membrane underneath. These are usually easy to remove. Use isopropyl alcohol and cotton swabs to clean the button caps. Clean the rubber membrane, especially the contact pads. Also, clean the areas on the circuit board that these pads touch. Use a clean toothbrush for stubborn grime. Ensure no liquid drips into other electronic components. You can find general cleaning guides for tough spots, for example, techniques used to clean baked-on grease from pans, which involve specific scrubbing, but remember to be gentle with electronics. This deep cleaning removes all internal gunk.
Cleaning Internal Components
With the controller open, you can clean specific parts. The button contacts are crucial. These are small carbon pads on the rubber membrane. They connect with traces on the circuit board. Over time, grime can build up on these pads. This prevents a good connection.
Take your cotton swab. Dip it in isopropyl alcohol. Gently wipe the carbon pads on the underside of the rubber membrane. Be thorough but gentle. Do not scrub too hard. Then, wipe the corresponding contact points on the circuit board. These look like small metallic circles or lines. This step ensures that the buttons make proper contact when pressed.
Also, clean the inside of the button wells. This is the area where the plastic button sits. Residue can accumulate here. Use a cotton swab to clean inside these wells. This allows the button to move freely. For very stubborn grime, you can use a slightly stiffer brush, like a very soft toothbrush. Make sure the brush is dry. Allow all components to air dry completely. This usually takes just a few minutes due to the alcohol’s quick evaporation. This detailed cleaning makes a big difference. Your buttons will feel crisp again.
Reassembling Your Xbox Controller and Testing
Once all components are clean and dry, it is time to reassemble your Xbox controller. This part requires patience. Refer to any photos you took during disassembly. This helps you remember where everything goes. First, place the cleaned rubber membranes back into their correct positions. They usually have small pegs that align with holes in the controller shell. Ensure they sit flat.
Next, place the plastic button caps back into their corresponding spots. Make sure each button fits snugly and moves freely. Test them by pressing them a few times. They should not stick. Then, carefully align the circuit board. It usually has specific guides or screw posts. Make sure all connectors are properly seated. Do not force anything.
Once the internal components are in place, bring the two halves of the controller shell together. Align the edges perfectly. You might hear a small click as they snap into place. Insert the screws you removed earlier. Screw them in gently. Do not overtighten them. Overtightening can strip the plastic or crack the shell. Once screwed, insert the batteries. Replace the battery cover. Finally, connect your controller to your Xbox. Test all buttons, joysticks, and triggers. Make sure everything responds correctly. Your Xbox controller should now feel like new. If issues persist, double-check your assembly.
Preventative Care: Keeping Your Xbox Controller Clean
Keeping your Xbox controller clean prevents future stickiness. Regular maintenance is simple. It saves you time and effort in the long run. First, always wash your hands before playing. This removes oils, dirt, and food particles. These are major causes of grime buildup. Clean hands mean a cleaner controller.
Avoid eating or drinking while using your controller. This is a common sense tip. Spills are a leading cause of sticky buttons. Even small crumbs can work their way into the controller. If you must have snacks, use a separate, clean hand for eating. Keep drinks far away from your gaming area. This greatly reduces the risk of accidental spills.
Store your controller properly when not in use. Do not leave it lying on the floor. It can collect dust and debris there. Place it in a clean drawer or on a shelf. You can even use a controller stand or case. This protects it from dust and accidental damage. You should also perform light external cleaning regularly. A quick wipe-down with a microfiber cloth helps. Do this once a week or every few days, depending on how much you play. This routine maintenance helps. It stops dirt from becoming a problem. For general cleaning principles that emphasize regular care, one might look at how cleaning solutions help for everyday tasks, much like using baking soda and vinegar for dishwasher cleaning. Though different tools, the concept of consistent product application for maintenance is similar.
Finally, consider a skin or grip for your controller. These accessories can offer some protection. They cover the main body of the controller. This makes cleaning the controller easier. You simply clean the skin. The controller itself stays cleaner underneath. These steps extend your controller’s life. They also ensure a smooth gaming experience every time.
Beyond Cleaning: When to Replace or Seek Professional Help
Sometimes, cleaning is not enough. There are times when a controller is beyond simple repair. Knowing when to stop cleaning and consider other options is important. If your buttons remain sticky after thorough cleaning, the internal components might be damaged. This damage could be due to a significant spill that corroded circuits. Or it could be from wear and tear over many years.
Physical damage is another reason. If a button feels loose or broken, cleaning will not fix it. Repeated drops or rough handling can damage the button mechanism itself. In these cases, the plastic parts inside might be cracked. Or the rubber membrane might be torn. These parts cannot be repaired with cleaning products. For instance, while methods exist to clean tough stains in household items, such as using baking soda and vinegar for washing machine cleaning, these are for surface grime, not structural damage.
If your controller is still under warranty, contact Microsoft support. They might offer a repair or replacement. Attempting to open the controller usually voids the warranty. If the warranty has expired, you have two choices. You can buy a new controller. This is often the easiest solution for heavily damaged or very old controllers. New controllers offer the best performance. Alternatively, you could seek professional repair. Some electronics repair shops might fix gaming controllers. Get a quote first. Compare it to the cost of a new controller. This helps you make the best decision for your gaming needs.
FAQ Section
Q1: Can I use water to clean my Xbox controller buttons?
Using plain water is not recommended for cleaning electronics. Water can cause corrosion and damage to internal circuits. Always use isopropyl alcohol. It evaporates quickly. This leaves no residue. Alcohol is much safer for delicate electronic components. It prevents water damage.
Q2: How often should I clean my Xbox controller?
You should perform a light external clean weekly if you play often. This involves wiping it down. A deeper clean is needed less often. Do a deep clean every few months. Or do it when buttons start feeling sticky. Regular quick cleaning prevents major buildup.
Q3: What is the best type of alcohol to use for cleaning?
Use isopropyl alcohol with a concentration of 90% or higher. This high concentration ensures rapid evaporation. It leaves minimal moisture behind. Lower concentrations have more water. This increases the risk of damage to electronic parts. High-purity alcohol is ideal.
Q4: Will opening my Xbox controller void the warranty?
Yes, opening your Xbox controller usually voids its warranty. Manufacturers often place “void if removed” stickers over screws. Breaking these seals or opening the casing invalidates your warranty. Consider this before attempting a deep clean. Check your warranty terms first.
Q5: Can I clean my controller without opening it at all?
Yes, you can clean your controller without opening it. For mild stickiness, use compressed air and isopropyl alcohol with cotton swabs. Focus on the button edges and gaps. This method works well for surface grime. It may not fix deeply embedded stickiness.
Q6: What if my buttons are still sticky after cleaning?
If buttons remain sticky after thorough cleaning, the issue might be internal. The rubber membrane could be worn or torn. Or the plastic mechanisms might be damaged. In such cases, consider replacing the controller. Or you might seek professional repair.
Conclusion
A sticky Xbox controller button can truly disrupt your gaming flow. It turns a fun activity into a frustrating chore. Luckily, cleaning sticky buttons on an Xbox controller is a task you can often handle yourself. We have covered everything you need to know. From understanding why stickiness occurs to performing both surface and deep cleaning methods, you now have the tools. You also know how to keep your controller in top shape.
Remember, prevention is key. Simple habits like washing your hands before playing make a huge difference. Avoiding food and drink around your controller helps even more. Regular, light cleaning keeps grime at bay. If you do encounter stubborn stickiness, do not be afraid to perform a careful deep clean. With the right tools and a bit of patience, your Xbox controller will once again provide smooth, responsive gameplay. Get back to enjoying your games without any sticky interruptions. Your controller, and your gaming experience, will thank you.
- Xbox controller cleaning
- sticky buttons fix
- gaming controller maintenance
- DIY electronics cleaning
- controller care


