· Home Cleaning · 18 min read
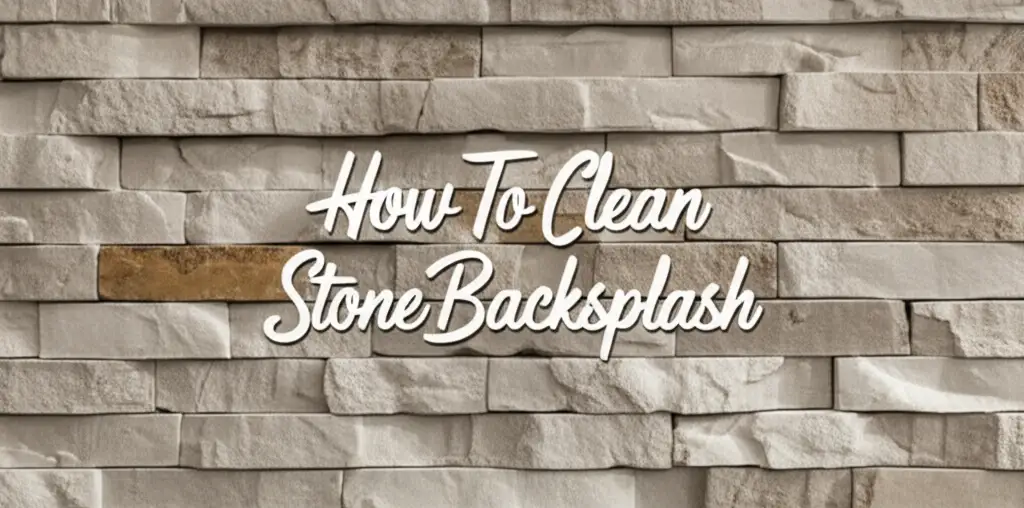
How To Clean Stone Backsplash
Mastering Stone Backsplash Cleaning for Lasting Beauty
Your kitchen’s stone backsplash adds beauty and character. It protects your walls from splashes and spills. However, keeping its pristine look requires specific knowledge. Knowing how to clean stone backsplash properly is key to its longevity. Different stone types need different care. Using the right methods prevents damage. This guide covers daily care, deep cleaning, stain removal, and crucial protection steps.
Takeaway:
- Use pH-neutral cleaners for all stone types.
- Wipe spills immediately to prevent stains.
- Seal natural stone regularly to protect it.
- Avoid acidic or abrasive cleaners on stone surfaces.
- Deep clean grout carefully with appropriate tools.
To clean your stone backsplash, use a soft cloth and a pH-neutral stone cleaner or mild dish soap diluted in warm water. Wipe down the surface daily for light grime. For deeper cleaning, gently scrub with a soft brush, focusing on grout lines, then rinse and dry thoroughly to prevent water spots and buildup.
Understanding Your Stone Backsplash Material
Every stone backsplash has its own needs. Knowing your stone type helps you clean it correctly. Natural stones like granite, marble, travertine, and slate are porous. They absorb liquids easily. This makes them prone to staining if not sealed. Engineered stones, like quartz, are less porous. They are more resistant to stains.
Types of Stone Backsplashes:
- Granite: This is a hard, durable stone. It resists scratches. Granite still needs sealing to prevent stains.
- Marble: Marble is softer and more porous. It reacts badly to acids. Lemon juice or vinegar can etch marble. For more details on cleaning marble, you can visit our guide on how to clean marble backsplash.
- Travertine: This is a type of limestone. It has small pits and holes. These can trap dirt if not filled and sealed. Travertine is also sensitive to acids.
- Slate: Slate is a dense, fine-grained stone. It is generally less porous than marble or travertine. However, it can still absorb oils.
- Quartz (Engineered Stone): Quartz backsplashes are made from quartz particles mixed with resin. They are non-porous and very durable. They do not require sealing.
Why Porosity Matters:
Porous stones absorb liquids. This absorption leads to stains. Water, oil, and food particles can sink into the stone. Sealing creates a barrier. It prevents liquids from soaking in. You can test your stone for a current seal. Place a few drops of water on the surface. If the water beads up, the stone is sealed. If it soaks in quickly, it needs sealing. Understand your stone’s porosity. This is the first step to proper cleaning.
Essential Tools and Gentle Cleaning Solutions
Gathering the right tools makes cleaning your stone backsplash easier. Using the wrong products can harm your stone. Always choose gentle, pH-neutral options. Harsh chemicals damage natural stone surfaces. They can strip sealants or cause etching.
Must-Have Tools:
- Soft cloths or microfiber towels: These are excellent for wiping surfaces. They do not scratch stone. They absorb liquids well.
- Soft-bristle brush: A soft brush helps clean grout lines. It works for textured stone surfaces. Make sure the bristles are not abrasive.
- Spray bottle: This helps apply cleaning solutions evenly. You can mix your own cleaners in it.
- Small bucket: Use this for mixing cleaning solutions. It is also good for rinsing cloths.
- Clean water: You will need plenty of clean water for rinsing. Rinsing removes cleaner residue.
Recommended Cleaning Solutions:
- pH-neutral stone cleaner: These cleaners are made for natural stone. They do not harm the stone’s finish or sealant. Look for products labeled “pH-neutral” or “safe for natural stone.”
- Mild dish soap: A few drops of mild dish soap work for everyday cleaning. Mix it with warm water. This solution is gentle enough for most stone types. Use a non-acidic soap.
- Rubbing alcohol (for grease): Diluted rubbing alcohol can cut through tough grease. Test it in a hidden spot first. Use it sparingly.
- Hydrogen peroxide (for mold/mildew): A diluted solution can treat mold. Mix it with water. Apply it carefully. For more specific advice on tackling mold, refer to our guide on how to clean mold off natural stone.
What to Avoid:
- Acidic cleaners: Vinegar, lemon juice, ammonia, and many common bathroom cleaners are acidic. They will etch, dull, and damage natural stone.
- Abrasive scrubbers: Steel wool, scouring pads, or stiff brushes will scratch stone surfaces. They can remove sealants.
- Harsh chemicals: Bleach or oven cleaners are too strong. They can cause permanent damage to stone.
- Wax-based cleaners: These can leave a sticky residue. The residue traps dirt.
Always test any new cleaning solution. Apply it to a small, hidden area first. Wait a few minutes. Check for discoloration or damage before using it on the whole backsplash.
Daily and Weekly Care for Stone Backsplashes
Regular cleaning prevents grime buildup. Daily and weekly care keeps your stone backsplash looking good. It also reduces the need for deep cleaning. This simple routine saves time later. It protects your investment.
Daily Maintenance:
- Wipe Spills Immediately: This is the most important step. Spills, especially acidic ones like tomato sauce or citrus, can stain or etch stone quickly. Use a soft, damp cloth to blot up spills. Do not rub, as this can spread the stain.
- Gentle Wipe-Down: After cooking, wipe down the backsplash. Use a damp microfiber cloth. This removes light food splatter and grease. You do not need soap every day.
- Dry the Surface: Always dry the backsplash after wiping. Use a clean, dry cloth. This prevents water spots and mineral buildup. Hard water can leave unsightly marks.
Weekly Routine:
- Prepare a Gentle Solution: Mix a few drops of pH-neutral dish soap with warm water in a spray bottle. Alternatively, use a specialized pH-neutral stone cleaner.
- Spray and Wipe: Lightly mist the backsplash with your chosen solution. Do not saturate the stone. Wipe the entire surface with a soft cloth. Work in small sections.
- Focus on High-Splash Areas: Pay extra attention to areas behind the stove or sink. These spots collect more grease and food particles.
- Clean Grout Lines Lightly: Use a soft-bristle brush for grout lines. Dip the brush in your cleaning solution. Gently scrub the grout. This prevents discoloration.
- Rinse Thoroughly: Dampen a clean cloth with plain water. Wipe the backsplash again to remove any soap residue. Residue can attract dirt over time.
- Dry Completely: Finish by drying the backsplash completely. Use a fresh, dry microfiber towel. This ensures a streak-free shine.
This consistent routine prevents major cleaning tasks. It also helps your stone backsplash retain its natural beauty.
Deep Cleaning Your Stone Backsplash and Grout
Sometimes your stone backsplash needs more than just a quick wipe. Deep cleaning removes stubborn grime and restores its shine. This process is important for maintaining both the stone and the grout. Grout is porous and traps dirt easily. Cleaning it correctly prevents discoloration and mold growth. For comprehensive stone tile and grout care, see our guide on how to clean natural stone tile and grout.
When to Deep Clean:
- Perform a deep clean every few months.
- Do it when you notice a greasy film.
- Clean if grout lines look discolored.
Deep Cleaning Steps:
- Clear the Area: Remove all items from the backsplash area. This includes decor and small appliances.
- Prepare Your Solution: Use a dedicated pH-neutral stone cleaner. Read the product instructions carefully. Mix it according to the label. If you do not have a stone cleaner, use a slightly stronger solution of mild dish soap and warm water than your weekly mix.
- Apply Cleaner: Spray the cleaning solution onto the backsplash. Let it sit for the recommended time. This allows the cleaner to break down grime. Do not let the solution dry on the stone.
- Gentle Scrubbing:
- For Stone: Use a soft cloth or sponge. Gently wipe the stone surface. For textured stones, use a soft-bristle brush.
- For Grout: Use a soft-bristle grout brush or an old toothbrush. Dip the brush in the cleaning solution. Scrub along the grout lines. Apply light pressure. Avoid scrubbing the stone directly with the grout brush if it is too stiff.
- Focus on Stubborn Spots: For extra tough spots, apply a small amount of cleaner directly. Let it sit for a few minutes. Then scrub gently.
- Rinse Thoroughly: Rinse your soft cloth in clean water. Wipe down the entire backsplash. Rinse the cloth often. Make sure all cleaner residue is gone. Any leftover soap can attract new dirt.
- Dry Completely: Use a clean, dry microfiber towel. Buff the stone until it is completely dry. This prevents water spots and streaks.
Special Notes for Grout:
- Grout often holds more dirt than stone.
- White grout shows dirt easily.
- If mold or mildew is present, use a diluted hydrogen peroxide solution (1 part hydrogen peroxide to 2 parts water) on the grout lines. Apply, let sit for 10-15 minutes, then scrub and rinse. For persistent mold issues, refer back to our guide on how to clean mold off natural stone.
- Consider sealing your grout after deep cleaning. This helps protect it from future stains.
Deep cleaning ensures your stone backsplash remains beautiful. It also extends its lifespan.
Tackling Common Backsplash Stains
Stains happen, especially in a kitchen. Different stains need different approaches. Knowing how to treat common backsplash stains saves your stone. Act quickly when a stain occurs. This increases your chance of full removal.
General Stain Removal Tips:
- Act Fast: The longer a stain sits, the harder it is to remove.
- Blot, Don’t Rub: Always blot liquid stains. Rubbing spreads the stain.
- Test First: Always test any stain removal method in an inconspicuous area.
- Work from Outside In: When treating a stain, work from the edge towards the center. This stops the stain from spreading.
Specific Stain Treatments:
Grease and Oil Stains:
- These are common near cooking areas.
- Method: Make a paste. Mix baking soda with a small amount of water. It should be the consistency of peanut butter. Apply the paste directly to the grease stain. Cover the paste with plastic wrap. Tape the edges down. Let it sit for 24-48 hours. The baking soda will absorb the oil.
- Removal: Scrape off the dried paste with a plastic scraper. Wipe the area clean with a damp cloth. Rinse and dry. For persistent oil stains, a commercial stone poultice might be needed.
- Tip: A diluted rubbing alcohol solution can also help break down fresh grease before it sets.
Food and Beverage Stains (Coffee, Tea, Wine, Ketchup):
- These stains are often organic.
- Method: For fresh stains, blot immediately with a damp cloth. For dried stains, make a paste of hydrogen peroxide (food grade) and a non-acidic abrasive cleaner (like a commercial stone cleaner powder or even fine cornstarch). Apply to the stain. Cover and let sit for 24 hours.
- Removal: Remove the paste, rinse, and dry. Repeat if necessary.
Water Spots and Mineral Buildup (Hard Water Stains):
- These appear as dull white spots or streaks. They are common near sinks.
- Method: Use a specialized mineral deposit remover safe for natural stone. Apply according to directions.
- Alternative: For light spots, try buffing with a dry microfiber cloth. A very fine steel wool (0000 grade) can sometimes remove stubborn spots on hard, sealed stones like granite, but use extreme caution and test first. Never use on softer stones like marble.
- Prevention: Dry your backsplash thoroughly after any water contact.
Mold and Mildew Stains:
- These appear as black or green spots, often in damp areas or grout.
- Method: Mix 1 part hydrogen peroxide (3% solution) with 2 parts water. Spray onto the affected area. Let it sit for 10-15 minutes.
- Removal: Gently scrub with a soft brush. Rinse thoroughly and dry. Ensure good ventilation to prevent future growth. Our guide on how to clean mold off natural stone provides more in-depth solutions.
Dealing with stains properly helps preserve your backsplash’s look. It prevents permanent damage to the stone.
Sealing Your Stone Backsplash for Protection
Sealing is a crucial step for natural stone backsplashes. It creates an invisible barrier. This barrier helps prevent stains. Porous stones like marble, granite, and travertine need sealing. Engineered stones, like quartz, do not need sealing. They are already non-porous.
Why Sealing is Important:
- Stain Prevention: A good sealer repels liquids. It gives you time to wipe spills before they soak in. This is key for porous materials.
- Easier Cleaning: Sealed stone is easier to clean. Dirt and grime sit on the surface. They do not penetrate the stone.
- Protection Against Etching: While sealers do not stop etching from acids (which is a chemical reaction), they can offer a tiny bit more resistance by reducing absorption.
- Preserves Appearance: Sealing helps maintain the stone’s original look. It prevents discoloration from absorbed liquids.
How Often to Seal:
The frequency depends on your stone type. It also depends on how much traffic the area gets.
- Highly Porous Stones (e.g., light-colored marble, limestone, travertine): Seal every 6-12 months.
- Moderately Porous Stones (e.g., many granites): Seal every 1-3 years.
- Test Your Seal: Perform the water test every 6 months. Drop a few water beads on the stone. If they soak in within 5-10 minutes, it is time to reseal. If they bead up, your seal is still good.
How to Seal Your Stone Backsplash:
- Clean Thoroughly: Before sealing, the backsplash must be spotless. Any dirt or grease sealed in will remain trapped. Deep clean your backsplash and grout. Allow it to dry completely. This might take 24 hours.
- Choose a Sealer: Buy a high-quality stone impregnating sealer. Look for one designed for kitchen use. These sealers penetrate the stone. They do not just sit on the surface. They do not change the stone’s look.
- Apply Sealer: Read the sealer’s instructions carefully. Every product is different.
- Typically, you apply the sealer with a clean cloth or a foam brush.
- Apply a thin, even coat. Do not over-saturate.
- Let the sealer penetrate for the recommended time (usually 10-20 minutes).
- Wipe Off Excess: This step is crucial. Do not let sealer dry on the surface. Buff off any excess sealer with a clean, dry microfiber cloth. If excess sealer dries, it can leave a hazy residue. This residue is difficult to remove.
- Apply Second Coat (Optional): Some porous stones may benefit from a second coat. Wait the recommended time between coats.
- Cure Time: Allow the sealer to cure. This is typically 24-72 hours. Avoid getting the backsplash wet during this time.
Sealing protects your stone backsplash. It makes cleaning easier. This simple process keeps your kitchen looking its best. Think of it as putting a protective shield on your stone. For overall stone floor care, which often shares principles with backsplashes, you can find more information on how to clean stone floor. Similarly, for specific stone types like Onyx, specialized care can be found in our guide on how to clean onyx stone.
Common Mistakes to Avoid When Cleaning Stone Backsplashes
Cleaning stone backsplashes correctly requires attention. Many common mistakes can cause permanent damage. Knowing what to avoid is as important as knowing what to do. Protect your stone by steering clear of these pitfalls.
1. Using Acidic Cleaners: * Mistake: Using vinegar, lemon juice, ammonia, or standard bathroom cleaners. These products are highly acidic. * Why it’s Bad: Acids etch natural stone, especially marble, travertine, and limestone. Etching creates dull spots or rough patches. It damages the surface permanently. It eats away at the stone. * Solution: Always use pH-neutral cleaners specifically made for natural stone. Mild dish soap and water are also safe.
2. Using Abrasive Tools or Cleaners: * Mistake: Scrubbing with steel wool, abrasive sponges, stiff brushes, or gritty cleaners. * Why it’s Bad: These tools scratch the stone surface. They can dull its shine. They also strip away protective sealants. Scratches are difficult to repair. * Solution: Use soft cloths, microfiber towels, and soft-bristle brushes. For tough spots, gentle scrubbing with a stone-safe cleaner is enough.
3. Not Wiping Spills Immediately: * Mistake: Letting spills sit on the backsplash. * Why it’s Bad: Porous stones absorb liquids quickly. Spills, especially oil, wine, or coffee, can create deep stains. These stains are very hard to remove. * Solution: Wipe up spills as soon as they happen. Blot liquids with a clean cloth. Do not rub.
4. Over-wetting the Stone: * Mistake: Soaking the stone or letting water pool. * Why it’s Bad: Excess water can penetrate porous stone and grout. This can lead to water spots, mineral buildup, or even mold and mildew growth. It also makes drying difficult. * Solution: Use damp cloths, not soaking wet ones. Spray cleaners lightly. Always dry the surface completely after cleaning.
5. Not Sealing Natural Stone: * Mistake: Skipping the sealing process for porous natural stone backsplashes. * Why it’s Bad: Unsealed stone is highly vulnerable to stains. Liquids soak in and leave lasting marks. The stone becomes harder to clean. * Solution: Regularly test your stone’s seal. Reapply a high-quality impregnating sealer as needed (every 6 months to 3 years depending on stone type and use).
6. Mixing Cleaning Products: * Mistake: Combining different household cleaners. * Why it’s Bad: Mixing chemicals can create dangerous fumes. It can also produce ineffective solutions. Some mixtures might react poorly with stone. * Solution: Use one product at a time. Follow product instructions precisely.
7. Ignoring Grout Lines: * Mistake: Focusing only on the stone and neglecting the grout. * Why it’s Bad: Grout is porous. It traps dirt, grease, and moisture. This leads to discoloration and mold growth. Dirty grout makes the entire backsplash look unkempt. * Solution: Clean grout lines regularly with a soft brush and pH-neutral cleaner. Consider sealing grout after deep cleaning.
Avoiding these common mistakes helps you keep your stone backsplash beautiful. It ensures its longevity and protects its finish.
Preventing Future Stains and Damage
Prevention is the best strategy for stone backsplashes. Taking proactive steps saves you time and effort. It also keeps your stone looking its best. Follow these tips to minimize future stains and damage.
1. Regular Sealing: * This is the most critical preventative step for natural stone. * Sealing creates a barrier against spills. * Test your seal every 6-12 months. Reapply when water no longer beads on the surface.
2. Immediate Spill Cleanup: * Wipe up spills as soon as they happen. * Keep a soft cloth handy in your kitchen. * Quick action prevents stains from soaking into the stone or grout.
3. Use pH-Neutral Cleaners Only: * Stick to cleaners specifically designed for natural stone. * Avoid acidic household cleaners like vinegar, lemon, or ammonia. * Do not use abrasive cleaners or tools.
4. Protect High-Splash Areas: * When cooking, use splatter guards. * Place trivets or mats under oil bottles or condiment containers on the countertop near the backsplash. * This minimizes direct contact with stain-causing agents.
5. Ensure Good Ventilation: * Use your kitchen exhaust fan while cooking. * This removes moisture and grease from the air. * Reduced moisture helps prevent mold and mildew growth on your backsplash.
6. Dry Thoroughly After Cleaning: * Always wipe your backsplash dry after cleaning or after any water contact. * Hard water contains minerals. These minerals leave spots if water dries on the stone. * A dry surface also discourages mold.
7. Educate Household Members: * Make sure everyone in the house knows how to care for the stone. * Explain the importance of wiping spills quickly. * Inform them about safe cleaning products to use.
By following these preventative measures, you extend the life and beauty of your stone backsplash. You will enjoy a cleaner, more pristine kitchen with less effort.
FAQs About Cleaning Stone Backsplashes
Q1: Can I use vinegar to clean my stone backsplash? No, you should never use vinegar on natural stone. Vinegar is acidic. It will etch and dull the stone’s surface, especially marble, travertine, and limestone. This damage is often permanent. Always use pH-neutral cleaners or mild dish soap for your stone backsplash.
Q2: How often should I clean my stone backsplash? You should wipe down your stone backsplash daily for light spills and splatters. A more thorough cleaning with a pH-neutral cleaner is recommended weekly. Deep cleaning, including the grout, should be done every few months, or when you notice buildup or discoloration.
Q3: How do I remove stubborn grease stains from a stone backsplash? For stubborn grease stains, make a paste of baking soda and water. Apply it thickly over the stain, cover with plastic wrap, and let it sit for 24-48 hours. The baking soda absorbs the oil. Scrape it off gently, then wipe the area clean. Repeat if needed.
Q4: Is sealing my stone backsplash really necessary? Yes, sealing is very necessary for most natural stone backsplashes like granite, marble, and travertine. These stones are porous. A high-quality impregnating sealer creates a barrier. This barrier helps prevent liquids from soaking in and causing stains. Engineered stones like quartz do not require sealing.
Q5: What is the best cleaner for a granite backsplash? The best cleaner for a granite backsplash is a pH-neutral stone cleaner. You can also use a few drops of mild, non-acidic dish soap mixed with warm water. Always avoid acidic cleaners like vinegar or lemon, as they can damage granite’s sealant and potentially etch the stone over time.
Q6: Can I use a steam cleaner on my stone backsplash? Using a steam cleaner on natural stone is generally not recommended. While steam can clean surfaces, the high heat can damage some sealants. It can also force moisture deep into porous stone and grout, potentially leading to issues like mold or mineral deposits if not properly dried. Stick to the recommended cleaning methods.
Conclusion
Keeping your stone backsplash clean and beautiful is simple once you know the right steps. We have learned that understanding your stone type is the first step. Using pH-neutral cleaners and soft tools protects your stone’s integrity. Daily wiping and regular deep cleaning prevent grime buildup. Tackling stains quickly with specific methods saves your stone’s appearance. Most importantly, sealing natural stone backsplashes provides a vital shield against future damage.
By following these guidelines, you ensure your stone backsplash remains a stunning feature in your kitchen. It will continue to enhance your home’s beauty for many years. Invest a little time in proper care. You will enjoy a pristine and elegant kitchen space. Your beautiful stone backsplash deserves this attention.
- stone backsplash
- natural stone cleaning
- kitchen cleaning
- stone care
- backsplash maintenance
- grout cleaning