· Hair Care Tools · 14 min read
How To Clean Straightening Brush
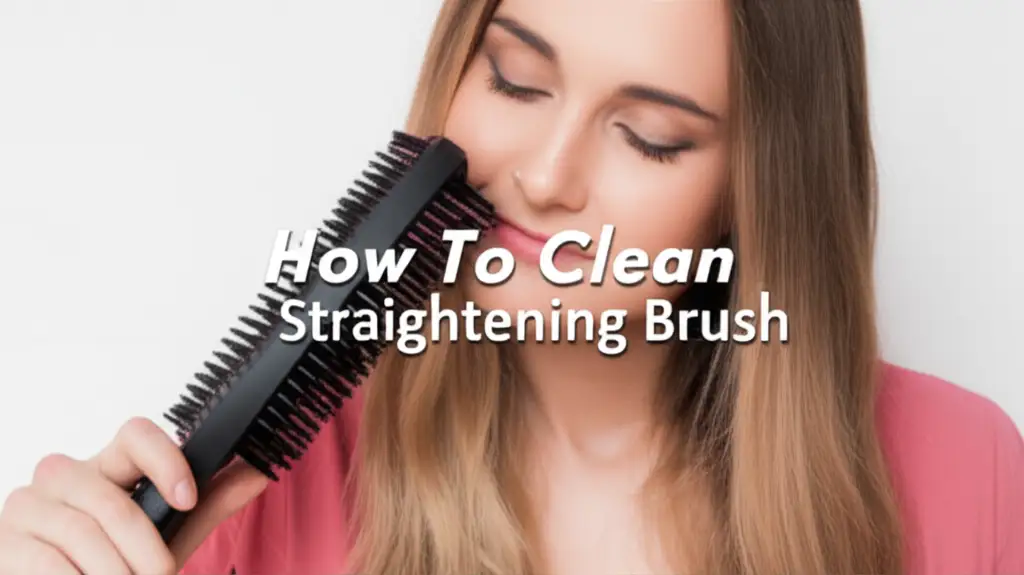
Master How To Clean Your Straightening Brush
Have you ever looked at your straightening brush and wondered why your hair does not feel as smooth as it used to? A dirty brush can stop your hair from looking its best. Hair styling tools, especially straightening brushes, collect hair, dust, and styling product buildup. This residue can transfer back to your clean hair. It also makes your brush work less well over time.
Cleaning your straightening brush is important for good hair health and tool longevity. I will guide you through simple steps to make your brush spotless. We will cover quick daily cleaning and deeper monthly sessions. You will also learn about cleaning different brush types and preventing future buildup. Let us make your straightening brush shine again.
Takeaway
Keeping your straightening brush clean is simple.
- Remove hair daily: Use a comb or your fingers to pull out loose hairs after each use.
- Wipe down regularly: Use a damp cloth to clean the surface of the brush weekly.
- Deep clean monthly: Use mild soap and water to remove product buildup from bristles.
- Dry completely: Allow the brush to air dry fully before storing it.
- Store properly: Keep your brush in a clean, dry place to prevent dust and grime.
To clean a straightening brush, first remove all loose hair from the bristles using a fine-tooth comb or your fingers. Next, wipe down the body and bristles with a damp cloth and mild soap solution to remove product buildup. For a deep clean, gently scrub between the bristles with a small brush. Always allow the brush to air dry completely before using it again.
Why Cleaning Your Straightening Brush Matters for Hair Health
Your straightening brush touches your hair every time you style it. Over time, hair strands, lint, and dust get caught in the bristles. Styling products like hairspray, serums, and heat protectants also leave a sticky film. This mixture of dirt and product residue can make your brush look dull. More importantly, it creates problems for your hair and your brush’s performance.
A dirty brush can spread germs and old product back onto your clean hair. This can make your hair look greasy or weighed down. It can also cause scalp irritation or make your hair feel less clean after styling. Imagine trying to straighten hair with a tool that adds grime instead of sleekness. Regularly cleaning your brush helps maintain hair hygiene. It ensures each straightening session starts fresh.
Furthermore, buildup affects how well your brush works. Dirt and product can coat the heating elements or bristles. This makes the brush less efficient at straightening hair. It can also lead to uneven heat distribution. This means you might need to go over sections of hair multiple times. This extra effort can cause more heat damage to your hair. Keeping your brush clean ensures it performs at its best. It gives you smooth, shiny results every time. It also extends the life of your valuable styling tool. Learn more about cleaning hair brushes in general to understand common hygiene practices.
Daily Maintenance: Quick Steps for a Clean Brush
Taking a few moments after each use helps keep your straightening brush in good shape. This daily routine stops major buildup from happening. It makes deeper cleaning tasks much easier down the road. Think of it as a small effort for a big reward. My personal experience shows this daily habit truly makes a difference.
The first step is always to remove loose hair. Hair gets trapped easily in the bristles. Turn off and unplug your brush first. Let it cool down completely. Use your fingers to pull out any visible strands of hair. A fine-tooth comb or a dedicated brush cleaning tool can help here. Gently slide the comb through the bristles, lifting hair as you go. This simple action prevents hair from tangling deep within the brush. Trapped hair can also block heat distribution over time.
After removing the hair, give your brush a quick wipe. Use a soft, dry cloth to wipe down the handle and the heated plates. This helps remove any surface dust or light product residue. You are not doing a deep scrub here. You are simply tidying up the tool. This daily wipe keeps your brush looking good. It also stops small amounts of grime from turning into stubborn buildup. This small habit only takes a minute. It adds great value to your hair care routine.
Deep Cleaning Your Straightening Brush: A Full Guide
Deep cleaning your straightening brush ensures it stays hygienic and performs well. This process removes stubborn hair, product buildup, and oils that accumulate over time. I usually deep clean my brush once a month. This depends on how often I use it and how much product I apply. Always ensure your brush is unplugged and cool before starting any deep cleaning. This prevents any risk of electric shock or burns.
Removing Stubborn Hair and Debris
Sometimes hair gets really tangled around the bristles. First, use a thin, pointed tool, like a skewer or the end of a rat-tail comb, to gently lift hair. Work slowly to avoid bending or breaking the bristles. You can also use a small pair of scissors to carefully cut hair strands caught deep inside. Be extremely careful not to cut the bristles or scratch the heated surface. This step is crucial for clearing out the main debris. It makes the next cleaning steps more effective. Many people wonder how to clean buildup on hair brush. This method works well for those situations.
Washing the Bristles and Plates
Next, prepare a cleaning solution. Mix a small amount of mild shampoo or dish soap with warm water in a bowl. Do not submerge the entire brush, especially if it is electric. Dip a soft cloth or a small, clean toothbrush into the soapy water. Gently scrub the bristles. Pay attention to the base of the bristles where product buildup often collects. For the heated plates, use a cloth dampened with the solution. Wipe the plates carefully. Ensure no water gets into the electrical components. Some brushes, like the Tymo, have specific cleaning needs, and learning how to clean a Tymo straightening brush can offer more insights.
Rinsing and Drying Properly
After scrubbing, rinse the cloth or toothbrush with clean water. Wipe down the bristles and plates again to remove any soap residue. It is important to remove all soap. Leftover soap can make your hair feel sticky. The most crucial step is drying. Place your straightening brush on a clean towel with the bristles facing down. This allows any remaining water to drain away from the electrical components. Let it air dry completely for several hours or even overnight. Never plug in or use a damp brush. Moisture can damage the heating elements and pose a safety risk. Complete drying prevents mold growth and extends your brush’s life.
Cleaning Different Types of Straightening Brushes
Straightening brushes come in various designs and materials. Each type requires slightly different cleaning care to ensure longevity and effective performance. Understanding these differences helps prevent damage. My own experience with different brushes has taught me that a one-size-fits-all approach does not always work.
Ceramic and ionic straightening brushes are common. These brushes often have bristles integrated directly into a heated plate. The plates are usually ceramic or tourmaline coated. For these types, avoid harsh abrasives or strong chemical cleaners. These can scratch the delicate coating. Use a soft cloth dampened with mild soapy water. Gently wipe the heated surface and bristles. Ensure water does not seep into the internal components. Pay close attention to the gaps around the bristles where residue accumulates. Some brands, like Revlon, offer various heated brushes. For specific advice on how to clean a Revlon brush, you can check dedicated guides.
Heated paddle brushes also need specific care. These brushes often have more traditional brush bristles. They are set into a heated paddle-shaped base. The bristles might be made of nylon or a mix of materials. When cleaning, focus on removing hair and product from between these bristles. A small brush or an old toothbrush works well for this. For the paddle surface, wipe it with a damp cloth. Be careful not to drench the brush. Over-saturating the bristles or base can damage the internal wiring. Always prioritize safety. Ensure the brush is unplugged and completely cool before touching it with any liquid. Proper cleaning maintains even heat distribution. This gives you the best styling results.
Tackling Product Buildup and Sticky Residue
Product buildup is a common problem for any styling tool. Hairspray, dry shampoo, and leave-in conditioners can leave a sticky film. This residue coats the bristles and heated plates of your straightening brush. It makes the brush less effective. It also gives your hair a dull appearance. My hair once felt greasy after straightening. I realized it was the buildup on my brush causing it.
For light product buildup, a simple solution of warm water and mild soap often works. Dampen a microfiber cloth or an old toothbrush with this mixture. Gently scrub the bristles and the base of the brush. You might need to repeat this a few times to loosen the sticky film. Focus on areas where the bristles meet the heated plate. This area collects most of the residue. Ensure you do not let water get into the electrical parts of the brush. After scrubbing, wipe with a clean, damp cloth to remove all soap.
For more stubborn or greasy residue, you can use rubbing alcohol. Isopropyl alcohol works well to dissolve stubborn product buildup without leaving a residue. Dampen a cotton swab or a small piece of cloth with rubbing alcohol. Carefully wipe the bristles and the heated plates. Alcohol evaporates quickly, reducing the risk of moisture damage. Always test a small, hidden area first. This ensures the alcohol does not damage your brush’s material. Avoid using abrasive scrubbers or harsh chemicals. These can scratch or corrode the heating elements or brush surface. Proper handling ensures your brush stays in top condition. If you face issues with tough stains, there might be relevant advice on how to clean a stain off a brush.
Preventing Dirt and Damage: Best Practices for Your Brush
Keeping your straightening brush clean is not just about active cleaning. It is also about adopting habits that prevent dirt and damage. Good prevention saves you time and effort in the long run. It also helps your brush last longer and perform better. I found that a few simple practices significantly reduced my cleaning frequency.
First, always brush your hair thoroughly before using the straightening brush. This simple step removes loose hair and detangles knots. If your hair is free of tangles and excess loose strands, fewer hairs will get caught in your straightening brush. This greatly reduces the amount of hair buildup. It also helps the brush glide through your hair more smoothly. This gives you better straightening results.
Second, consider where you store your brush. After it cools down completely, store your straightening brush in a clean, dry place. Avoid leaving it exposed on a dusty counter. A drawer or a dedicated cabinet is ideal. You can also place it in a cloth bag. This protects it from dust and other airborne particles. Dust can settle on the bristles and heated plates. This adds to the debris that needs cleaning later. Proper storage keeps your brush ready for use. It also helps it stay clean between deep cleaning sessions.
Finally, manage your product application. Apply styling products to your hair before using the straightening brush. Try not to spray products directly onto the brush. This minimizes direct product transfer and buildup on the heating elements. Use products sparingly. More product often means more residue on your tools. If you use a lot of product, you may need to clean your brush more often. A consistent cleaning schedule, along with these preventive measures, will keep your straightening brush in excellent condition.
When to Replace Your Straightening Brush
Even with the best cleaning and care, straightening brushes do not last forever. Knowing when to replace your tool is important for both performance and hair health. Over time, wear and tear can reduce a brush’s effectiveness. It can even pose safety risks. I once kept a brush too long, and it started snagging my hair. That was my sign to get a new one.
One clear sign of replacement is damaged bristles. Check your brush regularly. Are the bristles bent, broken, or missing? Bristles guide your hair and help distribute heat. If they are compromised, your brush cannot work as effectively. It might snag or pull your hair. This can lead to breakage and discomfort. Worn bristles also mean less contact with the heated plate. This leads to uneven straightening.
Another major indicator is a change in heating performance. Does your brush take longer to heat up? Does it feel less hot than it used to? Are there cold spots on the plates? These issues suggest a problem with the heating elements. This cannot usually be fixed by cleaning. A brush that does not heat evenly can cause more damage. You might need to pass over sections repeatedly. This exposes your hair to excess heat.
Lastly, consider hygiene concerns that go beyond cleaning. If your brush has an unpleasant odor that persists after deep cleaning, it might have internal mold or mildew. This is especially true if you live in a humid environment or have not dried it properly in the past. If the electrical cord is frayed, damaged, or feels hot during use, immediately stop using the brush. This is a fire hazard. Prioritize your safety and hair health. Replace your straightening brush when these signs appear.
FAQ Section
How often should I clean my straightening brush?
You should remove loose hair daily after each use. A light wipe-down with a damp cloth is good weekly. A deep clean with soap and water is best once a month. This schedule keeps your brush performing well and prevents excessive buildup.
Can I use alcohol to clean my straightening brush?
Yes, you can use rubbing alcohol for stubborn product buildup. Dampen a cotton swab or cloth with alcohol and carefully wipe the bristles and heated plates. Alcohol evaporates quickly and dissolves residue. Always test a small area first to ensure it does not damage the material.
What happens if I do not clean my straightening brush?
If you do not clean your straightening brush, it collects hair, dust, and product buildup. This leads to greasy-looking hair, reduced styling effectiveness, and possible scalp irritation. The buildup can also damage the brush over time.
How do I dry my straightening brush completely?
After cleaning, place your straightening brush on a clean towel with the bristles facing down. This allows water to drain away from the electrical components. Let it air dry completely for several hours, or even overnight. Ensure it is bone dry before plugging it in.
Can I put my straightening brush in water?
No, you should not submerge your entire electric straightening brush in water. This can damage the electrical components and pose a safety risk. Only use a damp cloth or a small, damp brush to clean the bristles and plates.
How do I remove melted hair from my straightening brush?
Melted hair is tricky to remove. First, let the brush cool completely. Gently try to scrape off the melted hair using a plastic scraper or a wooden stick. For small bits, use a cotton swab dipped in rubbing alcohol. Be careful not to scratch the heated surface.
Conclusion
A clean straightening brush is key to great hair and a long-lasting tool. You have learned simple daily steps like removing hair and wiping down. You now also know how to perform a thorough deep clean. We have covered cleaning specific brush types and tackling stubborn product buildup. These actions ensure your brush works at its best.
Maintaining your straightening brush is not just about aesthetics. It directly impacts your hair’s health and appearance. Regular cleaning prevents the transfer of dirt and residue to your hair. It also keeps your brush heating evenly and efficiently. Make these cleaning habits part of your routine. Your hair will thank you. Keep your straightening brush sparkling clean for perfect styling every time.
- hair care
- straightening tools
- cleaning tips
- beauty appliance care

