· Home Cleaning · 12 min read
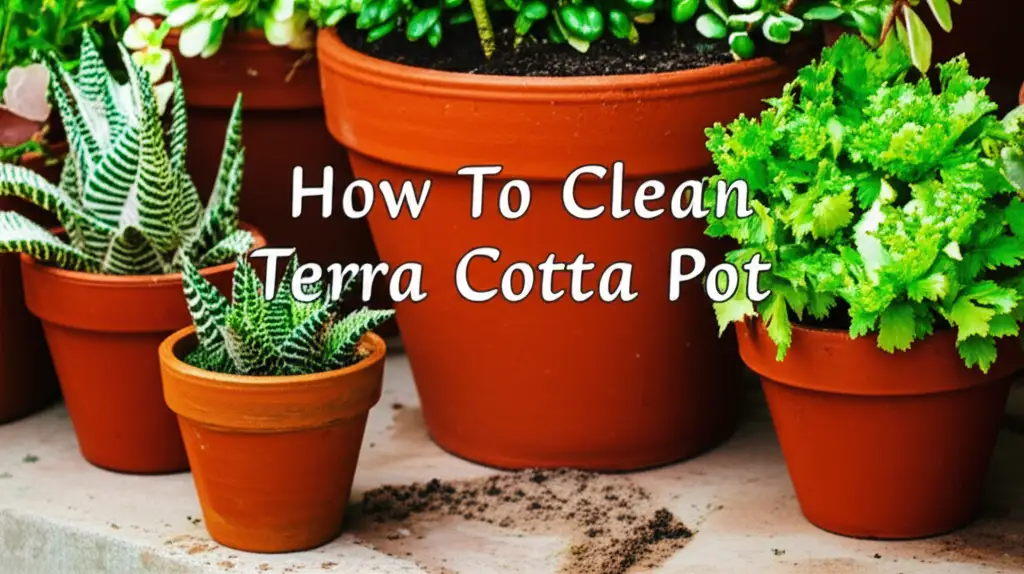
How To Clean Terra Cotta Pot
Restore Your Terra Cotta Pots: A Simple Guide to Cleaning
My terra cotta pots are truly beautiful additions to my garden and home. They offer a classic look and provide excellent aeration for plant roots. However, these porous clay pots absorb water, minerals, and organic matter over time. This leads to unsightly white crusts, green algae, or even mold. Knowing how to clean terra cotta pot effectively keeps them looking good. More importantly, it ensures your plants stay healthy.
This guide will show you simple methods for cleaning terra cotta pots. We will cover basic washes, tough stain removal, and sterilization techniques. You can make your pots look brand new. You will also create a cleaner home for your plants.
Takeaway
- Remove Old Soil: Always empty pots completely before cleaning.
- Brush Off Loose Debris: Use a stiff brush to remove surface dirt.
- Soak to Loosen Stains: Submerge pots in water to soften mineral buildup.
- Use Vinegar for Efflorescence: A diluted vinegar solution helps dissolve white mineral crusts.
- Address Algae/Mold with Vinegar or Bleach: Target green or black growths.
- Sterilize for Plant Health: Disinfect pots to prevent disease spread to new plants.
- Dry Completely: Ensure pots are fully dry before storage to prevent cracks.
Terra cotta pots need regular cleaning to remove mineral buildup, algae, and old soil. This improves their look and helps plants grow well. Soak pots in water with a brush to remove dirt. Use vinegar or a bleach solution for tough stains and to sterilize them. Always rinse pots thoroughly after cleaning and let them dry completely before reuse or storage.
Understanding Terra Cotta’s Cleaning Needs
Terra cotta pots are popular for many reasons. They are made from natural clay and have a beautiful, earthy look. Their porous nature allows air and water to pass through. This is good for plant roots, but it also means the pots absorb substances from the soil and water. Over time, these absorbed materials build up on the pot’s surface. This creates stains and residue.
The common issues you see on terra cotta pots include white mineral deposits. These come from salts in water and fertilizers. Green algae or moss often grow on pots kept in damp, shady areas. Sometimes, black mold can appear. Old soil and plant debris can also stick to the inside. Cleaning terra cotta pots helps keep them looking attractive. More importantly, it prevents the buildup of harmful salts and potential plant diseases. A clean pot means a healthier environment for your plants.
Basic Cleaning Steps for Light Dirt
Light dirt and loose soil often cling to terra cotta pots. You can usually remove this with just water and a brush. This basic cleaning is good for pots that are used often. It is also good for those without heavy stains. Start by removing all the old soil and plant material from the pot. Use a small trowel or your hands. Get as much out as you can.
Next, take a stiff brush, like a scrub brush or a wire brush. Gently brush the inside and outside surfaces of the pot. This helps remove loose dirt, dust, and any small bits of debris. You can do this dry first to avoid making mud. After brushing, rinse the pot thoroughly with warm water. A garden hose works well for outdoor pots. For indoor pots, use a utility sink or a large basin. Make sure to rinse until the water runs clear. This basic step prepares the pot for deeper cleaning if needed. It also makes it ready for immediate reuse for light tasks. You can learn more about general pot cleaning here: clean bottom of pan.
Tackling White Mineral Deposits (Efflorescence)
White mineral deposits, called efflorescence, are common on terra cotta pots. These crusty white patches form when water evaporates from the porous clay. It leaves behind salts and minerals from your water supply or fertilizers. This buildup does not look good. It can also harm plants by increasing salt levels in the soil. Fortunately, you can remove these deposits effectively.
Vinegar is an excellent natural cleaner for efflorescence. It is mildly acidic and dissolves mineral deposits. I usually mix one part white vinegar with ten parts water in a large bucket or tub. You can adjust the strength depending on how bad the deposits are. Submerge your terra cotta pots completely in this vinegar solution. Let them soak for at least 30 minutes. For heavy buildup, I sometimes let them soak for several hours or even overnight. The vinegar will bubble as it reacts with the minerals. After soaking, remove the pots and scrub the affected areas with a stiff brush. The white crust should come off easily. Rinse the pots very well with clean water afterward. This removes all vinegar residue. This method works well for many surfaces, similar to how you might clean shower with vinegar or clean glass with vinegar.
Removing Algae, Moss, and Mold from Terra Cotta
Green algae, soft moss, and black mold can grow on terra cotta pots. This often happens when pots are kept in damp, shaded areas. These growths are unsightly and can hold excess moisture. They might even block some air exchange. Removing them helps your pots look better and function well. You have a few options for dealing with these organic growths.
For mild algae or moss, the vinegar solution method described earlier often works. The acidity of vinegar helps break down the plant matter. You can also make a paste with baking soda and water. Apply this paste directly to the affected areas. Let it sit for 15-20 minutes. Then scrub with a brush. Baking soda is abrasive and helps lift the green or black stains. For stubborn mold or heavy moss, a diluted bleach solution is very effective. Mix one part bleach with nine parts water. Dip the pots in this solution for about 10-15 minutes. Always wear gloves and eye protection when using bleach. Make sure to rinse the pots thoroughly afterward to remove all bleach residue. This also prevents harm to future plants. If you need more tips on mold removal, consider guides like clean mold in shower or clean mold with vinegar. Cleaning mold from porous surfaces like concrete shares principles with cleaning terra cotta, as seen in how to clean mold off concrete.
Sterilizing Terra Cotta Pots for Healthy Plants
Sterilizing your terra cotta pots is a vital step, especially when reusing them for new plants. Old soil can harbor plant diseases, fungal spores, and insect eggs. These hidden threats can transfer to your new plants. This causes problems like root rot, wilting, or pest infestations. A clean, sterile pot gives your new plants the best possible start. It protects them from previous issues.
There are two main ways to sterilize terra cotta pots:
- Bleach Solution: This is a common and effective method. Mix one part household bleach with nine parts water in a large container. Submerge your thoroughly cleaned pots in this solution. Let them soak for at least 30 minutes. This contact time kills most pathogens. After soaking, rinse the pots extensively with clean running water. Make sure to remove all traces of bleach. Bleach residue can harm plant roots. Let them air dry completely before use.
- Boiling Water: This is a bleach-free alternative for sterilization. Place your clean terra cotta pots into a large pot of boiling water. Ensure the pots are fully submerged. Let them boil for at least 15-20 minutes. The high heat effectively kills most fungi, bacteria, and insect eggs. Carefully remove the pots from the boiling water using tongs. Let them cool down completely on a rack. This method is safe and very effective. Both methods ensure that your pots are free from harmful contaminants.
Advanced Cleaning Techniques for Stubborn Stains
Sometimes, basic cleaning and vinegar treatments are not enough. Some terra cotta pots have deep-seated stains. These might include ingrained dirt, stubborn mineral deposits, or old fertilizer residue. These situations call for more advanced techniques. You can revive even the dirtiest pots with a little extra effort. My goal is always to make the pot look as good as new.
Here are a few methods for tougher stains:
- Hydrogen Peroxide: For organic stains that resist other cleaners, try hydrogen peroxide. A 3% solution, commonly found in drugstores, works well. You can apply it directly to the stain. Let it fizz for a few minutes. Then scrub with a brush. Hydrogen peroxide helps break down organic matter. Rinse the pot well after treatment. This is similar to how you might tackle tough stains on other surfaces; learning how to clean stains off walls involves similar principles of targeting specific types of dirt.
- Pressure Washing (Low Setting): For outdoor pots with heavy, widespread dirt or moss, a pressure washer can save time. Use the lowest pressure setting. Stand a good distance from the pot. This prevents damage to the porous clay. The water pressure helps blast away stubborn grime. Always test a small, hidden area first.
- Extended Soaking: For extremely stubborn mineral deposits or deeply embedded dirt, consider an extended soak. After scrubbing, submerge the pot in plain water or a weak vinegar solution for 24 to 48 hours. The prolonged exposure helps soften the hardest deposits. You may need to replace the water if it becomes very cloudy. Follow this with another good scrub and rinse. These methods help restore the natural beauty of your terra cotta.
Drying and Storing Clean Terra Cotta Pots
Proper drying and storage are just as important as the cleaning process itself. Terra cotta is porous. It absorbs water easily. If you store wet terra cotta pots in freezing temperatures, the trapped water will freeze and expand. This expansion causes the clay to crack and break. This damage can ruin your pots. Therefore, proper drying is a critical step to protect your investment.
After cleaning and rinsing your pots, let them air dry completely. I usually place them upside down on a drying rack or on a clean surface outdoors. This allows air to circulate around all sides. It also lets any excess water drain out. Give them several days to dry fully, especially in humid conditions. Make sure no moisture remains inside the clay.
When the pots are completely dry, you can stack them for storage. I usually nest smaller pots inside larger ones. This saves space. Place a piece of newspaper or cardboard between each pot to prevent chipping. Store them in a dry, protected area. A shed, garage, or even a covered patio works well. Avoid areas where temperatures drop below freezing if you live in a cold climate. Proper storage keeps your pots clean and ready for their next use. It also extends their lifespan for many years of gardening enjoyment.
FAQ Section
Q1: Can I use dish soap to clean terra cotta pots?
You can use a small amount of mild dish soap for cleaning terra cotta pots. It helps cut through grease or stubborn organic residue. After using soap, rinse the pots extremely well. Terra cotta is porous and can absorb soap. Any leftover soap could harm your plants or create a residue. Stick to water, vinegar, or bleach when possible.
Q2: How often should I clean my terra cotta pots?
The frequency depends on how often you use them and how dirty they get. I clean my pots thoroughly between plantings. This is especially true if I am replanting something different. For pots used seasonally, an annual deep clean before spring planting is a good idea. Pots outdoors in damp conditions might need more frequent cleaning for algae.
Q3: What causes the white crust on terra cotta pots?
The white crust on terra cotta pots is mineral buildup, known as efflorescence. It comes from salts and minerals found in tap water and fertilizers. As water evaporates from the porous clay, it leaves these white deposits behind. It is a common, natural occurrence. Vinegar helps remove it effectively.
Q4: Is it okay to use bleach on terra cotta?
Yes, you can use diluted bleach on terra cotta pots for cleaning and sterilization. Mix one part bleach with nine parts water. Soak the pots for about 10-30 minutes. Always rinse the pots thoroughly afterward. This removes all bleach residue. Bleach residue can be harmful to plants. Ensure good ventilation when using bleach.
Q5: Can I put terra cotta pots in the dishwasher?
It is generally not recommended to clean terra cotta pots in a dishwasher. Dishwashers use harsh detergents. They also use high heat. These can damage the porous clay. They might leave chemical residues. Hand washing with natural cleaners like vinegar or water is always better. This helps preserve the pot’s integrity.
Q6: Do new terra cotta pots need cleaning?
Yes, it is a good practice to rinse new terra cotta pots before using them. New pots can have dust, dirt, or residues from the manufacturing process. A quick rinse under running water is usually enough. This prepares the pot for planting. It ensures a clean start for your new plant.
Conclusion
Cleaning terra cotta pots is a simple yet vital task for any gardener. It helps maintain the beauty of your pots. More importantly, it keeps your plants healthy and thriving. You have learned how to tackle common issues like white mineral deposits, green algae, and stubborn stains. You also know the importance of sterilizing your pots. This prevents plant diseases.
By following these straightforward steps, you can ensure your terra cotta pots remain beautiful and functional for many years. From a quick brush and rinse to a deep soak with vinegar or bleach, you now have the tools. Regular cleaning truly makes a difference. Give these methods a try. See how wonderful your rejuvenated pots look. You will provide the best possible environment for all your plants.
- terra cotta
- pot cleaning
- plant care
- gardening tips
- clay pots
- mineral deposits