· Tile Cleaning · 18 min read
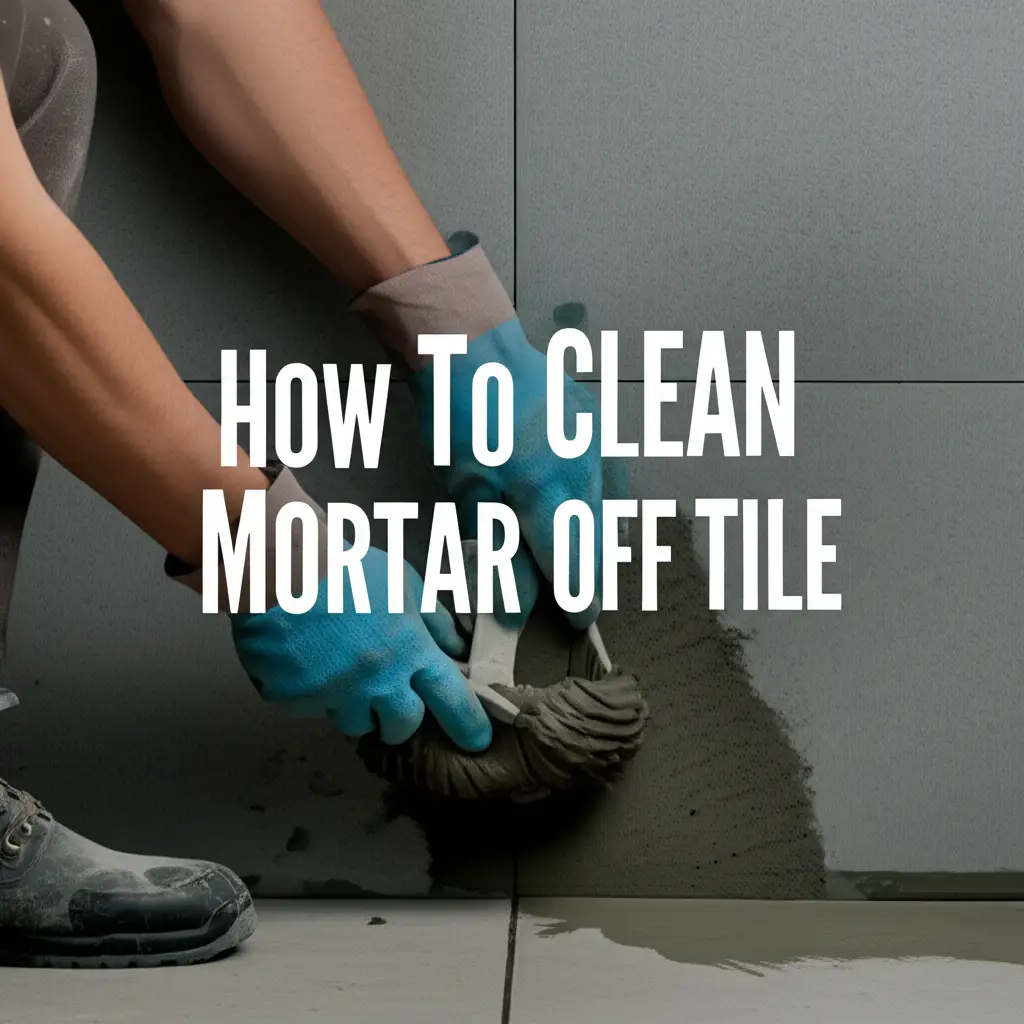
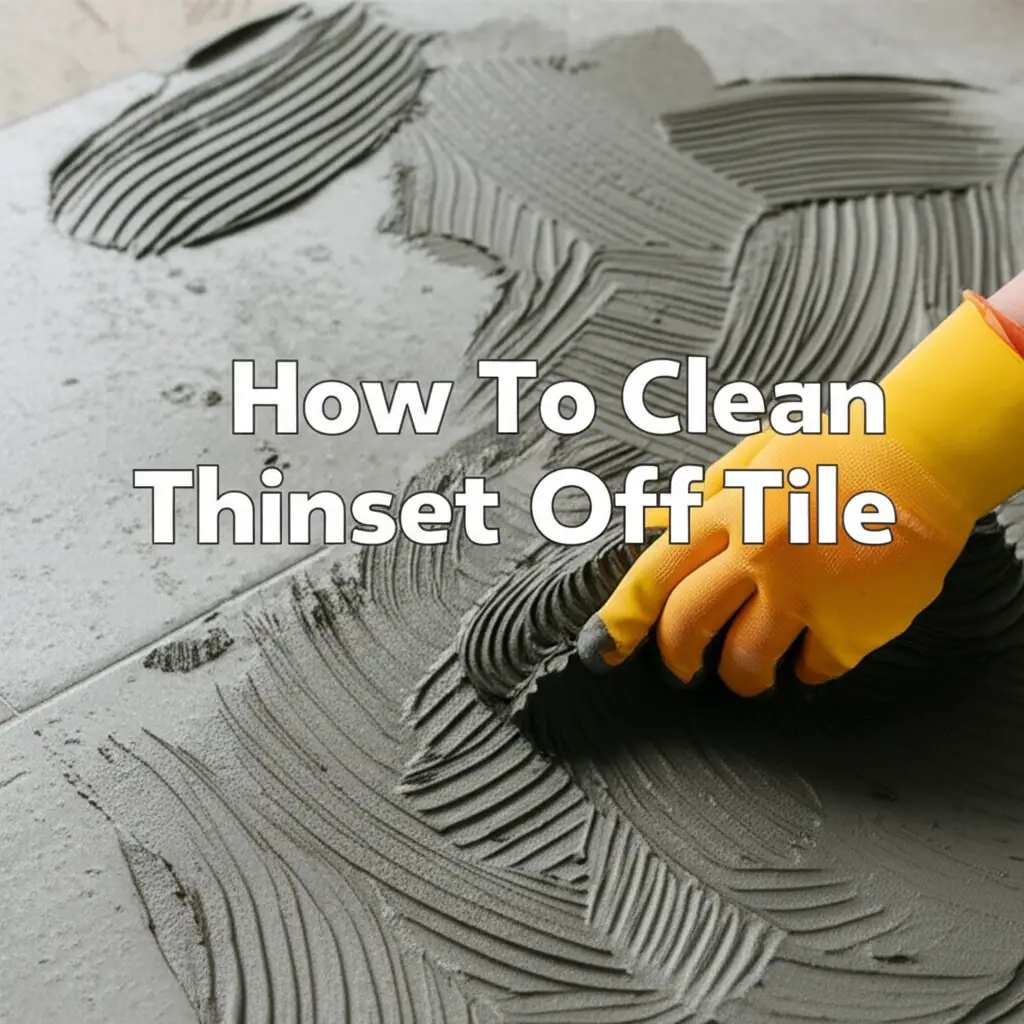
How To Clean Thinset Off Tile
Conquering Thinset: How To Clean Off Tile Effectively
Finishing a tile project feels rewarding. You admire your new floor or wall. Then, you spot it: stray bits of thinset mortar on the tile surface. These spots distract from your beautiful work. Thinset is a strong adhesive. It holds tiles securely. Yet, it also sticks firmly to tile faces if not wiped quickly.
Cleaning thinset off tile can seem like a big challenge. Fresh thinset is simple to wipe away. Dried thinset requires more effort. You need the right tools and methods. I will guide you through the process. We will cover various techniques. We will discuss cleaning both fresh and dried thinset. You will learn about different tile types. We will make sure your tiles shine.
Takeaway
- Act quickly for fresh thinset using water and a sponge.
- For dried thinset, start with gentle scraping and pre-soaking.
- Use chemical removers or acidic solutions cautiously for tough spots.
- Always protect delicate tiles like natural stone from strong chemicals.
- Prioritize safety with proper ventilation and protective gear.
Cleaning thinset off tile involves a mix of mechanical scraping, softening with water or specialized removers, and careful scrubbing. The approach depends on whether the thinset is fresh or dried, and the type of tile involved. Always work gently and test methods in a hidden area first.
Understanding Thinset: Why It Sticks So Hard
Thinset is a cement-based mortar. It contains sand, water, and polymers. These polymers give thinset its strong adhesive properties. Tile installers use it to bond tiles to various surfaces. Thinset creates a durable, long-lasting bond. This strength makes it hard to remove once dry.
Thinset adheres to tile surfaces through a chemical and mechanical bond. The cement components harden over time. They form a rigid structure. The polymers increase its stickiness. This makes it challenging to simply wipe off. If you leave thinset on tile, it cures. Cured thinset becomes part of the tile surface. This requires more aggressive cleaning methods. Ignoring thinset residue affects your tile’s look. It also makes future cleaning harder. Understanding thinset helps you choose the best removal method.
The drying process starts quickly. Within minutes, thinset begins to set. It fully cures over days. This timeline is important for cleaning. Fresh thinset is easier to handle. Dried thinset needs different tools and approaches. Its grip strengthens as it dries. Therefore, quick action is always best. We aim to remove thinset without damaging your tile. This requires careful selection of tools and chemicals.
Essential Tools and Materials for Thinset Removal
Removing thinset requires specific tools. The right supplies make the job easier. Having everything ready saves time. Your choice of tools depends on the thinset’s age. It also depends on the tile material.
Manual Scraping Tools
Manual tools are good for general scraping. They help loosen larger thinset pieces. Always be gentle to avoid scratching tiles.
- Plastic Putty Knife: Use this for fresh thinset. It is gentle on tile surfaces. A plastic knife helps scrape without damage.
- Wooden Scraper: This tool works well for slightly dried thinset. It offers more rigidity than plastic. Wood still minimizes scratching risk.
- Grout Scraper: This tool removes thinset from grout lines. It works well along tile edges. The blade targets narrow spaces.
- Chisel (Small, Dull): For very stubborn, dried spots. Use a rubber mallet with it. Aim for a flat angle. Always hold it almost flat against the tile.
- Utility Knife: Great for trimming thinset along grout lines. Be careful not to slip. This knife has a sharp, precise blade.
- Stiff Bristle Brush/Nylon Brush: Use these for scrubbing. They work with water or cleaners. These brushes help lift softened thinset.
Chemical Solutions for Tough Residue
Sometimes, scraping alone is not enough. Chemicals help soften stubborn thinset. Always test chemicals in a hidden area first.
- Warm Water: This is your first line of defense. It softens fresh or slightly dried thinset. Water is safe for all tile types.
- Vinegar (White Distilled): A mild acid, good for light thinset haze. Mix with water for a gentler solution. It works on some mineral deposits. For general tile maintenance, vinegar is a common choice. You can learn more about general cleaning with vinegar by looking at how to clean a shower with vinegar or how to clean pool tile with vinegar.
- Commercial Thinset Remover: These products are specially formulated. They break down thinset components. Follow product instructions carefully. They can be strong.
- Muriatic Acid (Diluted): Use this as a last resort. It is a very strong acid. Only use it on acid-resistant tiles like ceramic or porcelain. Never use it on natural stone. You must dilute it greatly. Always wear full protective gear. For more information on handling strong acids, consider resources like how to clean pool tile with muriatic acid. Muriatic acid can also be highly effective for very tough mineral deposits, similar to cleaning calcium buildup on pool tile.
Protective Gear
Safety is important when handling chemicals or scraping. Protect yourself from dust and chemical splashes.
- Safety Glasses/Goggles: Protect your eyes from debris and splashes.
- Gloves: Chemical-resistant gloves are a must. They protect your skin from irritants.
- Dust Mask/Respirator: Wear a mask if creating dust. This prevents inhaling particles.
- Knee Pads: For floor work, knee pads save your joints.
- Ventilation: Work in a well-ventilated area. Open windows and use fans. This reduces fume exposure.
Gathering these items before you start saves effort. It makes the cleaning process smoother. Being prepared helps ensure your success. You will protect both yourself and your tile.
Step-by-Step Guide: Cleaning Fresh Thinset from Tile
Cleaning fresh thinset is the easiest task. Prompt action prevents headaches later. Always monitor your work as you go. This section helps you clean up wet thinset.
Prepare Your Area
First, gather your tools. You need a bucket of clean water, sponges, and cloths. A plastic putty knife is also helpful. Ensure good lighting to spot spills. Fresh thinset is forgiving. It has not fully bonded yet.
Wipe Immediately
As you lay tiles, spills happen. Do not wait for thinset to dry. Immediately wipe away any excess. Use a damp sponge. Wipe across the tile surface. Change the water often. This prevents spreading thinset haze. A clean sponge picks up more residue. I always keep a bucket of water next to me during tiling.
Scrape Gently
Sometimes, a thicker blob appears. Use your plastic putty knife for this. Hold the knife at a low angle. Gently push the thinset off the tile. Collect the removed thinset. Dispose of it properly. Do not press too hard. You might scratch the tile.
Rinse and Inspect
After wiping, rinse the tile surface. Use a clean, damp cloth. Wipe the tile several times. This removes any thin film or haze. Inspect the tile from different angles. Look for any remaining residue. Early removal saves hours of scrubbing later. This step prevents thinset from hardening. It keeps your tiles looking clean from the start.
Working quickly keeps your tiling project neat. It reduces cleanup time later. This proactive approach saves frustration. Fresh thinset comes off with minimal effort.
Tackling Dried Thinset: Methods That Work
Dried thinset is tougher. It requires more effort and patience. Do not get discouraged. Different methods work for different situations. We will explore mechanical and chemical options. Always start with the least aggressive method.
Mechanical Removal for Dried Thinset
Mechanical removal means scraping or grinding. These methods physically remove thinset. They are often the first step for stubborn spots.
- Pre-Soaking: Begin by softening the thinset. Pour warm water over the dried spots. Let it sit for 15-30 minutes. You can also use wet cloths or paper towels. Keep them on the thinset. This rehydrates the mortar. It makes scraping easier.
- Scraping with Caution: Use a plastic scraper for light residue. For tougher spots, switch to a wooden scraper or a dull chisel. Hold the scraper at a very low angle. Almost flat against the tile. Push gently but firmly. The goal is to chip away the thinset without scratching the tile. Use a rubber mallet for the chisel if needed. Tap lightly. I always test a small, hidden spot first. This checks for tile durability.
- Wire Brush (Nylon or Brass): For textured tiles or rough spots, a wire brush helps. Use a nylon brush first. It is less abrasive. If needed, move to a brass brush. Never use steel brushes. They can leave metal marks. Scrub in small circles. This helps lift the thinset.
- Oscillating Tool with Scraper Blade: This power tool can be very effective. It has a vibrating blade. It scrapes thinset quickly. Use it carefully. Keep the blade flat. Avoid digging into the tile or grout. This tool creates dust. Wear a dust mask and safety glasses.
Chemical Applications for Stubborn Spots
When mechanical methods fail, chemicals come into play. These solutions dissolve or weaken the thinset. Always use them in a well-ventilated area.
- Vinegar Solution: For light thinset haze or minor spots, vinegar can work. Mix equal parts white vinegar and warm water. Apply the solution to the thinset. Let it soak for 10-15 minutes. Scrub with a stiff brush. Rinse thoroughly. While vinegar is mild, it might not tackle thick, dried thinset. It’s a good eco-friendly option for general tile cleaning and light residues. For more comprehensive tile cleaning, consider resources like how to clean tile grout on floors. Also, if you need to remove other sticky residues like caulk, similar principles apply as outlined in how to clean caulk off tile.
- Commercial Thinset Remover: Many products exist specifically for thinset. Read the label carefully. They often contain strong acids or solvents. Apply according to instructions. Usually, you apply, let it sit, then scrub and rinse. Always wear gloves and eye protection. These removers can be very effective on tough, dried thinset.
- Muriatic Acid (Diluted): This is the strongest option. Use it only on ceramic or porcelain tiles. It will damage natural stone. Dilute the acid strictly according to package directions. Often, it’s 1 part acid to 10 parts water. Apply with a plastic brush. Do not let it sit for long. Scrub, then rinse immediately with plenty of water. Neutralize the acid with a baking soda paste after rinsing. This is a hazardous chemical. Ensure extreme ventilation. Protect all surrounding surfaces. Refer to guidelines for strong acid use, like how to clean pool tile with muriatic acid.
Start with the gentlest method first. If it does not work, move to a stronger one. This approach prevents tile damage. Patience is key when cleaning dried thinset.
Special Considerations for Different Tile Types
Not all tiles are the same. Their material dictates safe cleaning methods. Using the wrong product can cause permanent damage. Always identify your tile type before you start.
Ceramic and Porcelain Tiles
Ceramic and porcelain tiles are durable. They are less porous than other types. This makes them more forgiving for thinset removal.
- Durability: These tiles can handle most scraping tools. You can use plastic scrapers, chisels, or even oscillating tools. They resist scratches better than natural stone.
- Chemical Resistance: Ceramic and porcelain tiles are generally acid-resistant. This means you can use commercial thinset removers. You can even use diluted muriatic acid as a last resort. Always test a small, hidden area first. Always dilute the acid properly. Rinse thoroughly after use. These tiles are common in showers and floors. For more tips on maintaining these surfaces, check out resources like how to clean ceramic tile shower and how to clean porcelain tile floors without streaks. I find them easiest to clean.
Natural Stone Tiles
Natural stone tiles are beautiful but delicate. They include marble, travertine, granite, slate, and limestone. They are highly porous. They react badly to acids.
- Porous Nature: Thinset can seep into the pores of natural stone. This makes removal harder. Acidic cleaners will etch or dull the stone surface. This damage is often permanent.
- Gentle Methods Only: Avoid all acidic cleaners. This includes vinegar and muriatic acid. Do not use harsh abrasives or steel brushes. Stick to warm water and gentle scraping. Use plastic or wooden scrapers. Poultices designed for stone can help. These absorb stains and residue. Always pre-soak with water. Commercial thinset removers labeled “stone safe” are available. Test them in an inconspicuous spot first. For detailed care of natural stone, refer to how to clean natural stone tile and grout. I advise extreme caution with these materials.
Textured or Glazed Tiles
Textured and glazed tiles have unique surfaces. These surfaces can impact cleaning.
- Textured Tiles: The uneven surface of textured tiles traps thinset. This makes scraping difficult. Use stiff nylon brushes or a brass brush for scrubbing. Focus on getting into the grooves. Chemical removers might be necessary to loosen thinset from recesses.
- Glazed Tiles: Glazed tiles have a smooth, often shiny finish. The glaze itself can be delicate. Avoid aggressive scraping. This can scratch the glaze. Always use plastic or wooden tools first. Be careful with abrasive cleaners. They can dull the shine. Test any chemical cleaner on an unseen area. Ensure it does not affect the glaze.
Always confirm your tile type before starting any cleaning. This protects your investment. It ensures a successful outcome. Taking a moment to identify the material prevents costly mistakes.
Safety First: Protecting Yourself and Your Home
Working with chemicals and sharp tools requires care. Your safety is most important. Protect yourself and your surroundings. Follow these safety guidelines.
Personal Protective Equipment (PPE)
Always wear appropriate gear. This protects your skin, eyes, and lungs.
- Eye Protection: Safety glasses or goggles are non-negotiable. Debris can fly. Chemical splashes can occur. Your eyes are vulnerable.
- Hand Protection: Wear chemical-resistant gloves. Nitrile or rubber gloves are good choices. They protect your hands from chemicals and abrasions.
- Respiratory Protection: Use a dust mask or respirator. Scraping thinset creates dust. Some chemical fumes are harmful. A mask prevents inhalation. Ensure proper fit.
- Knee Pads: If working on floors, knee pads reduce strain. They also protect your knees from hard surfaces.
Ventilation and Area Protection
Working in a well-ventilated space is vital. It reduces exposure to fumes and dust.
- Open Windows and Doors: Create cross-ventilation. This helps air circulate. It removes fumes quickly.
- Use Fans: Position fans to blow fresh air in. They also push contaminated air out. This improves air quality.
- Protect Surrounding Surfaces: Cover nearby furniture, walls, and flooring. Use plastic sheeting or drop cloths. This protects them from splashes and dust. Thinset residue can damage other surfaces.
- Keep Pets and Children Away: Ensure no one else enters the work area. Chemicals and tools pose a hazard. Set up clear boundaries.
Handling Chemicals Safely
Chemical thinset removers and acids are powerful. Use them with extreme caution.
- Read Instructions: Always read the product label entirely. Follow all manufacturer instructions. This includes dilution ratios, application times, and disposal.
- Mix in a Well-Ventilated Area: If mixing, do so outdoors or in a highly ventilated space.
- Never Mix Chemicals: Do not mix different cleaning solutions. This can create dangerous reactions. For example, mixing bleach with acid produces toxic gas.
- Apply Carefully: Use a brush or sprayer suitable for the chemical. Avoid splashing. Apply only to the thinset.
- Rinse Thoroughly: After chemical application, rinse the area completely. Ensure no residue remains. Some chemicals require neutralization after rinsing.
- Proper Storage: Store chemicals in their original containers. Keep them in a cool, dry place. Store them away from children and pets.
Prioritizing safety protects you and your home. Do not rush the process. Take all precautions seriously. A safe job is a good job.
Post-Cleanup Care: Restoring Your Tile’s Shine
You have removed the thinset. The hard work is almost over. Now, focus on making your tiles truly shine. This final stage involves thorough cleaning and protection. It restores your tile’s original beauty.
Neutralize and Rinse Thoroughly
If you used acidic cleaners, neutralization is essential. Acids can continue to react if not stopped.
- Baking Soda Paste: Mix baking soda with water to form a paste. Apply this paste to the areas where you used acid. Let it sit for a few minutes. Baking soda is alkaline. It neutralizes the acid.
- Heavy Rinsing: Rinse the entire tiled area with plenty of clean, fresh water. Use a mop or sponge. Change the rinse water often. You want to remove all chemical residue and neutralized particles. Ensure no soapy or chemical film remains. This prevents streaks and future residue buildup.
Deep Cleaning the Grout and Tile
After thinset removal, your grout might look dirty. The tiles may still have a slight film. A final deep clean is necessary.
- Grout Cleaning: Use a specialized grout cleaner. Apply it to the grout lines. Scrub with a grout brush. For general tile grout on floors, this is a good routine. Consider tips on how to clean tile grout on floors. This makes your grout lines look fresh.
- Tile Cleaning: Clean the entire tile surface with a pH-neutral tile cleaner. This removes any lingering dust or film. Use a microfiber mop or cloth. Ensure the cleaner is appropriate for your tile type. For porcelain tiles, specific methods ensure streak-free results. See how to clean porcelain tile floors without streaks for ideas. I often use warm water and a small amount of dish soap for a final wipe.
- Dry Thoroughly: After cleaning, dry the tiles. Use a clean, dry mop or cloth. This prevents water spots and streaks.
Consider Sealing (Especially for Natural Stone)
Sealing is important for porous tiles. It protects them from future stains.
- Natural Stone: Natural stone tiles must be sealed. Thinset removal can strip existing sealants. Reapply a high-quality impregnating sealer. This penetrates the stone. It forms a protective barrier. It helps prevent absorption of liquids and stains.
- Grout Sealing: You can also seal grout lines. This makes grout easier to clean. It resists staining from spills.
- Porcelain/Ceramic: Most porcelain and ceramic tiles do not require sealing. Their low porosity makes it unnecessary. However, unglazed or highly textured ceramic tiles might benefit from it.
By following these post-cleanup steps, your tile will not just be thinset-free. It will be sparkling clean. It will look brand new. This final effort completes your project beautifully.
FAQ Section
Q1: Can I use vinegar to clean thinset off tile?
A1: White vinegar is a mild acid. It can help soften fresh thinset haze or very thin residue. Mix it with warm water (1:1 ratio). Apply, let it sit for 10-15 minutes, then scrub. However, vinegar is usually not strong enough for thick, dried thinset. Never use vinegar on natural stone tiles like marble or travertine, as it will cause etching.
Q2: Will muriatic acid damage my tile?
A2: Muriatic acid is very strong. It can damage certain tile types. Use it only on ceramic or porcelain tiles. It will etch and permanently damage natural stone, concrete, and unglazed tiles. Always dilute muriatic acid heavily, use full protective gear, and ensure extreme ventilation. Rinse immediately and thoroughly after use to prevent damage.
Q3: How long does thinset need to dry before cleaning?
A3: Fresh thinset should be cleaned immediately while wet. The longer it sits, the harder it becomes. Thinset starts to set within minutes and cures over 24-72 hours. For fully dried thinset, you must wait until it is completely hard to scrape or use chemical removers effectively. This curing time varies by product and conditions.
Q4: Is it safe to use a power grinder to remove thinset?
A4: Using a power grinder with a diamond cup wheel can remove large amounts of dried thinset from concrete subfloors. However, it is generally not recommended for removing thinset off the tile surface itself. A grinder can easily damage or scratch the tile, especially glazed or delicate types. It also creates a lot of dust. This method should be a last resort, used only by professionals, and with extreme caution.
Q5: What is “thinset haze” and how do I clean it?
A5: Thinset haze is a cloudy, dusty film left on tiles after the main thinset has been removed. It is very fine residue. You can often remove it with warm water and a stiff brush, or with a mild acidic cleaner like diluted vinegar. Commercial haze removers are also available. For natural stone, use only neutral pH cleaners or specific stone haze removers to avoid etching the surface.
Q6: Can I use a regular household cleaner for thinset removal?
A6: Regular household cleaners are generally ineffective for removing dried thinset. They are designed for surface dirt, not hardened cementitious materials. While they might help with a very light, fresh haze, they lack the chemical power to break down cured thinset mortar. Specialized thinset removers or acidic solutions are needed for tough jobs.
Conclusion
Cleaning thinset off tile can seem daunting. With the right approach, it is a manageable task. You now understand the tools and techniques. You know how to tackle both fresh and dried thinset. Remember to act quickly for fresh spills. Apply patience and the correct methods for stubborn, dried spots.
Always identify your tile type first. This prevents irreversible damage. Prioritize your safety by wearing protective gear. Ensure proper ventilation. After the thinset is gone, take time for a thorough final clean. Your beautiful, spotless tiles will be a testament to your hard work. Keep your tile surfaces clean. Enjoy your pristine results for years to come.
- thinset removal
- tile cleaning
- mortar residue
- DIY cleaning
- tile maintenance