· Bathroom Cleaning · 18 min read
How To Clean Under Rim Of Toilet
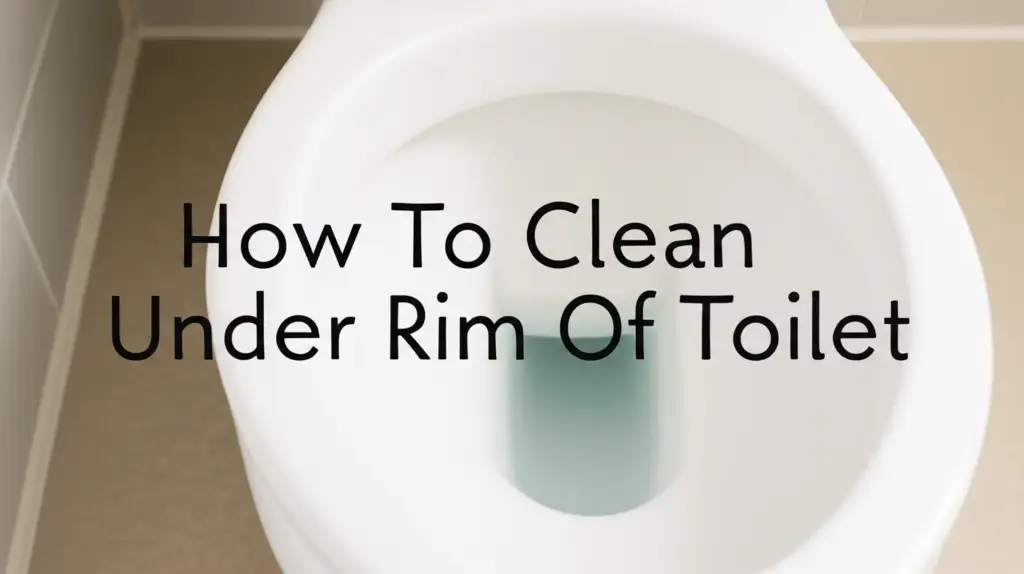
Deep Clean: How to Clean Under Toilet Rim Effectively
The toilet bowl might look clean, but what about the hidden areas? The space under the toilet rim is a prime spot for grime, bacteria, and unsightly mineral deposits to hide. It is often overlooked during regular cleaning routines. Ignoring this area leads to unpleasant odors and can harbor germs, making your bathroom less hygienic.
Knowing how to clean under the rim of toilet effectively is important for a truly clean bathroom. This article provides detailed, actionable steps. We will cover the tools you need, the best cleaning agents, and specialized techniques to conquer even the toughest buildup. You will learn to remove black rings, limescale, and other stubborn stains. Get ready to transform your toilet into a sparkling, fresh fixture.
Takeaway
To clean under the toilet rim thoroughly:
- Gather specific tools like a rim brush, old toothbrush, or angled brush.
- Use a strong acid-based cleaner or natural alternatives like vinegar and baking soda.
- Apply the cleaner and allow sufficient dwell time for tough stains.
- Scrub vigorously under the rim, focusing on hidden channels.
- Rinse and flush multiple times to remove all residue and loosened grime.
- Maintain cleanliness with regular, targeted cleaning to prevent buildup.
How do you effectively clean under the rim of a toilet?
To effectively clean under the rim of a toilet, apply an acid-based toilet cleaner or a vinegar solution directly into the rim jets and channels. Allow it to sit for at least 15-30 minutes. Then, scrub vigorously with a specialized rim brush or an old toothbrush. Flush several times to rinse away dissolved grime and cleaner.
Understanding the Hidden Challenges of the Toilet Rim
Cleaning under the toilet rim presents unique challenges. This area remains largely out of sight during routine cleaning. It is a perfect breeding ground for various unpleasant issues. Water continuously flows through the rim’s channels, carrying minerals and bacteria. Over time, these deposits build up and form a crust.
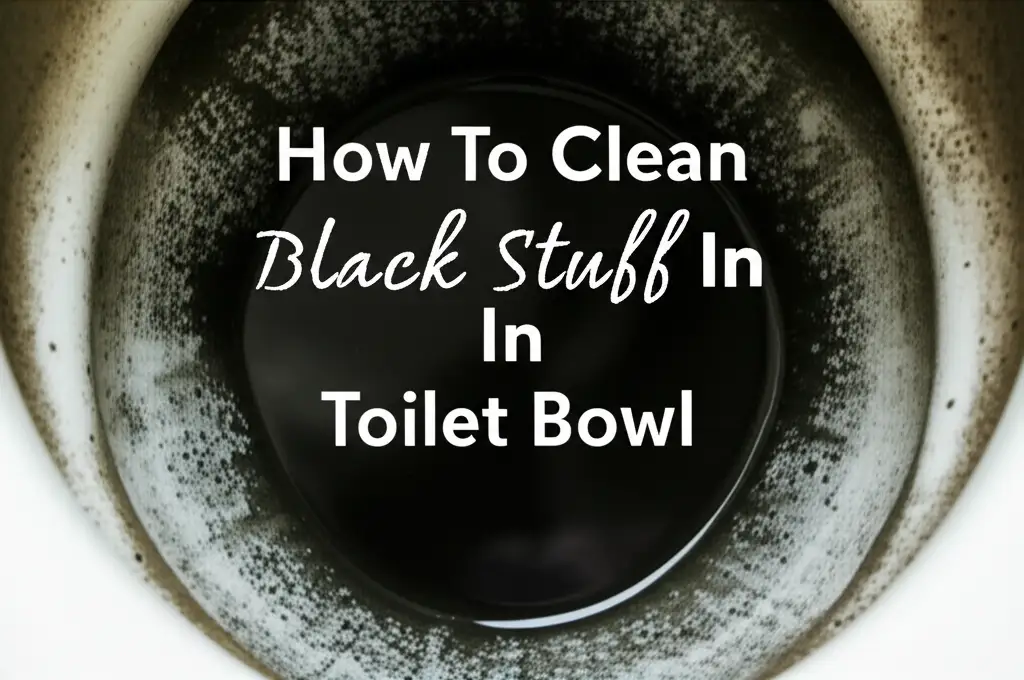
Common problems include limescale, mineral deposits, mold, and mildew. Limescale and other mineral deposits appear as hard, chalky white or brownish stains. They cling stubbornly to surfaces. Mold and mildew often show as black or green spots, thriving in the damp, dark environment. A persistent foul odor often signals a significant buildup under the rim. These hidden growths can also lead to the visible problem of a black ring under the toilet rim.
Traditional toilet brushes often cannot reach deep into these channels. This makes it difficult to remove the accumulated grime. Understanding these challenges helps us select the right tools and cleaning methods. Proper cleaning keeps your toilet truly hygienic and prevents odor issues. It ensures your bathroom smells fresh.
Essential Tools and Cleaning Supplies
Having the right tools makes cleaning under the toilet rim much easier. You do not need many items, but specialized tools are helpful. A good toilet rim brush is a must-have. These brushes often have an angled head or stiff bristles designed to reach into the rim’s crevices.
An old toothbrush also works wonderfully for detailed scrubbing. Its small head lets you get into tight spots. A pair of rubber gloves protects your hands from harsh chemicals. Safety glasses are also a good idea to prevent splashes from reaching your eyes.
For cleaning solutions, you have several choices. A strong acid-based toilet bowl cleaner is highly effective for breaking down limescale and mineral deposits. Products containing hydrochloric acid or phosphoric acid work well. For natural alternatives, distilled white vinegar is a powerful choice. Baking soda offers additional scrubbing power when combined with vinegar. You might also consider a spray bottle for applying solutions evenly. Remember, never mix different cleaning chemicals, especially bleach with acid-based cleaners, as this can create dangerous fumes.
Step-by-Step Guide to Cleaning Under the Toilet Rim
Let’s get into the step-by-step process for cleaning under the toilet rim. This method helps you achieve a sparkling, fresh result. Following these steps ensures you tackle all hidden grime effectively. I find this approach works well for even the toughest build-up.
Step 1: Prepare the Toilet and Gather Supplies
Before you begin, ensure your toilet bowl is as empty as possible. You can do this by turning off the water supply valve behind the toilet. Then, flush the toilet to empty the bowl. If a small amount of water remains, it is fine. This step allows cleaning solutions to work directly on the grime without dilution.
Now, put on your rubber gloves and safety glasses. Gather all your tools and cleaning agents. Have your toilet rim brush, old toothbrush, and chosen cleaner ready. Place a towel on the floor around the toilet to catch any drips.
Step 2: Apply the Cleaning Solution Liberally
It is time to apply your chosen cleaner. If using a commercial toilet bowl cleaner, squirt a generous amount directly under the toilet rim. Aim for the inner channels and the jet holes. Ensure the cleaner coats the entire underside of the rim.
If you prefer a natural solution, pour a cup of distilled white vinegar into a spray bottle. Spray the vinegar generously under the rim, saturating all areas. You can also mix a paste of baking soda and a little water, then spread it under the rim. For extra power, pour about a cup of vinegar into the overflow tube in the toilet tank. This helps clean the water jets from the inside.
Step 3: Allow for Adequate Dwell Time
This step is crucial for effective cleaning. The cleaner needs time to break down the grime, mold, and mineral deposits. For most commercial cleaners, refer to the product’s instructions for recommended dwell time. Generally, 15 to 30 minutes is sufficient for light to moderate buildup.
For heavy limescale or black stains, allow the cleaner to sit for several hours. You can even let it sit overnight. This extended contact time gives the chemicals or natural acids the opportunity to dissolve stubborn grime. Do not flush the toilet during this period. I often apply the cleaner before leaving the house or going to bed.
Step 4: Scrub Thoroughly with Specialized Tools
After the cleaner has had enough dwell time, it is time to scrub. Use your specialized toilet rim brush to scrub vigorously under the entire rim. Pay close attention to the small channels and jet holes. These areas often harbor the most buildup. The angled design of a good rim brush helps reach these difficult spots.
For the really tight crevices and individual jet holes, use an old toothbrush. Push the bristles into each hole to dislodge any remaining deposits. You might be surprised by how much grime comes out. Scrub until you see the stains lifting and the surface feels smooth. You are effectively cleaning those stubborn stains, including limescale from the toilet bowl and any black stuff in the toilet bowl that originates from under the rim.
Step 5: Rinse and Inspect
Once you have scrubbed thoroughly, flush the toilet several times. This rinses away the loosened grime and cleaning solution. Observe the water flow from under the rim. It should be strong and clear. If you still see visible stains or feel rough deposits, repeat the application and scrubbing process.
You might need to repeat the process for very stubborn buildup. Sometimes, a second application with more dwell time is necessary. Inspect the entire rim closely with a flashlight if needed. Ensure every part is clean and free of residue. A truly clean rim contributes to a fresh-smelling bathroom.
Tackling Stubborn Stains: Limescale, Rust, and Black Rings
Sometimes, regular cleaning is not enough. You face specific stubborn stains that require a more targeted approach. Limescale, rust, and black rings are common culprits under the toilet rim. These stains need special attention and often stronger treatments. I have faced these many times, and specific methods always work best.
Removing Limescale and Hard Water Deposits
Limescale appears as a white, chalky, or yellowish crust. It results from mineral buildup in hard water. An acid-based cleaner is your best friend here. Pour a generous amount of strong toilet bowl cleaner directly under the rim. Make sure it contains hydrochloric acid or phosphoric acid. Allow it to sit for at least an hour, or even overnight for severe buildup. The acid will dissolve the calcium and magnesium deposits.
For a natural method, hot distilled white vinegar works well. Heat two cups of vinegar in the microwave. Carefully pour the hot vinegar under the rim using a funnel or a squirt bottle. Let it sit for several hours. The heat helps the vinegar penetrate the deposits. After soaking, scrub with a stiff brush or an old toothbrush. You may need to repeat this process for very thick limescale. Pumice stones can also be effective for cleaning calcium buildup in the toilet, including under the rim, but use them carefully to avoid scratching porcelain.
Eliminating Rust Stains
Rust stains show as reddish-brown marks. They often occur from iron in the water supply or from corroding toilet tank parts. Standard toilet bowl cleaners might not remove rust effectively. For rust, use a cleaner specifically designed for rust removal. These cleaners often contain oxalic acid or phosphoric acid. Apply the rust remover directly to the stained areas under the rim. Let it dwell for the recommended time, usually 15-30 minutes.
After soaking, scrub the rusted areas vigorously with a stiff brush. If a rust-specific cleaner is unavailable, a paste made from lemon juice and borax can sometimes help. Apply the paste and let it sit for a few hours before scrubbing. Regular cleaning prevents rust from becoming a long-term problem. You can find more tips on cleaning rust from a toilet bowl.
Tackling Black Rings and Mold/Mildew
Black rings and black stains under the rim often indicate mold, mildew, or severe bacterial buildup. These thrive in damp, dark environments. For these, a cleaner with bleach or a strong disinfectant is very effective. Apply a bleach-based toilet cleaner generously under the rim. Allow it to sit for at least 30 minutes, or longer if the stain is stubborn. Remember, never mix bleach with acid-based cleaners. This combination creates dangerous toxic gas.
Alternatively, for a natural solution, spray a solution of hydrogen peroxide or tea tree oil under the rim. Let it sit for an hour. Then, scrub thoroughly with your rim brush and old toothbrush. Ensure you reach deep into all channels. Regular maintenance is key to preventing these black rings under the toilet rim from returning. Ensure good ventilation in your bathroom to reduce humidity, which helps prevent mold growth.
Natural and DIY Cleaning Solutions
Many people prefer using natural or DIY cleaning solutions. These options are often safer for the environment and for people with sensitivities to harsh chemicals. You can achieve excellent results with common household ingredients. I often use these methods for routine cleaning and lighter buildup.
Vinegar and Baking Soda Power
The combination of white vinegar and baking soda creates a powerful cleaning reaction. This mixture fizzes, helping to loosen grime and stains. It is effective for general cleaning and moderate mineral deposits.
- How to use it: First, sprinkle about half a cup of baking soda liberally under the toilet rim. Try to get it into all the crevices. Next, pour or spray a cup or two of distilled white vinegar over the baking soda. You will see a fizzing reaction immediately. Let this mixture sit for at least 30 minutes, or even a few hours. The fizzing action helps break down organic matter and light mineral deposits. After soaking, scrub thoroughly with your toilet rim brush and old toothbrush. Flush several times to rinse. This method is also excellent for general cleaning with vinegar and baking soda.
Lemon Juice and Borax Paste
Lemon juice contains citric acid, a natural cleaning agent. Borax is a natural mineral with cleaning and deodorizing properties. Combined, they form a paste effective against mild stains and grime.
- How to use it: Mix about a quarter cup of borax with enough fresh lemon juice to form a thick paste. Apply this paste directly to the stained areas under the rim. Use a small spatula or an old spoon to spread it. Let the paste sit for an hour or two. The acidic lemon juice and borax work together to lift stains. After the dwell time, scrub the areas well with a brush. Rinse thoroughly with water.
Hydrogen Peroxide for Mold and Mildew
Hydrogen peroxide is a mild disinfectant and bleaching agent. It is excellent for tackling mold and mildew without the harshness of bleach. It breaks down into water and oxygen, making it environmentally friendly.
- How to use it: Pour 1/2 cup of 3% hydrogen peroxide into a spray bottle. Spray it liberally under the toilet rim, targeting any black or green mold spots. Let it sit for at least 30 minutes. The hydrogen peroxide will kill mold spores and help lighten stains. After soaking, scrub the area with your toilet brush. Flush to rinse. For stubborn mold, you might need to repeat this process.
Maintaining a Clean Toilet Rim for Longer
Cleaning under the toilet rim thoroughly is a great start. However, consistent maintenance keeps it clean and prevents future buildup. Regular care minimizes the need for deep cleaning sessions. I incorporate these habits into my routine.
Establish a Regular Cleaning Schedule
Consistency is key. Aim to clean under the toilet rim at least once a week. A quick scrub with your specialized rim brush and a squirt of cleaner during your regular bathroom cleaning routine helps immensely. This prevents grime from hardening and becoming difficult to remove. Marking it on your calendar or setting a reminder on your phone can help establish this habit.
Preventative Measures for Hard Water and Stains
If you live in an area with hard water, mineral deposits are a recurring problem. Consider using a toilet bowl cleaner that specifically targets hard water stains and limescale as part of your regular cleaning. You can also occasionally pour a cup of white vinegar under the rim and let it sit for an hour. This helps dissolve minerals before they build up significantly. Another option is to use toilet bowl drops designed to inhibit mineral deposits. Keeping the toilet tank clean also helps prevent new stains from forming in the bowl and rim. You can learn more about how to clean your toilet tank with baking soda.
Proper Ventilation and Drying
Mold and mildew thrive in moist environments. Ensuring good ventilation in your bathroom helps prevent their growth under the toilet rim. Open a window or use an exhaust fan during and after showers. This reduces overall humidity. After cleaning the toilet, you can also wipe down the visible areas of the rim with a dry cloth. This helps dry the surface faster. A dry environment is less hospitable for mold and bacteria. These simple steps can make a big difference in maintaining cleanliness.
Advanced Techniques and Professional Tips
Sometimes, the buildup under the toilet rim is so severe that standard methods struggle. In these cases, a few advanced techniques and professional tips can make a significant difference. These methods require more caution but yield impressive results.
Using a Pumice Stone for Extreme Buildup
A pumice stone is a powerful tool for removing very stubborn mineral deposits and rings. It works by gently abrading the hard surface without scratching the porcelain. However, use it with care. A pumice stone can clean a toilet effectively, but always keep it wet.
- How to use it: Ensure the pumice stone and the toilet surface are wet. Gently rub the pumice stone over the hard mineral deposits under the rim. Apply light pressure. The stone will break down the buildup. Rinse frequently to check your progress. Avoid excessive force, as this could potentially damage the porcelain. A pumice stone is best for mineral deposits, not for general grime or mold.
Utilizing Steam Cleaners for Sanitization
Steam cleaners offer a chemical-free way to sanitize and loosen tough grime. The high heat of steam kills bacteria and melts away waxy buildup. While not ideal for dissolving hard mineral deposits, it is excellent for sanitization and preparing the area for scrubbing.
- How to use it: Use a steam cleaner with a nozzle attachment. Direct the steam jet under the toilet rim, moving slowly along the channels. The steam will loosen organic matter and disinfect the area. After steaming, immediately scrub with a brush to remove the loosened grime. Then, flush the toilet to rinse. Steam cleaning is especially effective for removing sticky residues and general dirt.
Considering Professional Cleaning Services
For toilets with years of neglect or extremely severe buildup, professional cleaning might be the best option. Professional cleaners have access to industrial-grade products and specialized equipment. They can safely handle very tough stains and ensure a comprehensive clean. They can assess the type of buildup and apply the most effective, safe treatment.
A professional cleaning service can restore your toilet to a near-new condition. They also offer valuable advice on maintaining cleanliness. This can save you time and effort in the long run. It is an investment in your home’s hygiene and appearance.
What Not To Do When Cleaning Under the Toilet Rim
While cleaning is important, knowing what to avoid is equally crucial. Improper cleaning techniques or product choices can damage your toilet or create safety hazards. Always prioritize safety and product compatibility.
Avoid Mixing Chemicals
This is a critical safety rule. Never mix different cleaning chemicals, especially bleach with acid-based cleaners (like toilet bowl cleaners containing hydrochloric acid or vinegar). Mixing these creates toxic chlorine gas. This gas is extremely dangerous and can cause severe respiratory problems or even be fatal. Use one cleaner at a time, and rinse thoroughly before applying a different type if necessary.
Do Not Use Abrasive Tools on Porcelain
While a pumice stone is generally safe when used correctly on porcelain, avoid other overly abrasive tools. Steel wool, very stiff metal brushes, or harsh scouring pads can scratch the toilet’s porcelain surface. Scratches not only look bad but also create rough spots where grime and bacteria can more easily accumulate in the future. Stick to brushes designed for toilets, plastic scrapers, or pumice stones for tough spots.
Neglecting Proper Ventilation
Working with strong cleaners in an enclosed space can lead to inhaling fumes. Always ensure good ventilation when cleaning your bathroom. Open a window or turn on the exhaust fan. If fumes are strong, take breaks to get fresh air. Good ventilation protects your respiratory system and helps dry surfaces, preventing mold growth.
Ignoring Product Instructions
Always read and follow the instructions on your cleaning product labels. Manufacturers provide specific guidelines for safe and effective use. This includes recommended dwell times, dilution ratios, and safety precautions. Ignoring these instructions can lead to ineffective cleaning, product waste, or even personal injury. Every product is formulated differently.
Frequently Asked Questions
What causes the black gunk under the toilet rim?
Black gunk under the toilet rim is usually mold, mildew, or a combination of bacteria and mineral deposits. These thrive in the dark, damp environment. Hard water minerals, soap scum, and organic matter provide food for their growth. Regular cleaning with a disinfectant helps prevent this buildup.
How often should I clean under the toilet rim?
You should clean under the toilet rim at least once a week during your regular bathroom cleaning routine. For households with hard water or high usage, more frequent cleaning, perhaps twice a week, might be beneficial. This prevents stubborn buildup from forming.
Can I use bleach to clean under the toilet rim?
Yes, you can use bleach-based toilet cleaners or a diluted bleach solution to clean under the toilet rim. Bleach is effective for killing mold, mildew, and bacteria. However, never mix bleach with other cleaners, especially acid-based ones or vinegar, as this creates dangerous fumes.
Is it safe to pour vinegar directly into the toilet tank for cleaning the rim?
Yes, pouring vinegar into the toilet tank is generally safe and can help clean the rim’s jets. It helps break down mineral deposits from the inside out. Use distilled white vinegar. Avoid using it if you have old rubber components in your tank, as concentrated vinegar can sometimes degrade them over time.
What is the best tool for scrubbing under the toilet rim?
The best tool for scrubbing under the toilet rim is a specialized toilet rim brush with an angled or curved head. An old toothbrush is also excellent for reaching into the tiny jet holes and very tight crevices that larger brushes cannot access.
How do I prevent limescale buildup under the toilet rim?
To prevent limescale buildup, regularly use an acid-based toilet cleaner or white vinegar under the rim. For hard water areas, consider using toilet bowl tablets designed to prevent mineral deposits. Also, ensure regular scrubbing to remove deposits before they harden.
Conclusion
Cleaning under the rim of toilet is a vital step for a truly hygienic and fresh-smelling bathroom. This often-neglected area harbors grime, mold, and stubborn mineral deposits. We have explored effective strategies, from gathering the right tools to applying strong cleaners or natural solutions. You now understand how to tackle everything from everyday grime to challenging limescale and black stains.
Regular maintenance and targeted cleaning are key to preventing buildup and keeping your toilet pristine. Embrace the powerful combination of proper tools, effective cleaning agents, and consistent effort. Your efforts will result in a healthier, cleaner bathroom environment. Take action today and transform your toilet from neglected to remarkably clean.
- toilet cleaning
- under toilet rim
- deep cleaning
- bathroom hygiene
- limescale removal
- toilet stains