· Home Care · 18 min read
How To Clean Vacuum Cleaner
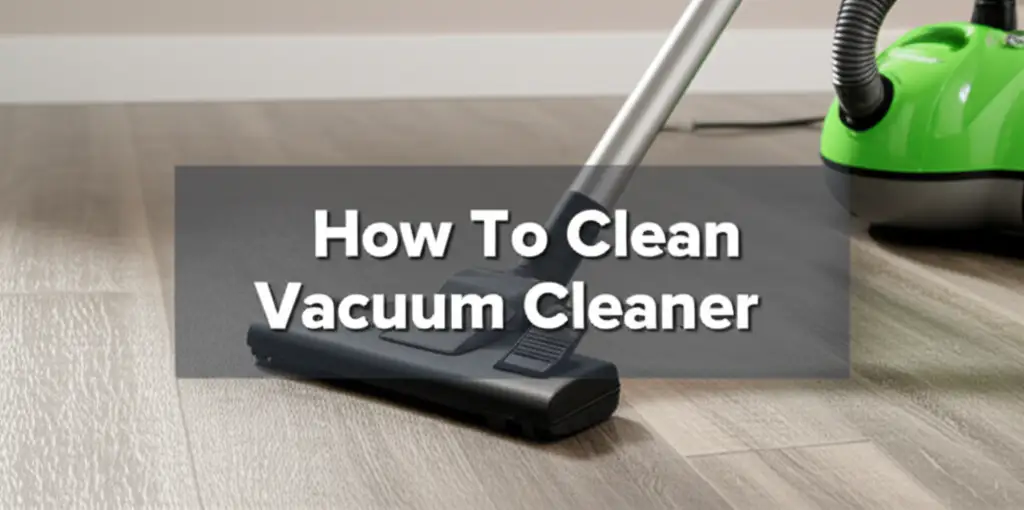
Reclaim Suction Power: How To Clean Your Vacuum Cleaner
Do you remember when your vacuum cleaner picked up every speck of dust effortlessly? Over time, even the best vacuums lose their cleaning power. Dirt, hair, and debris build up inside, making your vacuum less effective. This article shows you how to clean your vacuum cleaner to restore its suction and extend its life. You will learn simple steps to maintain different vacuum types. Keeping your vacuum clean means your home stays cleaner, too. Let’s make your vacuum work like new again!
Takeaway:
- Empty the dustbin or change the bag regularly.
- Clean or replace filters to improve air flow.
- Remove tangled hair and debris from the brush roll.
- Check hoses and attachments for clogs.
- Perform routine maintenance for lasting performance.
Cleaning your vacuum cleaner involves emptying the dustbin or changing the bag, washing or replacing filters, removing hair from the brush roll, and clearing any clogs from hoses or attachments. This process restores suction power and keeps your cleaning tool working efficiently. Regular maintenance prevents breakdowns and improves overall cleaning results in your home.
Why Cleaning Your Vacuum Cleaner Matters
A vacuum cleaner is a hard-working appliance. It pulls in dust, dirt, pet hair, and allergens daily. Over time, these particles build up inside the machine. This buildup clogs filters, wraps around brush rolls, and blocks hoses. When this happens, your vacuum loses suction power. It cannot pick up dirt as well as it used to.
A dirty vacuum also pushes dust back into the air. This makes your home less clean, not more. Regular cleaning makes your vacuum work better. It picks up more dirt and filters the air more effectively. A clean vacuum also lasts longer. You save money by not needing to buy a new one too soon. Think of it as giving your cleaning partner a much-needed spa day. I always feel better knowing my tools are in top condition for the job.
Gather Your Tools: What You Need to Clean Your Vacuum
Before you start cleaning, get all your supplies ready. Having everything at hand makes the job faster and easier. You likely have most of these items around your home already. Safety is important, so always unplug your vacuum before you start. This prevents accidental starts.
Here is a list of what you will need:
- Scissors or seam ripper: For cutting tangled hair from the brush roll.
- Microfiber cloth or old rags: For wiping down surfaces and parts.
- Soft brush or old toothbrush: To scrub stubborn dirt from crevices and filters.
- Mild soap or dish detergent: For washing certain filters or bins.
- Warm water: For rinsing washable parts.
- Gloves: To protect your hands from dust and dirt.
- Trash bag: For disposing of dust and debris.
- Screwdriver (optional): Some models might need one to access specific parts.
Having these tools ready helps you clean your vacuum efficiently. You can focus on the task without interruption. Remember, patience is key to a thorough clean.
Step-by-Step Guide: How to Clean Canister and Upright Vacuums
Cleaning your upright or canister vacuum involves a few key areas. Each step addresses a common point of dirt buildup. Following these steps helps restore your vacuum’s peak performance. Always unplug your vacuum from the wall outlet first for safety.
Empty the Dustbin or Change the Bag
This is the most frequent cleaning task. A full dustbin or bag greatly reduces suction.
- For Bagless Vacuums: Locate the release button for the dustbin. Take the bin to a trash can. Press the release lever to open the bottom and empty all contents. Wipe the inside of the bin with a damp cloth if needed. Let it air dry completely before putting it back. Many manufacturers, like Dyson, design their dustbins for easy emptying. To learn more about specific Dyson models, you can check guides on how to clean Dyson vacuum v11 or how to clean Dyson Animal vacuum.
- For Bagged Vacuums: Open the bag compartment. Carefully remove the full bag, making sure to seal the opening if it has one. Place it in a trash bag. Insert a new vacuum bag according to your vacuum’s instructions. A fresh bag ensures maximum airflow and suction.
Clean or Replace Filters
Filters trap fine dust particles, preventing them from re-entering your air. Dirty filters choke your vacuum’s airflow.
- Locate Filters: Most vacuums have at least one pre-motor filter and often a post-motor or HEPA filter. Refer to your vacuum’s manual for filter locations.
- Tap Off Loose Dirt: Take the filters outside. Gently tap them against a hard surface to dislodge loose dust. You will see a cloud of dirt come off.
- Washable Filters: If your filter is washable (check your manual!), rinse it under cool running water. Squeeze it gently until the water runs clear. Do not use soap unless specified. Let the filter air dry for at least 24 hours. It must be completely dry before reinserting. A damp filter can damage your vacuum and promote mold growth. Brands like Shark often have washable filters. For specifics on how to clean Shark vacuum filters, you can find dedicated guides.
- Non-Washable Filters: These cannot be washed. If they are heavily soiled, you must replace them. A good rule of thumb is to replace non-washable filters every 3-6 months.
- HEPA Filters: Many HEPA filters are not washable and need replacement annually. Check your specific model for details. This is especially true for advanced filtration systems found in models like those from Dyson.
Clear the Brush Roll (Beater Bar)
The brush roll picks up debris from carpets and hard floors. Hair and threads easily get tangled around it.
- Access the Brush Roll: Turn the vacuum cleaner over. You may need to remove a bottom plate held by screws or clips.
- Remove Debris: Use scissors or a seam ripper to cut away tangled hair, string, or fibers. Be careful not to cut the bristles or the belt. Pull all cut debris off the brush roll.
- Check for Damage: Spin the brush roll by hand. It should spin freely. Check the bristles for wear. If they are matted or worn down, it might be time for a replacement brush roll.
- Clean the Belt: Inspect the drive belt that connects the brush roll to the motor. Make sure it is intact and not stretched or broken. A worn belt can prevent the brush roll from spinning.
Inspect Hoses and Attachments
Clogs in the hose or attachments can drastically reduce suction.
- Remove Attachments: Detach all accessories like crevice tools, upholstery brushes, and extension wands.
- Check for Clogs: Look through each attachment. Use a broom handle or a long, slender object to push through any blockages.
- Inspect the Hose: Remove the main hose from both ends of the vacuum. Stretch it out and look through it for any obstructions. You can often feel clogs by squeezing the hose along its length. If you find a clog, gently push it through with a broom handle or similar object. Be careful not to puncture the hose.
Cleaning Specific Vacuum Types: Cordless, Stick, and Handheld Vacuums
While the core principles of cleaning a vacuum cleaner remain, specific types have unique features. Cordless, stick, and handheld vacuums are popular for their convenience and compact size. Their maintenance often focuses on accessible components and battery care. I find these smaller vacuums incredibly useful for quick clean-ups, so keeping them in top shape is essential.
Cordless and Stick Vacuums
These vacuums combine mobility with decent power. Their smaller size means components can clog faster.
- Dust Bin: Empty the dust bin after every use. Cordless vacuums often have smaller bins that fill up quickly.
- Filters: Many cordless vacuums feature washable filters. Remove the filter and rinse it under cool water until clear. Allow it to air dry for at least 24 hours. Never put a damp filter back into the vacuum. This can damage the motor and lead to mold. Some models, like the Shark Rocket Vacuum or specific Dyson handheld vacuums, have very accessible filters for easy cleaning.
- Brush Bar/Head: The main cleaning head is crucial. Remove the brush bar (often by releasing a latch or cover). Use scissors to cut away any tangled hair or fibers. Wipe the entire head, including wheels, with a damp cloth. Some Dyson models, like the Dyson vacuum head, have specific instructions for disassembly and cleaning.
- Battery Care: While not a cleaning task, proper battery care extends the life of your cordless unit. Follow manufacturer guidelines for charging and storage. Avoid extreme temperatures.
Handheld Vacuums
Handheld vacuums are perfect for small spills and quick tasks. They are simple to clean due to their basic design.
- Dust Cup: These have small dust cups. Empty them frequently, ideally after each use.
- Filters: Most handheld vacuums use simple filters, often washable foam or pleated paper. Remove and rinse washable filters, ensuring they dry completely. Replace non-washable filters as needed.
- Nozzle/Attachments: Check the suction nozzle for any blockages. Use a small brush or a stick to clear debris. Wipe down any attachments.
Regular, quick maintenance on these smaller vacuums keeps them ready for action. It prevents bigger issues down the line. I make it a habit to check the brush bar on my stick vacuum every few uses. It really makes a difference in its performance.
Maintaining Robotic Vacuums: A Special Approach
Robotic vacuums offer hands-free cleaning, but they still need your attention. Their compact design and reliance on sensors require specific cleaning steps. Neglecting these can lead to poor navigation and less effective cleaning. I’ve seen firsthand how a little regular care keeps these smart cleaners running smoothly.
Emptying the Dust Bin and Cleaning Filters
Just like other vacuums, the dust bin is the first place to check. Robotic vacuum bins are usually smaller.
- Frequent Emptying: Empty the dust bin after every few runs, or even daily, especially if you have pets. A full bin reduces suction and leaves dirt behind.
- Filter Care: Most robot vacuums have a HEPA-style filter. Remove the filter and tap it over a trash can to dislodge dust. Some models have washable filters; if so, rinse them under cool water and let them air dry completely. Replace filters according to the manufacturer’s recommendations, usually every 1-2 months. Specific brands like Shark Robot Vacuums often provide clear filter maintenance guidelines.
Cleaning Brushes and Side Brushes
Robotic vacuums use main brush rolls and small side brushes to sweep debris into the suction path. These collect a lot of hair.
- Main Brush Roll: Invert the robot vacuum. Locate the main brush roll assembly. You usually unclip a cover to access it. Use scissors to cut away any tangled hair or string. Pull out all debris. Ensure the brush spins freely when reinstalled. Some advanced models, like those from Bissell, have easy-to-remove brush rolls.
- Side Brushes: These small brushes push debris into the main cleaning path. They often get tangled. Pull off any hair or threads. If a side brush is damaged or missing bristles, replace it. Many side brushes can be easily popped off for cleaning.
Cleaning Sensors and Charging Contacts
Robotic vacuums rely heavily on sensors for navigation. Dirty sensors can cause your robot to bump into walls, get stuck, or miss spots.
- Drop Sensors: These are usually on the bottom of the robot. They prevent the vacuum from falling down stairs. Wipe them gently with a clean, dry microfiber cloth.
- Bumper Sensors: These detect obstacles. Wipe around the bumper area to remove any dust that might interfere with its movement.
- Charging Contacts: These metal pads on the robot and the charging base need to be clean for proper charging. Wipe both sets of contacts with a dry cloth. Corrosion or dirt can prevent your robot from charging.
Regular sensor and brush cleaning ensures your robotic vacuum can navigate efficiently and clean effectively. It’s a small effort for continuous automated cleaning.
Troubleshooting Common Vacuum Issues After Cleaning
Even after a thorough clean, your vacuum might still have issues. This is normal, and often, simple troubleshooting can solve the problem. I always double-check these common areas if my vacuum isn’t performing as expected.
Poor Suction Despite Cleaning
If you have cleaned everything and suction is still weak, here’s what to check:
- Hidden Clogs: A small clog can hide deep in the hose or internal ducts. Detach the hose completely and visually inspect it. Use a broom handle or a long, stiff wire (like a coat hanger straightened out) to push through the entire length of the hose. Also, check the port where the hose connects to the vacuum body.
- Gaskets and Seals: Ensure all dustbin gaskets, filter seals, and hose connections are tight. A tiny air leak can significantly reduce suction. Replace any cracked or worn seals.
- Filter Installation: Double-check that all filters are correctly inserted and fully seated. A misplaced filter can disrupt airflow.
- Bag Full/Bin Overfilled: Even if you just emptied it, ensure it’s not somehow over capacity from a previous missed spot. Also, verify the bag is correctly installed and not blocked internally.
- Brush Roll Height: On upright vacuums, ensure the brush roll height setting is appropriate for your flooring. Too high, and it won’t agitate carpet fibers; too low, and it can reduce airflow on hard floors.
Vacuum Smells Bad
A persistent bad odor usually indicates mold or bacteria growth, often from moisture or embedded debris.
- Deep Clean Dustbin: If your dustbin is washable, give it a thorough wash with warm soapy water. Use a few drops of dish soap or a mild disinfectant. Rinse well and dry completely, ideally in sunlight.
- Washable Filters: Re-wash any washable filters. Ensure they dry for at least 24-48 hours. A damp filter will breed mold.
- Replace Filters: If filters are old or non-washable, replace them. Odors often cling to filter material.
- Clean Brush Roll Thoroughly: Embedded pet hair or food particles in the brush roll can cause smells. Clean it meticulously.
- Baking Soda Trick: Sprinkle baking soda inside the empty dustbin or a new vacuum bag. This can help absorb lingering odors as you vacuum.
Brush Roll Not Spinning
This is a common problem, especially for pet owners.
- Belt Check: The most common cause is a broken or stretched drive belt. Turn the vacuum over and inspect the belt that connects the motor to the brush roll. If it’s broken, you will need to replace it. This is usually an inexpensive part.
- Tangles: Even after a quick clean, a significant amount of hair or string might still be preventing the brush roll from spinning. Remove the brush roll and thoroughly clean around its end caps and bearings.
- Obstruction: A small object (like a coin or a toy) might be jammed in the brush roll housing. Remove it carefully.
- Brush Roll Bearing: Sometimes the bearings at the ends of the brush roll can wear out or become stiff, preventing free movement. In this case, the brush roll itself might need replacement.
- Motor Issues: If none of the above fix the problem, there might be an electrical issue with the brush roll motor. This often requires professional repair.
Addressing these issues methodically can bring your vacuum back to full health. Don’t give up if the first clean doesn’t solve everything!
Preventative Maintenance Tips for Long-Lasting Performance
Cleaning your vacuum is essential, but preventing issues in the first place is even better. Regular, simple habits can significantly extend your vacuum cleaner’s life and maintain its cleaning power. Think of these as small investments that pay off big in the long run. I’ve learned that a little proactive care saves a lot of hassle later.
Empty the Dustbin/Bag Often
This is the simplest yet most crucial tip. Do not wait until the bin is overflowing or the suction drops.
- After Every Use: For smaller dustbins on stick or handheld vacuums, empty them after every cleaning session.
- When Half Full: For larger upright or canister vacuum bins, aim to empty them when they are about half to two-thirds full. A fuller bin restricts airflow sooner than you might think.
- Change Bags Regularly: Do not overfill vacuum bags. Change them when they are about 80% full, even if they don’t seem to be affecting suction yet. An overfilled bag strains the motor.
Clean Filters Periodically
Filters are the lungs of your vacuum. They need to breathe to work correctly.
- Washable Filters: Wash them monthly or every few uses, depending on how often you vacuum and how dirty your home gets. Always allow at least 24 hours for complete air drying.
- Non-Washable Filters: Tap them out weekly. Replace them every 3-6 months.
- HEPA Filters: Replace these annually or as recommended by your vacuum’s manufacturer. Mark the date of replacement on the filter itself or in your calendar. Brands like Hoover carpet cleaners also rely on clean filters for optimal performance, so apply these principles broadly.
Inspect the Brush Roll Regularly
Hair and debris love to wrap around the brush roll. This can quickly hinder its performance.
- Weekly Check: Flip your vacuum over weekly (or every few uses) and visually inspect the brush roll.
- Cut Away Tangles: Use scissors or a seam ripper to remove any tangled hair, string, or threads. This takes only a minute but makes a huge difference.
- Check for Wear: Over time, brush roll bristles can wear down. If they are no longer effective at agitating carpets, consider replacing the brush roll. This can be particularly important for maintaining powerful suction, similar to how proper maintenance helps keep a Rainbow Vacuum in good working order.
Clear Hoses and Attachments
Don’t forget the tools you use!
- Periodically Check for Clogs: Every few months, or if you notice a sudden drop in suction, detach the hose and check for blockages. Push a broom handle through it.
- Clean Attachments: Wipe down your crevice tools, upholstery brushes, and other attachments after use. This prevents dust and debris from hardening inside them.
Avoid Vacuuming Certain Things
Prevention is better than cure. Some items should never go into your vacuum.
- Liquids or Damp Debris: Never vacuum wet messes. This can damage the motor, cause mold, or lead to electrical hazards.
- Fine Powders: Fine powders like drywall dust, fireplace ash, or large amounts of flour can quickly clog filters and overwhelm your vacuum’s motor. Use a shop vac for these tasks.
- Sharp Objects: Glass shards, nails, screws, or staples can puncture bags, damage the hose, or scratch internal components. Pick these up by hand.
- Large Objects: Big pieces of paper, socks, or small toys can easily cause immediate clogs in the hose or brush roll.
By adopting these simple maintenance habits, your vacuum cleaner will perform better and serve you reliably for many years. It is worth the small amount of time to keep your cleaning ally in top shape.
FAQ Section
How often should I clean my vacuum cleaner?
You should empty the dustbin or change the bag after every few uses or when half full. Clean or tap out filters monthly. Deep clean the brush roll and check hoses every 1-3 months, depending on usage and presence of pets. Regular, lighter cleaning prevents bigger issues.
Can I wash my vacuum filter?
Some vacuum filters are washable, typically foam or pleated plastic ones. Check your vacuum’s manual to confirm if yours is washable. If it is, rinse it under cool running water until the water runs clear. Always allow it to air dry completely for at least 24 hours before reinserting it.
What if my vacuum still smells bad after cleaning?
A bad smell often means lingering moisture or embedded organic matter. Re-wash any washable filters and the dustbin, ensuring they dry completely, ideally in sunlight. Replace non-washable filters. You can also sprinkle baking soda in the dustbin or new bag to absorb odors.
How do I clear a vacuum clog?
First, unplug the vacuum. Detach the hose and all attachments. Look inside each section for visible blockages. Use a broom handle, a straightened coat hanger, or a long, stiff brush to push through the clog. Always check the main vacuum inlets and outlets as well.
Is it safe to use water when cleaning vacuum parts?
Only use water on parts specifically marked as “washable” by your vacuum’s manufacturer. These usually include dustbins and certain filters. Never get the motor, electrical components, or non-washable parts wet. Ensure all washed parts are completely dry before reassembly.
What specific cleaning is needed for pet hair vacuums?
Pet hair vacuums need more frequent brush roll cleaning due to hair tangles. Empty the dustbin more often as pet hair fills it quickly. Pay close attention to cleaning pet hair from filters; consider washing or replacing them more frequently. Check the upholstery tool for hair buildup often.
Conclusion
Keeping your vacuum cleaner in top condition is easier than you think. A clean vacuum picks up more dirt, lasts longer, and improves your home’s air quality. We covered how to clean your vacuum cleaner by emptying the dustbin, cleaning filters, and clearing brush rolls and hoses. We also discussed specific steps for cordless and robotic models.
Remember, a little routine maintenance goes a long way. Regularly empty the bin, wash washable filters, and cut hair from the brush roll. If you run into issues, simple troubleshooting steps can often restore power. By following these guidelines, you ensure your vacuum remains a powerful tool in keeping your home spotless. Take charge of your cleaning tools today!
- vacuum cleaner cleaning
- vacuum maintenance
- deep clean vacuum