· Home Maintenance · 20 min read
How To Clean Vinyl Siding With A Pressure Washer
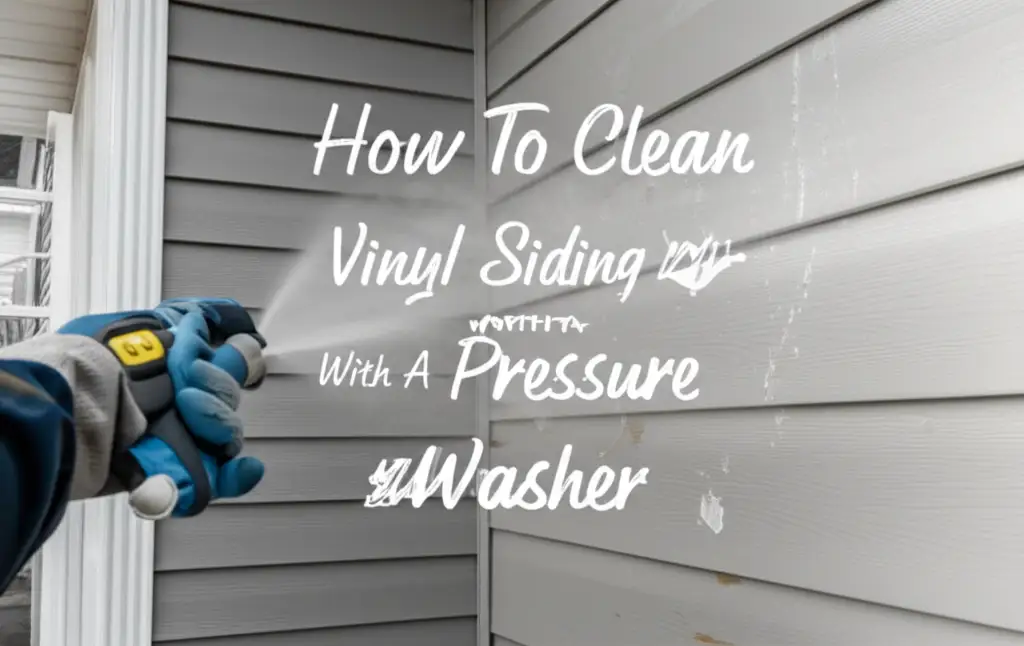
Clean Vinyl Siding Effectively: Pressure Washing Your Home
My home’s vinyl siding gets dirty over time. It collects dust, grime, and green algae. I know this dirt makes my house look less appealing. Cleaning it makes a big difference in curb appeal.
Today, I want to show you how to clean vinyl siding with a pressure washer. This method saves time and effort. It restores your home’s appearance. We will cover choosing the right equipment. We will also review safety precautions. I will guide you through the entire cleaning process.
You will learn how to prepare your house. I will explain the best cleaning techniques. This article ensures a safe and effective clean. Get ready to give your home a fresh look!
Takeaway
- Choose the right pressure washer and nozzles: Use a low PSI (1200-1500) and a wide-angle tip (25-40 degrees).
- Prepare the area: Protect plants, cover electrical outlets, and seal windows.
- Use appropriate cleaning solutions: Mix detergents specifically for vinyl siding.
- Master the technique: Work from bottom to top when applying soap, then top to bottom when rinsing. Maintain a safe distance from the siding.
- Prioritize safety: Wear eye protection, gloves, and sturdy shoes.
- Address stubborn stains: Treat mold, mildew, or rust spots specifically before general washing.
How do you clean vinyl siding with a pressure washer?
To clean vinyl siding with a pressure washer, first, prepare your home by protecting plants and covering electrical outlets. Mix a suitable cleaning solution and apply it with a low-pressure nozzle. Then, rinse the siding thoroughly from top to bottom using a fan-tip nozzle, keeping a safe distance to avoid damage.
Why Pressure Wash Vinyl Siding? Restore Your Home’s Appearance
Vinyl siding provides a durable exterior for many homes. However, it collects dirt over time. Dust, spiderwebs, and environmental pollutants stick to the surface. This accumulation can make a beautiful home look neglected. Regular cleaning helps maintain its appearance.
Dirty siding also impacts your home’s value. A clean exterior instantly boosts curb appeal. It creates a good first impression. Pressure washing quickly removes years of built-up grime. This effort enhances your property’s overall aesthetic appeal. It also protects your investment.
Beyond aesthetics, dirt and organic growth can harm your siding. Mold, mildew, and algae thrive on damp surfaces. They break down materials over time. These growths can also cause health issues for residents. Pressure washing removes these harmful elements. It prevents them from causing long-term damage.
I find that pressure washing is the most efficient method for this task. It reaches high areas easily. It also cleans large surfaces quickly. Manual scrubbing would take hours or even days. A pressure washer completes the job in a fraction of the time. It delivers powerful results with less physical effort.
Understanding Common Vinyl Siding Stains
Many types of stains appear on vinyl siding. Each stain has a specific cause. The most common stains are green and black. Green stains usually indicate algae growth. Black stains often mean mildew. These thrive in shaded, damp areas.
Other stains include dirt and grime from rain and wind. These make the siding look dull. Spiderwebs and insect nests also cling to the surface. These add to the dirty appearance. Pressure washing tackles these common issues effectively.
Rust stains can also appear. These often come from metal fixtures or sprinklers. Pollen leaves a yellow film during allergy season. Even bird droppings leave unsightly marks. Identifying the stain type helps you choose the right cleaning solution.
Benefits of Regular Siding Cleaning
Regular cleaning extends the life of your vinyl siding. It removes harmful organisms like mold and mildew. These organisms eat away at the siding material. They cause premature aging. Consistent cleaning prevents this degradation.
A clean home exterior also prevents costly repairs. Left unchecked, mold can spread into the walls. It can cause structural damage. Regular pressure washing stops this problem early. This proactive maintenance saves money in the long run.
Finally, regular cleaning creates a healthier living environment. Mold and mildew release spores into the air. These spores trigger allergies and respiratory issues. Cleaning your siding reduces these airborne irritants. My family enjoys a healthier outdoor space because of it.
Choosing the Right Pressure Washer for Vinyl Siding
Selecting the correct pressure washer is crucial. The wrong type or setting can damage your vinyl siding. Vinyl is durable but not indestructible. I always recommend using a pressure washer with adjustable PSI. This allows for precise control.
Pressure washers come in different power levels. These levels are measured in PSI (pounds per square inch). They also consider GPM (gallons per minute). GPM indicates water flow. Both numbers are important for effective cleaning. A higher GPM cleans faster.
For vinyl siding, a lower PSI is safer. Too much pressure can gouge, crack, or even remove siding panels. It can also force water behind the siding. This leads to moisture problems and mold growth inside walls. Always start with the lowest effective pressure.
I prefer electric pressure washers for home use. They are generally quieter than gas models. They also require less maintenance. Electric washers typically offer a lower PSI range. This range is ideal for delicate surfaces like vinyl siding.
Electric vs. Gas Pressure Washers
Electric pressure washers are perfect for light to medium-duty tasks. They plug into a standard outlet. They produce less noise. They are also lighter and easier to move around. Their PSI range usually goes from 1,300 to 2,000 PSI. This range is perfect for vinyl siding.
Gas pressure washers offer more power. Their PSI can go above 3,000. This power is excellent for concrete or heavily soiled surfaces. However, it is too powerful for vinyl siding. Gas washers are louder and require fuel. They also need more maintenance. I only use them for very tough jobs, never for vinyl.
For most homeowners, an electric pressure washer is sufficient. It provides enough power to remove dirt and grime. It also keeps your siding safe. You can rent one if you do not own one. Make sure it has adjustable pressure settings.
Ideal PSI for Vinyl Siding
The safest PSI for cleaning vinyl siding is between 1,200 and 1,500. Some experts even recommend staying below 1,500 PSI. Using anything higher risks damaging the material. It can force water into crevices. This causes unseen damage.
Always start with the lowest PSI setting on your machine. Test it on an inconspicuous area first. This could be a hidden part of the siding. Observe how the siding reacts. Increase the pressure gradually if needed. Stop when the dirt removes without harming the siding.
Most electric pressure washers fall within this safe range. If you use a gas model, be extra cautious. Adjust the pressure regulator carefully. Use a wide-angle nozzle, like a 25-degree or 40-degree tip. These tips spread the water pressure over a larger area. They reduce the risk of damage.
Essential Tools and Cleaning Solutions for Vinyl Siding
Having the right tools and cleaning solutions makes the job easier and safer. Beyond the pressure washer itself, you need specific accessories. These ensure an effective clean. I always gather everything before I start. This prevents interruptions during the process.
You will need different nozzles for your pressure washer. Each color-coded nozzle provides a specific spray pattern. You will also need a good quality cleaning solution. This helps break down stubborn dirt, mold, and mildew. Remember to include safety gear. Protecting yourself is important.
Detergent application is crucial. Many pressure washers have a soap tank or a siphon tube. These allow you to mix and apply cleaning solutions. Using the right solution helps lift dirt without aggressive scrubbing. It makes the pressure washer more effective.
I also keep a soft-bristled brush handy. This is for scrubbing any areas with really tough stains. Sometimes, the pressure washer alone is not enough. A little manual scrubbing can help. This combination provides the best results.
Selecting the Correct Nozzles
Pressure washer nozzles are color-coded. Each color indicates a different spray pattern.
- 0-degree (Red) nozzle: This delivers a concentrated, powerful stream. It is very dangerous for vinyl siding. I never use this for siding. It will cause severe damage.
- 15-degree (Yellow) nozzle: This provides a narrower spray. It is still too strong for vinyl siding. Avoid this for general cleaning.
- 25-degree (Green) nozzle: This offers a wider spray pattern. It reduces pressure intensity. This nozzle is suitable for rinsing vinyl siding. It is a good starting point for cleaning.
- 40-degree (White) nozzle: This gives the widest, gentlest spray. It is ideal for applying soap and for general rinsing. This is my preferred nozzle for vinyl siding. It spreads the pressure safely.
- Soap (Black) nozzle: This nozzle has the widest opening and lowest pressure. It is designed for applying detergents. It creates a foam that clings to the surface. Always use this nozzle when applying cleaning solutions.
I typically use the black soap nozzle for detergent. Then I switch to a 40-degree or 25-degree nozzle for rinsing. This combination ensures safe and effective cleaning.
Effective Cleaning Solutions for Vinyl Siding
Plain water often isn’t enough for tough stains. A good cleaning solution lifts dirt and kills mildew. You can buy specialized vinyl siding cleaners. These are formulated for exterior use. They are safe for plants and pets.
I often use a mixture of household items. A popular solution is a mix of water, dish soap, and white vinegar. This natural cleaner works well on light grime. For stubborn mold and mildew, I might add a small amount of bleach. Use bleach sparingly. Bleach can harm plants if not diluted properly.
Always follow the manufacturer’s instructions for any commercial cleaner. Mix the solution in a bucket or the pressure washer’s detergent tank. Do not use abrasive cleaners. These can scratch or dull the vinyl. Make sure the solution is safe for your pressure washer.
For particularly challenging stains, such as stubborn mold or mildew, a stronger solution might be necessary. Just as you might tackle tough mineral deposits when learning how to clean hard water stains on shower glass, specialized cleaners are best for vinyl. These often contain mildewcides. They kill the spores that cause the growth. Always test any strong solution on an inconspicuous area first. This ensures it does not discolor or damage your siding.
Safety Gear You Need
Pressure washing involves high-pressure water. This requires important safety precautions. I never start without the right gear. Safety glasses protect your eyes from flying debris and chemicals. The water stream itself can also cause eye injury.
Waterproof gloves protect your hands. They guard against chemicals in the cleaning solution. They also prevent skin irritation from prolonged water exposure. Sturdy, closed-toe shoes with good grip are also essential. Slippery surfaces are common during pressure washing. This footwear prevents falls.
Wear long pants and a long-sleeved shirt. This protects your skin from splashes and debris. Avoid wearing loose clothing. It can get caught in machinery. Always keep pets and children away from the work area. The powerful water stream can cause serious injury.
If you are using a ladder, ensure it is stable. Have someone hold it for you. Avoid directing the pressure washer stream at yourself or others. The force can cause severe injury. Always follow the pressure washer’s operating manual.
Pre-Cleaning Preparations for Your Home
Before you start pressure washing, proper preparation is essential. This step protects your home and landscape. It also ensures a smoother cleaning process. Skipping preparation can lead to damage or delays. I dedicate ample time to this phase.
I start by clearing the immediate work area. Move outdoor furniture, grills, and decorations. Store them away from the splashing water and chemicals. This prevents them from getting dirty or damaged. It also creates a clear path for me to work.
Next, I address landscaping. Protecting plants and shrubs is vital. The pressure from the water or chemicals can harm them. Covering electrical outlets and light fixtures is also crucial. Water and electricity are a dangerous combination.
Finally, I inspect the siding itself. Look for any loose panels or damage. These areas need special attention. Pressure washing can worsen existing problems. Addressing them beforehand prevents bigger issues.
Protecting Your Landscape and Fixtures
Water and cleaning solutions can harm plants. I always wet down all plants, bushes, and flowers around the house. This saturates their leaves and soil. It helps dilute any cleaning solution that splashes on them.
After wetting, I cover sensitive plants with tarps or plastic sheeting. This provides an extra layer of protection. Ensure the covers are secure. Remove them as soon as you finish cleaning. This allows plants to breathe and dry.
Electrical outlets and light fixtures need waterproof covers. Use plastic bags and duct tape to seal them completely. Make sure water cannot seep into them. This prevents electrical shorts and hazards. Check that all windows and doors are fully closed and latched. I even recommend taping window seams. This stops water from entering your home.
Moving items like garden hoses, decorative items, and anything near the house perimeter creates a safe zone. This prevents accidental damage or entanglement. Just as you would clear a space for a different outdoor cleaning task like learning how to clean dryer vent from outside with drill, removing obstacles around your siding ensures safety and efficiency.
Inspecting Your Siding
Before turning on the pressure washer, walk around your entire house. Closely inspect the vinyl siding. Look for any loose, cracked, or damaged panels. Note any areas that are already showing signs of wear.
The high pressure can worsen existing damage. It can rip off loose siding. It can also force water behind panels. This creates perfect conditions for mold growth inside your walls. Repair any significant damage before cleaning. This might involve reattaching loose pieces or sealing cracks.
Pay attention to areas around windows and doors. Check the caulking. Ensure it is intact and secure. If you find any gaps, seal them before washing. This prevents water intrusion. This thorough inspection prepares your home for a safe and effective clean.
Step-by-Step Guide to Pressure Washing Vinyl Siding
Now comes the actual cleaning process. This involves careful application of soap and rinsing. Following these steps ensures a thorough clean without damaging your siding. I always work systematically to cover all areas evenly.
Remember to wear your safety gear. Double-check your connections. Ensure your pressure washer is set up correctly. Start with the gentlest settings and nozzles. You can always increase pressure if needed, but you cannot reverse damage.
I begin by rinsing the entire house with plain water. This helps loosen some surface dirt. It also prepares the siding for the cleaning solution. Then, I apply the detergent, letting it soak. Finally, I rinse everything thoroughly. This methodical approach delivers the best results.
Always work in sections. Do not try to clean the entire side of the house at once. Cleaning in manageable sections allows for proper soaking and rinsing. This prevents the cleaning solution from drying on the siding. Dried solution leaves streaks.
Starting the Cleaning Process
First, connect your pressure washer to a water source and power outlet. If using a gas washer, ensure it has enough fuel. Attach the black (soap) nozzle to the wand. Fill the detergent tank with your chosen cleaning solution.
Start the pressure washer. Begin by wetting down the entire section you plan to clean. Do this with plain water. Work from top to bottom. This initial rinse removes loose dirt. It also helps the cleaning solution spread evenly.
Now, apply the cleaning solution. Work from the bottom of the section upwards. This prevents streaking. If you apply from the top, the solution can run down onto dry siding. This creates dirty streaks. Ensure even coverage of the cleaning solution.
Let the solution dwell on the siding for 5-10 minutes. Do not let it dry completely. Drying solutions can leave marks. If it starts to dry, mist it lightly with water. This keeps it active.
Mastering Pressure Washing Technique
After the solution dwells, switch to a 40-degree or 25-degree nozzle for rinsing. Start at the top of the section. Work your way down. This allows gravity to help pull the dirty water away. Overlap your spray paths slightly. This ensures no spots are missed.
Keep the nozzle 12-18 inches away from the siding. Closer distances increase the risk of damage. Move the wand in smooth, sweeping motions. Avoid focusing the stream on one spot for too long. This prevents etching or gouging the vinyl.
Pay attention to corners, window frames, and under eaves. These areas collect a lot of dirt. Use careful, sweeping motions here. Do not spray directly into vents or openings. This can force water into your home.
I always hold the wand at a slight downward angle. This helps guide the dirty water down the siding. It prevents water from going under the panels. This technique is important for preventing moisture problems.
Rinsing Thoroughly
After cleaning a section, rinse it completely. Ensure all soap residue is gone. Soap left on the siding will attract more dirt. It can also leave unsightly streaks. Rinse until the water runs clear.
Rinse from top to bottom. This washes away loosened dirt and detergent. Pay attention to all nooks and crannies. Check under window sills and eaves. These areas often trap soap.
Step back and look at the cleaned section. Check for any missed spots or streaks. If you see any, re-apply solution and rinse again. Sometimes, stubborn spots need a second pass. Just like you might perform multiple rinses to ensure a streak-free finish when tackling how to clean hard water stains on shower glass, complete rinsing is key to a spotless vinyl siding finish.
Move to the next section. Repeat the entire process. Continue until you clean all the vinyl siding on your house. This systematic approach ensures a consistent clean.
Tackling Stubborn Stains on Vinyl Siding
Even with proper technique, some stains cling stubbornly. Mold, mildew, and rust are common culprits. These require more targeted treatment. I prepare special solutions for these specific problems. This ensures they are fully removed.
Never increase the pressure drastically to remove tough stains. This will damage the siding. Instead, rely on the right cleaning agent. Let the chemical do the work. Give it enough dwell time.
Sometimes, gentle scrubbing is necessary. Use a soft-bristled brush attached to an extension pole. This allows you to reach high areas safely. Always test a small, hidden area first. This checks for any discoloration or adverse reactions.
For some stains, multiple applications might be needed. Be patient and persistent. My goal is to remove the stain without harming the vinyl. This approach ensures a pristine finish.
Removing Mold and Mildew
Mold and mildew appear as black or green fuzzy spots. They thrive in damp, shaded areas. These growths need a specific cleaner. A bleach-based solution is very effective. Mix one part bleach with four parts water. Add a squirt of dish soap to help it cling.
Apply this solution directly to the moldy areas. Use a garden sprayer for this. Let it sit for 10-15 minutes. Do not let it dry. If it starts to dry, mist it with water. The bleach kills the mold spores.
After dwelling, rinse the area with your pressure washer. Use a 40-degree or 25-degree nozzle. Keep a safe distance. The mold should lift away easily. For extremely tough mold on surfaces, similar concentrated efforts are needed, much like when cleaning a heavily affected concrete basement floor after a flood.
If mold persists, repeat the application. You might need to gently scrub the area. Use a soft brush. Then, rinse again. Ensure the area is thoroughly cleaned to prevent regrowth.
Dealing with Dirt and Grime
General dirt and grime are the easiest to remove. A good quality vinyl siding cleaner works best. These often contain surfactants that lift dirt. Mix according to the product’s instructions.
Apply the cleaner with the black (soap) nozzle. Start from the bottom and work up. Allow the solution to soak for several minutes. The cleaner penetrates and loosens the dirt. This prepares it for rinsing.
Rinse thoroughly from top to bottom. Use a 40-degree or 25-degree nozzle. Keep the nozzle a safe distance from the siding. Ensure all dirt and soap residue are washed away. This process leaves your siding clean and bright.
For areas with heavy dirt buildup, a second application might be helpful. Sometimes, a gentle scrub with a soft brush helps break up thick layers of grime. Always rinse well after scrubbing.
Addressing Rust Stains
Rust stains often appear below metal fixtures. They also come from sprinkler systems. These orange-brown marks are difficult to remove. Bleach does not work on rust. You need an oxalic acid-based cleaner.
Look for rust removers specifically for siding. Follow the product’s instructions carefully. These cleaners typically require direct application. They often need a longer dwell time.
Apply the rust remover to the stain. Let it sit for the recommended time. The oxalic acid reacts with the rust. It breaks it down. Do not let the cleaner dry on the siding.
After dwelling, rinse the area thoroughly with your pressure washer. Use a low-pressure nozzle. Ensure all traces of the rust remover are gone. If the stain remains, repeat the process. Stubborn rust might require professional help.
Post-Cleaning Care and Maintenance Tips
Your vinyl siding now looks fantastic. The cleaning is complete. However, the job is not truly finished until you perform some post-cleaning care. This helps preserve your hard work. It also prepares your home for the future.
After cleaning, I always take a final walk-around. I inspect the entire house. This ensures no spots were missed. It also allows me to check for any unexpected issues. A thorough inspection is crucial.
Proper drying is important. Do not close up your house immediately. Let the siding air dry completely. This prevents moisture buildup. It also helps prevent new mold growth.
Finally, consider ongoing maintenance. Regular light cleaning prevents heavy buildup. This makes future pressure washing jobs easier. It keeps your home looking great all year round.
Final Inspection and Drying
Once you finish pressure washing all sections, turn off the machine. Detach the hoses. Store your equipment properly. Then, perform a detailed final inspection.
Walk slowly around your entire house. Look at the siding from different angles. Check for any missed spots, streaks, or residue. Pay close attention to areas under eaves, around windows, and in corners. These are common places to miss.
If you find any missed spots, address them immediately. A quick spot treatment and rinse might be all that is needed. Ensure the siding is completely clean.
Allow the siding to air dry naturally. This can take several hours depending on weather conditions. Sunlight and breeze help speed up the process. Do not cover the siding while it is drying. This traps moisture.
Preventing Future Algae and Mildew
Preventing future growth saves you time and effort. Several steps can help. Regular light cleaning is the first defense. A quick rinse with a garden hose can prevent heavy buildup.
Consider applying a mildewcide or anti-algae treatment. These products inhibit growth. They create an unfriendly environment for spores. Apply these after your siding is completely dry. Follow the product instructions for application.
Trim back overgrown bushes and trees. These create shaded areas. They also reduce air circulation. Both conditions promote mold and mildew growth. Ensure good ventilation around your home.
Address any drainage issues around your foundation. Water pooling near the house can contribute to siding dampness. Install gutters or downspout extenders. Redirect water away from your home. Consistent attention prevents significant problems.
FAQ Section
1. Can I use bleach on vinyl siding? Yes, you can use bleach on vinyl siding. Mix one part household bleach with four parts water. Add a small amount of dish soap. This solution effectively kills mold and mildew. Always rinse thoroughly after applying any bleach solution. Bleach can harm plants, so protect your landscaping.
- vinyl siding cleaning
- pressure washing
- house washing
- exterior cleaning
- mold removal
- siding maintenance