· Home Cleaning · 19 min read
How To Clean Walls With Mop
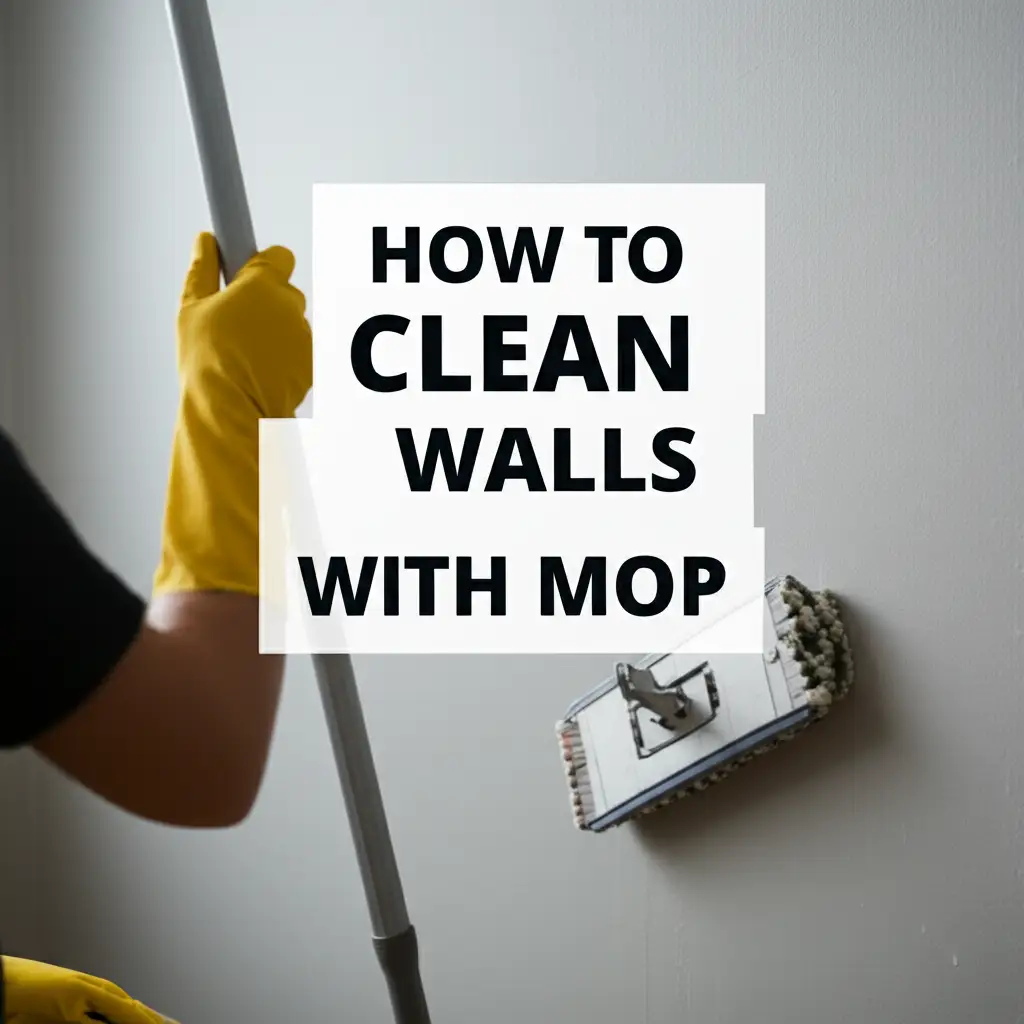
Effortless Wall Cleaning: How To Clean Walls With Mop
Have you ever looked at your walls and noticed a dull film or subtle smudges? Walls, like floors, gather dust and dirt over time. Knowing how to clean walls with a mop can make this chore much easier and faster. It is a fantastic method to refresh large wall surfaces.
This guide will show you how to use a mop for effective wall cleaning. We will explore the best tools and cleaning solutions. We will also cover essential preparation steps and detailed cleaning techniques. You will learn to avoid common mistakes like streaks and paint damage. By the end, your walls will look fresh and bright, making your home feel much cleaner.
Takeaway
- Choose the Right Mop: Use a flat-head or microfiber mop designed for walls.
- Prepare Your Space: Dust walls and protect furniture before cleaning.
- Test Cleaning Solution: Always test in an inconspicuous area first.
- Work Top-Down: Clean walls from top to bottom to avoid drips on clean sections.
- Use Proper Solution: Use a mild, diluted cleaning solution and wring out excess water.
- Rinse Frequently: Keep your mop head clean for streak-free results.
- Dry Promptly: Air dry or gently wipe walls dry to prevent water marks.
To clean walls with a mop, first dust the entire wall surface. Then, prepare a mild cleaning solution and dampen a microfiber or flat mop head. Work from top to bottom in small sections, overlapping your strokes. Rinse the mop frequently and wring it thoroughly to prevent excess moisture and streaks.
Why Use a Mop for Wall Cleaning?
Cleaning walls can feel like a big job. Using a mop offers several benefits that make this task much simpler. It lets you cover large areas quickly. A mop also helps you reach high spots without needing a ladder. This saves you time and effort.
Traditional hand scrubbing can be tiring. It often leaves streaks or uneven spots. A mop, especially a flat or microfiber type, glides smoothly across surfaces. It applies even pressure. This results in a more uniform clean. Plus, it keeps your hands out of harsh cleaning solutions.
Mops are versatile tools. They are not just for floors. Many modern mop designs are perfect for vertical surfaces. They pick up dust and grime efficiently. Using a mop can transform wall cleaning from a dreaded chore into a manageable task.
However, using a mop for walls also has challenges. You must control the amount of water on the mop. Too much water can damage paint or drywall. It can also leave unsightly streaks. Choosing the right cleaning solution is also crucial. A harsh cleaner can strip paint. A mild, all-purpose solution works best for most walls. We will discuss specific solutions in a later section.
The key is proper technique and preparation. You need to dust walls well before washing. This stops dust from turning into muddy streaks. You also need to protect your floors and furniture. A simple drop cloth can do this job. With the right approach, a mop becomes a powerful tool for maintaining clean walls. It helps keep your living space fresh and bright.
Essential Tools and Supplies for Mop Wall Cleaning
Successful wall cleaning with a mop depends on having the right tools. Picking the correct mop head and cleaning solution is important. These choices prevent damage and ensure a sparkling finish. Let us look at what you need to gather.
First, the mop itself. Not all mops are suitable for walls. You need a mop that is lightweight and easy to control. A flat-head mop with a microfiber pad is an excellent choice. Microfiber material attracts dust and dirt effectively. It holds cleaning solution well without dripping excessively. It also glides smoothly over painted surfaces. A spin mop with a clean, soft head can also work. Ensure the mop head is not abrasive. You want to avoid scratching your walls. You also need to keep your mop head clean. Learn how to clean mop head without washing machine to ensure it is ready for the next job.
Next, you will need two buckets. One bucket will hold your cleaning solution. The other will hold clean rinse water. This two-bucket method is vital for preventing dirt transfer. It keeps your cleaning solution from becoming dirty too quickly. You also need a wringer mechanism, either built into the bucket or separate. This helps you control the dampness of your mop.
For cleaning solutions, mild is key. Dish soap mixed with warm water works well for general dirt. You can also use a mixture of white vinegar and water. For tougher spots, a small amount of all-purpose cleaner might be necessary. Always dilute these cleaners properly. Avoid harsh chemicals like bleach. They can damage paint or leave residue. Remember, gentleness is important when cleaning walls.
You will also need a few other items. A soft brush or duster is crucial for pre-cleaning. Drop cloths or old towels protect your floors and furniture from drips. You might also want a ladder for very high areas. Safety glasses protect your eyes from splashes. Finally, old rags or microfiber cloths are useful for drying or spot-cleaning. Having all these supplies ready makes the cleaning process efficient.
- Mops:
- Flat-head microfiber mop
- Spin mop with soft microfiber head
- Buckets:
- Two large buckets (one for solution, one for rinse water)
- Cleaning Solutions:
- Mild dish soap
- White vinegar
- Warm water
- Optional: Gentle all-purpose cleaner
- Other Supplies:
- Soft duster or vacuum with brush attachment
- Drop cloths or old towels
- Ladder (for high walls)
- Safety glasses
- Clean microfiber cloths (for drying)
Preparing Your Walls and Room for Mop Cleaning
Proper preparation is the secret to successful wall cleaning. Skipping these steps can lead to more work or even damage. Taking a few minutes to prepare will protect your home and make the cleaning process smoother. This section details how to get your walls and room ready.
First, you must remove all loose dust and cobwebs from your walls. Dust acts like a magnet for moisture. If you try to wash dusty walls, you will create muddy streaks. Use a soft duster with an extendable handle. A vacuum cleaner with a brush attachment also works well. Start from the top of the wall and work your way down. Pay attention to corners and edges. This step is essential for a streak-free clean.
Next, protect your furniture and flooring. Water drips are almost impossible to avoid when cleaning walls. Move furniture away from the walls. Cover anything you cannot move with drop cloths or old sheets. Lay down old towels or drop cloths along the baseboards. This will catch any spills or drips. It saves you from having to clean your floors afterward.
Before applying any cleaner, always test it in an inconspicuous area. This is very important. Find a hidden spot, like behind a door or inside a closet. Apply a small amount of your chosen cleaning solution with a damp cloth. Let it sit for a few minutes, then wipe it off. Check for any discoloration, paint removal, or damage. Different paint types react differently to cleaners. This quick test prevents damage to your main walls. If you are worried about damaging the paint, there are ways to clean walls without removing paint. Learn how to clean walls without removing paint.
Finally, gather all your tools and supplies. Fill one bucket with your cleaning solution and the other with clean rinse water. Place your drop cloths and towels. Make sure your mop is ready. Having everything organized saves time during the cleaning process. Good preparation sets you up for a highly effective and safe wall cleaning experience.
- Dust Walls Thoroughly:
- Use a soft duster or vacuum with a brush attachment.
- Start from the top and work downwards.
- Focus on corners and edges.
- Protect Furniture and Flooring:
- Move furniture away from walls.
- Cover immovable items with drop cloths.
- Lay towels or drop cloths along baseboards.
- Test Cleaning Solution:
- Find an inconspicuous area (e.g., behind a door).
- Apply a small amount of solution.
- Check for discoloration or damage after a few minutes.
- Organize Supplies:
- Prepare two buckets (solution, rinse water).
- Have mop, cloths, and other tools ready.
Step-by-Step Guide to Cleaning Walls with a Mop
Now that you have prepared your space, it is time to start cleaning. Following these steps ensures a thorough and streak-free clean. Remember, patience and proper technique are your best friends here. Let us begin the wall cleaning process.
First, fill one bucket with your chosen cleaning solution. As discussed, a mix of warm water and a few drops of dish soap works for most walls. Fill your second bucket with plain clean water for rinsing. This two-bucket system prevents you from spreading dirt around.
Dip your mop head into the cleaning solution. Wring out excess liquid thoroughly. Your mop should be damp, not dripping wet. Too much water can damage drywall or paint. It can also leave streaks. A well-wrung mop helps you control moisture on the wall surface.
Start cleaning from the top of the wall. Work in small sections, about a 3x3 foot area at a time. Work your way downwards. Gravity will pull any drips down. If you start from the bottom, drips from above will run over already clean areas. This can create streaks. Use gentle, overlapping strokes. This ensures even coverage.
After cleaning each section, rinse your mop head in the clean water bucket. Wring it out well again. Then, use the damp, rinsed mop head to wipe down the section you just cleaned. This removes any soap residue. Rinsing your mop frequently is crucial. A dirty mop will only spread grime around, leading to dull, streaky walls. Keep the rinse water clean by changing it when it gets cloudy.
For stubborn spots, you might need to apply a bit more pressure. You can also use a soft sponge or cloth for specific marks. Then, follow up with the mop. Once a section is clean, allow it to air dry. If you notice streaks, you might have used too much solution or not rinsed enough. In that case, gently wipe the area again with a clean, damp cloth. Repeat the process section by section until all your walls are clean.
- Prepare Solution and Rinse Water:
- Fill one bucket with mild cleaning solution.
- Fill a second bucket with plain clean water.
- Dampen and Wring Mop:
- Dip mop in cleaning solution.
- Wring out until just damp, not dripping.
- Clean Top-Down in Sections:
- Start at the top of the wall.
- Clean in small, manageable sections (e.g., 3x3 feet).
- Use gentle, overlapping strokes.
- Rinse and Rewipe:
- Rinse mop head in clean water after each section.
- Wring thoroughly.
- Rewipe the cleaned section with the damp, rinsed mop to remove residue.
- Change Rinse Water:
- Change the rinse water when it becomes cloudy.
- Address Stubborn Spots:
- Use slightly more pressure or a separate cloth for tough marks.
- Allow to Air Dry:
- Let the cleaned walls air dry naturally.
Tackling Different Wall Surfaces and Stains with a Mop
Not all walls are the same. Different wall surfaces and types of stains require specific approaches. Understanding these differences ensures you clean effectively without causing damage. Let us look at common wall types and how to handle various marks with your mop.
Painted walls are the most common surface you will clean. The type of paint matters. Latex or acrylic paints are generally more washable than oil-based paints. Flat or matte finishes are less durable than satin, eggshell, or semi-gloss. For flat paints, use very little moisture and wipe gently. For shinier finishes, you can be a bit more robust. Always remember to test your cleaning solution in a hidden spot first. This helps you understand how the paint reacts.
Wallpapered walls need careful handling. Most modern wallpapers are washable or scrubbable. However, vintage or delicate wallpapers are not. For washable wallpaper, use a very slightly damp mop with mild soap. Avoid saturating the paper. Excessive moisture can loosen the adhesive and cause bubbling or peeling. If your wallpaper is not washable, stick to dry dusting only.
Textured walls, like those with knockdown or popcorn finishes, can trap dirt. A flat microfiber mop works well. It can reach into the crevices. However, be gentle. Rough textures can sometimes snag or damage mop heads. For these walls, less moisture is often better to prevent dirt from settling deeper into the texture.
Now, let us talk about stains. Regular dust and grime usually come off with your basic cleaning solution. For specific marks, you might need extra steps. For scuff marks, try a magic eraser or a damp cloth with baking soda paste. Gently rub the mark, then wipe it clean with your mop. Learn how to clean scuff marks off walls for detailed steps. For crayon or ink marks, rubbing alcohol on a clean cloth can work. Always test first.
Smoke stains, whether from cigarettes or candles, are particularly tough. These stains leave a sticky residue. A solution of white vinegar and water, or a specialized smoke cleaner, might be necessary. Wipe carefully with your mop. Be prepared to rinse your mop head more often. You may also need to change your cleaning solution frequently. For specific advice on smoke residue, you can learn how to clean candle smoke off walls or how to clean yellow walls from smoke. These resources provide deeper insights into removing these challenging stains.
- Painted Walls:
- Latex/Acrylic: Generally washable, but test first.
- Flat/Matte Finish: Use minimal moisture, wipe gently.
- Satin/Eggshell/Semi-Gloss: More durable, can handle slightly more moisture.
- Always test solution in an inconspicuous area.
- Wallpapered Walls:
- Washable Wallpaper: Use a very slightly damp mop, mild soap. Avoid saturation.
- Delicate/Non-Washable: Dry dust only.
- Textured Walls:
- Use a flat microfiber mop.
- Be gentle to avoid snagging.
- Use less moisture to prevent dirt trapping.
- Specific Stains:
- Scuff Marks: Gentle rubbing with a magic eraser or baking soda paste.
- Crayon/Ink: Rubbing alcohol on a cloth, test first.
- Smoke Stains: Vinegar/water solution or specialized cleaner. Requires frequent mop rinsing and solution changes.
Avoiding Streaks and Damage When Mop Cleaning Walls
The goal of cleaning walls is to make them look fresh and clean, not streaky or damaged. Preventing streaks and protecting your walls requires attention to detail. This section focuses on key strategies to achieve a flawless finish.
The most common cause of streaks is using too much water. A dripping wet mop will leave excess moisture on the wall. This moisture dries unevenly, leaving visible lines. Always wring your mop head thoroughly. It should be damp, not soaked. You should not see water running down the wall after you pass the mop. This controlled dampness is crucial for streak-free results.
Another major culprit for streaks is a dirty mop head or dirty rinse water. If your mop head is full of grime from previous sections, you are just spreading that dirt. This creates streaks. Rinse your mop head frequently in your clean water bucket. If the rinse water becomes cloudy, change it immediately. Using a clean mop and clean water ensures you are removing dirt, not relocating it.
Improper cleaning solution can also cause issues. Too much soap will leave a sticky residue that attracts more dirt and causes streaks. Use only a small amount of mild cleaning solution. For general cleaning, a few drops of dish soap in a bucket of warm water is usually enough. For an alternative, a white vinegar solution can be very effective at preventing streaks. Vinegar evaporates cleanly and cuts through residue. Learn how to clean painted walls without leaving streaks for more detailed guidance.
Speed and technique play a part too. Working in small, manageable sections is better than trying to clean a large area all at once. This allows you to maintain consistent pressure and dampness. Overlapping your strokes slightly also helps. This prevents missed spots and uneven cleaning.
Finally, consider the drying process. Air drying is generally fine. However, if your room is humid or if you used slightly more water than intended, you might want to gently wipe down the walls with a clean, dry microfiber cloth immediately after cleaning. This helps remove any remaining moisture before it can leave water spots. By paying attention to these details, you can ensure your walls look spotless and beautiful after every clean.
- Control Moisture:
- Wring mop thoroughly; it should be damp, not dripping.
- No visible water should run down the wall after mopping.
- Maintain Mop and Water Cleanliness:
- Rinse mop head frequently in clean water.
- Change rinse water immediately when it becomes cloudy.
- A dirty mop spreads grime and causes streaks.
- Use Proper Cleaning Solution:
- Use minimal, mild cleaning solution (e.g., few drops of dish soap).
- Consider white vinegar solution for streak prevention.
- Avoid excessive soap or harsh chemicals.
- Apply Proper Technique:
- Work in small, manageable sections.
- Use consistent pressure and slightly overlapping strokes.
- Manage Drying:
- Allow walls to air dry.
- For humid conditions or excess moisture, gently wipe with a clean, dry microfiber cloth.
Post-Cleaning Wall Care and Maintenance Tips
Your walls are now sparkling clean, but the work is not entirely done. Proper post-cleaning care helps maintain their freshness. It also prepares them for future cleaning. Following a few simple steps ensures your efforts last longer.
After cleaning, allow your walls to air dry completely. This is important to prevent moisture-related issues. Good ventilation helps. Open windows or use fans to circulate air. Ensure the room is well-ventilated before putting furniture back. This prevents trapped moisture, which can lead to mold or mildew over time. For specific concerns about mold, consider learning how to clean mold off basement walls. While this article focuses on general wall cleaning, preventing moisture buildup is key to avoiding future mold problems.
Regular dusting is the best defense against dirty walls. Dust is the primary cause of build-up on walls. Make dusting your walls part of your regular cleaning routine. Use a long-handled duster or a vacuum with a brush attachment. Aim to dust your walls every few weeks or once a month. This simple habit significantly reduces the need for wet cleaning. It keeps your walls looking good between deeper cleans.
Address new marks and spills immediately. The longer a stain sits, the harder it is to remove. For fresh marks, a quick wipe with a damp cloth can often do the trick. This prevents small spots from becoming major cleaning tasks. Knowing how to clean marks off painted walls quickly can save you a lot of effort in the long run.
Consider the paint finish when choosing cleaning frequency. High-traffic areas, like hallways or kitchens, might need more frequent spot cleaning. Walls in bedrooms or living areas might only need a full wash once or twice a year. If you have children or pets, you might find yourself spot-cleaning more often.
Finally, keep a small cleaning kit ready for quick touch-ups. A spray bottle with diluted all-purpose cleaner and a clean microfiber cloth can be very useful. This allows you to tackle minor smudges or spills as soon as they appear. Consistent light maintenance goes a long way. It helps your walls stay cleaner for longer. It extends the time between major cleaning sessions.
- Ensure Complete Drying:
- Allow walls to air dry thoroughly.
- Use good ventilation (open windows, fans).
- Do not replace furniture until walls are completely dry.
- Implement Regular Dusting:
- Dust walls every few weeks or monthly.
- Use a long-handled duster or vacuum with a brush.
- Prevents dust buildup and reduces need for wet cleaning.
- Address Marks Immediately:
- Wipe fresh marks or spills with a damp cloth.
- Prevents stains from setting.
- Adjust Cleaning Frequency:
- Clean high-traffic areas more often.
- Bedrooms/living areas may need full wash once or twice a year.
- Maintain a Quick-Clean Kit:
- Keep diluted cleaner and microfiber cloth handy for spot touch-ups.
FAQ Section
Q: Can I use any type of mop to clean walls? A: No, not all mops are suitable. Flat-head mops with microfiber pads are best. They are gentle on surfaces and absorb dirt well. Avoid traditional string mops; they can be too heavy when wet and may leave streaks. A spin mop with a soft, clean head can also work effectively.
Q: What is the best cleaning solution for walls? A: A mild, diluted solution is usually best. Warm water with a few drops of dish soap works well for general grime. For a streak-free finish, a mix of white vinegar and water (1:1 ratio) is also very effective. Always test your chosen solution in an inconspicuous area first.
Q: How often should I clean my walls with a mop? A: The frequency depends on your home environment. Walls in high-traffic areas, or those exposed to cooking fumes or smoke, may need cleaning every few months. In general, a thorough mop cleaning once or twice a year is sufficient for most homes, with regular dusting in between.
Q: Will cleaning walls with a mop damage the paint? A: If done correctly, cleaning walls with a mop should not damage paint. The key is to use a mild solution and a barely damp mop. Avoid saturating the wall. Always test the cleaner on a hidden spot first. This checks for adverse reactions with your specific paint type.
Q: Can I clean textured walls with a mop? A: Yes, you can clean textured walls with a mop. A flat microfiber mop head works best. It can get into the crevices of textured surfaces. Be gentle and use less moisture to avoid pushing dirt deeper into the texture or damaging the finish.
Q: What type of mop is best for reaching high walls or ceilings? A: A flat-head mop with an extendable handle is ideal for high walls and ceilings. This allows you to reach elevated areas without needing a ladder, ensuring safety and ease. Look for models that are lightweight and easy to maneuver for overhead work.
Conclusion
Cleaning your walls with a mop is a truly efficient way to refresh your living space. It makes the task of cleaning large surfaces much more manageable. You have learned how to select the right mop and prepare the perfect mild cleaning solution. We have covered vital steps, like dusting walls thoroughly and protecting your furniture. You also understand the importance of testing your cleaning solution first.
By following the step-by-step guide, you can confidently clean walls from top to bottom. Remember to wring your mop head until it is just damp. Rinse it frequently to prevent streaks. We also discussed how to tackle different wall surfaces and stubborn stains. You now know the secrets to avoiding common mistakes and ensuring a streak-free finish.
Maintaining clean walls contributes greatly to a fresh and inviting home. Regular dusting and prompt spot cleaning will extend the time between full mop washes. Now, grab your mop and cleaning supplies. You are ready to make your walls sparkle! Keep your living space bright and clean, one wall at a time.
- wall cleaning
- mop cleaning
- streak-free walls