· Home Maintenance · 15 min read
How To Clean Whirlpool Dryer
How to Clean Your Whirlpool Dryer for Optimal Performance
Your Whirlpool dryer works hard. It dries countless loads of laundry. Over time, lint and dirt build up inside. This buildup impacts how your dryer performs. Regular cleaning keeps your dryer working well. It also prevents fire hazards.
I want to help you keep your appliance safe and efficient. This article will show you how to clean your Whirlpool dryer. We will cover the lint trap, vent, drum, and moisture sensor. You will learn easy steps to maintain your dryer.
Takeaway
- Empty the lint screen after every load.
- Clean the lint screen with soap and water monthly.
- Vacuum the lint trap housing regularly.
- Inspect and clean the dryer vent system yearly.
- Wipe down the dryer drum interior as needed.
- Clean the moisture sensor for accurate drying cycles.
Clear, Concise Answer
To clean a Whirlpool dryer, regularly empty the lint trap, wash the lint screen monthly, and vacuum the lint trap housing. Annually, clean the dryer vent system, wipe the dryer drum, and gently clean the moisture sensor for efficient and safe operation.
Why Cleaning Your Whirlpool Dryer Matters
Cleaning your Whirlpool dryer is very important. It directly affects how well your dryer works. Lint buildup reduces airflow. This makes your dryer work harder. Harder work means higher energy bills. A clean dryer uses less energy. This saves you money.
Safety is another big reason. Lint is very flammable. A clogged dryer vent is a major fire risk. Cleaning removes this danger. You protect your home and family. An ignored dryer can become a hazard.
A clean dryer also lasts longer. Dirt and lint can strain the motor. They can block important parts. This causes wear and tear. Regular cleaning prevents premature breakdowns. It extends your dryer’s life. You avoid costly repairs or replacements. Cleaning helps your Whirlpool dryer perform its best. It keeps it running safely for many years.
You can compare this to cleaning other home appliances. Just like you clean your oven to keep it working well, your dryer needs similar care. Cleaning the bottom of your oven helps it heat evenly. Cleaning your dryer ensures proper drying. Both tasks improve appliance longevity. You get better results from your machines.
Gathering Your Cleaning Supplies for Your Whirlpool Dryer
Before you start cleaning your Whirlpool dryer, gather your tools. Having everything ready makes the job easier. You will need a few common household items. Make sure you have these supplies on hand. This ensures a smooth cleaning process.
Here is what you will need:
- Lint brush or vacuum cleaner with a hose attachment: This helps remove lint from tight spaces. A thin attachment is best for the lint trap housing.
- Warm water: For washing the lint screen and wiping surfaces.
- Mild dish soap: Use a small amount for deep cleaning the lint screen.
- Microfiber cloths or soft rags: These are good for wiping down the drum and exterior. They absorb dirt well without scratching.
- Rubbing alcohol or white vinegar: These are useful for cleaning the moisture sensor. They remove residue effectively.
- Dryer vent cleaning kit (optional but recommended): This kit typically includes a long brush and rods. It helps clean deep into the dryer vent. You can attach it to a drill for easier cleaning. Consider exploring how to clean dryer vent from outside with drill for specific tools and methods.
- Screwdriver: You might need this to remove vent covers or access panels.
- Work gloves: Protect your hands from dust and debris.
Having these supplies ready saves time. It helps you clean your Whirlpool dryer completely. You will be prepared for every step.
Cleaning the Whirlpool Dryer Lint Trap: A Crucial Step
The lint trap is your dryer’s first line of defense. It catches lint from your clothes. Cleaning it often is very important. This prevents lint buildup in other parts of the dryer. I always empty the lint screen after every single load. This habit prevents many problems.
Daily Lint Screen Emptying
After each drying cycle, pull out the lint screen. You will see a layer of lint. Peel this lint off the screen. Discard it in the trash. This simple action takes only seconds. It greatly improves dryer performance. It also helps prevent fires. Do this every time you use your Whirlpool dryer.
Monthly Deep Cleaning the Lint Screen
Even with daily emptying, some residue can stick to the screen. Fabric softener and detergent residue builds up. This residue can block airflow. Once a month, clean the screen with water and soap.
Here is how:
- Remove the lint screen from your dryer.
- Wet the screen under warm water.
- Apply a small amount of mild dish soap to a soft brush or your fingers.
- Gently scrub both sides of the screen. You will see the water run through freely. If water beads up, the screen is clogged.
- Rinse the screen thoroughly under warm water.
- Let the screen air dry completely. Do not put a wet screen back into the dryer.
- Reinsert the dry lint screen into its slot.
This deep cleaning ensures proper airflow. It keeps your dryer working efficiently.
Cleaning the Lint Trap Housing
The area where the lint screen sits also collects lint. This is called the lint trap housing. Lint can fall past the screen. It accumulates in this space. This area needs cleaning too.
Use a vacuum cleaner with a narrow hose attachment. Reach down into the lint trap housing. Remove any visible lint or debris. A specialized lint brush can also help. These brushes are long and thin. They reach deep into the crevice. Clean this area every few months. This prevents lint from building up inside the dryer ductwork. This is a critical step in how to clean a GE dryer or any other brand. The principles are similar across models. Keeping this area clear is vital for safety.
Deep Cleaning the Whirlpool Dryer Vent System
The dryer vent system carries moist, hot air outside. It also carries lint. A clogged vent is a fire hazard. It also makes your dryer less efficient. Cleaning the vent system is a yearly task. Sometimes, you might need to clean it more often.
Internal Dryer Vent Cleaning
First, unplug your Whirlpool dryer from the power outlet. Turn off the gas supply if you have a gas dryer. This is a crucial safety step. Move the dryer away from the wall. This gives you access to the back.
Disconnect the dryer vent hose from the wall and the dryer. This hose is often flexible. It collects a lot of lint. Vacuum inside the hose. Use a long, narrow attachment if you have one. You might need to shake out loose lint. Inspect the hose for damage. Replace it if it has holes or tears.
Next, clean the vent opening on the dryer itself. Use your vacuum cleaner’s hose to remove lint from this opening. Also, vacuum the wall vent opening. Clear out any lint you see.
External Dryer Vent Cleaning
The vent exits your home, often on a side wall or the roof. This part also collects lint. It can become a nesting spot for small animals.
- Wall Vent: Access the vent cover on the outside of your house. Remove the cover if possible. Use a vacuum cleaner or a long brush to clear out lint. Ensure the flapper on the vent moves freely. It should open when the dryer runs and close when it stops.
- Roof Vent: Cleaning a roof vent can be dangerous. Consider hiring a professional for this task. If you choose to do it yourself, use extreme caution. Wear proper safety gear. Use a sturdy ladder. Clean out any lint or debris from the vent cap. You can learn more about how to clean dryer vent on roof for detailed steps.
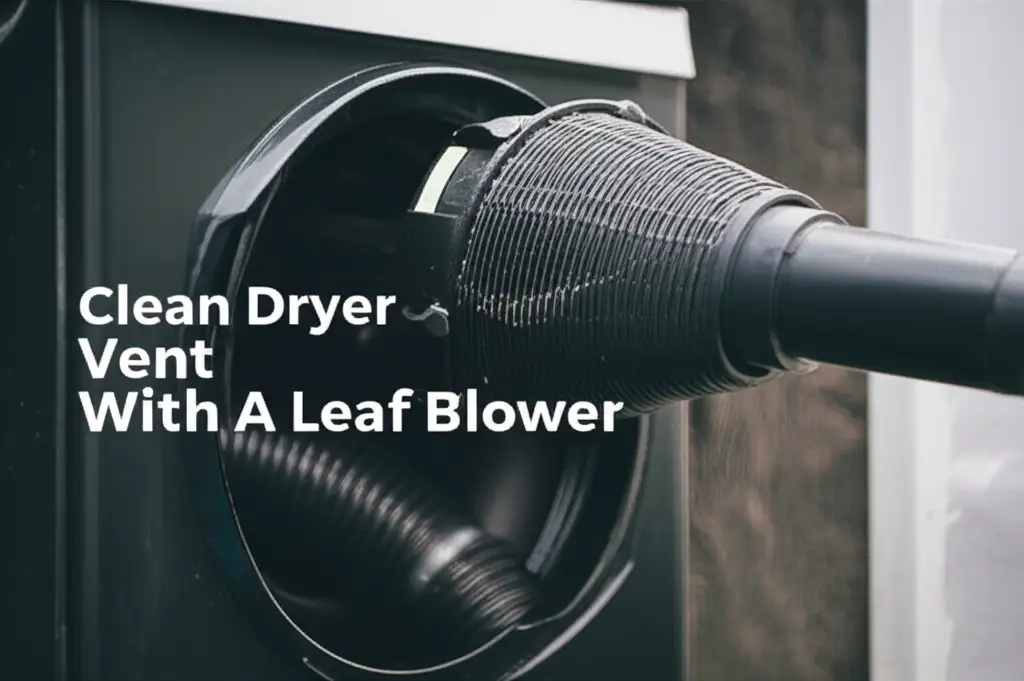
- Ductwork Cleaning: For the long run of ductwork, you need a dryer vent cleaning kit. These kits have a long brush with flexible rods. You can push these rods through the ductwork. Start from the dryer end or the exterior end. Rotate the brush to loosen lint. Many kits can attach to a drill for easier use. This helps push lint out. You can also explore methods like how to clean dryer vent with a leaf blower for alternative approaches.
After cleaning, reconnect all parts of the vent system. Make sure all connections are secure. Push the dryer back into place. Restore power. This thorough cleaning drastically reduces fire risk. It also makes your Whirlpool dryer dry clothes faster.
Refreshing the Whirlpool Dryer Drum and Interior
Even if clothes come out clean, the inside of your dryer can get dirty. Marks from pens, crayons, or even residual dye from clothes can appear. Keeping the drum clean ensures your clothes stay fresh. I clean my dryer drum a few times a year. This prevents any residue from transferring to fresh laundry.
General Drum Cleaning
First, make sure the dryer is cool and unplugged. Use a damp microfiber cloth. Wipe down the entire interior surface of the drum. You can use a small amount of mild soap on the cloth. For general dirt and dust, plain water often works. Pay attention to any dark spots or sticky areas.
If you notice stubborn spots, try a different cleaner. A mixture of equal parts white vinegar and water works well. Apply it to the cloth and wipe the drum. Vinegar is a natural disinfectant and deodorizer. After cleaning, wipe the drum again with a clean, damp cloth. Then, use a dry cloth to remove any moisture. Make sure the drum is completely dry before using the dryer. This prevents rust or mildew.
Removing Specific Stains from the Dryer Drum
Sometimes, unwanted items end up in the dryer. This can lead to tough stains on the drum. Common culprits include crayons, gum, or ink pens. These require specific cleaning methods.
- Crayon Marks: If a crayon melts in your dryer, act fast. First, unplug the dryer. Let the drum cool. Scrape off as much crayon as you can with a plastic scraper. Be careful not to scratch the drum. Then, use a soft cloth with a small amount of WD-40 or mineral spirits. Rub the crayon residue gently. The WD-40 breaks down the wax. After removing the crayon, clean the area thoroughly with soap and water. This removes the oily residue. You can find more detailed instructions on how to clean crayon out of dryer.
- Gum Stains: Gum can leave sticky, stubborn marks. Again, unplug the dryer and let it cool. Apply a small amount of ice to the gum. This freezes and hardens the gum. Once hard, use a plastic scraper to carefully lift it off. For any remaining stickiness, use rubbing alcohol or a small amount of peanut butter on a cloth. The oils in peanut butter help break down the gum. After removal, clean the drum with soap and water. Learn more about how to clean gum out of a dryer.
- Pen Ink Marks: Ink can be tricky. Unplug the dryer. Apply rubbing alcohol to a clean cloth. Dab the ink stain gently. Do not rub vigorously, as this can spread the ink. Repeat the process with fresh sections of the cloth until the ink lifts. You might need to use a cleaner designed for ink stains. Always test cleaners in an inconspicuous area first. After the ink is gone, wipe the drum with a damp cloth and then dry it completely. For more tips, check out how to clean pen ink out of a dryer.
Always ensure the drum is fully dry before running a new load. This prevents new stains or moisture issues.
Maintaining the Whirlpool Dryer Moisture Sensor
Most modern Whirlpool dryers have moisture sensors. These sensors detect how much moisture is in your clothes. They tell the dryer when to stop. This prevents over-drying and saves energy. If these sensors get dirty, they cannot work correctly. Your dryer might stop too early or run too long.
The moisture sensor is usually located inside the dryer drum. It looks like two or more metal strips. These strips are often on the front wall of the drum. Sometimes they are near the lint filter opening. These strips can get coated with residue. Fabric softener, dryer sheets, and mineral deposits from hard water leave a film. This film prevents accurate moisture detection.
I make sure to clean these sensors regularly. I usually do this every few months. This keeps my dryer cycles accurate. It ensures my clothes are perfectly dry.
Here is how to clean your Whirlpool dryer’s moisture sensor:
- Unplug the dryer: Safety first. Always disconnect power before touching internal parts.
- Locate the sensors: Open the dryer door. Look for two or more shiny metal strips inside the drum. They are often thin and parallel.
- Prepare your cleaner: Dampen a clean microfiber cloth. You can use rubbing alcohol or white vinegar. Both are effective at cutting through residue. Do not use abrasive cleaners or harsh chemicals. These can damage the sensor strips.
- Gently wipe the sensors: Carefully rub the metal strips with the damp cloth. You should see a film or residue come off. Wipe until the strips look clean and shiny.
- Dry completely: Allow the sensors to air dry for a few minutes. Make sure they are completely dry before you plug the dryer back in.
Cleaning the moisture sensor is a quick task. It significantly impacts your dryer’s efficiency. A clean sensor ensures your dryer doesn’t waste energy over-drying clothes. This small step makes a big difference. For other brands, like Samsung, the process is similar: how to clean moisture sensor on Samsung dryer. The principles apply broadly across different dryer models.
Special Cleaning Tips for Your Whirlpool Dryer
Beyond the core components, a few extra cleaning steps can improve your Whirlpool dryer’s overall health and appearance. These tips focus on areas often overlooked. They ensure a complete cleaning routine.
Cleaning the Dryer Exterior
The outside of your dryer also needs attention. Dust and dirt can accumulate on the top and sides. Wipe down the exterior surfaces with a damp cloth. You can use a mild all-purpose cleaner if needed. For stainless steel finishes, use a specialized stainless steel cleaner. Always wipe in the direction of the grain. Polish with a dry cloth for a streak-free finish. Don’t forget the control panel. Use a soft, slightly damp cloth to wipe away fingerprints and smudges. Avoid spraying cleaner directly onto the control panel. Spray it onto the cloth first.
Cleaning the Dryer Door Gasket
The rubber gasket around the dryer door can collect lint and debris. It can also trap moisture, leading to mildew. Open the dryer door wide. Inspect the gasket. Wipe it down with a damp cloth. For mildew or stubborn grime, use a cloth dampened with a diluted bleach solution (1 part bleach to 10 parts water) or white vinegar. Wipe thoroughly. Then, wipe with a clean, damp cloth to remove any residue. Ensure the gasket is dry before closing the door. This prevents odors and keeps the seal effective.
Checking and Cleaning the Exhaust Hood Flapper
On the exterior wall, your dryer vent usually has a hood with a flapper. This flapper opens when the dryer runs and closes to keep out pests. Make sure it moves freely. Lint can build up around it. Small birds or rodents might try to nest inside. Regularly check that the flapper is not obstructed. Clear any lint, spiderwebs, or debris. This ensures proper air expulsion. It helps your dryer vent efficiently.
These extra steps contribute to a fully clean and well-maintained Whirlpool dryer. They complement the more intensive cleaning tasks. Regular maintenance keeps your appliance running smoothly for years. It protects your investment.
FAQ Section
How often should I clean my Whirlpool dryer’s lint trap?
You should empty the lint screen after every single load of laundry. This is the most crucial step for safety and efficiency. Deep clean the lint screen with soap and water monthly. Vacuum the lint trap housing every few months.
What happens if I don’t clean my dryer vent?
A dryer vent that is not clean builds up lint. This lint blocks airflow. It makes your dryer less efficient, increasing drying times and energy use. A clogged vent is also a major fire hazard because lint is highly flammable.
Can I use household cleaners on my dryer drum?
Yes, you can use mild household cleaners. A damp cloth with a small amount of dish soap works for general cleaning. For tougher stains or odors, a mixture of white vinegar and water is effective. Always rinse the drum thoroughly and dry it completely afterward.
How do I know if my dryer vent is clogged?
Signs of a clogged dryer vent include clothes taking longer to dry, clothes feeling hotter than usual after a cycle, the dryer itself feeling very hot, and a burning smell. Excessive lint around the dryer or vent opening also indicates a clog.
Is it hard to clean a dryer vent?
Cleaning the dryer vent can be moderately easy, depending on your setup. Cleaning the short, flexible hose behind the dryer is simple. Cleaning the long ductwork to the outside requires a special vent cleaning kit. This task is doable for most homeowners but can be challenging if the vent run is long or has many bends.
Conclusion
Keeping your Whirlpool dryer clean is an essential part of home maintenance. It is not just about keeping things tidy. It is about safety, efficiency, and extending the life of your appliance. I have shown you how to clean your Whirlpool dryer systematically. You learned about daily lint screen care, monthly deep cleans, and annual vent system maintenance. We also covered drum and moisture sensor cleaning.
These actions improve your dryer’s performance. They make sure your clothes dry faster. They also lower your energy bills. Most importantly, regular cleaning protects your home from fire hazards. Make these cleaning tasks a regular part of your routine. A well-maintained dryer works better and lasts longer. Take action today. Start with your lint trap. Then, plan your deep cleaning sessions. Your Whirlpool dryer will thank you.
- Whirlpool dryer
- dryer cleaning
- appliance maintenance
- lint trap
- dryer vent
- dryer drum