· Vaping Device Maintenance · 17 min read
How To Clean Yocan Coils
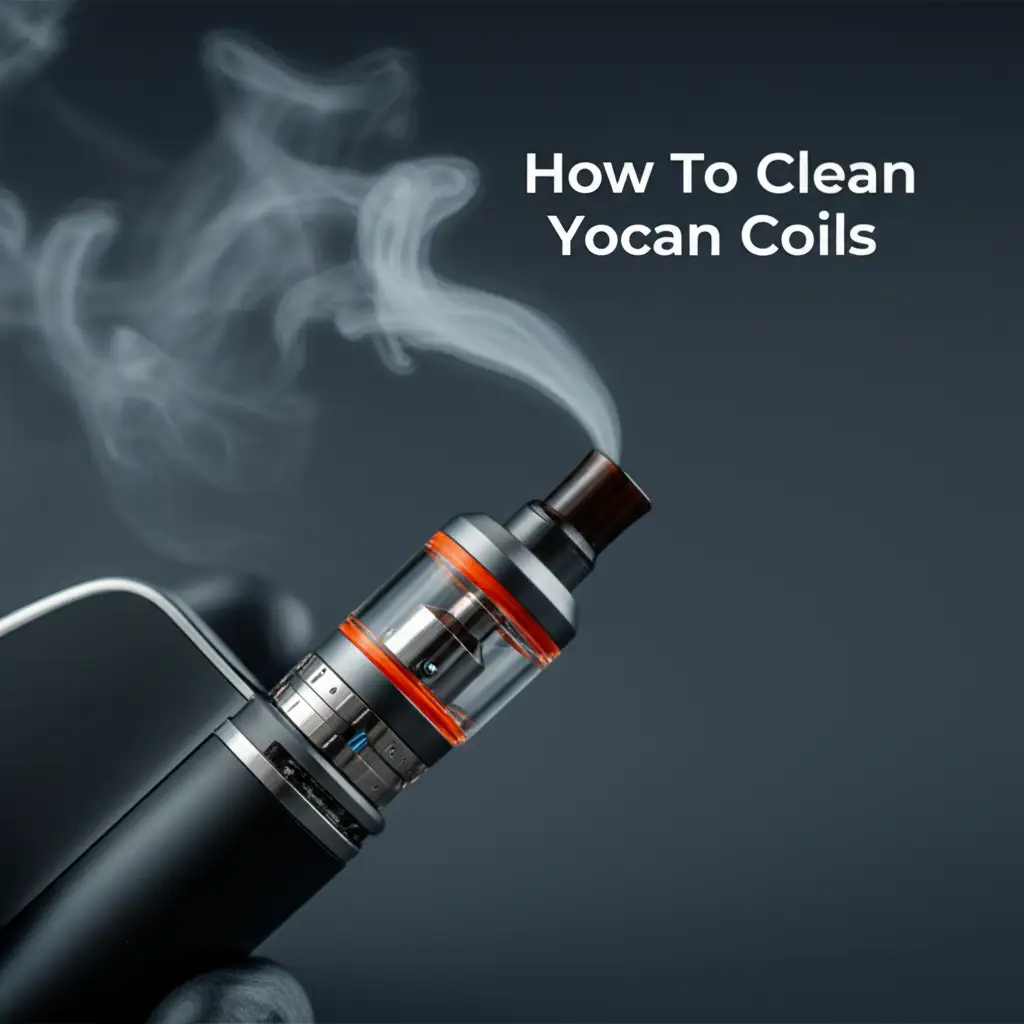
How To Clean Yocan Coils
Do you notice a burnt taste from your Yocan device? Is your vapor production low? These issues often mean your Yocan coils need cleaning. Cleaning Yocan coils is a simple task. It helps maintain the performance of your device. A clean coil delivers pure flavor and dense vapor. This guide will show you how to clean Yocan coils effectively. We cover simple methods and deep cleaning techniques. We also provide tips to keep your coils working well. Learn how to restore your Yocan experience today.
Takeaway
- Regularly cleaning Yocan coils improves device performance.
- Isopropyl alcohol is the most effective cleaning solution.
- Thorough drying of coils is essential before reassembly and use.
- Proper maintenance extends the life of your Yocan coils.
To clean Yocan coils, separate them from the device. Soak the coils in 90%+ isopropyl alcohol for 30 minutes to a few hours. Swirl them gently to loosen residue. Rinse thoroughly with warm water. Allow the coils to air dry completely, which can take several hours, before reattaching and using.
Why Clean Your Yocan Coils?
You might wonder why cleaning your Yocan coils matters. Dirty coils lead to a poor vaping experience. Residue builds up on the heating element. This residue comes from concentrates or e-liquids. It can burn and produce a harsh, unpleasant taste. No one wants a burnt flavor when they try to enjoy their device.
A dirty coil also affects vapor production. The heating element cannot heat evenly when covered in gunk. This reduces the amount and density of vapor. You get less satisfaction from your hits. A clean coil heats efficiently. It gives you full, satisfying clouds every time. My own experience shows this clearly.
Cleaning your coils saves you money. Coils are consumables. They wear out over time. However, a dirty coil wears out much faster. The buildup can stress the coil. It may cause premature failure. Regular cleaning extends the lifespan of your coils. This means you buy new coils less often. It is a smart way to manage your expenses. Think of it like taking care of any other valuable tool.
A clean coil also means a safer device. Excessive residue can sometimes cause electrical issues. While rare, it is a risk to avoid. A well-maintained device operates more reliably. You have peace of mind when using it. Keeping coils clean is a simple step for safety. It keeps your device working its best.
Understanding Yocan Coil Types
Yocan offers many types of coils. Each coil has a specific design. Knowing your coil type helps with cleaning. Common types include quartz dual coils and ceramic donut coils. Each one has unique features for heating concentrates.
Quartz dual coils use two quartz rods. A wire wraps around each rod. Concentrates melt onto these rods. Residue often sticks to the quartz and wire. This type of coil needs careful cleaning. The small spaces between the rods can trap material. You must reach these areas to clean effectively.
Ceramic donut coils are different. They have a ceramic heating element. This element heats up evenly from below. Concentrates vaporize on its surface. Ceramic coils often produce smoother vapor. Residue on ceramic coils can be baked on. This means it may be harder to remove. But the smooth surface helps prevent deep clinging.
Triple quartz coils exist too. They use three quartz rods. This type offers more surface area. It creates bigger vapor clouds. More rods mean more places for residue to build. Cleaning these coils requires patience. You must ensure all three rods are clean. Each type of coil gets dirty in a similar way. They all gather residue from heated materials.
Understanding your coil type helps choose the right cleaning method. It also tells you where to focus. No matter the type, a clean coil always performs better. It delivers the flavor you expect. It ensures your Yocan device works as designed.
Essential Tools and Cleaning Solutions
Before you start cleaning, gather your supplies. Having everything ready makes the process easy. You do not want to stop midway. The right tools help you do a thorough job. These items are usually easy to find around your home or at a local store.
First, you need isopropyl alcohol. This is often called rubbing alcohol. Choose a concentration of 90% or higher. Higher concentrations evaporate faster. They leave less water behind. Isopropyl alcohol dissolves concentrate residue well. It is safe for most vape coil materials. I always keep a bottle of 91% isopropyl alcohol on hand. It is a universal cleaning agent for many electronics. When I need to clean things like coils, I trust it.
Next, get some cotton swabs. These are useful for small spaces. They can reach around the coil wire. Cotton balls or soft cloths also work. You will use these to wipe away residue. Paper towels are good for drying. They absorb moisture quickly. Make sure they are lint-free. Lint can stick to coils.
You also need a small container. A shot glass or a small bowl works well. This is for soaking your coils. A small brush, like a soft toothbrush, can be helpful. It helps scrub stubborn spots. You can also use warm water for rinsing. It helps wash away the alcohol and residue. For general cleaning tasks around the house, you can often clean your shower with vinegar for a natural option. Similarly, cleaning glass with vinegar is effective. While vinegar is a cleaning agent, isopropyl alcohol is generally preferred for Yocan coils due to its faster evaporation and lack of residual smell.
Make sure you have a safe, well-ventilated area. Cleaning produces fumes from the alcohol. Proper ventilation is important. A dedicated cleaning mat or old towel helps. It protects your work surface from spills. With these simple items, you are ready to clean your Yocan coils.
Step-by-Step: Basic Cleaning for Yocan Coils
Basic cleaning is for light residue. It helps maintain your coils regularly. This method is quick and easy. It keeps your device performing well day-to-day. You should do this after every few uses.
Disassemble Your Yocan Device
First, separate the coil from your Yocan battery. Twist the coil counter-clockwise. It should detach easily. Some Yocan models have atomizers that unscrew. Ensure all parts are cool before handling. You do not want to burn yourself. Always handle device parts gently.
Remove Loose Residue
Look at the coil. You might see some dry residue. Gently tap the coil on a paper towel. This helps dislodge any loose, flaky material. Do not tap too hard. You do not want to damage the heating element. A soft brush can also remove dry bits. I often use a small, clean paintbrush for this.
Wipe Down the Coil
Dampen a cotton swab with isopropyl alcohol. Gently wipe the visible parts of the coil. Pay attention to the inside of the chamber. Also, wipe the metal threading. This removes sticky residue. Be careful around the heating wires. Do not put too much pressure on them. The goal is to clean, not to bend or break.
Clean the Airpath
Some Yocan coils have small air holes. These can get clogged. Use a fresh cotton swab. Insert it into the air holes. Gently twist to clear any blockages. A toothpick can also help clear tiny holes. Ensure the air path is clear for good airflow. Just like maintaining other coiled components, such as when you clean air conditioner coils, ensuring proper airflow is key for optimal function and efficiency.
Dry the Coil
After wiping, place the coil on a clean paper towel. Let it air dry completely. Isopropyl alcohol evaporates quickly. But you need to be sure it is all gone. Any remaining alcohol can affect flavor. It can also be unsafe. Allow at least 30 minutes for drying. You can also gently blow air over it. This speeds up drying. Once dry, your coil is ready for use. This basic cleaning helps prevent heavy buildup.
Deep Cleaning Methods for Stubborn Residue
Sometimes, coils need more than a basic wipe. Heavy use leads to stubborn residue. This gunk can be hard to remove. Deep cleaning restores heavily soiled coils. This method involves soaking and thorough rinsing. It takes more time but gives excellent results.
Prepare for Soaking
Separate the coil from your Yocan device. Remove any O-rings or rubber seals if possible. Isopropyl alcohol can degrade rubber over time. Place the coil in a small glass container. A shot glass or a small jar works well. Make sure the container is clean.
Soak the Coil in Isopropyl Alcohol
Pour 90%+ isopropyl alcohol into the container. Make sure the coil is fully submerged. Let the coil soak for at least 30 minutes. For very stubborn residue, soak it for several hours. Some people even let it soak overnight. The alcohol dissolves the hardened residue. You will see the alcohol turn murky. This means it is working. I often leave mine soaking while I do other chores. It is a passive cleaning method that works wonders.
Agitate and Scrub (Optional)
After soaking, gently agitate the container. Swirl the alcohol around. This helps loosen remaining gunk. You can use a soft brush if needed. A clean, soft toothbrush works well. Gently scrub the coil’s surface. Pay attention to hard-to-reach spots. Do not scrub too hard. The heating elements are delicate. If you find tough, baked-on residue, this step is important. Removing any kind of tough, built-up gunk is similar to how you might remove mold with vinegar – sometimes a little agitation and the right cleaner makes all the difference.
Rinse Thoroughly
Remove the coil from the alcohol. Rinse it under warm running water. Rinse for at least one minute. This washes away the dissolved residue. It also removes any remaining alcohol. Ensure no alcohol smell remains. Residual alcohol can affect flavor. It can also pose a health risk if inhaled. Rinse until the water runs clear. Make sure all parts of the coil are rinsed.
Dry Completely
This step is critical. Place the rinsed coil on a clean paper towel. Allow it to air dry completely. This can take several hours. Sometimes, it needs to dry overnight. You can place it in a well-ventilated area. Do not use the coil if it feels damp. Any moisture can cause short circuits. It can also produce bad vapor. Patience is key here. A fully dry coil works best.
Proper Drying and Reassembly of Yocan Coils
The drying phase is perhaps the most important part of cleaning. A coil must be completely dry before you use it again. Moisture inside the coil can cause big problems. It can lead to a short circuit. This can damage your Yocan device. It can also produce a horrible taste. You want to avoid that burnt, metallic taste from water.
Air Drying is Best
After rinsing, place your Yocan coil on a clean, dry paper towel. Let it sit in a well-ventilated area. A warm room helps. Direct sunlight is not recommended. It can damage delicate components. Air drying is the safest method. It allows all moisture to evaporate naturally. This process takes time. For most coils, it can take anywhere from 4 to 24 hours. Small coils dry faster. Larger ones need more time. Do not rush this step.
Speeding Up Drying (Use Caution)
You can try to speed up drying slightly. Gently blow air across the coil. A small fan can help. Do not use a hairdryer on high heat. Excessive heat can warp plastic parts. It can also damage the heating element. If you use a fan, keep it on a low setting. Hold the coil a few inches away. The goal is gentle airflow, not intense heat. My preferred method is still just patient air drying.
Visual Inspection
Once you think the coil is dry, inspect it closely. Look for any visible moisture. Look into the small crevices. You can hold it up to a light source. Sometimes, tiny water beads can hide. If you see any, let it dry longer. A completely dry coil will look dull and clean. There should be no shiny spots from water.
Reassembly
When the coil is bone dry, it is time to reassemble. Screw the coil back onto your Yocan battery. Ensure it is snug but do not overtighten. Overtightening can strip threads. It can also damage the connection points. If you removed O-rings, put them back on. Ensure they are seated correctly.
Test Firing (Optional but Recommended)
Before loading concentrates, you can do a test fire. Attach the coil to the battery. Press the fire button for a second or two. Look for a gentle, even glow from the heating element. You should not hear any sizzling. Sizzling means there is still moisture. If you hear sizzling, stop immediately. Let the coil dry further. A proper test fire ensures your coil is ready. It also burns off any tiny residual elements.
Extending Yocan Coil Lifespan Through Maintenance
Cleaning coils is one part of maintenance. Other habits help your Yocan coils last even longer. Good care means fewer replacements. It saves you money and trouble. Think of it as preventative care for your device. This keeps your experience smooth and enjoyable.
Clean Regularly
Consistency is key. Do not wait for your coil to taste burnt. Regular light cleaning prevents heavy buildup. Try a quick wipe down every few uses. Do a deep clean once a week or every two weeks. This depends on how often you use your device. I clean my coils every Sunday. This schedule works well for me. It keeps my coils fresh.
Use Proper Concentrates
The type of concentrate you use matters. Some concentrates leave more residue. Thinner, cleaner concentrates burn more efficiently. They leave less gunk behind. Thicker, darker concentrates can be harder on coils. They tend to stick more. Choosing quality concentrates helps. This reduces the need for constant deep cleaning. It also gives a better flavor.
Do Not Overload Your Coil
Overloading your coil is a common mistake. Putting too much concentrate can spill over. It can get into parts of the coil that are hard to clean. It also creates more residue. Follow the manufacturer’s recommendations for loading. A small, rice-sized amount is usually enough. Loading smaller amounts means less mess. It also means more efficient vaporization.
Prime Your Coils (When New)
When you install a new coil, prime it. Apply a small amount of concentrate directly to the heating element. Let it sit for a minute. This allows the coil to soak up the concentrate. Then, take a few short, light puffs. This prepares the coil for use. It prevents dry hits. Priming helps the coil perform better from the start. This practice also extends its initial life.
Store Your Device Properly
When not in use, store your Yocan device upright. This prevents concentrates from leaking. Leaks can gum up connections. They can also get into the battery. Store it in a cool, dry place. Extreme temperatures are bad for batteries and coils. A simple case can protect your device. Proper storage keeps your entire Yocan unit in good shape. It helps maintain the integrity of the coils over time. For any component that filters or manages flow, regular care, much like how to clean a water filter, is crucial for its longevity and effective operation.
Common Issues and Troubleshooting Coil Cleaning
Even after cleaning, you might face some issues. It is normal. Knowing how to troubleshoot helps you fix problems quickly. Most issues relate to incomplete cleaning or improper drying.
Burnt Taste After Cleaning
If your coil tastes burnt after cleaning, several reasons exist.
- Incomplete Drying: This is the most common cause. Any remaining moisture turns into steam. This creates a harsh, burnt taste. Remove the coil. Let it air dry for several more hours.
- Residue Remaining: You might have missed a spot. Some gunk can be stubborn. Do another deep clean. Focus on the hard-to-reach areas. Consider a longer soak time.
- Coil Damage: The coil might be at the end of its life. Cleaning helps, but it cannot fix a worn-out coil. If the wire is dark or misshapen, replace it.
Reduced Vapor Production
Low vapor after cleaning points to airflow issues.
- Clogged Airpath: Check the small air holes on the coil. They might still be blocked. Use a toothpick or small brush to clear them.
- Coil Not Seated Correctly: Ensure the coil is screwed on tightly. A loose connection affects power delivery. This reduces vapor.
- Battery Issue: Sometimes, the battery is the problem. Ensure your Yocan battery is charged. Clean the battery contact points too.
Coil Does Not Fire
If the coil does not heat up at all, it is usually an electrical issue.
- Loose Connection: Unscrew the coil and reattach it. Make sure it is finger-tight.
- Damaged Coil: The heating element might be broken. This happens from rough handling. Or it is just worn out. You will need a new coil.
- Dirty Contact Points: Clean the contact points on both the coil and the battery. Use a cotton swab with a tiny bit of isopropyl alcohol. This ensures a good electrical connection.
Coil Looks Clean but Still Performs Poorly
Sometimes a coil looks clean but still underperforms.
- Micro-fractures: Tiny cracks in the ceramic or quartz can occur. These are not visible to the naked eye. They affect heat distribution.
- Internal Residue: Some residue can be inside the heating element. This is almost impossible to remove.
- Coil Age: Coils degrade over time. The resistance can change. They simply reach the end of their functional life. In such cases, replacement is the only solution. Remember, cleaning extends life. It does not make coils last forever.
FAQ Section
Q1: Can I clean all types of Yocan coils?
Yes, you can clean most Yocan coils. This includes quartz dual coils and ceramic donut coils. The basic principles remain the same. Some coils might have delicate parts. Handle them carefully. Always use isopropyl alcohol for best results.
Q2: How often should I clean my Yocan coils?
Clean your Yocan coils regularly. A light clean after every few uses is good. Perform a deep clean once a week. If you use your device often, clean it more. This prevents heavy residue buildup. It keeps your device working well.
Q3: What if my coil still tastes burnt after cleaning?
If your coil tastes burnt, it is likely still wet. Let it air dry for longer. It might also have stubborn residue. Try a longer soak in isopropyl alcohol. If problems persist, the coil might be too old or damaged. In that case, replace it.
Q4: Is water enough to clean Yocan coils?
Water alone is not enough. Water cannot dissolve concentrate residue effectively. Isopropyl alcohol is essential. It breaks down the waxy buildup. After alcohol, a warm water rinse removes alcohol and loosened gunk. Always use alcohol for effective cleaning.
Q5: How long do Yocan coils last?
Yocan coil lifespan varies. It depends on usage habits and cleaning frequency. With regular cleaning, a coil can last for several weeks to a few months. Without cleaning, coils can burn out much faster. Proper care extends their life.
Q6: Can I reuse a coil after cleaning?
Yes, you can reuse coils after cleaning. The goal of cleaning is to restore their function. A properly cleaned coil should perform like new. Ensure it is completely dry before reuse. This extends its life and saves money.
Conclusion
Cleaning Yocan coils is a simple, effective way to improve your vaping experience. It prevents burnt tastes and boosts vapor production. You extend the life of your coils. This saves you money in the long run. We discussed why cleaning matters and the different types of Yocan coils. We covered essential tools like isopropyl alcohol. We also provided step-by-step guides for both basic and deep cleaning.
Remember, thorough drying is critical. Any moisture can harm your device and affect flavor. Proper maintenance habits, such as regular cleaning and smart usage, will keep your Yocan coils performing their best. If you face issues, use our troubleshooting tips. They help you solve common problems quickly. Taking care of your coils ensures a pure, enjoyable session every time. Start implementing these steps today. Make cleaning Yocan coils a part of your routine. You will appreciate the difference in flavor and vapor. Your Yocan device will thank you.
- Yocan coils
- clean coils
- vape maintenance
- atomizer cleaning
- Yocan upkeep
- coil lifespan
- device cleaning