· Crafting & DIY Cleaning · 14 min read
How To Wash A Cricut Mat
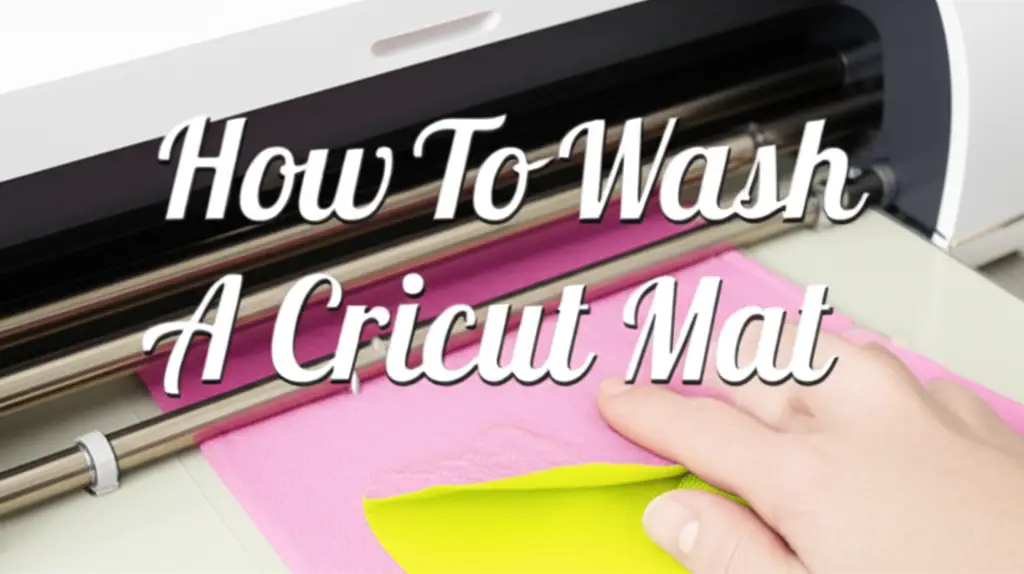
How to Wash Your Cricut Mat for Optimal Performance
My Cricut mats often lose their stickiness. This happens because dust, fabric fibers, and tiny paper bits collect on the surface. A dirty mat struggles to hold materials firmly. This causes cutting errors. I found that learning how to wash a Cricut mat correctly makes a big difference. It brings back much of its original grip. This extends the life of my mats significantly.
This guide helps you restore your mats. We discuss why cleaning is important. We list the right supplies to use. We provide clear, step-by-step instructions for cleaning different mat types. You will also learn how to dry your mat properly. We cover tips for keeping your mat sticky longer. You can keep creating with confidence.
Takeaway:
- Clean mats perform better.
- Use gentle methods for washing.
- Air dry completely, sticky side up.
- Protect your mat after cleaning.
You can wash a Cricut mat by gently wiping it with mild soap and water. Use a soft brush or sponge. Rinse it well. Let the mat air dry completely, sticky side up. This process removes debris. It helps restore the mat’s grip for better cutting.
Why Your Cricut Mat Needs a Wash
Your Cricut mat is the foundation for precise cuts. Over time, it collects tiny particles. Dust, lint, and bits of material stick to its surface. This buildup makes the mat less sticky. Materials begin to shift during cutting. This leads to wasted material and faulty projects. I experienced this often before I started cleaning my mats.
A clean mat holds your materials firmly in place. This ensures accurate and clean cuts every time. Cleaning helps you use your materials fully. It prevents misaligned designs. Regular cleaning also saves you money. You will not need to buy new mats as often. A well-maintained mat lasts longer. This is a simple step that helps your crafting.
Dirty mats also affect your machine. Excess debris can transfer into your Cricut machine. It might cause wear on rollers or other parts. Keeping your mat clean keeps your machine clean too. This is part of overall Cricut machine care. A clean mat makes your crafting smoother. It also protects your valuable crafting equipment. Make cleaning a regular habit.
You notice the difference immediately after a wash. The mat feels tacky again. Materials stick easily. My cuts become precise and clean. This simple act keeps my projects looking professional. It boosts my confidence in my crafts. A dirty mat causes frustration. A clean mat brings joy back to crafting.
Essential Supplies for Cleaning Your Cricut Mat
You do not need many special items to clean your Cricut mat. Most supplies are simple. You might already have them at home. Gathering your supplies before you start saves time. It makes the cleaning process smooth. I always check my cleaning cabinet first.
You need mild dish soap. Choose one that is gentle. Avoid harsh detergents or abrasive cleaners. These can damage the mat’s adhesive. A small amount of soap is enough. Too much soap leaves residue. A liquid dish soap works best for this purpose.
Next, you need a soft brush or sponge. I prefer a soft-bristled scrub brush. A kitchen sponge also works well. Make sure the sponge is new or very clean. You do not want to transfer grease or food bits. Some people use a plastic scraper. This helps remove larger pieces of stuck material. A Cricut scraper tool works perfectly for this.
Finally, you need clean water. Warm water is ideal. It helps dissolve grime. Have a clean towel or paper towels ready for rinsing. A microfiber cloth is also useful. It helps wipe away excess water gently. Do not use anything sharp. Sharp objects can scratch the mat. Scratches ruin the cutting surface.
- Mild Dish Soap: Use a small drop. It cleans without stripping the adhesive.
- Soft Brush or Sponge: A gentle tool helps lift debris. It protects the mat surface.
- Plastic Scraper (Optional): This helps remove stubborn, larger pieces.
- Clean Water: Warm water is effective for washing.
- Microfiber Cloth or Paper Towels: These are for wiping and initial drying.
These simple items make cleaning easy. They help restore your mat’s stickiness. You keep your mat in good shape without fuss.
Step-by-Step Guide: How to Wash a StandardGrip Cricut Mat
Washing your StandardGrip Cricut mat is simple. It brings back its stickiness. I follow these steps carefully. You will get the best results too. Start by getting your supplies ready. This includes mild soap, a soft brush, and water.
First, remove any large pieces of material. Use a Cricut scraper tool. Gently scrape away paper bits, fabric scraps, or vinyl pieces. Move the scraper slowly. Work from the edges inward. Be careful not to press too hard. You want to lift the debris, not embed it. A light touch protects the adhesive.
Next, wet your mat. Hold it under lukewarm running water. The water helps loosen dirt. Do not soak the mat. Soaking can damage the adhesive. Just let the water run over the sticky side. Then, put a small drop of mild dish soap onto the mat. Spread it around with your fingers.
Now, gently scrub the mat. Use your soft brush or sponge. Use light, circular motions. Work across the entire sticky surface. You will see dirt lifting off. Rinse your brush often. This removes the grime from the brush. Focus on areas with a lot of buildup. The goal is to remove all visible debris.
After scrubbing, rinse the mat thoroughly. Hold it under running water again. Make sure all soap is gone. Soap residue leaves the mat feeling slippery. It can also attract more dirt later. Rinse until the water runs clear. The mat will feel less sticky when wet. Do not worry; the stickiness returns after drying. This method works well for cleaning other sticky items too.
Cleaning Different Cricut Mat Types
Not all Cricut mats are the same. Each has a different level of stickiness. This means they need slightly different cleaning care. Understanding these differences helps you protect your mats. I always consider the mat type before I start cleaning.
The LightGrip mat is the least sticky. It is for delicate materials like paper or vellum. When cleaning a LightGrip mat, be extra gentle. Use very light pressure with your brush or sponge. A soft microfiber cloth might be enough. You still use mild soap and water. Ensure all soap is rinsed away quickly. Over-scrubbing or harsh treatment can remove too much adhesive. You want to preserve its delicate grip.
The StrongGrip mat is very sticky. It handles thick materials like chipboard or leather. This mat often collects more stubborn debris. You can use slightly more pressure when cleaning a StrongGrip mat. A plastic scraper is very useful here. It helps dislodge tougher pieces of material. Still, use mild soap. Avoid scrubbing too hard in one spot. Focus on even coverage. A good wash restores its powerful hold.
The FabricGrip mat is unique. It has a special adhesive for fabrics. This mat is often pink. Only clean the adhesive side. Do not get the fabric backing wet. Water can cause the fabric to warp or shrink. Use a damp cloth with a tiny bit of mild soap. Gently wipe the adhesive surface. Remove lint and threads. Rinse the cloth often. Wipe away soap residue carefully. Let it air dry completely. This special care protects its fabric-specific grip. This care is similar to how you might clean a desk mat with a non-slip back.
- LightGrip Mats: Use minimal pressure. A microfiber cloth often suffices.
- StrongGrip Mats: Can handle slightly more pressure. A scraper helps with tough debris.
- FabricGrip Mats: Clean only the sticky side. Keep the fabric backing dry.
Adjusting your method ensures your mats stay functional. Each mat type gets the care it needs. This keeps your crafting versatile and efficient.
Drying Your Cricut Mat Correctly
Proper drying is a very important step. It prevents damage to the mat’s adhesive. It also helps the stickiness return fully. I always make sure my mats are completely dry. Rushing this step can ruin your cleaning efforts.
After rinsing your mat, shake off excess water. You can also gently pat the mat with a clean, lint-free towel. Do not rub the surface. Rubbing can transfer lint or even lift adhesive. The goal is to remove drips, not to dry it completely with a towel.
Now, place your mat somewhere clean and flat. Position it sticky side up. This allows air to circulate around the adhesive. Avoid hanging the mat. Hanging can cause it to warp. A warped mat does not load correctly into your Cricut machine. It leads to cutting errors. Find a clean counter or table.
Keep the mat away from direct heat or sunlight. Direct sun or heat sources can melt the adhesive. It can also make the mat brittle. A shaded, well-ventilated area is best. Drying takes several hours. Sometimes it takes a full day. The time depends on humidity levels. Patience is key here.
Check the mat for dryness before use. Touch the surface lightly. It should feel tacky. It should not feel wet or slippery. If it still feels wet, let it dry longer. Using a damp mat introduces moisture into your machine. It can also cause materials to slip. A completely dry mat works best. This careful drying helps restore its grip.
- Shake off excess water.
- Gently pat with a lint-free towel.
- Place sticky side up on a clean, flat surface.
- Keep away from direct heat or sunlight.
- Allow plenty of time for air drying.
A properly dried mat feels almost new. It is ready for your next project. This step is as important as the washing itself.
Restoring Stickiness to Your Cricut Mat
Many crafters wonder about restoring mat stickiness. Often, a good wash brings back enough tackiness. The “lost” stickiness is usually just embedded dirt. Once that dirt is gone, the adhesive works again. My mats feel much stickier after a proper cleaning.
Sometimes, after washing, your mat might not feel sticky enough. This can happen if the adhesive is truly worn out. It might also happen if you have a LightGrip mat. For slightly less stickiness, you can try a few tricks. A lint roller can help. Roll it over the mat to pick up any remaining tiny fibers. This often reveals more stickiness. It is a quick fix.
Another method is using painter’s tape. Place strips of painter’s tape across the mat. Press down firmly. Then, quickly pull the tape off. This acts like a giant lint roller. It lifts embedded dust particles. Repeat this a few times. This method does not add stickiness. It only uncovers existing stickiness.
If your mat still lacks grip, its adhesive may be gone. Mats do not last forever. They wear out with heavy use. At this point, you might need a new mat. Some people try re-sticking solutions. These can be messy. They often do not work well. They might even damage your Cricut machine. It is often better to replace a truly non-sticky mat.
Remember that stickiness is not the only factor. Your Cricut machine settings matter too. Ensure you use the right pressure for your material. Incorrect settings can make materials slip. Even on a perfectly sticky mat. Proper care helps extend its life. This is similar to cleaning and caring for other synthetic items or delicate rain jackets.
- Wash first to remove debris.
- Use a lint roller for leftover fibers.
- Try painter’s tape for stubborn particles.
- Replace truly worn-out mats.
- Check your Cricut settings.
Focus on cleaning before considering replacement. Most mats recover well with a good wash.
Tips for Maintaining Your Cricut Mat’s Life
Regular care extends your Cricut mat’s life. Prevention is key. I have learned small habits make a big difference. These tips help you avoid frequent deep cleaning. They keep your mats performing well.
Always cover your mat when not in use. Cricut mats come with a clear protective sheet. Put this sheet back on after every project. The sheet protects the adhesive. It stops dust and lint from sticking. Airborne particles are everywhere. The cover acts as a shield. Do not lose this cover. It is very important.
Store your mats flat. Do not roll them or bend them. Bending can cause the mat to warp. A warped mat does not feed correctly into your machine. It leads to inaccurate cuts. Hang your mats using hooks if they have holes. Or store them flat in a drawer or on a shelf. Keep them away from extreme temperatures. Heat can melt the adhesive. Cold can make the mat brittle.
Use the right cutting settings for your materials. Using too much pressure on thin materials pushes fibers deeper into the mat. This makes cleaning harder. Always do a test cut if you are unsure. Adjust your settings. This reduces mat wear. It also protects your blades.
Periodically use a lint roller or painter’s tape on your mat. Do this even if you do not plan a full wash. This removes loose debris. It keeps the surface clearer between washes. It is a quick maintenance step. This prevents heavy buildup. It keeps your mat consistently sticky.
- Cover your mat after every use.
- Store mats flat.
- Use correct cutting settings.
- Do light lint roller cleanings often.
These simple habits make your mats last longer. They save you time and money. A well-maintained mat ensures smooth crafting sessions.
FAQ Section
Q1: How often should I wash my Cricut mat? The frequency depends on how much you use it. For light use, wash every few months. For heavy use, wash every few weeks. If your materials start to slip, it is time for a wash. Regular light cleaning with a lint roller helps between washes.
Q2: Can I use rubbing alcohol to clean my Cricut mat? No, do not use rubbing alcohol. It can dissolve the adhesive on your mat. It may also dry out the mat material. Stick to mild dish soap and warm water. Strong chemicals damage the mat’s surface. They can reduce its lifespan.
Q3: What if my mat is still not sticky after washing? If your mat is not sticky after washing, the adhesive might be worn out. Mats do not last forever. Consider if it is truly worn or if there is still fine debris. Sometimes a lint roller helps. If it is still not sticky, it is likely time for a new mat.
Q4: Can I put my Cricut mat in the dishwasher? No, do not put your Cricut mat in the dishwasher. Dishwashers use high heat and strong detergents. Both can ruin the mat’s adhesive and material. Always wash your mat by hand with mild soap and water. Dishwashing causes irreversible damage.
Q5: How do I remove tiny paper bits from my mat? You can use a scraper tool to remove larger bits. For tiny paper bits, gently scrub with a soft brush during washing. A lint roller or painter’s tape also works well. These methods lift small particles effectively. Be patient and gentle.
Q6: Does washing a Cricut mat ruin it? No, washing a Cricut mat correctly does not ruin it. In fact, it extends its life. Using harsh chemicals, scrubbing too hard, or improper drying can damage it. Follow gentle cleaning steps to keep your mat in good condition. Proper washing makes it work better.
Conclusion
Learning how to wash a Cricut mat is a simple skill. It greatly improves your crafting experience. It also extends the life of your valuable Cricut mats. You now know the reasons to clean them. You have the right supplies. You understand the step-by-step process for different mat types. Proper drying is also key.
A clean mat provides optimal stickiness. It ensures precise cuts every time. This means fewer wasted materials. It brings more successful projects. My crafting feels much smoother with clean mats. This simple maintenance saves you money. It also keeps your creative flow going strong.
Do not let a dirty mat slow down your creativity. Take a few minutes to give your Cricut mat the care it deserves. Start washing your mats regularly. Share your own mat cleaning tips in the comments below. Let us help each other keep our crafting tools in top shape. Happy crafting!
- Cricut care
- mat cleaning
- sticky mat
- craft supplies
- DIY cleaning