· Laundry Care · 18 min read
How To Wash A Hat In Washing Machine
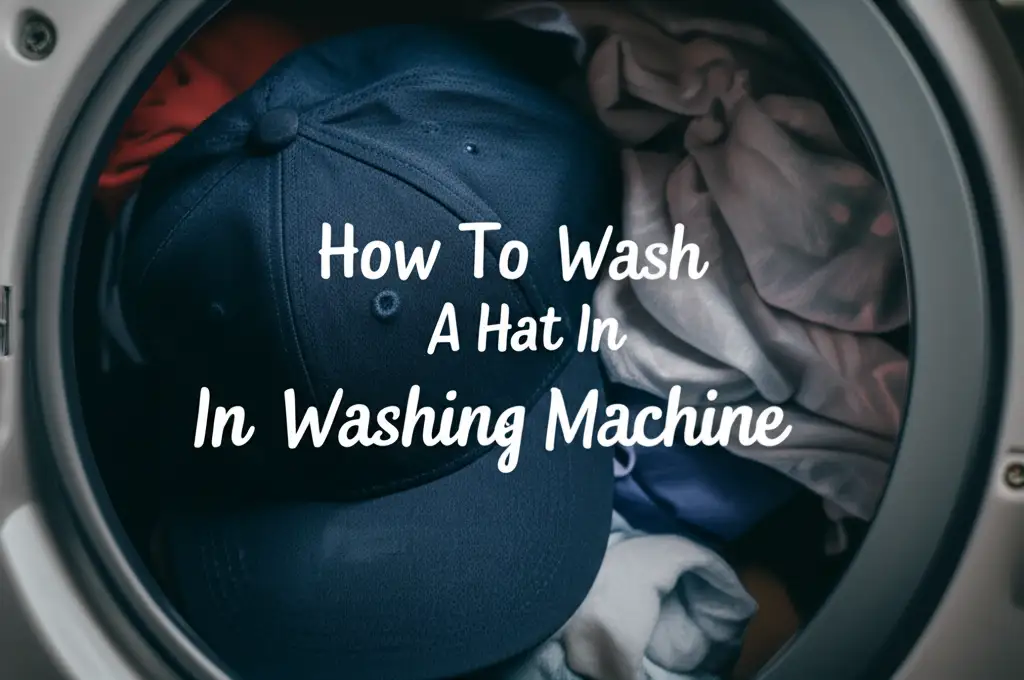
How To Wash A Hat In Washing Machine: Your Complete Guide
Hats are popular accessories, but they gather dirt, sweat, and oils over time. You might wonder if you can simply toss them into the washing machine. Many people avoid machine washing hats, fearing damage or misshaping. However, washing a hat in a washing machine is possible with the right steps.
This guide helps you understand how to safely clean your favorite headwear. We cover everything from checking hat material to selecting machine settings. We also explain proper drying methods. Soon, you will have clean hats that hold their shape.
Takeaway
- Assess Hat Compatibility: Check the care tag and material. Machine wash only sturdy, colorfast hats. Avoid old, delicate, or cardboard-brimmed hats.
- Pre-Treat Stains: Use a mild stain remover or laundry detergent to target sweat marks and dirt spots.
- Use a Hat Cage: Protect your hat’s shape with a specialized hat cage or a sturdy laundry bag.
- Select Gentle Settings: Choose the “delicate” or “gentle” cycle with cold water. Use a mild detergent.
- Air Dry Carefully: Always air dry hats. Place them on a non-rusting form or a clean towel to maintain their original shape.
To wash a hat in a washing machine, first check its care tag and material; most cotton or synthetic baseball caps are suitable. Pre-treat any stains, place the hat in a hat cage for protection, and wash on a gentle or delicate cycle with cold water and mild detergent. Air dry the hat to help it keep its shape.
Before You Begin: Assessing Your Hat for Machine Washing
Before you clean your hat, you must know if it can handle a washing machine. Not all hats are machine friendly. Checking the hat’s care tag is your first step. This tag provides important instructions about washing methods and materials.
Many hats, especially older ones, lack a care tag. In such cases, you must identify the hat’s material. Most baseball caps made of cotton or synthetic blends are generally safe for machine washing. These materials are durable and hold up well to water. However, some materials are too delicate for machine agitation. Hats made of wool, silk, or those with delicate embellishments should not go into a washing machine. These materials can shrink, lose shape, or get damaged easily.
Consider the hat’s structure next. Modern baseball caps often have plastic brims. These brims can withstand water and agitation. Older hats, especially vintage ones, might have cardboard brims. Cardboard brims will fall apart or warp when wet. Feel the brim to tell the difference. A firm, bendable brim usually indicates plastic. A soft, easily deformable brim suggests cardboard. I always check this part carefully.
Lastly, think about the hat’s color. If your hat is new or brightly colored, it might bleed dye. You can test for colorfastness. Dab a hidden area with a damp white cloth. If color transfers to the cloth, wash the hat separately or by hand. This prevents dye transfer to other clothes or inside the washing machine. Understanding these factors helps you decide the best cleaning method for each hat. This initial assessment saves your hat from potential damage.
- Check the Care Tag: Always look for care instructions first. Follow them strictly.
- Identify Material:
- Machine-Safe: Cotton, polyester, acrylic, most synthetic blends.
- Hand-Wash Only/Special Care: Wool, silk, leather, suede, hats with delicate embroidery, sequins, or old cardboard brims.
- Inspect Brim Material:
- Plastic Brim: Safe for machine washing. It feels firm and resilient.
- Cardboard Brim: Not safe. It feels soft and bends easily.
- Test for Colorfastness: Dampen a small, hidden spot with a clean white cloth. If dye transfers, wash the hat alone or by hand. This avoids color bleeding.
Preparing Your Hat: Spot Treatment and Protection
Once you confirm your hat is machine washable, some preparation steps are important. These steps help achieve the best cleaning results. They also protect your hat during the wash cycle. Start by dealing with any visible stains. Sweat marks often appear on the brim and band of hats. Dirt spots can be on the crown.
You can pre-treat these areas. Apply a small amount of mild liquid laundry detergent directly to the stains. Use a soft brush, like an old toothbrush, to gently work the detergent into the fabric. Rubbing too hard can damage the material or spread the stain. Let the detergent sit for about 10-15 minutes. This allows it to break down the dirt and oils. Avoid using harsh stain removers, especially those with bleach, as they can fade your hat’s color. Always use a gentle hand when cleaning.
Next, consider using a hat cage. A hat cage is a plastic frame designed to hold a hat’s shape during washing and drying. It is a smart investment if you plan to machine wash hats often. The cage keeps the hat from deforming or creasing under the washing machine’s agitation. If you do not have a hat cage, a sturdy mesh laundry bag can offer some protection. Place the hat inside the bag to prevent it from getting tangled or stretched. This method helps maintain the hat’s form, but a hat cage offers superior protection.
Remove any removable parts from your hat. This includes pins, badges, or other accessories. These items can get lost, damaged, or cause damage to the hat or the washing machine. Secure any loose strings or flaps on the hat itself. This prevents them from snagging or tearing during the wash. These preparation steps make a big difference in the final outcome. They ensure your hat comes out clean and retains its original shape.
- Spot Treat Stains:
- Apply a small amount of mild liquid laundry detergent to sweat stains and dirt spots.
- Gently rub the detergent into the fabric with a soft brush or your fingers.
- Let it sit for 10-15 minutes.
- Avoid harsh chemicals or bleach.
- Use a Hat Cage or Laundry Bag:
- A hat cage provides the best protection for maintaining shape.
- A mesh laundry bag offers an alternative for preventing tangles and stretching.
- Remove Accessories: Take off any pins, badges, or other removable items.
- Secure Loose Parts: Tie or secure any loose strings or flaps on the hat.
Choosing the Right Washing Machine and Settings
Selecting the correct washing machine and settings is vital for successful hat cleaning. The type of washing machine you have can influence the process. Front-loading machines are generally gentler on clothes than top-loaders with agitators. If you own a top-loader with a central agitator, consider using a hat cage or a laundry bag for extra protection. The agitator can be harsh on delicate items. However, some newer top-loaders come without agitators; these are much gentler and perform more like front-loaders. You can learn more about how to clean specific washing machine types, such as a GE washing machine top loader no agitator, if you need to prepare your machine.
For the wash cycle, always choose the “delicate” or “gentle” setting. These cycles use less agitation and lower spin speeds. This reduces the stress on your hat’s fabric and structure. It minimizes the risk of stretching or misshaping. I always opt for the gentlest cycle available.
Water temperature is another important factor. Cold water is best for washing hats. Hot water can cause colors to fade or bleed. It can also cause shrinkage, especially with certain materials like cotton. Cold water helps preserve the hat’s color and shape. It also removes dirt effectively without being too harsh.
When it comes to detergent, a mild liquid laundry detergent is the ideal choice. Avoid powdered detergents, as they might not dissolve completely in cold water and can leave residue on your hat. Harsh chemicals or strong detergents can damage the fabric or fade the color. Use only a small amount of detergent. Too much detergent can leave a residue, which can attract more dirt later. For general washing machine care, knowing how to clean your washing machine with baking soda and vinegar can also ensure your machine is clean for delicate items like hats. Regularly cleaning your machine, including checking the filter, is a good practice to ensure optimal performance. For instance, if you have a Samsung machine, understanding how to clean a Samsung washing machine filter top loader is helpful. This prepares your washing machine for effective cleaning of all your laundry items, including your hats.
- Machine Type Consideration:
- Front-loader: Generally gentle, preferred.
- Top-loader with agitator: Use with caution; always use a hat cage for protection.
- Top-loader without agitator: Similar to front-loaders, gentler.
- Cycle Setting: Select “delicate” or “gentle” cycle.
- Water Temperature: Use cold water only to prevent color fading and shrinkage.
- Detergent:
- Use a mild liquid laundry detergent.
- Use a small amount to avoid residue.
- Avoid harsh chemicals and powdered detergents.
Loading Your Hat into the Washer Safely
Proper loading of your hat into the washing machine is the next step. It sounds simple, but how you place the hat can affect the outcome. If you are using a hat cage, make sure the hat fits snugly inside. The cage should hold the hat’s shape firmly. Once the hat is secure in the cage, place the cage directly into the washing machine drum. Do not try to stuff the cage into a small space.
If you are using a mesh laundry bag instead of a hat cage, place the hat carefully inside the bag. Make sure the bag is zipped or tied securely. The bag should not be overly full. Give the hat some room to move slightly but still be protected. Place this bag in the machine drum. I always put delicate items like hats in their own protective bags.
You might wonder what else to wash with your hat. It is best to wash hats with other light-colored, similar items. Avoid washing hats with heavy items like jeans or towels. These heavy items can push against the hat, causing it to lose its shape. They can also create excessive lint. Wash hats with items like t-shirts, socks, or underwear. Ensure these items are also colorfast to prevent any dye transfer to your hat. This helps distribute the load evenly in the machine. It also cushions the hat during the wash cycle.
Consider washing only one or two hats at a time. Overloading the washing machine can prevent a thorough clean. It can also increase the risk of damage to your hats. Each hat needs enough space to be cleaned effectively. The drum should not be packed tightly. Give your hats room to agitate gently. This helps the water and detergent reach all parts of the hat. This loading method ensures your hats receive gentle care throughout the wash. It helps them come out clean and in good condition.
- Using a Hat Cage:
- Ensure the hat fits snugly inside the cage.
- Place the cage directly into the washing machine drum.
- Using a Mesh Laundry Bag:
- Place the hat carefully inside the bag.
- Zip or tie the bag securely.
- Do not overfill the bag.
- Wash with Similar Items:
- Wash hats with light-colored, lightweight items like t-shirts or socks.
- Avoid heavy items like jeans or towels that can distort the hat’s shape.
- Avoid Overloading:
- Wash only one or two hats at a time.
- Allow enough space in the drum for proper cleaning and gentle agitation.
The Washing Process: What to Expect
Once you load your hat and set the machine, you can start the wash cycle. The washing process for a hat is usually quick. The “delicate” or “gentle” cycle is shorter than a standard wash. This shorter duration is beneficial for your hat. It minimizes exposure to water and agitation. This helps maintain its shape and integrity.
During the cycle, the washing machine will fill with cold water. The agitator (if present) or the drum will move gently. You will see mild suds from the detergent. The hat, secured in its cage or bag, will move with the water. The goal is to gently dislodge dirt and sweat. This process is much less aggressive than a typical laundry cycle. I sometimes check through the machine door to see how the hat is moving inside.
It is important not to add any harsh chemicals during the wash. Bleach or strong stain removers, if not used for pre-treatment, should not go into the machine with your hat. These chemicals can severely damage the hat’s fabric. They can also cause irreversible color fading or discoloration. Stick to the mild liquid detergent you chose earlier.
The washing machine will then drain the water and begin the spin cycle. For hats, the spin cycle should be at a low speed. This low spin helps remove excess water without distorting the hat’s shape. A high spin speed can be too harsh. It can cause creasing or stretching. If your machine allows, select a specific low-spin option. After the spin cycle finishes, the hat will be damp but not soaking wet. It will be ready for the drying stage. The hat will feel clean and fresh. The machine’s gentle action helps preserve the hat’s structure.
- Short Cycle Duration: The delicate cycle is quick, reducing hat exposure to water and agitation.
- Gentle Action: The machine will move water and hat gently, designed to dislodge dirt without harshness.
- Avoid Additional Chemicals: Do not add bleach or strong stain removers during the wash cycle.
- Low Spin Speed: Ensure the machine uses a low spin speed to remove water without distorting the hat. The hat will be damp, not soaking.
Proper Drying Techniques After Machine Washing
Drying your hat correctly after machine washing is as important as the wash itself. Improper drying can ruin your hat’s shape, even after a perfect wash. The most important rule for drying hats is to always air dry them. Never put a hat in a tumble dryer. The high heat from a dryer will cause shrinkage. It will also warp the brim and crown. A dryer’s tumbling action can also distort the hat’s original form. I learned this the hard way with one of my favorite caps.
To air dry your hat, you need to help it keep its shape. If you used a hat cage during washing, you can often leave the hat in the cage for drying. The cage acts as a perfect mold. It helps the hat maintain its spherical shape as it dries. If you do not have a hat cage, find a non-rusting object that mimics a head’s shape. A clean, round container or a balloon blown up to the hat’s size works well. You can also place the hat over a rolled-up towel to help support the crown. Avoid drying on flat surfaces, as this can flatten the crown.
Place the hat in a well-ventilated area. Avoid direct sunlight. While sunlight helps dry, prolonged exposure can cause colors to fade. A shaded outdoor area or an indoor spot with good airflow is ideal. A fan can also help speed up the drying process. Do not use a hairdryer on high heat. If you need to speed up drying, use a hairdryer on a cool or low-heat setting, keeping it at a distance.
Periodically check the hat’s dryness. Depending on humidity and air circulation, drying can take several hours or even a full day. The hat must be completely dry before you wear it or store it. A damp hat can develop mildew or unpleasant odors. Once dry, your hat should look refreshed and hold its original form. This careful drying ensures your hat lasts longer and looks good.
- Air Dry Only: Never use a tumble dryer. High heat causes shrinkage and warping.
- Maintain Shape During Drying:
- Leave the hat in its hat cage if used.
- Place over a non-rusting, head-shaped object (e.g., clean container, balloon, rolled towel).
- Avoid drying on flat surfaces.
- Optimal Drying Environment:
- Place in a well-ventilated area.
- Avoid direct sunlight to prevent color fading.
- Use a fan for faster drying.
- Use a hairdryer on a cool or low-heat setting at a distance if needed.
- Ensure Complete Dryness: Hats must be fully dry to prevent mildew and odors. This may take several hours or a full day.
Addressing Common Issues: Preventing Damage and Maintaining Shape
Even with careful machine washing, sometimes issues can arise. Knowing how to address them helps keep your hats in top condition. One common concern is shrinkage. This usually happens if you use hot water or a high-heat dryer. If your hat shrinks slightly, you might be able to stretch it back. While the hat is still damp, gently pull and shape it with your hands. You can also wear it for a short time to help it conform to your head as it dries. Prevention is better. Always use cold water and air dry.
Fading is another potential issue. Washing hats too frequently or using harsh detergents can cause colors to dull. To prevent fading, wash hats only when necessary. Use a mild, color-safe detergent. Turn dark-colored hats inside out before washing. This reduces direct exposure to detergent and agitation. Air drying away from direct sunlight also helps preserve color vibrancy. If a hat has faded a lot, sometimes a fabric dye designed for apparel can restore color. However, this takes careful application.
Misshaping is a fear for many when machine washing hats. This often results from not using a hat cage or an unsuitable washing cycle. If your hat comes out of the wash with an odd shape, try to reshape it while it is still damp. Place it on a proper hat form or a round object. Gently mold the crown and brim back into place. Let it air dry completely in this corrected shape. For baseball caps, pay special attention to the brim. You can carefully bend it to its original curve as it dries.
Proper storage also helps maintain your hat’s shape between washes. Store hats on a hook or a hat rack. Avoid stacking hats on top of each other, as this can flatten the crowns. Keeping hats in a cool, dry place also prevents mildew. If your hat gets a slight crease, often a little steam can help. Hold it over boiling water (carefully) or use a garment steamer. Gently reshape the area. By understanding these potential problems and their solutions, you can keep your hats looking sharp for a long time.
- Shrinkage:
- Prevention: Always use cold water and air dry.
- Solution: While damp, gently stretch and reshape by hand or wear briefly to stretch to fit your head.
- Fading:
- Prevention: Wash only when needed, use mild color-safe detergent, wash dark hats inside out, air dry away from direct sunlight.
- Solution: Consider fabric dye for restoration if fading is severe.
- Misshaping:
- Prevention: Use a hat cage, select gentle cycle.
- Solution: Reshape while damp on a hat form or round object; pay attention to brim curve.
- Maintenance & Storage:
- Store hats on hooks or hat racks to preserve shape.
- Avoid stacking.
- Keep in a cool, dry place to prevent mildew.
- Use steam to remove slight creases.
FAQ Section
Can I wash any type of hat in a washing machine?
No, not all hats are machine washable. You should only machine wash hats made of sturdy materials like cotton or synthetic blends. Always check the care tag. Hats with cardboard brims, delicate embellishments, or made of wool or silk are usually not suitable for machine washing.
Is it necessary to use a hat cage for machine washing?
While not strictly necessary for every hat, a hat cage is highly recommended. It provides the best protection for maintaining your hat’s original shape during agitation. If you do not have one, a sturdy mesh laundry bag can offer some protection, but a hat cage provides superior results.
What detergent should I use when washing a hat?
Use a mild liquid laundry detergent. Avoid powdered detergents, as they may not dissolve completely in cold water and can leave residue. Do not use harsh chemicals, bleach, or strong stain removers unless specifically for pre-treating a stubborn spot, and even then, use with caution.
Can I put my hat in the dryer after washing?
No, you should never put a hat in a tumble dryer. The high heat will cause the hat to shrink and warp its brim and crown. Always air dry your hat. Place it on a non-rusting, head-shaped object or a hat cage to help it retain its original form as it dries.
How do I prevent my hat from losing its color?
To prevent color fading, wash your hat only when necessary using cold water and a mild, color-safe detergent. For dark-colored hats, turn them inside out before washing. Always air dry your hat in a well-ventilated area, avoiding direct sunlight, which can also cause colors to fade.
What if my hat still looks dirty after washing?
If your hat still looks dirty, it might be due to stubborn stains that needed more thorough pre-treatment or very old, set-in grime. You can try repeating the pre-treatment process on specific spots. For very dirty hats, a second gentle wash might be needed, but assess the hat’s durability first.
Conclusion
Washing a hat in a washing machine does not have to be a daunting task. By following these steps, you can refresh your favorite headwear safely and effectively. Remember to assess your hat’s material and structure first. Prepare it by spot treating stains and securing it in a hat cage. Choose the gentle cycle, cold water, and a mild detergent for the wash. Always air dry your hat to help it keep its shape.
Taking the time for proper hat care extends the life of your hats. It keeps them looking clean and sharp. You can confidently machine wash many types of hats, preserving their fit and appearance. If you need more cleaning guides, explore our website for other helpful tips to keep your belongings clean and well-maintained. A clean hat makes a difference in your overall look, and now you have the tools to achieve it.
- hat washing
- washing machine
- hat care
- laundry tips
- cleaning hats
- baseball caps
- delicate wash