· Printing Maintenance · 20 min read
How To Clean 3d Print Bed
Optimize Your Prints: How to Clean a 3D Print Bed
Achieving flawless 3D prints often comes down to one critical factor: a clean and well-maintained print bed. Have you ever started a print, only to find it curling or detaching mid-way? A dirty print surface is a common culprit. Residues from previous prints, fingerprints, or even dust can severely compromise bed adhesion. This leads to failed prints and wasted material. Ensuring your print bed is spotless is not just about cleanliness; it directly impacts the success and quality of every object you create. This guide will walk you through precise methods to clean your 3D print bed, no matter its type. You will learn the best practices for optimal print results. We also cover routine maintenance that keeps your printer running smoothly. Let us get your print bed ready for perfect first layers every time.
Takeaway
A clean 3D print bed is essential for good print adhesion and overall print quality.
- Always use the right cleaning agent for your specific bed material.
- Regular cleaning prevents residue buildup and improves print success.
- Proper bed leveling follows effective cleaning for best results.
To effectively clean a 3D print bed, identify its material type (e.g., glass, PEI, magnetic). Use the appropriate cleaning agent like isopropyl alcohol for most surfaces. Remove stubborn residues with gentle scraping or specific solvents. This ensures proper adhesion and high-quality 3D prints.
Understanding Your 3D Print Bed Materials
Before you begin cleaning, identify your 3D printer bed material. Different surfaces need different cleaning approaches. Using the wrong cleaner can damage your bed or reduce its effectiveness. Knowing your bed type helps choose the safest and most effective method. This protects your investment and improves print outcomes.
Common 3D Print Bed Surfaces
Most 3D printers use one of several common print bed types. Each type offers specific advantages for print adhesion and ease of removal. They also have unique cleaning needs.
- Glass Beds: These are popular for their flatness and even heat distribution. Glass provides a very smooth bottom layer finish. However, prints often need an adhesion helper like glue stick or hairspray. These additives leave residue.
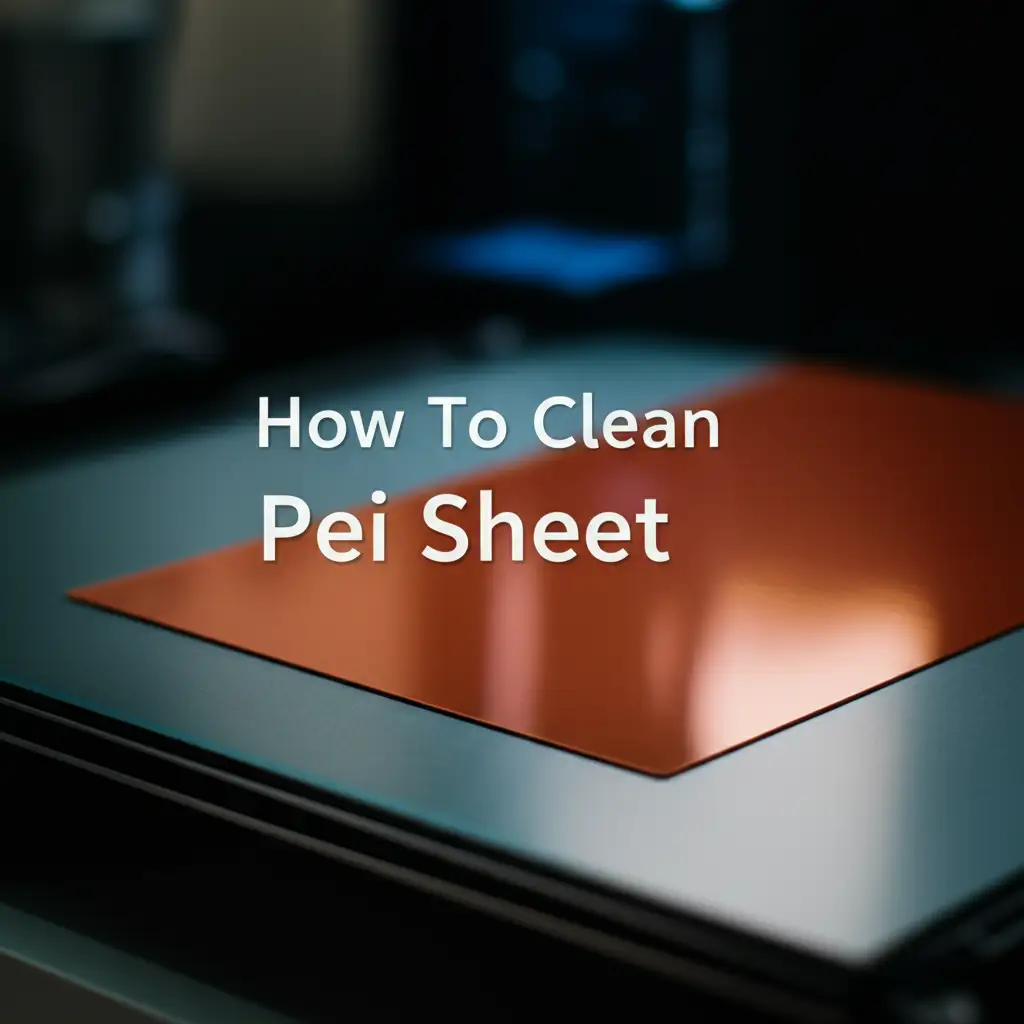
- PEI Sheets (Polyetherimide): PEI sheets are widely used for their excellent adhesion properties, especially with PLA and PETG. They come as rigid plates or flexible magnetic surfaces. PEI usually needs less adhesive than glass. However, oils from fingers can reduce its stickiness.
- Magnetic Flexible Build Plates: These plates typically feature a PEI or textured surface. They attach magnetically to a heated bed. Their flexibility allows for easy print removal by bending the plate. Cleaning often focuses on the top flexible sheet.
- Other Surfaces: Some beds use Kapton tape, painter’s tape, or specialized coatings. Each needs attention to its material properties during cleaning. For example, Kapton tape is robust, but specific solvents might damage its adhesive.
Understanding your print bed material is the first step toward effective cleaning. It ensures you use the correct methods and products. This prevents damage and maintains optimal print performance.
Essential Tools and Cleaning Agents for 3D Print Beds
Gathering the right tools and cleaning agents simplifies the process of cleaning your 3D print bed. Having everything ready ensures a thorough and efficient cleaning session. The correct supplies make a big difference in the results.
Must-Have Cleaning Supplies
These items are generally safe and effective for most common 3D print bed materials. They help remove common residues without causing damage.
- Isopropyl Alcohol (IPA): IPA is a primary cleaner for most 3D print beds. It dissolves oils, fingerprints, and many filament residues. Use IPA with a purity of 70% or higher for best results. It evaporates quickly, leaving little residue.
- Microfiber Cloths or Lint-Free Wipes: These cloths prevent scratches and leave no fibers behind. Using paper towels can leave small lint particles, which affect print quality.
- Scraper Tool: A plastic scraper is ideal for removing larger pieces of stuck filament. Metal scrapers can scratch softer build surfaces like PEI. Choose a tool appropriate for your bed type.
- Distilled Water: Sometimes, a simple wipe with distilled water is enough for light dust or fresh glue stick residue. It helps to remove any streaks after IPA cleaning on glass.
Optional or Specific Cleaning Agents
Some situations or materials may require specialized cleaners. These are not always necessary but can be helpful for stubborn issues.
- Acetone: Acetone is effective for cleaning ABS residue from glass beds. However, never use acetone on PEI surfaces. It will damage them. It can also harm certain plastic frames. Use it only when necessary and with caution.
- Dish Soap and Warm Water: For heavily soiled glass or removable build plates, dish soap and warm water can break down stubborn greases and old adhesive layers. Rinse thoroughly with water afterwards.
- Window Cleaner (Ammonia-Free): For glass beds, an ammonia-free window cleaner can offer a streak-free finish. Avoid ammonia on PEI or coated surfaces. Ammonia can cause degradation over time.
- Fine Grit Sandpaper (for specific PEI issues): In rare cases, a very fine grit (e.g., 600-800 grit) sandpaper can scuff a worn PEI surface. This helps restore adhesion. Only do this if prints are no longer sticking, and only very lightly. Follow manufacturer guidelines.
Always use a test patch first if you are unsure about a new cleaning agent. This prevents accidental damage to your print bed. Proper ventilation is also important when using chemical cleaners like IPA or acetone.
Step-by-Step Guide to Cleaning Different 3D Print Beds
Cleaning your 3D print bed varies slightly depending on its material. Follow these specific steps to ensure an effective clean for common bed types. Always make sure the bed is cool before cleaning. A heated bed can evaporate cleaning agents too quickly and cause burns.
Cleaning a Glass Print Bed
Glass beds are durable but often accumulate residue from adhesives like glue stick or hairspray. They can also show fingerprints easily.
- Remove Loose Debris: Use a plastic scraper to gently remove any large pieces of filament or dried adhesive. Be careful not to scratch the glass surface.
- Initial Wipe with IPA: Dampen a clean microfiber cloth with isopropyl alcohol (70% or higher). Wipe down the entire surface of the glass bed. This removes fingerprints, oils, and light residues. Repeat if necessary. For deeper cleaning on glass, you might find tips on how to clean glass without streaks. This can help ensure a truly pristine surface.
- For Stubborn Residues (Glue/Hairspray):
- Warm Water and Soap: For heavy glue stick build-up, remove the glass plate from the printer if possible. Wash it in a sink with warm water and a little dish soap. Gently scrub with a sponge or soft brush.
- Acetone (for ABS residue): If you print ABS directly on glass and have stubborn plastic stains, use a small amount of acetone on a lint-free cloth. Acetone effectively dissolves ABS. Remember, never use acetone on other bed types like PEI. It is also good for removing certain sticky residues like those discussed when you want to clean wax off glass.
- Final Rinse and Dry: After using soap or acetone, rinse the glass thoroughly with distilled water. This prevents mineral deposits from tap water. Dry it completely with a clean, dry microfiber cloth. A completely dry surface prevents issues during reheating.
Cleaning a PEI Sheet or Magnetic Flexible Plate
PEI surfaces are fantastic for adhesion but can lose stickiness due to oils and fine plastic particles.
- Remove Loose Debris: Carefully peel off any leftover filament with your hands or a gentle plastic scraper. Avoid sharp metal tools as they can gouge the PEI.
- IPA Wipe Down: This is your go-to method for PEI. Dampen a fresh microfiber cloth with 90% or higher isopropyl alcohol. Wipe the entire surface. IPA removes oils and light filament dust very well. This is usually all that is needed for daily cleaning.
- Deeper Cleaning for Reduced Adhesion:
- Dish Soap and Water: If IPA alone is not enough, remove the PEI sheet. Wash it with warm water and mild dish soap. Use a soft sponge. Rinse thoroughly with clean water and let it air dry or wipe with a lint-free cloth. Ensure it is fully dry before reattaching to the printer.
- Light Scuffing (Rarely): If your PEI sheet still struggles with adhesion after thorough cleaning, its surface might be too smooth or contaminated. Very, very gently scuff the surface with fine-grit (600-800) sandpaper. This creates microscopic texture for better grip. Use light pressure and clean thoroughly with IPA afterwards. This step should be a last resort.
Cleaning Other Print Bed Surfaces
For beds with painter’s tape, Kapton tape, or specialized coatings, follow specific manufacturer instructions. Generally, light cleaning with IPA is safe. Avoid harsh chemicals that could dissolve adhesives or coatings. Always test a small, inconspicuous area first.
Troubleshooting Common Adhesion Issues After Cleaning
Even after a thorough cleaning, you might still face bed adhesion problems. Cleaning is a vital step, but it is part of a larger process. Proper bed adhesion depends on several factors working together. Addressing these can significantly improve your print success rate.
Re-level Your Print Bed
A freshly cleaned bed requires accurate leveling. This is crucial for a successful first layer. The nozzle must be at the correct distance from the bed. If it is too far, plastic does not stick. If it is too close, plastic scrapes off.
- Manual Leveling: Use the paper method. Place a piece of standard paper between the nozzle and the bed. Adjust bed screws until you feel slight drag on the paper. Repeat at multiple points around the bed.
- Auto-Leveling: Even with auto-leveling, run the calibration routine after cleaning. Some auto-leveling systems need a clean surface to get accurate readings.
- Z-Offset Adjustment: Fine-tune your Z-offset. This setting precisely adjusts the nozzle height during the first layer. A small change can make a big difference.
Optimizing First Layer Settings
Your slicer settings play a huge role in first layer adhesion. Adjusting these can help filament stick better to a clean bed.
- Initial Layer Height: A slightly thicker first layer (e.g., 0.25mm to 0.3mm) can provide more material to bond with the bed.
- Initial Layer Line Width: Increase the first layer line width (e.g., 120% to 150%). This makes lines wider, creating more contact area.
- Initial Layer Print Speed: Print the first layer slowly (e.g., 10-20 mm/s). Slower speeds give the plastic more time to bond.
- Bed Temperature: Ensure your bed temperature is appropriate for your filament.
- PLA: 50-60°C
- PETG: 70-85°C
- ABS: 90-110°C (requires enclosure for best results)
- Consult your filament manufacturer’s recommendations.
Using Adhesion Promoters
Sometimes, even a clean bed and perfect settings need a little help. Adhesion promoters create an extra sticking layer.
- PVA Glue Stick: A thin, even layer of standard washable PVA glue stick works wonders for most filaments, especially PLA and PETG on glass. Reapply as needed.
- Hairspray: Unscented, extra-hold hairspray (e.g., Aqua Net) can provide a consistent adhesion layer on glass. Apply a light mist from a distance.
- Specialized Adhesives: Products like Magigoo, 3DLac, or liquid glues are formulated for specific filament types and bed materials. They can be very effective for problematic materials.
Remember, a clean bed is the foundation. Combining it with proper leveling, optimized slicer settings, and the right adhesion promoter will help you achieve consistent, high-quality prints.
Advanced Cleaning Techniques and Stubborn Stains
Some residues on your 3D print bed are more challenging than simple dust or fingerprints. These stubborn stains require more focused cleaning methods. Knowing how to tackle them ensures your bed stays pristine and functional.
Dealing with Deeply Embedded Filament Residue
Over time, tiny bits of filament can bond firmly to the print bed surface. This is common if the nozzle was too close or bed temperature was too high.
- Heat Cycling: For glass or metal beds, try heating the bed to a high temperature (e.g., 80-100°C) for 10-15 minutes, then letting it cool completely. This expansion and contraction can sometimes loosen embedded plastic. After cooling, attempt to scrape it off with a plastic scraper.
- Targeted Solvents (Use with Caution):
- ABS Residue: If you have ABS filament stuck on a glass bed, a small amount of acetone on a cloth can dissolve it. As mentioned, never use acetone on PEI or other plastic surfaces, as it will cause irreversible damage.
- PLA Residue: PLA is generally resistant to common solvents. For very stubborn PLA on glass, try a solution of dish soap and very warm water. Let it soak if the plate is removable.
- Gentle Abrasion (Last Resort for PEI): If a PEI sheet has significant “bald spots” where adhesion is completely gone due to embedded plastic or wear, a very light wet-sanding with high-grit (600-800 grit) sandpaper can sometimes restore the texture. Use minimal pressure and wet the sandpaper with IPA. Wipe thoroughly with IPA afterwards. This process removes a thin layer of PEI, so use it sparingly.
Removing Grease and Oil Stains
Fingerprints are the most common source of oil on a print bed. However, sometimes oils or greases can transfer from other sources in the workshop. These reduce adhesion significantly.
- IPA is Your First Line of Defense: Isopropyl alcohol is excellent at dissolving most oils and greases. A good scrub with IPA and a microfiber cloth often does the trick.
- Dish Soap and Water for Heavy Greases: For persistent oil slicks or greasy residues, especially on removable glass or magnetic sheets, a thorough wash with warm water and dish soap is effective. Dish soap breaks down grease. Think about how you might clean oil out of oven; the principle of using a degreaser applies here too. Rinse very well afterwards to remove all soap residue.
- Vinegar Solutions: A dilute solution of white vinegar and water can also cut through light grease and act as a general cleaner. While not specifically a degreaser for print beds, vinegar is a versatile cleaning agent. You can explore its uses in cleaning various items, such as in articles discussing how to clean mold with vinegar or how to clean shower with vinegar. Always rinse well after using vinegar.
Remember to always ensure the bed is cool before applying any cleaning agents. Proper ventilation is also important when using stronger solvents. Taking time to address stubborn stains keeps your print bed in top condition for optimal print quality.
Regular Maintenance and Prevention of Print Bed Issues
Prevention is always better than cure, especially when it comes to your 3D print bed. Establishing a routine for bed maintenance can significantly reduce adhesion problems and extend the life of your bed. Small, consistent efforts make a big difference in the long run.
Daily and Weekly Cleaning Routines
Incorporate simple cleaning steps into your daily and weekly workflow. This keeps residue from building up.
- Before Every Print (Daily):
- Quick Wipe: Use a clean microfiber cloth dampened with isopropyl alcohol (IPA). Wipe the entire print surface. This removes fingerprints, dust, and any light residue from the previous print. This quick step is crucial for maintaining consistent adhesion.
- Visual Inspection: Briefly check the bed for any stuck filament bits or damage. Remove them before starting a new print.
- After Several Prints or Weekly (Depending on Usage):
- Thorough IPA Clean: Perform a more comprehensive wipe-down with IPA. Ensure no streaks remain.
- Scrape Residue: If you use adhesives like glue stick or hairspray, gently scrape off any significant build-up with a plastic scraper.
- Wash Removable Beds: If you have a removable glass or magnetic plate, consider washing it with warm water and dish soap. This removes stubborn grease and old adhesive layers more effectively than IPA alone. Rinse well and dry completely.
Tips for Preventing Adhesion Problems
Minimizing the causes of adhesion issues saves you time and effort in cleaning.
- Avoid Touching the Print Surface: Oils from your fingers are a major cause of poor adhesion. Handle your print bed by the edges. Wear gloves if you must touch the print area.
- Use the Right Adhesion Aid: If your filament needs an adhesion promoter, apply it evenly and sparingly. Too much glue stick can create an uneven surface. Too much hairspray can build up quickly.
- Calibrate Your Printer Regularly:
- Bed Leveling: Re-level your print bed routinely, especially if you move the printer or notice prints failing.
- Z-Offset: Adjust your Z-offset if your first layer looks too squished or too stringy. A perfect first layer ensures strong adhesion.
- Store Filament Properly: Damp filament can lead to inconsistent extrusion and poor first layer quality. Store filament in a dry, sealed environment. Desiccants can help absorb moisture.
- Printer Enclosure (for certain filaments): For materials like ABS that are prone to warping, using a printer enclosure helps maintain stable temperatures. This reduces drafts that can cause parts to lift from the bed.
By following these maintenance practices, you can largely prevent print bed issues. A clean and well-prepared bed is your best assurance for successful 3D prints.
Common Mistakes to Avoid When Cleaning Your 3D Print Bed
Cleaning your 3D print bed seems straightforward, but certain mistakes can damage your bed or reduce its effectiveness. Knowing what to avoid saves you time, money, and frustration. It also ensures the longevity of your printer components.
Using the Wrong Cleaning Agents
This is perhaps the most critical mistake. Different bed materials react differently to chemicals.
- Acetone on PEI: Never use acetone on a PEI (Polyetherimide) surface. Acetone will dissolve PEI, permanently damaging the sheet and creating an unusable surface. This is a very common and costly error.
- Harsh Abrasives: Avoid using scouring pads, steel wool, or overly aggressive metal scrapers on any delicate print surfaces. These can leave deep scratches that compromise adhesion and print quality.
- Ammonia-Based Cleaners: Ammonia can degrade certain plastics and coatings over time. While possibly safe for plain glass, it is best to stick to IPA or dish soap for most 3D print bed cleaning.
Cleaning a Hot Print Bed
Always allow your print bed to cool down completely before cleaning.
- Evaporation: Cleaning solutions, especially IPA, evaporate very quickly on a hot surface. This reduces their cleaning power. It also leaves residues or streaks.
- Safety Hazard: A hot bed can cause burns. Touching a heated surface with a damp cloth can also create steam, which is dangerous.
Leaving Residue Behind
The goal of cleaning is to remove all contaminants. Incomplete cleaning defeats the purpose.
- Soap or Chemical Residue: If you wash your print bed with soap and water, rinse it thoroughly. Leftover soap residue can prevent filament from sticking. The same applies to any chemical cleaner; ensure it evaporates or is wiped clean.
- Lint or Fibers: Using paper towels or non-lint-free cloths can leave tiny fibers on the bed. These small particles can cause print imperfections or reduce adhesion in tiny areas. Always use microfiber cloths or dedicated lint-free wipes.
Forgetting About Bed Leveling and Z-Offset
A clean bed is only part of the equation.
- Ignoring Leveling: A perfectly clean bed will still produce failed prints if it is not level. A warped or un-level bed means the nozzle is too far or too close in different areas.
- Incorrect Z-Offset: The Z-offset dictates the exact distance of the nozzle from the bed during the first layer. Even a tiny error here can cause poor adhesion, despite a clean and level bed. Always check and adjust after significant cleaning or maintenance.
By being mindful of these common mistakes, you can ensure your cleaning efforts truly contribute to successful and high-quality 3D prints.
The Impact of a Clean Print Bed on 3D Print Quality
A clean 3D print bed is more than just a preference; it is a fundamental requirement for achieving high-quality 3D prints. The condition of your bed directly influences the success of your first layer, which in turn affects the entire print. Understanding this connection helps prioritize proper bed maintenance.
Why the First Layer Matters Most
The first layer is arguably the most important part of any 3D print. It sets the foundation for everything that comes after.
- Adhesion: A clean bed ensures maximum adhesion for the first layer. If the first layer does not stick well, the print will warp, lift, or detach entirely. This wastes time and material.
- Dimensional Accuracy: A good first layer ensures your print starts flat and true to dimensions. If the first layer is uneven or deformed due to poor adhesion, subsequent layers will build upon a faulty base. This can lead to distorted or inaccurate parts.
- Surface Finish: The bottom surface of your print will take on the texture of your print bed. A clean, smooth bed leads to a clean, smooth bottom surface on your print. Residues on the bed can transfer directly to your print, causing cosmetic flaws.
Preventing Common Print Failures
Many common 3D print failures trace back to an unclean or poorly maintained print bed.
- Warping: This occurs when the edges or corners of a print lift from the bed. A primary cause is uneven cooling or insufficient adhesion. A dirty bed reduces adhesion, making warping more likely.
- Prints Detaching Mid-Print: If a print releases from the bed during the printing process, it often indicates poor initial adhesion. Residues, oils, or dust on the bed weaken the bond between the plastic and the surface.
- Elephant’s Foot: This refers to the squishing out of the first few layers, making the base of the print wider than intended. While often related to Z-offset, a dirty bed can exacerbate this by causing uneven adhesion, leading to inconsistent squish.
- Layer Shifting (Indirectly): While layer shifting is usually a mechanical issue, a print detaching and then re-sticking slightly off its original position can appear as a layer shift. A clean bed prevents this initial detachment.
Investing a few minutes in cleaning your 3D print bed before each print session is a small effort with a huge return. It improves print success rates, enhances print quality, and reduces troubleshooting time. A clean bed means more successful prints and less frustration.
When to Replace Your 3D Print Bed Surface
Even with the best cleaning and maintenance, 3D print bed surfaces do not last forever. Knowing when to replace your print bed is crucial for maintaining print quality and preventing ongoing frustration. Continuing to use a worn-out bed can lead to consistent print failures.
Signs of a Worn-Out Print Bed
Several indicators suggest your print bed surface needs replacement. Pay attention to these common warning signs.
- Permanent Damage: Deep scratches, gouges, or significant dents are clear signs. These imperfections will directly affect the first layer of your prints. They create areas where filament cannot adhere properly.
- Reduced Adhesion Despite Cleaning: If you have thoroughly cleaned, re-leveled, and optimized your settings, but prints still refuse to stick, the surface itself might be compromised. This is especially true for PEI sheets that have lost their texture.
- Bubbling or Delamination (PEI/Magnetic Beds): Heat cycles and repeated print removals can cause PEI sheets to bubble or delaminate from their base. This creates uneven areas where prints will not stick well.
- Excessive Discoloration or Stains: While some discoloration is cosmetic, extensive, non-removable staining can indicate a surface breakdown. This might also come with adhesion issues.
- Warping (Glass/Metal): Though less common with quality glass or aluminum beds, significant warping can occur over time, especially with cheaper materials or uneven heating. A warped bed makes proper leveling impossible.
Lifespan of Different Bed Materials
The expected lifespan varies significantly by bed material and usage.
- Glass Beds: These are generally very durable. They can last for years with proper care. Their main failure points are cracking from impact or thermal shock, or accumulation of very stubborn, unremovable stains.
- PEI Sheets: The lifespan of PEI sheets depends heavily on use. A well-cared-for PEI sheet can last hundreds of prints or even longer. However, frequent scraping, excessive nozzle crashes, or using harsh solvents will shorten its life. Flexible PEI sheets might also show wear from repeated bending.
- Other Surfaces (Tape, Coatings): These often have the shortest lifespan. Painter’s tape needs replacement after every few prints. Kapton tape might last longer but can degrade with heat and aggressive scraping.
Replacement Options
When it is time for a new bed, consider the replacement options.
- Direct Replacement: Often, the easiest option is to buy an identical replacement part from your printer manufacturer or a reputable third-party.
- Upgrade: This is a good opportunity to upgrade to a different bed material. For example, if you have been using glass with glue stick, you might consider a flexible PE
- 3D printer cleaning
- print bed adhesion
- filament residue
- isopropyl alcohol
- bed leveling
- glass print bed
- PEI sheet