· Photography · 12 min read
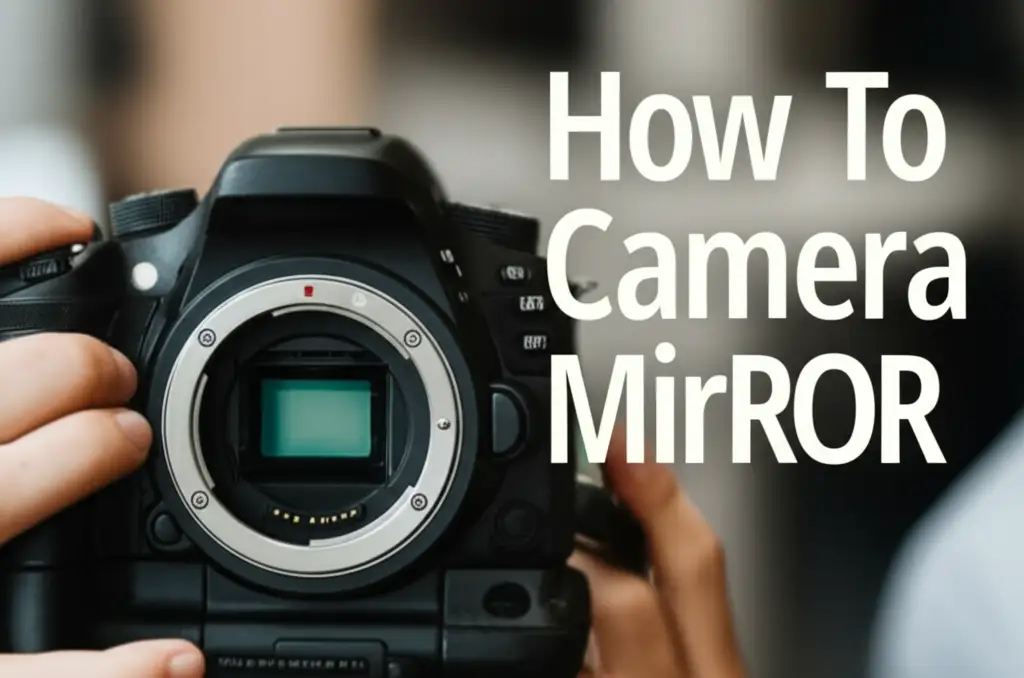
How To Clean A Camera Mirror
How to Clean a Camera Mirror: The Ultimate Guide
When it comes to photography equipment maintenance, knowing how to clean a camera mirror properly is essential for any photographer. Your camera’s mirror is a delicate component that requires special attention to ensure your images remain crisp and clear. Dust, fingerprints, and other debris on your camera mirror can significantly impact image quality, making regular cleaning a crucial part of camera care.
Key Takeaways:
- Never touch the camera mirror with your fingers
- Use specialized tools like sensor cleaning kits and air blowers
- Different camera brands may require slightly different cleaning approaches
- Professional cleaning is recommended for severe contamination
- Regular maintenance prevents the need for deep cleaning
In short: To clean a camera mirror, power off your camera, remove the lens in a dust-free environment, use an air blower to remove loose particles, then carefully use a specialized sensor cleaning kit with proper technique if needed. Avoid touching the mirror directly with your fingers or abrasive materials.
Understanding Your Camera Mirror
The mirror in a DSLR (Digital Single-Lens Reflex) camera is a crucial component that reflects light from the lens up to the optical viewfinder, allowing you to see what you’re shooting. Unlike mirrorless cameras, DSLRs have this delicate mirror system that flips up during exposure to let light reach the sensor.
Camera mirrors are typically made of specialized glass with a reflective coating. This delicate surface can easily be damaged by improper cleaning techniques. Before attempting to clean your camera mirror, it’s important to understand its function and fragility.
The mirror sits in front of the image sensor and flips up when you take a photo. Any dust or smudges on this mirror can affect what you see through the viewfinder but won’t actually appear in your photos (unlike dust on the sensor itself). However, excessive dirt can eventually make its way to the sensor, which is why keeping the mirror clean is still important.
Different camera manufacturers like Canon, Nikon, and others may have slightly different mirror designs, but the cleaning principles remain largely the same. If you’re unsure about your specific model, consulting your camera’s manual is always a good first step before attempting any cleaning.
When to Clean Your Camera Mirror
Knowing when to clean your camera mirror is just as important as knowing how. Unnecessary cleaning increases the risk of damage, so only clean when truly needed.
Signs your camera mirror needs cleaning:
- You notice visible dust, smudges, or spots when looking through the viewfinder
- The viewfinder image appears hazy or unclear
- You can see debris on the mirror when the lens is removed
- After using your camera in dusty, sandy, or humid conditions
- If you haven’t cleaned your camera for an extended period
It’s important to distinguish between mirror issues and sensor issues. If you see spots in your actual photos, that’s typically a sensor problem, not a mirror problem. The mirror only affects what you see through the viewfinder, not the final image quality.
Regular visual inspections of your camera’s internal components when changing lenses can help you spot potential issues early. If you’re uncertain whether cleaning is necessary, consulting with a professional camera store can save you from potential damage caused by unnecessary cleaning.
Essential Tools for Cleaning a Camera Mirror
Having the right tools is crucial for safely cleaning your camera mirror. Using improper tools can lead to scratches or other damage to this delicate component. Here’s what you’ll need:
Air Blower
A rubber air blower (not compressed air cans) is your first line of defense against dust particles. It provides a gentle stream of air that can dislodge most loose debris without making contact with the mirror.
Sensor Cleaning Kit
Although designed primarily for sensors, some elements of these kits can be useful for mirrors when used carefully:
- Sensor swabs (can be used very gently on mirrors)
- Cleaning solution (specifically designed for camera optics)
- Microfiber cloths (for outer camera body only)
Additional Helpful Tools:
- Lighting source to better see dust and debris
- Clean workspace with minimal dust
- Camera manual for reference
- Anti-static brush (specifically designed for camera cleaning)
What to avoid:
- Household cleaning solutions
- Regular tissues or paper towels
- Your breath or mouth blowing (introduces moisture)
- Cotton swabs (can leave fibers)
- Vacuum cleaners (too powerful)
Investing in a proper camera cleaning kit is well worth the cost compared to potential repair expenses. Quality tools designed specifically for camera maintenance will help ensure you don’t damage your equipment while cleaning.
Step-by-Step Guide to Clean a Camera Mirror
Follow this systematic approach to safely clean your camera mirror:
Preparation
- Find a clean, dust-free environment
- Wash and dry your hands thoroughly
- Gather all necessary tools
- Turn off your camera and remove the battery
- Remove the lens and place the camera on a stable surface with the mirror facing down
Basic Cleaning Procedure
Air Blower Method (First Defense)
- Hold the camera with the mirror facing downward
- Use the air blower to gently puff air onto the mirror
- Direct air at different angles to dislodge stubborn particles
- Never touch the blower tip to the mirror surface
For Persistent Dust (Advanced Cleaning)
- If blowing doesn’t remove all debris, use a specialized sensor brush
- Gently sweep across the mirror surface without applying pressure
- Move in one direction only, preferably from top to bottom
- Never reuse a dirty brush without proper cleaning
For Smudges or Fingerprints (Last Resort)
- Use a sensor swab with minimal cleaning solution
- Apply solution to the swab, never directly to the mirror
- Gently glide the swab across the mirror in one direction
- Use a new swab for each pass
Final Inspection
- Use a small flashlight at different angles to check for remaining dust or streaks
- Repeat cleaning steps if necessary
- Replace the lens promptly to minimize dust exposure
- Turn on the camera and test the viewfinder
Taking your time with each step is crucial. Rushing the process increases the risk of damage. If you’re unsure at any point, it’s better to consult a professional than risk damaging your equipment.
Brand-Specific Cleaning Tips
Different camera manufacturers have slight variations in their mirror designs and recommended cleaning procedures. Here are some brand-specific considerations:
How to Clean a Camera Mirror Nikon
Nikon DSLR mirrors often have a slightly different coating than other brands. When cleaning a Nikon mirror:
- Use Nikon’s recommended cleaning solutions when possible
- Be extra cautious around the autofocus sensor elements near the mirror
- Consider using Nikon’s own cleaning kits for best results
- The mirror box in many Nikon models is slightly deeper, so angle your tools accordingly
How to Clean Camera Mirror Canon
Canon cameras often have specific considerations:
- Canon’s mirrors may have slightly different reflective coatings
- Be aware of the location of the secondary mirror underneath the main mirror
- Canon often recommends their own brand of cleaning solutions
- Some Canon models have mirror lock-up cleaning modes that can be helpful
Other Manufacturers
- Sony DSLRs (older A-mount): Similar to Canon procedures but be careful of the in-body stabilization system
- Pentax: Often have weather sealing that can trap dust differently
- Olympus: Their DSLR mirrors (in older models) are typically smaller and require extra precision
Always consult your specific camera’s manual before cleaning, as even models within the same brand may have different recommendations. When in doubt, manufacturer service centers can provide model-specific advice.
For vintage or film cameras, the cleaning process might differ significantly. Learning how to clean viewfinder film cameras requires additional research, as these often have different mirror constructions.
Common Mistakes to Avoid
Even with the best intentions, many photographers make mistakes when cleaning their camera mirrors. Here are the most common errors to avoid:
Physical Contact Errors
- Using fingers to remove dust: The oils on your fingers can damage the mirror coating permanently
- Applying pressure: Camera mirrors are delicate and can be knocked out of alignment
- Using improper materials: Paper towels, tissues, or clothing can scratch the surface
- Scrubbing motions: Any abrasive movement can damage the reflective coating
Cleaning Solution Mistakes
- Using alcohol without research: While some photographers report success cleaning DSLR mirrors with alcohol, many manufacturers advise against it
- Using household cleaners: These can contain chemicals harmful to optical coatings
- Applying liquids directly: Solutions should always be applied to tools, never directly to the mirror
- Using too much liquid: Excess solution can seep into mechanical parts
Procedural Errors
- Cleaning unnecessarily: Every cleaning session poses some risk; only clean when needed
- Ignoring the manual: Camera-specific guidance should always take precedence
- Rushing the process: Hasty cleaning often leads to damage
- Leaving the mirror exposed: Minimize the time your camera spends with the lens removed
Technical Misunderstandings
- Confusing mirror vs. sensor issues: Spots in photos come from sensor dust, not mirror dust
- Cleaning the wrong surface: Make sure you’re actually addressing the mirror, not the focusing screen above it
- Ignoring secondary mirrors: Some DSLRs have smaller secondary mirrors that also need attention
If you make a mistake during cleaning, stop immediately. Further attempts to fix the issue might compound the problem. In these cases, seeking professional assistance is the safest approach.
Professional Cleaning Services
Sometimes, the safest option is to seek professional help, especially if you’re dealing with stubborn issues or are uncomfortable performing the cleaning yourself.
When to Consider Professional Cleaning
- After exposure to extreme environments (beach, desert)
- When visible contamination doesn’t respond to basic cleaning
- If you notice scratches or damage to the mirror
- When dealing with fungus or moisture issues
- For vintage or particularly valuable equipment
- If you lack the confidence to clean it yourself
Finding Reputable Services
- Manufacturer service centers offer the most reliable service
- Local camera shops often provide cleaning services
- Check reviews and ask for recommendations from other photographers
- Inquire about warranty implications before servicing
What to Expect
- Professional cleaning typically costs between $50-150 depending on the service level
- Turnaround time is usually 3-10 business days
- Many services include additional maintenance checks
- Some offer sensor cleaning combined with mirror cleaning for better value
Questions to Ask
- Does the service include inspection of other components?
- What cleaning methods do they use?
- Is there a guarantee on their work?
- Do they have experience with your specific camera model?
While professional cleaning adds expense, it eliminates risk and often includes a thorough inspection of your camera’s condition. For expensive camera bodies or when facing complicated contamination issues, professional services are well worth considering.
If you’re traveling and need emergency cleaning, many tourist destinations have camera shops that cater to photographers. For specialized equipment like medium format cameras or technical cameras, always seek services from specialists familiar with that equipment.
Preventive Maintenance Tips
Preventing mirror contamination is far easier than cleaning it. Implementing these preventative measures can significantly reduce how often you need to clean your camera mirror:
Proper Camera Storage
- Always store your camera with a lens or body cap attached
- Use a camera bag with proper padding and dust protection
- Consider using silica gel packets in your storage containers to reduce humidity
- Store in a cool, dry place away from direct sunlight
Lens Changing Techniques
- Change lenses quickly and in clean environments
- Turn the camera off before changing lenses (reduces static that attracts dust)
- Point the camera downward when changing lenses
- Keep your back to the wind in outdoor situations
- Have the replacement lens ready before removing the attached one
Regular Maintenance Habits
- Use an air blower on the camera body before putting it away
- Clean the outside of your camera regularly to prevent dust transfer
- Inspect your mirror periodically with a flashlight
- Keep your camera bag clean to prevent transferring dust
Environmental Awareness
- Be mindful of shooting in dusty, sandy, or high-humidity environments
- Consider using rain covers in adverse conditions
- Avoid changing lenses in challenging environments
- Allow your camera to acclimate to temperature changes before opening
Equipment Considerations
- Higher-end cameras often have better dust and weather sealing
- Some modern DSLRs have automatic sensor/mirror cleaning systems
- Having backup equipment reduces the need to change lenses frequently
By incorporating these preventive measures into your photography routine, you’ll significantly reduce the frequency of necessary cleanings, extending the life of your equipment and reducing maintenance costs over time.
Remember that consistent minor maintenance is better than occasional deep cleaning. A quick inspection and gentle air blowing after shooting sessions can prevent buildup that would require more invasive cleaning later.
FAQs About Camera Mirror Cleaning
How often should I clean my camera mirror?
Only clean your camera mirror when necessary, typically when you notice visible dust or debris affecting your viewfinder clarity. Unnecessary cleaning increases the risk of damage. For most photographers, a thorough inspection every 3-6 months is sufficient unless you frequently shoot in challenging environments.
Can I use compressed air to clean my camera mirror?
No, compressed air cans are not recommended for cleaning camera mirrors. They can release propellant that damages optical coatings and the extreme pressure can harm delicate components. Always use a manual air blower specifically designed for camera cleaning.
How do you clean a blurry mirror on a camera?
A blurry viewfinder image might be caused by dust on the mirror, focusing screen, or viewfinder. First, identify which component has the issue. For mirror cleaning, follow the steps outlined in this guide. For focusing screens, consult your manual as they’re even more delicate than mirrors.
Is it safe to clean a camera mirror with alcohol?
While some photographers report success cleaning DSLR mirrors with alcohol, most manufacturers advise against it. If you do use alcohol, it should be 99% isopropyl alcohol, used sparingly on a proper sensor swab. However, camera-specific cleaning solutions are always preferable.
How do I clean dust from inside my DSLR camera?
For dust inside the camera body but not on the mirror, use an air blower while holding the camera with the mount facing downward. If dust persists on internal components, professional cleaning is recommended. Learning how to clean the inside of a DSLR camera properly requires research specific to your model.
What should I do if I accidentally touched the camera mirror?
Don’t panic, but don’t attempt to wipe it clean with your finger. Power off the camera immediately and use the proper cleaning methods described in this guide. If a fingerprint is present, you may need to use a sensor swab with a minimal amount of cleaning solution. If you’re uncertain, consult a professional.
Final Words: Maintaining Your Camera for Optimal Performance
Knowing how to clean a camera mirror properly is just one aspect of comprehensive camera maintenance. By following the guidelines outlined in this article, you can ensure your viewfinder remains clear and your photography equipment stays in prime condition.
Remember that prevention is always better than correction when it comes to camera care. Developing good habits for lens changing, storage, and general handling will minimize the need for cleaning in the first place. Regular but minimal maintenance is the key to extending your camera’s lifespan.
If you’re ever unsure about cleaning your specific camera model, consult your manual or reach out to the manufacturer’s support team. For valuable equipment, investing in professional cleaning services can provide peace of mind and expert results.
With proper care and maintenance, your camera will continue to serve you well for years to come, allowing you to focus on what really matters—capturing amazing images. Keep your equipment clean, and it will reward you with consistent, high-quality performance when you need it most.
Whether you shoot with Canon, Nikon, Sony, or any other brand, these mirror cleaning principles will help maintain your viewfinder clarity and protect your investment in quality photography equipment.
- camera maintenance
- DSLR cleaning
- mirrorless camera
- photography tips
- camera sensor