· Equipment Maintenance · 19 min read
Clean Your Air Compressor Tank A Complete Guide
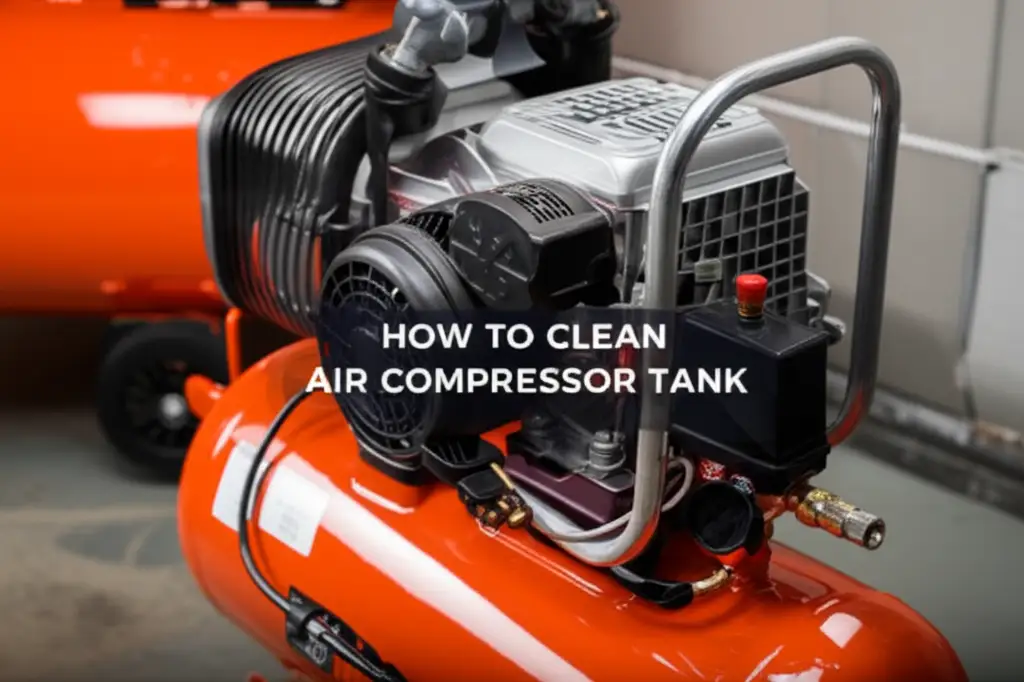
Clean Your Air Compressor Tank: A Complete Guide
Air compressors are useful tools for many jobs. They power impact wrenches, spray paint guns, and fill tires. Over time, moisture and debris build up inside the tank. This dirty buildup harms your compressor. It also reduces air quality. Knowing how to clean an air compressor tank is vital for its long life.
I know many people forget about this important task. Ignoring tank cleaning leads to rust and poor performance. This guide will walk you through each step. You will learn to drain the tank safely. You will also discover how to clean its inside thoroughly. We will cover how to prevent future problems too. Let’s make your air compressor last longer and work better.
Takeaway:
- Regularly drain your air compressor tank to remove water and oil.
- Use appropriate safety gear before starting any cleaning process.
- Flush the tank with water and a mild cleaner to remove internal grime.
- Dry the tank completely to prevent new rust from forming.
- Perform routine checks to ensure long-term compressor health.
To clean an air compressor tank, drain all air and water from the tank first. Then, flush the tank with a mild cleaning solution to remove rust and debris. Rinse the tank with clean water. Finally, dry the tank completely to prevent rust.
Why Cleaning Your Air Compressor Tank Matters
Your air compressor tank holds compressed air. But it also collects water and oil. This happens naturally as the compressor runs. Air has moisture in it. When air compresses, this moisture turns into liquid water. This water then settles at the bottom of the tank. Over time, this water mixes with oil and rust particles. This creates a sludge. This sludge harms your compressor. It also makes the air less clean.
Ignoring this sludge causes big problems. It can lead to tank corrosion. Corrosion weakens the tank walls. A weak tank can fail under pressure. This creates a safety risk. Clean air is also important for many tasks. If you paint, dirty air causes paint defects. If you use air tools, dirty air shortens their life. Regular cleaning prevents these issues. It keeps your compressor running well and safely.
Rust Formation and Its Dangers
Water sitting in a steel tank causes rust. Rust is iron oxide. It eats away at the metal. Air compressor tanks are often made of steel. They are designed to hold high pressure. Rust weakens the tank’s structure. This makes the tank unsafe. A rusted tank can rupture. A tank rupture is very dangerous. It releases compressed air with explosive force. This can cause severe injury or even death.
Rust particles also get into your air lines. They travel with the compressed air. These particles can damage your air tools. They clog air filters and pneumatic components. This shortens the life of your tools. Rust also contaminates your work. If you spray paint or use a sandblaster, rust spots ruin your project. Regularly cleaning your air compressor tank removes this rust. This protects your equipment and your safety.
Impact on Compressor Performance
A dirty tank affects how your compressor works. Water and sludge take up space inside the tank. This reduces the tank’s air capacity. Your compressor has to work harder. It runs more often to maintain pressure. This uses more electricity. It also wears out the motor faster. Your energy bills go up. Your compressor’s lifespan goes down.
Dirty air also harms internal parts. Moisture and debris can get into valves. They can affect the pressure switch. This causes the compressor to cycle incorrectly. It might not build pressure properly. Or it might lose air quickly. A clean tank helps the compressor operate at peak efficiency. It delivers a steady supply of clean, dry air. This improves your productivity. It also saves you money on repairs and power.
Health and Safety Risks
A dirty air compressor tank poses health risks. The moisture inside the tank creates a breeding ground. Mold and bacteria can grow in this environment. When you use the compressor, these airborne particles spread. They can get into your lungs. This causes respiratory problems. Breathing in mold spores is especially harmful. It can trigger allergies or asthma attacks.
Safety is the top concern. As mentioned, rust weakens the tank. A weak tank is a ticking time bomb. The risk of explosion is real. Always follow safety steps when working with air compressors. Never operate a compressor with a heavily rusted tank. Regular cleaning makes your workspace safer. It also protects your health. Prioritize safety with this equipment.
Essential Tools and Safety Gear for Tank Cleaning
Before you start to clean your air compressor tank, gather your supplies. You need the right tools for a safe and effective job. You also need personal protective equipment (PPE). Safety comes first when working with pressure vessels. Do not skip any safety steps. Having everything ready saves time. It also prevents accidents.
Make sure you have space to work. The area should be well-lit. Good ventilation is also important. Some cleaning solutions produce fumes. You do not want to breathe these in. A clear workspace prevents trips and falls. It also helps you focus on the task. Double-check your equipment list before you begin.
Required Cleaning Solutions
You need specific solutions to clean the tank well. Water is your primary cleaning agent. You will use a lot of it. A mild degreaser or detergent helps break down oil and sludge. Dish soap works fine for this. For rust, you might need a stronger rust remover. Some people use white vinegar. Vinegar is a natural acid. It helps dissolve light rust. Always read the product labels for any chemicals you use.
You will also need brushes. A long-handled brush can help scrub the inside of the tank. If your tank has an inspection port, this is possible. Otherwise, you will rely on agitation. A garden hose is useful for rinsing. A shop vacuum can help remove residual water. Have buckets ready to collect dirty water. You will need to dispose of this water properly.
Personal Protective Equipment (PPE)
Safety gear is critical when cleaning an air compressor tank. First, wear safety glasses or goggles. Water and cleaning solutions can splash. Rust particles can fly. Eye protection prevents injury. Second, wear chemical-resistant gloves. Cleaning solutions can irritate your skin. They can also be corrosive. Gloves protect your hands.
Third, wear a respirator or mask. Some cleaning solutions produce fumes. Mold or rust dust can become airborne. A mask protects your lungs. Fourth, wear old clothes or an apron. You will get dirty. Spills are likely. Good work boots provide foot protection. They also give you good grip. Always review your compressor’s manual for specific safety warnings. For more general air equipment cleaning, you might find tips on how to clean a portable air conditioner useful, as they also involve water tanks.
Step-by-Step Guide to Draining Your Air Compressor Tank
Draining your air compressor tank is the most important step. You cannot clean the tank if it holds air or water. This process removes built-up moisture and oil. It also depressurizes the tank. Never attempt to clean a tank under pressure. It is extremely dangerous. Make sure the compressor is off and unplugged. This prevents accidental startup.
Draining should be a regular maintenance task. Many people drain their tanks daily or weekly. This depends on how often you use the compressor. It also depends on the humidity where you live. Daily draining prevents major buildup. It reduces the need for deep cleaning. Always drain your tank before storing the compressor for a long time.
Preparing for Drainage
First, turn off the air compressor. Unplug it from the power outlet. This cuts all power to the unit. It prevents the motor from starting while you work. Next, open the main air outlet valve. This releases any air pressure in the lines. It helps the tank depressurize faster. Some compressors have a separate pressure relief valve. Open this too. You should hear air escaping. Wait until all air has left the tank. The pressure gauge should read zero.
Locate the drain valve at the bottom of the tank. This valve is usually a small petcock or ball valve. Place a bucket or container under the drain valve. This catches the dirty water and oil. Some older compressors might have a simple plug. Be ready to quickly remove and replace it if that is the case. Ensure your container is large enough to hold all the water.
The Drainage Process
Once the tank pressure is zero, open the drain valve. Slowly turn the valve counter-clockwise. Water and oil will begin to spray out. It will likely look rusty and oily. This is normal. Let all the liquid drain out. Sometimes the flow slows down. You might need to tilt the compressor. This helps stubborn water escape. You can also briefly run a small amount of air through the compressor, if it has a specific setting for that, to push out remaining moisture. Do not re-pressurize the tank during this step.
Close the drain valve once no more liquid comes out. Sometimes, small amounts of rust particles remain. You can try shaking the tank gently. This might dislodge them. Then open the valve again for a moment. Repeat this until only air comes out. This ensures you remove as much free liquid as possible. This first drainage gets rid of the loose stuff. For stubborn blockages in other systems, like an AC drain line, an air compressor can be useful for clearing clogs, as seen in how to clean AC drain line with air compressor.
Post-Drainage Inspection
After draining, inspect the drained liquid. Look at its color and consistency. A lot of rust indicates heavy corrosion inside the tank. Excessive oil might mean your compressor pump is leaking. Note any unusual smells. A strong, sour smell can suggest bacterial growth. These observations help you understand the tank’s condition. They also guide your cleaning efforts.
Check the drain valve itself. Make sure it closes completely. There should be no drips. If it leaks, you might need to replace the valve. A leaking drain valve causes air loss. This makes your compressor work harder. A small leak also lets more moisture enter the tank. Clean any sludge or debris around the drain valve. Use a rag to wipe the area clean. This simple inspection helps keep your compressor in good shape.
Thoroughly Cleaning the Inside of the Tank
Draining removes the loose stuff. Now, it’s time for a deeper clean. This step targets rust and stubborn deposits. You cannot usually see inside the tank. So, you will rely on solutions and agitation. This part of the process is more involved. Be patient and follow the steps carefully. This deep cleaning extends the life of your air compressor. It also ensures the air it produces is cleaner.
Remember to keep safety gear on. You will be dealing with cleaning solutions. Some might be corrosive. Wear your gloves and eye protection. Make sure you work in a well-ventilated area. This prevents inhaling fumes. If your tank has a large opening, you might reach inside with a brush. Most small and medium tanks do not allow this.
Using Cleaning Solutions
Start by pouring a cleaning solution into the tank. You can use a mix of water and mild dish soap. For heavier rust, use white vinegar or a dedicated rust remover. Fill the tank about one-quarter to one-half full with the solution. Do not fill it completely. You need space for agitation. Close the drain valve and the air outlet valve.
Seal all openings tightly. Then, carefully rock or shake the tank. This sloshes the solution around inside. The liquid contacts all inner surfaces. This agitation helps loosen rust and grime. Let the solution sit for several hours. For heavy rust, let it sit overnight. The longer it sits, the more it works. This process is similar to cleaning other types of tanks, like when you clean a gas tank on a lawn mower to remove rust and debris. Learn more about it at how to clean gas tank on lawn mower.
Mechanical Agitation (If Possible)
If your air compressor tank has a wide opening, like an inspection port, you can add mechanical agitation. This means using a brush. A long-handled wire brush helps scrub away stubborn rust. You can also add small, non-abrasive objects inside the tank. Steel ball bearings or plastic beads work well. Add them with the cleaning solution. Then, shake the tank vigorously. The objects tumble around inside. They scrape against the tank walls. This helps dislodge rust and scale.
After shaking, let the tank sit again. This allows the loosened debris to settle. Remember to remove these objects before rinsing. They can block the drain valve. Always use materials that will not damage the tank’s internal coating. Avoid harsh abrasives that can scratch the metal. Scratches create new spots for rust to form.
Rinsing and Drying the Tank
After the cleaning solution has done its job, it is time to rinse. Open the drain valve and empty the cleaning solution. Be prepared for very dirty water. Collect it in a bucket for proper disposal. Once the tank is empty, flush it with clean water. Use a garden hose to run water into the tank. Let it flow out the drain valve. Keep flushing until the water runs clear. This means all the cleaning solution and loose debris are gone.
Drying the tank is crucial. Any moisture left inside will cause new rust. Use a shop vacuum on reverse (blower mode) to force air into the tank. Aim it at the opening or the drain valve. This helps evaporate water. You can also leave the tank openings open for several hours. Air circulation promotes drying. For complete drying, some people place the tank in direct sunlight. A completely dry tank prevents immediate rust formation. This step ensures your hard work lasts.
Preventing Future Contamination and Rust Buildup
A clean air compressor tank is a happy tank. But cleaning is not a one-time event. Preventing contamination saves you effort later. It also extends your compressor’s life even more. Simple habits make a big difference. These practices keep your air clean and your tank healthy. They reduce the need for deep cleaning. They also keep your tools running smoothly.
Consistency is key. Make these prevention steps part of your routine. You will notice better performance. Your compressor will last longer. And you will avoid costly repairs. Think of it as preventative medicine for your equipment. Small actions now save big headaches later.
Regular Drainage Schedule
This is the easiest and most important prevention step. Drain your air compressor tank daily or after each use. Water builds up fast. Releasing it immediately prevents it from sitting. This removes the primary cause of rust. It also gets rid of oil and other contaminants before they settle. The more often you drain, the less likely rust will form.
How often depends on your usage and climate. If you use the compressor daily in a humid area, drain it daily. If you use it only once a week in a dry climate, draining after each use might be enough. Check your compressor’s manual for specific recommendations. Make draining a habit. This one step makes the biggest impact on tank health.
Air Filter Maintenance
The air filter is your compressor’s first line of defense. It stops dirt and debris from entering the pump. It also helps reduce moisture. A dirty air filter cannot do its job. It restricts airflow. This makes your compressor work harder. It also allows more contaminants to enter the system. These contaminants eventually end up in your tank.
Check your air filter regularly. Clean it or replace it as needed. Some filters are washable. Others require replacement. Follow your compressor’s instructions. A clean air filter means cleaner air enters the tank. This reduces buildup inside. It also prolongs the life of your compressor’s pump and motor. Proper air filter maintenance is crucial. If you want to know how to clean an air conditioner filter, that could provide some useful insight, as seen at how to clean air conditioner filter. Similarly, understanding how to clean a foam air filter can be helpful for different types of air systems, such as found here: how to clean foam air filter.
Proper Storage Conditions
Where you store your air compressor matters. Avoid humid environments. Basements or damp garages promote moisture buildup. Store your compressor in a dry area. A controlled climate is best. If you must store it in a cool place, ensure good airflow. This helps prevent condensation inside the tank. Condensation leads to rust.
Always store the compressor with the drain valve open. This allows any residual moisture to evaporate. It also prevents new moisture from getting trapped. If you store it for a long time, consider adding a desiccant. Desiccants absorb moisture. Small packets placed near the open drain can help. Proper storage protects your tank. It keeps your compressor ready for use.
Common Problems and Troubleshooting During Cleaning
Cleaning an air compressor tank can present challenges. You might encounter heavy rust. There could be lingering odors. Sometimes, the compressor does not work right after cleaning. Knowing how to handle these issues saves time. It helps ensure a successful cleaning process. Do not get discouraged by problems. Most have simple solutions.
Always prioritize safety. If you face a problem that feels unsafe, stop. Consult your compressor manual. You can also contact a professional. It is better to be safe than sorry. Troubleshooting helps you learn more about your equipment. It also makes you a more capable cleaner.
Dealing with Heavy Rust
Heavy rust is a common issue in neglected tanks. A simple water and soap solution might not be enough. For thick rust, use a stronger rust remover. Many products are available at hardware stores. Follow the product instructions carefully. Some require longer soaking times. Others might need multiple applications. White vinegar can also work for significant rust. Let it soak for 24-48 hours.
After soaking, try adding some small, hard objects to the tank. Steel nuts or gravel can work. Cap the openings. Shake the tank vigorously. The objects scrape against the rust. This helps dislodge it. Then, rinse thoroughly. You might need to repeat this process several times. If rust is extremely severe, it might have weakened the tank. In such cases, replace the tank. Do not risk a burst tank.
Odor Issues After Cleaning
Sometimes, a strange smell remains after cleaning. This often indicates mold or bacterial growth. It can also be residual cleaning solution. If it is mold or bacteria, flush the tank again. Use a solution of water and a small amount of bleach. Mix one cup of bleach per five gallons of water. Let it sit for an hour. Then, rinse thoroughly multiple times. Ensure good ventilation when using bleach.
If the odor is from a cleaning solution, rinse more. Run clean water through the tank until the smell is gone. For a lingering chemical smell, try rinsing with a baking soda solution. Baking soda neutralizes odors. Mix a few tablespoons in water. Let it sit for a short time. Then, rinse again. Proper drying also helps eliminate odors. An open drain allows trapped fumes to escape.
Compressor Not Building Pressure
After cleaning, you might find your compressor does not build pressure. This can be frustrating. First, check all connections. Make sure all valves are closed. The drain valve must be fully shut. The main air outlet valve should also be closed. A small leak prevents pressure buildup. Check for any new leaks around fittings.
Sometimes, debris from cleaning gets into the check valve. The check valve lets air into the tank but not out. If it is stuck open, air escapes. You might hear a hissing sound near the tank. You might need to clean or replace the check valve. Consult your compressor’s manual for its location. Also, ensure the pressure switch works. If none of these solutions work, your compressor might need professional repair. Cleaning other tanks, like an RV’s fresh water tank, also requires ensuring all valves seal properly after cleaning, which is detailed at how to clean fresh water tank in RV.
When to Call a Professional for Air Compressor Tank Service
Most air compressor tank cleaning you can do yourself. But some situations require a professional. Knowing when to call an expert saves you time. It also prevents bigger problems. Never try to fix something beyond your skill level. Especially when dealing with pressurized equipment. Your safety is most important.
A professional has specialized tools. They also have the experience to spot hidden problems. They can perform more complex repairs. They know safety standards well. If you are unsure, get expert advice. It is a smart investment for your equipment’s health.
Severe Tank Damage
Visually inspect your air compressor tank. Look for any dents, bulges, or deep corrosion. A minor surface rust patch is normal. But if you see flaking rust or holes, call a professional. A bulging tank wall indicates structural weakness. This is a sign of internal corrosion. It means the tank is unsafe. Do not use a tank with severe damage.
If your tank leaks air even when all valves are closed, it needs expert attention. A professional can assess the tank’s integrity. They can perform pressure tests. They will tell you if the tank is repairable or needs replacement. Never try to weld or patch a damaged air compressor tank yourself. This is extremely dangerous.
Persistent Performance Issues
After cleaning, your compressor should work better. If it still struggles to build pressure, there might be other issues. Persistent short cycling means the compressor turns on and off too often. This suggests a leak or a faulty pressure switch. If the compressor overheats frequently, it could be a motor problem. These issues are beyond basic cleaning.
A professional can diagnose these problems. They have diagnostic tools. They can check the pump, motor, and electrical components. They can also inspect the check valve and unloader valve. These parts are crucial for proper operation. Expert repair prevents total compressor failure. It restores your compressor’s efficiency.
Unidentifiable Internal Contamination
You might have drained your tank multiple times. You might have used cleaning solutions. But the water still comes out very dirty. Or you hear strange noises inside. This can mean heavy, unidentifiable contamination. It could be large pieces of rust. It might be unusual foreign objects. These might be impossible to remove with home methods.
- air compressor maintenance
- compressor tank cleaning
- rust removal
- drain air tank
- compressor care
- equipment cleaning
- DIY maintenance