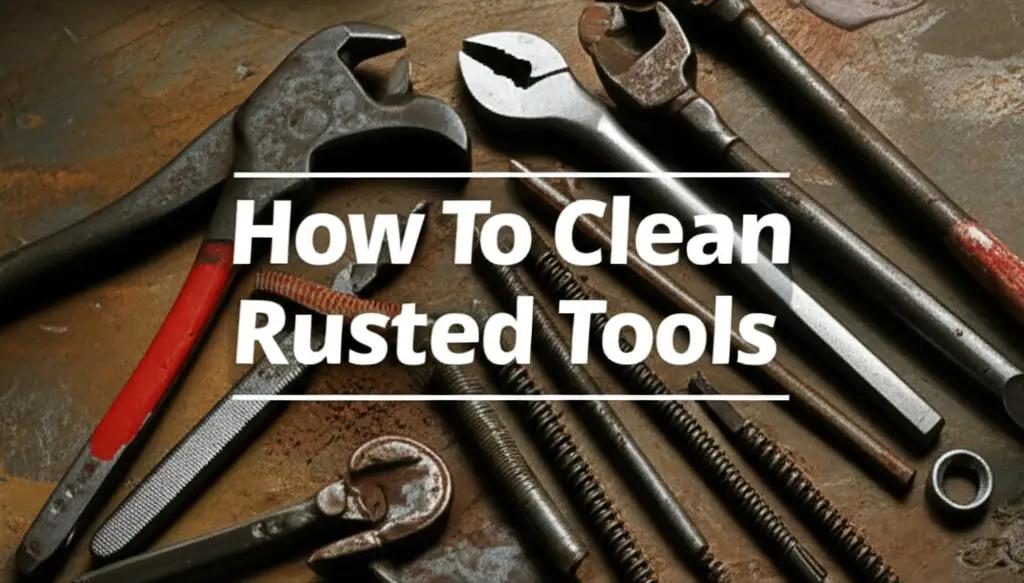
· Tool Maintenance · 16 min read
How To Clean Table Saw Top
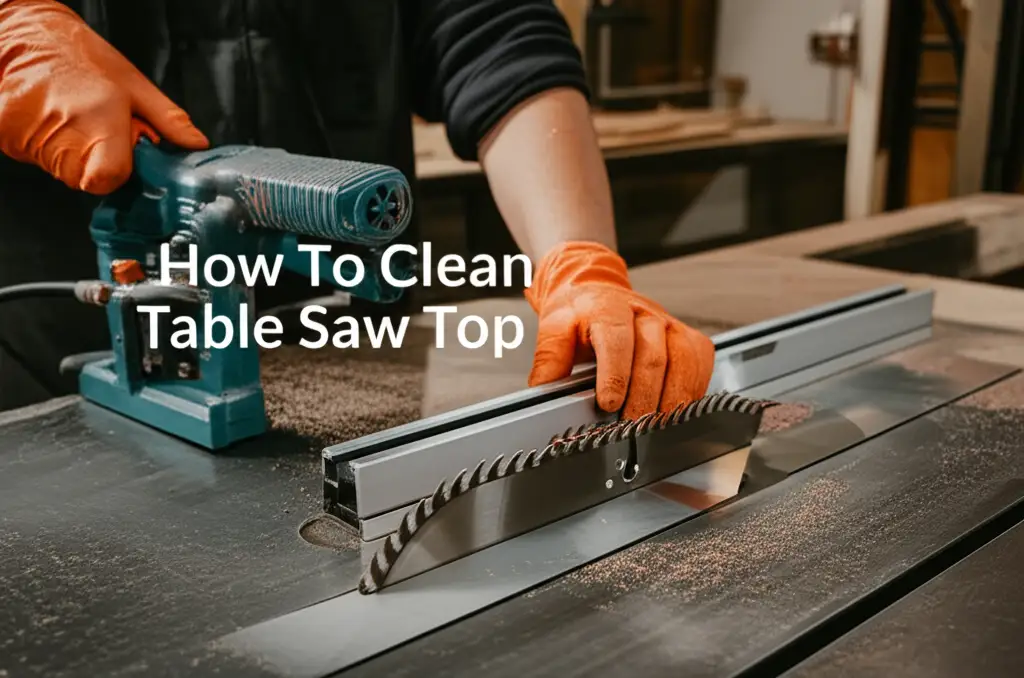
Keep Your Saw Safe: How to Clean Table Saw Top
Working with wood creates a mess. Sawdust, resin, and grime build up on your table saw top over time. This build-up affects saw performance and wood accuracy. A dirty table saw surface can also lead to rust, reducing your tool’s lifespan. I know the feeling of a sticky or rusty surface, it just makes precise cuts impossible. Keeping your table saw top clean is essential for safety, precision, and tool longevity. In this article, I will guide you through the process of how to clean table saw top surfaces. We will cover necessary tools, step-by-step cleaning methods for various types of grime, and important rust prevention strategies. Get ready to give your saw the care it deserves.
Takeaway
- Gather Tools: Collect safety gear, brushes, scrapers, and cleaning solutions.
- Remove Grime: Use appropriate cleaners to dissolve sticky resin and sawdust.
- Tackle Rust: Employ methods like sandpaper, rust removers, or natural solutions.
- Protect Surface: Apply a protective wax or rust inhibitor after cleaning.
- Prevent Build-up: Establish a regular cleaning schedule and use covers.
To clean a table saw top, begin by unplugging the saw for safety. Remove all surface debris like sawdust and wood chips with a brush or vacuum. For resin and grime, apply a specific saw blade cleaner or mineral spirits, letting it sit to dissolve the residue. Scrape off loosened build-up with a plastic scraper. For rust, use fine-grit sandpaper, a rust eraser, or a phosphoric acid-based solution. Finally, apply a protective layer of paste wax or a rust preventative to the clean surface.
Why Cleaning Your Table Saw Top Matters for Performance
You might wonder, why bother cleaning a table saw top? A clean table saw surface is more than just about appearances. It directly impacts your work and your tool. A dirty surface can cause wood to stick or drag, leading to inaccurate cuts. This happens because built-up resin and sawdust create friction.
A smooth, clean surface allows wood to glide easily across the table. This smooth movement ensures your cuts are precise and consistent. Think about pushing a board across a sticky counter versus a freshly waxed one; the difference is clear. Accuracy is crucial for woodworking projects. Even slight resistance can throw off a cut.
Ignoring saw top cleanliness also risks rust formation. Cast iron table saw tops are strong, but they can rust if exposed to moisture. Rust creates an uneven surface. This unevenness increases friction and can damage your wood. Rust also weakens the saw’s metal over time.
A well-maintained saw performs better and lasts longer. Regular cleaning protects your investment. It helps you avoid costly repairs or replacements. It also keeps your workspace safer. A saw that works as it should reduces the chance of kickback. Kickback can cause serious injury. I always feel safer knowing my tools are in top condition.
Essential Tools and Materials for Table Saw Cleaning
Before you start cleaning your table saw top, gather all the necessary tools and materials. Having everything ready makes the cleaning process smooth and efficient. You will need safety items first. Always protect yourself when working with tools and chemicals. I make sure to have my safety glasses on and gloves ready.
Here is a list of what you will need:
- Safety Glasses: Protect your eyes from debris and cleaning solutions.
- Gloves: Chemical-resistant gloves protect your hands from cleaners and rust.
- Shop Vacuum or Air Compressor: For removing loose sawdust and debris.
- Stiff Bristle Brush or Bench Brush: To sweep away sawdust from the surface.
- Plastic Scraper or Putty Knife: To gently remove stubborn resin build-up without scratching the metal. Avoid metal scrapers that can mar the surface.
- Mineral Spirits or Denatured Alcohol: Excellent for dissolving wood resin and general grime.
- Dedicated Saw Blade/Table Cleaner: Products like Rockler Pitch & Residue Remover or CMT Formula 2050 are designed for woodworking tool cleaning.
- Fine-Grit Sandpaper (220-grit or higher) or Rust Eraser: For light rust spots.
- 0000 Steel Wool: For scrubbing rust and polishing the surface.
- Clean Rags or Microfiber Cloths: For applying cleaners and wiping surfaces dry.
- Paste Wax (e.g., Johnson’s Paste Wax, TopCote) or Rust Inhibitor: For surface protection after cleaning.
- Clean Water and a Bucket: For rinsing or diluting some cleaners. Remember, use water sparingly and dry immediately.
Some common household items can also help. For example, a solution of vinegar can remove some rust or grime. You can learn more about general cleaning with vinegar here: how to clean shower with vinegar. Sometimes, a mixture of baking soda and vinegar works wonders for tough spots. For more on this, check out how to clean with vinegar and baking soda. Always test any new cleaner on a small, hidden area first. This helps ensure it does not damage your saw’s finish.
Step-by-Step Guide: Removing Surface Grime and Sawdust
Ready to get your table saw top sparkling? The first step involves clearing away the everyday mess. This means sawdust, wood chips, and light resin build-up. Always start with safety. Ensure your table saw is unplugged from its power source before touching any part of it. This prevents accidental starts.
First, I grab my shop vacuum. Use the hose attachment to suck up all loose sawdust from the table surface. Pay attention to the fence, miter slots, and blade area. An air compressor works well too, but wear eye protection. Blowing dust around can send small particles flying. After vacuuming, use a stiff-bristle brush or bench brush. Sweep away any remaining dust particles that cling to the surface.
Next, it’s time to tackle the sticky resin and grime. Wood resin, also called pitch, builds up from cutting wood. It creates a sticky film that attracts more dust. I usually start with mineral spirits or denatured alcohol. These solvents are excellent for dissolving resin. Apply a small amount to a clean rag. Wipe down the entire table saw top. You will notice the grime starting to lift off. For stubborn spots, let the solvent sit for a few minutes. This gives it time to break down the sticky residue.
If mineral spirits are not strong enough, use a dedicated saw blade or table cleaner. These products are formulated to cut through tough pitch. Spray the cleaner onto the affected areas. Allow it to soak for the recommended time, usually 5-10 minutes. Then, use a plastic scraper. Gently push the scraper across the surface to remove the loosened grime. Be careful not to gouge the cast iron. The goal is to lift the grime, not scratch the metal. After scraping, wipe the surface clean with another rag dampened with the cleaner. Finish by wiping the entire top with a dry, clean cloth. This ensures no residue remains. Keeping your table saw free of general grime makes future cleanings easier.
Tackling Rust: Effective Methods for Table Saw Tops
Rust is the enemy of a cast iron table saw top. It creates an uneven surface and can make your projects less accurate. If you see reddish-brown spots, it means rust has started to form. Do not panic; there are effective ways to remove it. My approach depends on how severe the rust is.
For light surface rust, I often start with simple methods. Fine-grit sandpaper, like 220-grit or higher, works well. Attach it to a sanding block for even pressure. Gently sand the rusty spots in small circles. You can also use a rust eraser, which is a specialized abrasive block. These tools rub away light rust without damaging the surrounding metal. Wipe away the rust dust with a clean cloth. After removing the rust, the surface might look dull. You will polish it later.
For more stubborn rust, 0000 steel wool combined with a rust penetrating oil or a specialized rust remover works best. Apply the rust remover or penetrating oil to the rusty area. Let it soak for the time specified by the product manufacturer. Then, use the steel wool to scrub the rust away. Apply firm, circular motions. The steel wool is abrasive enough to remove rust but fine enough not to deeply scratch the cast iron. Be patient; this might take a few passes. You want to see the original metal surface again.
Another effective method for deeper rust involves using phosphoric acid-based rust removers. These products chemically convert rust into a stable compound. Follow the product instructions carefully. They usually require applying the solution and letting it sit. Then, you wipe it away. Always wear gloves and eye protection when using such chemicals. After using any rust remover, wipe the surface thoroughly. Ensure no chemical residue remains. I always make sure the surface is completely dry immediately after, to prevent new rust from forming. This step is critical.
Remember, removing rust is only half the battle. You need to protect the newly exposed metal. Ignoring this can lead to rust returning very quickly. This is similar to how you would clean tough stains from other metal surfaces, like the bottom of a pan where grime can build up: how to clean bottom of pan. The principle of removing the issue and then protecting the surface holds true for many cleaning tasks.
Polishing and Protecting Your Table Saw Surface
Once your table saw top is free of grime and rust, the next crucial step is polishing and protecting it. This makes your saw perform better and prevents future problems. A smooth, protected surface allows wood to slide effortlessly. It also creates a barrier against moisture, which causes rust. I always feel a sense of satisfaction when my saw top is slick and ready for action.
First, let’s talk about polishing. After rust removal, the cast iron might look a bit dull or have slight abrasive marks. You can polish the surface using a clean rag and a small amount of mineral spirits or denatured alcohol. Rub the surface vigorously to bring back some sheen. Some woodworkers even use auto body polishing compounds, but be very careful. These can be too abrasive if not used correctly. The goal is a smooth, low-friction surface, not a mirror finish.
Now for the protection. This is arguably the most important part of the entire cleaning process. My preferred method for protecting a cast iron table saw top is using paste wax. Products like Johnson’s Paste Wax or specific woodworking table waxes work perfectly. Apply a thin, even coat of wax to the entire surface of the table saw top. Use a clean, lint-free cloth. Do not apply too much; a little goes a long way. Let the wax dry to a haze, which usually takes about 10-15 minutes.
Once the wax has hazed over, buff it off with another clean, dry cloth. Rub in circular motions until the surface is smooth and slick. You should feel very little friction when you slide your hand across it. This layer of wax creates a protective barrier. It repels moisture and prevents rust. It also reduces friction, making it easier to push wood through the blade. I usually apply a new coat of wax every few months, or more often if I use the saw heavily.
Alternatively, you can use specialized rust inhibitors or dry lubricants designed for tool surfaces. Products like Boeshield T-9 or TopCote are popular choices. These often come in spray cans. Apply a light, even spray, then wipe off any excess. Always follow the manufacturer’s instructions. Whatever product you choose, regular application is key to long-term protection. A well-protected table saw top means less cleaning and more precise woodworking for you.
Preventive Measures: Keeping Your Table Saw Top Clean
Prevention is always easier than cure, especially when it comes to keeping your table saw top clean. Regular preventive measures save you time and effort in the long run. By making a few habits part of your routine, you can significantly reduce grime and rust build-up. I have learned that a little bit of care after each use goes a long way.
Here are some proactive steps you can take:
- Wipe Down After Each Use: This is the most basic yet effective step. After you finish working, grab a clean rag. Wipe down the entire table saw top to remove fresh sawdust and any resin that might have transferred from the wood. This prevents sticky build-up from hardening. This quick wipe also helps you spot any new rust spots early.
- Regular Waxing: As mentioned before, applying paste wax or a rust inhibitor regularly is crucial. I recommend re-waxing your table top every 1-3 months, depending on your workshop’s humidity and how often you use the saw. If you cut a lot of resinous wood, more frequent waxing helps. The wax forms a protective barrier against moisture.
- Control Humidity: Moisture is the primary cause of rust on cast iron. If your workshop is prone to high humidity, consider using a dehumidifier. Keeping the air dry helps protect all your metal tools. I live in a humid climate, so a dehumidifier is a must for me.
- Use a Table Saw Cover: When your saw is not in use, cover it. A custom-fit cover or even a large piece of canvas works. This protects the table top from dust, condensation, and accidental spills. It acts as a physical barrier.
- Store Wood Properly: Avoid storing wood directly on your table saw top for extended periods. Wood can contain moisture. It can also transfer sap or resin to the surface. Store your lumber on racks or dedicated shelves.
- Clean Miter Slots: Do not forget the miter slots. These grooves can collect dust and debris. This can hinder the smooth movement of your miter gauge. Use a narrow brush or a vacuum crevice tool to keep them clean.
Implementing these habits will keep your table saw top in prime condition. It ensures your saw is always ready for precise work. Plus, it extends the life of your valuable tool. A clean shop makes woodworking much more enjoyable.
Common Mistakes to Avoid When Cleaning Your Table Saw
When you clean your table saw, certain actions can cause more harm than good. Avoiding these common mistakes helps protect your tool and ensures a successful cleaning process. I have seen many people make these errors, often with frustrating results. Let’s make sure you do not.
Here are the mistakes to avoid:
- Using Water Excessively: Cast iron and water are not friends. Water causes rust. Never douse your table saw top with water. If you use a water-based cleaner, apply it sparingly. Always dry the surface immediately and thoroughly with a clean cloth. Even better, use non-water-based cleaners like mineral spirits.
- Using Abrasive Cleaners or Tools: Avoid harsh chemicals like bleach or strong acid cleaners not designed for metal. These can damage the cast iron finish or leave stains. Do not use very coarse sandpaper or steel wool coarser than 0000 grit. These will scratch the surface, creating an uneven plane. Scratches increase friction and can promote new rust.
- Forgetting to Unplug the Saw: This is a critical safety mistake. Always unplug your table saw before cleaning any part of it. An accidental power-up during cleaning can lead to severe injury. Make it the very first step in your routine.
- Leaving Residue: After cleaning, make sure to wipe off all cleaner residue. If you leave solvents or rust removers on the surface, they can continue to react with the metal or attract more dust. A clean, dry surface is essential before applying any protective layer.
- Ignoring Miter Slots and Fence: The main table top gets most of the attention, but the miter slots and the fence also need cleaning. Grime in the miter slots affects the accuracy of your miter gauge. Build-up on the fence can prevent wood from sliding smoothly and affect squareness. Treat these areas with the same care as the main table.
- Not Applying Protection: Cleaning without protecting is a wasted effort. If you remove rust or grime and do not apply a wax or rust inhibitor, the surface will likely rust again quickly. The protective layer is essential for long-term maintenance.
- Using Silicone-Based Products: Some sprays contain silicone. Avoid these on your table saw top. Silicone can transfer to the wood you are cutting. This can interfere with wood finishes, causing fisheyes or uneven staining. Stick to woodworking-specific waxes or dry lubricants.
By steering clear of these pitfalls, you can clean your table saw top safely and effectively. This will maintain its precision and extend its working life.
FAQ Section
How often should I clean my table saw top?
I recommend a light cleaning after each use to remove sawdust and fresh resin. A more thorough cleaning, including rust inspection and re-waxing, should happen every 1-3 months. This depends on your usage frequency and workshop humidity levels. Consistent care prevents major build-up and rust.
Can I use WD-40 to clean my table saw top?
WD-40 is not ideal for cleaning table saw tops. It can leave an oily residue that attracts sawdust and can transfer to your wood. While it acts as a light rust preventative, it is not the best choice for a woodworking surface where wood needs to slide smoothly. Opt for paste wax or dry lubricants instead.
What is the best way to prevent rust on a table saw?
The best way to prevent rust is to keep the table saw top dry and protected. Regularly apply a good quality paste wax or a dedicated rust inhibitor designed for tool surfaces. Control workshop humidity with a dehumidifier if needed. Also, cover the saw when it is not in use.
Is it safe to use water on my cast iron table saw top?
No, it is not safe to use water directly on your cast iron table saw top. Water causes rust. If a cleaner requires a damp cloth or minimal water, use it sparingly. Immediately dry the surface completely with a clean cloth. Prioritize non-water-based cleaning solutions like mineral spirits.
What kind of wax should I use for my table saw top?
I use a good quality paste wax, such as Johnson’s Paste Wax. There are also specialized woodworking waxes like TopCote or Boeshield T-9. These products create a slick, protective barrier. They repel moisture and reduce friction, making wood slide smoothly. Avoid silicone-based waxes.
Can I use household cleaners like oven cleaner or degreaser?
No, do not use harsh household cleaners like oven cleaner or strong degreasers. These products are often too caustic for cast iron. They can strip the metal, cause discoloration, or leave harmful residues. Stick to mineral spirits, denatured alcohol, or cleaners specifically designed for woodworking tools.
Conclusion
A clean table saw top is the sign of a well-cared-for tool and a precise woodworker. We have covered the critical steps needed to maintain this essential surface. From understanding why cleanliness matters for accuracy and safety, to gathering the right tools, and executing a thorough cleaning process, you now have the knowledge. We tackled everything from removing everyday sawdust and sticky resin to effectively dealing with stubborn rust. Protecting your saw top with wax is also a key step.
Remember, prevention is paramount. Regular wiping, consistent waxing, and humidity control will keep your table saw top in prime condition. Avoiding common mistakes during cleaning ensures you do not inadvertently harm your tool. Taking these steps extends your saw’s lifespan and keeps your cuts consistently accurate. Do not let a dirty or rusty surface hinder your woodworking projects. Take action today. Give your table saw the care it needs. A well-maintained table saw truly makes a difference in your workshop. Start your cleaning routine now for better cuts and a safer work environment.
- table saw cleaning
- rust removal
- cast iron maintenance
- workshop tools
- tool care