· Air Conditioner Maintenance · 21 min read
How To Clean Air Conditioner Wall Unit
Clean Your Wall Unit AC: A Full Guide
Have you ever noticed your air conditioner wall unit not cooling as well as it used to? Maybe it smells a bit musty, or you see dust building up. A dirty wall unit is not just an eyesore; it affects your comfort and your health. Knowing how to clean air conditioner wall unit models correctly helps you avoid these issues. I want to help you restore your unit’s top performance.
Cleaning your wall unit keeps your home cool and your energy bills low. It also ensures you breathe clean, fresh air. A clean unit runs more quietly and lasts longer. This guide will walk you through every step. We cover everything from gathering tools to deep cleaning coils and preventing mold. Let’s make your air conditioner shine again.
Takeaway
Regularly cleaning your air conditioner wall unit is vital. It improves cooling power, lowers energy costs, and boosts air quality. Always unplug the unit before you start. Clean the filters, coils, and drain pan to remove dirt and mold.
To clean an air conditioner wall unit, first, disconnect power. Then, remove and wash the air filters. Wipe down the outer casing. Next, access and clean the evaporator coils and blower fan. Finally, clear the drain pan and line. This process removes dirt, mold, and improves efficiency.
Why Cleaning Your Wall Unit Matters
A clean air conditioner wall unit does more than just cool your room. It significantly impacts your home’s air quality and your energy bills. Many people underestimate the importance of regular AC maintenance. A dirty unit works harder, uses more power, and shortens its own life. Let’s explore why this simple chore makes a big difference.
A primary benefit of a clean wall unit is better air quality. Over time, dust, pollen, pet dander, and other particles build up inside the unit. When the AC runs, it blows these contaminants into your room. This can trigger allergies or respiratory problems for sensitive individuals. Regularly cleaning helps remove these particles. This ensures the air you breathe is fresh and healthy.
Efficiency is another key reason to clean your unit. Dirt on the filters and coils blocks airflow. This forces your air conditioner to work harder to cool the space. A hardworking unit uses more electricity. This leads to higher energy bills. Cleaning helps your unit run smoothly. It uses less power to achieve the desired temperature. You save money and reduce your carbon footprint.
Extending the life of your appliance is a practical gain. Constant strain on a dirty motor and components causes wear and tear. Overheating is common when airflow is restricted. This can lead to costly repairs or even a full unit replacement. Regular cleaning prevents these issues. It keeps parts functioning correctly. This adds years to your unit’s operational life.
Finally, a clean unit prevents bad odors. Mold and mildew thrive in dark, damp places like AC coils and drain pans. As these fungi grow, they release musty smells into your home. Cleaning removes these growths. This eliminates unpleasant odors. Your home smells clean and fresh, not stale or damp. Prioritizing this task offers many benefits. It is a worthwhile investment of your time.
Essential Tools and Safety First
Before you start any cleaning project, preparing your workspace and gathering the right tools is important. Cleaning an air conditioner wall unit requires specific items. Safety must always be your top concern. Ignoring safety steps can lead to electric shock or damage to the unit. I want to guide you through this process with confidence and care.
First, let’s talk about the tools you will need. Having everything ready saves time and makes the job easier. You will need a Phillips head screwdriver for opening the unit. A vacuum cleaner with a brush attachment helps remove loose dust. A soft brush or an old toothbrush is good for cleaning tight spaces and coils. You also need a spray bottle for cleaning solutions.
For cleaning solutions, a mild detergent mixed with water often works. You can also use a specialized AC coil cleaner. Some prefer a diluted vinegar solution or a bleach solution (1 part bleach to 16 parts water) for mold. Gather several clean cloths or microfiber towels. A small bucket or tray can catch drips. You might also want a protective tarp or old towels to place under the unit. This protects your floor or furniture from water and dirt.
Safety is paramount when working with electrical appliances. The very first step before touching your unit is to disconnect its power. Find the circuit breaker that controls your air conditioner and switch it off. Confirm the power is off by trying to turn the unit on. It should not respond. Never work on an AC unit that is still connected to power. This rule protects you from electric shock.
Wear appropriate protective gear. Gloves shield your hands from dirt, cleaning solutions, and sharp edges. A dust mask or respirator protects your lungs from inhaled dust, mold spores, and cleaning solution fumes. Safety glasses guard your eyes from splashes or debris. Always consult your owner’s manual before starting. Each unit can have unique features or specific instructions. Following these steps ensures a safe and effective cleaning experience.
Step-by-Step Guide to Cleaning the Outer Casing and Filters
Now that you have your tools ready and safety measures in place, it is time to start cleaning. We will begin with the most accessible parts: the outer casing and the air filters. These components collect the most visible dust and debris. Cleaning them makes a big difference in air quality and unit efficiency. I will walk you through each step.
Power Off and Prepare
Before anything else, make sure the power to your wall unit is completely off. Go to your home’s circuit breaker box and flip the switch labeled for your air conditioner. If it is not clearly labeled, flip the main breaker. This step prevents any electrical hazards. Next, lay down a protective tarp or old towels on the floor directly below your wall unit. This catches any dust, dirt, or water that might fall during cleaning. Protecting your floor makes cleanup much easier afterward.
Remove and Clean Air Filters
Air filters are the first line of defense against dust and pollutants. They get dirty quickly and need regular attention. Many wall units have filters located behind the front panel.
- Open the Front Panel: Gently unlatch or unscrew the front cover of your wall unit. Your owner’s manual will show you how to do this correctly. The panel usually swings open or detaches.
- Locate and Remove Filters: You will see one or more mesh filters. They often slide out easily. Note how they sit in the unit so you can put them back correctly.
- Vacuum Loose Debris: Take the filters outside or to a trash can. Use a vacuum cleaner with a brush attachment to gently remove loose dust and large debris from both sides of the filters.
- Wash the Filters: Fill a basin or sink with cool, soapy water. Use a mild dish soap. Place the filters in the water and let them soak for a few minutes. Gently scrub them with a soft brush or sponge to dislodge embedded dirt. For more detailed filter cleaning tips, consider reading about how to clean window ac unit filter. This helps remove deep-seated grime.
- Rinse and Dry Thoroughly: Rinse the filters under cool running water until all soap residue is gone and the water runs clear. Shake off excess water. Place the filters in a well-ventilated area to air dry completely. Do not put them back into the unit if they are still damp. This can lead to mold growth.
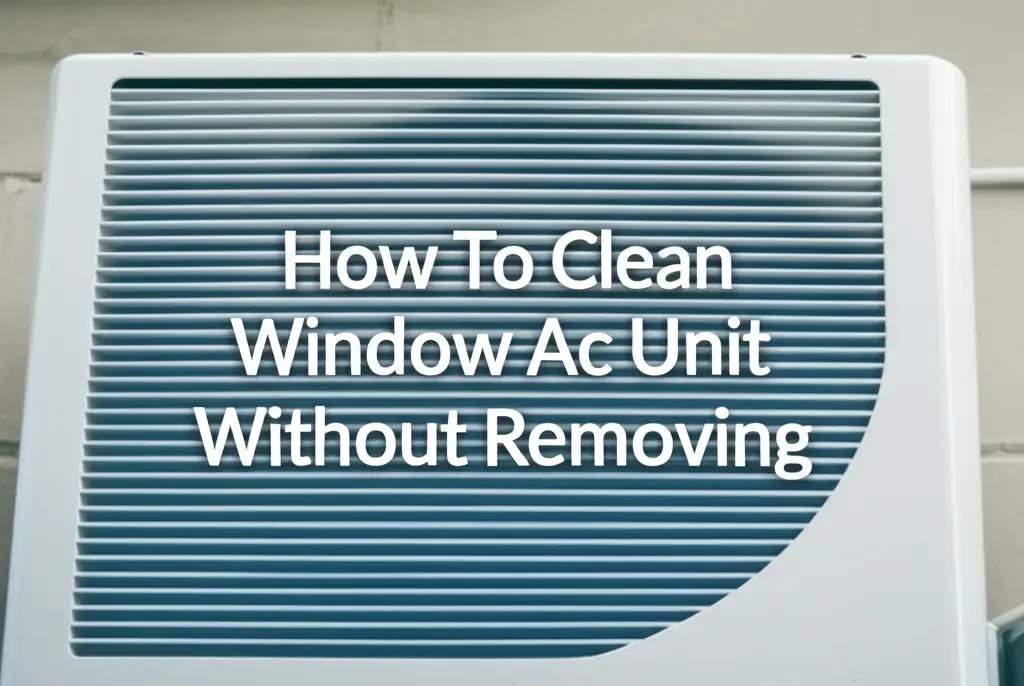
Wipe Down the Outer Casing
While the filters are drying, turn your attention to the unit’s exterior. The outer casing accumulates dust and grime.
- Damp Cloth Wipe Down: Dip a clean cloth in a solution of mild soap and water. Wring it out so it is just damp, not dripping. Gently wipe down all exterior surfaces of the wall unit. Pay attention to vents and crevices where dust collects.
- Dry Thoroughly: Use a separate dry cloth to wipe away any moisture. Ensure the casing is completely dry before proceeding. A clean exterior improves the unit’s appearance and prevents dust from re-entering immediately. This simple step makes your unit look fresh.
Deep Cleaning the Coils and Fan Blades
After cleaning the filters and outer casing, it is time to focus on the inner workings of your air conditioner. The evaporator coils and the blower fan are critical for cooling. They often harbor significant dirt, dust, and mold. Cleaning these parts improves efficiency and air quality. This step requires more care and precision.
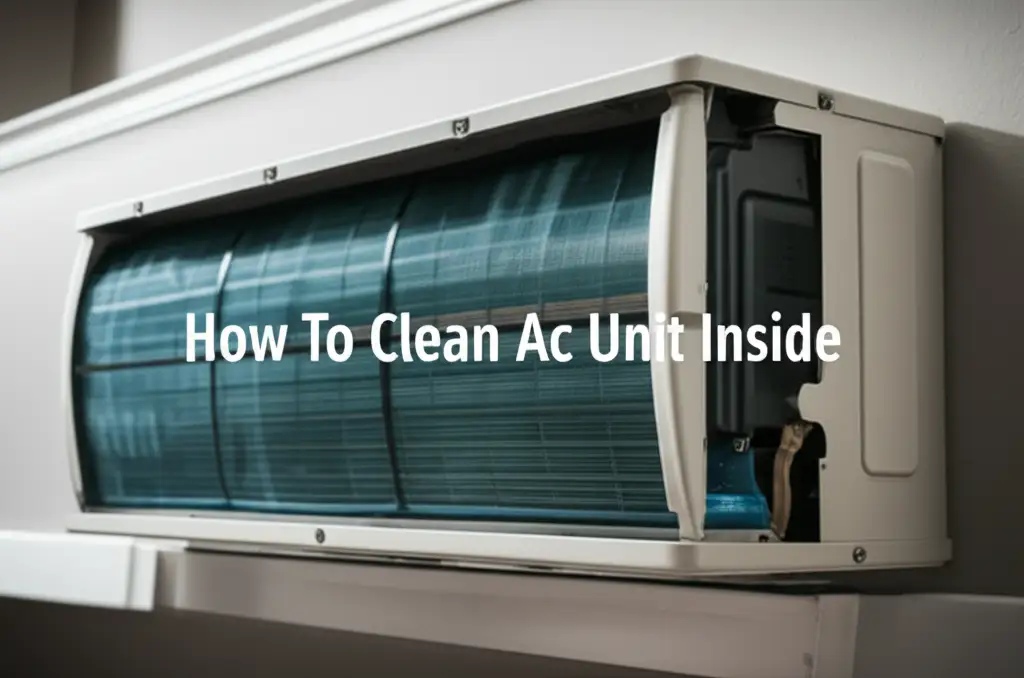
Accessing the Interior
To reach the coils and fan, you need to open the unit further. This usually involves removing the front panel completely. Some models may require removing a few screws. Consult your owner’s manual for specific instructions. Different manufacturers design their units uniquely. Once the cover is off, you will see the evaporator coils at the top and the blower fan, a long cylindrical component, usually beneath them. Be careful not to bend any delicate parts.
Cleaning Evaporator Coils
The evaporator coils are thin, metallic fins that cool the air. They easily collect dust, grime, and mold, which hinders heat exchange.
- Vacuum Loose Debris: Use a vacuum cleaner with a soft brush attachment. Gently vacuum the surface of the coils. Move the brush in the direction of the fins to avoid bending them. Be very careful; the fins are fragile.
- Apply Coil Cleaner: Use a specialized non-rinse AC coil cleaner spray. These cleaners foam up and dissolve dirt and grime. Spray the cleaner evenly over the coils. Follow the product instructions for application and waiting time. Most non-rinse cleaners will drip into the drain pan.
- Brush Stubborn Dirt: For areas with caked-on dirt or mold, use a soft brush or an old toothbrush. Gently brush the fins to dislodge the buildup. Again, brush in the direction of the fins. Do not use excessive force. For more details on cleaning these parts, you can check out resources on how to clean coils on window ac unit. This helps ensure a thorough job.
- Allow to Drip Dry: The cleaner will break down the dirt. It will drip into the drain pan below. Give it ample time to work.
Cleaning the Blower Fan/Wheel
The blower fan, or squirrel cage, moves air across the coils. It often accumulates a thick layer of dust, hair, and mold. This buildup reduces airflow and can cause vibrations.
- Access the Fan: The blower fan is usually located just below the evaporator coils. It might be challenging to reach fully. You may need to gently push aside some wires or plastic components.
- Vacuum and Brush: Use a vacuum with a narrow crevice tool or brush attachment to remove as much loose dust as possible from the fan blades. Then, use a soft brush, a coil cleaning brush, or an old toothbrush. Carefully clean each blade of the squirrel cage fan. This task needs patience. The fan blades are numerous and often narrow.
- Wipe with Damp Cloth: Dampen a cloth with mild soap and water or the AC coil cleaner solution. Wring it out well. Carefully wipe down each blade. You can also use cotton swabs for very tight spots. This helps remove sticky residue and mold.
- Dry Thoroughly: Ensure the fan is dry before reassembling. You can use a dry cloth to speed up the process. A wet/dry vacuum can also help remove excess water after cleaning. This step makes a huge difference in airflow.
Deep cleaning these internal components ensures your unit works at its peak. It removes hidden sources of bad smells and improves overall efficiency. Take your time with these steps for best results.
Addressing the Drain Pan and Line for Optimal Flow
A crucial part of your air conditioner’s function is managing condensation. As your unit cools the air, moisture condenses on the evaporator coils. This water collects in a drain pan and then exits through a drain line. If this system gets clogged, water can back up, leading to leaks, water damage, and mold growth. Proper cleaning of the drain pan and line is essential.
Locating and Cleaning the Drain Pan
The drain pan sits directly under the evaporator coils. It collects the condensation. Over time, algae, mold, and sludge can grow in this damp environment.
- Identify the Drain Pan: Once the front cover of your wall unit is removed and you have cleaned the coils, you will see a shallow pan beneath them. This is the drain pan.
- Remove Standing Water: If there is standing water in the pan, use a wet/dry vacuum or absorbent cloths to remove it. This prevents spills during cleaning.
- Clean the Pan: Use a solution of warm water and mild dish soap, or a diluted bleach solution (1 part bleach to 16 parts water), to clean the pan. Scrub away any slime, mold, or debris using a brush or sponge. For stubborn grime, an old toothbrush can reach tight corners.
- Rinse and Dry: Rinse the pan with clean water, ensuring all cleaning solution and debris are gone. You might need to spray water carefully into the pan to flush it out. Allow the pan to air dry or wipe it thoroughly with a clean cloth.
Clearing the Drain Line
The drain line is a narrow tube that carries water from the drain pan outside or to a proper drain. These lines are prone to clogging from algae and mold buildup. A clogged drain line is a common cause of AC water leaks.
- Locate the Drain Line Exit: The drain line typically exits the back or bottom of the wall unit. Sometimes it connects to a larger drain system.
- Clear Blockages: You can try to clear minor blockages by pouring a cup of distilled vinegar down the drain line. Let it sit for 30 minutes to an hour. Vinegar kills mold and breaks down sludge. Flush with water afterward.
- Use a Wet/Dry Vacuum: For more stubborn clogs, attach a wet/dry vacuum to the end of the drain line (if accessible) and create a seal. Turn on the vacuum to suck out the blockage. This method is often very effective. For detailed instructions on clearing this line, refer to guides on how to clean air conditioner drain line.
- Consider an Air Compressor: In some cases, a specialized tool like an air compressor designed for drain lines can blow out clogs. Be very careful with this method, as excessive pressure can damage the line. If you are unsure, consult a professional. You can learn more about this method through resources like [how to clean ac drain line with air compressor](https://beacleaner.com/how to clean ac drain line with air compressor).
- Preventive Treatment: After cleaning, you can pour a cup of distilled vinegar down the drain line every few months. This helps prevent future algae and mold growth. Ensure the vinegar does not sit in the pan for too long if your pan material is sensitive.
Cleaning the drain pan and line ensures proper water drainage. This prevents leaks and keeps your unit free from water-related damage and mold issues. It contributes significantly to your unit’s longevity and health.
Tackling Mold and Preventing Future Growth
Mold is a common issue in air conditioner wall units due to the dark, damp conditions. It not only causes unpleasant musty odors but can also release spores into your indoor air, affecting health. Dealing with mold promptly is important. Preventing its return is equally vital. I will show you how to safely remove mold and keep it from growing back.
Safe Mold Removal
If you find mold on your AC coils, fan, or drain pan, do not panic. Small to moderate amounts can often be cleaned safely by you.
- Assess the Mold: Determine the extent of the mold growth. If it covers a large area, like more than 10 square feet, or if you suspect it is part of a larger structural issue, call a professional. For smaller areas within the AC unit, you can proceed.
- Protect Yourself: Always wear gloves, safety glasses, and a respirator or N95 mask before disturbing mold. This protects your skin and lungs from spores.
- Prepare Cleaning Solution: You have a few options for mold cleaning solutions.
- Bleach Solution: Mix 1 part household bleach with 16 parts water (about 1 cup bleach per gallon of water). Bleach is effective at killing mold, but it can be harsh on some materials and should be used in a well-ventilated area.
- Vinegar Solution: Use undiluted white distilled vinegar in a spray bottle. Vinegar is a natural antifungal and antibacterial agent. It is safer for some materials than bleach. It leaves less residue.
- Commercial Mold Remover: Use an AC-safe mold cleaner specifically designed for air conditioning units. Read the product labels carefully.
- Apply and Scrub: Spray the chosen solution directly onto the moldy areas. Let it sit for 10-15 minutes to allow the solution to work. Then, use a stiff brush, an old toothbrush, or a specialized coil brush to scrub away the mold. For guidance on mold specific to window units, you might find details on how to clean mold from window air conditioner useful. For general AC mold, information about how to clean mold from ac unit can also apply.
- Rinse (if needed): If using bleach or a cleaner that requires rinsing, carefully wipe the area with a damp cloth. Do not soak electrical components. If using a non-rinse coil cleaner or vinegar, often no rinsing is needed.
- Dry Thoroughly: After cleaning, ensure all parts are completely dry. Use a fan or allow ample air circulation to dry the unit before reassembling. Dampness encourages mold regrowth.
Prevention Strategies
The best way to deal with mold is to prevent it from growing in the first place. Here are key strategies:
- Regular Cleaning: This is the most important step. Clean your air filters monthly during heavy use seasons. Deep clean your entire unit annually.
- Ensure Proper Drainage: A clear drain line is essential. If water sits in the drain pan, mold will grow. Periodically pour a cup of distilled vinegar down the drain line to inhibit growth.
- Maintain Humidity Levels: Keep your indoor humidity below 60%. Use a dehumidifier if needed, especially in humid climates. Lower humidity makes it harder for mold to thrive.
- Run Fan Mode: After using the cooling mode, run your AC in “fan-only” mode for 15-30 minutes. This helps dry out the evaporator coils and drain pan. This simple trick reduces moisture buildup, a primary cause of mold.
- Check for Leaks: Inspect your unit periodically for any signs of water leaks. Address leaks immediately to prevent standing water.
By proactively managing moisture and maintaining cleanliness, you can significantly reduce the risk of mold in your air conditioner wall unit. This ensures healthier air and a more efficient cooling system.
Reassembling and Final Checks
You have done the hard work of deep cleaning your air conditioner wall unit. Now, it is time to put everything back together. Reassembling the unit correctly ensures it functions safely and efficiently. A few final checks will confirm your cleaning efforts paid off. I will guide you through the process of finishing the job right.
Reassembling the Unit
Take your time during reassembly. Make sure all parts are dry before putting them back. This prevents new moisture traps that could lead to mold.
- Reinstall the Drain Pan: Place the cleaned and dried drain pan back into its proper position under the evaporator coils. Ensure it is seated correctly so it can collect condensation.
- Replace the Blower Fan/Wheel (if removed): If you fully removed the blower fan for cleaning, carefully put it back into its housing. Ensure it spins freely and is aligned correctly. This step is crucial for proper airflow.
- Reinstall the Evaporator Coils (if moved): If the coils shifted during cleaning, gently adjust them back into their original position. Be very careful not to bend the delicate fins.
- Insert Cleaned Air Filters: Slide the completely dry air filters back into their slots. Make sure they are facing the correct direction, if indicated by arrows or guides. Properly installed filters are vital for catching dust.
- Reattach the Front Panel: Carefully align the front cover of your wall unit. Snap it back into place or secure it with the screws you removed earlier. Do not force it. If it does not fit, check if any internal components are misaligned.
- Replace Any Other Parts: If you removed any other small covers, screws, or clips, put them back now. Double-check that everything is secure.
Final Checks and Testing
Before you consider the job done, perform a few checks. These steps confirm your unit is ready for use.
- Inspect for Tools and Debris: Look inside and around the unit. Make sure no tools, rags, or loose debris were left behind. Anything left inside could damage the unit or block airflow.
- Check Electrical Connections: Briefly inspect any visible electrical connections or wires. Ensure nothing was accidentally dislodged or pinched during the cleaning process. Do not touch exposed wires.
- Restore Power: Go back to your circuit breaker box. Flip the switch to restore power to your air conditioner wall unit.
- Run a Test Cycle: Turn on your air conditioner. Set it to a low temperature and high fan speed.
- Listen for Unusual Noises: Pay attention to any new or strange sounds. Rattling, grinding, or loud humming could indicate a part is loose or misaligned.
- Check Airflow: Feel the air coming out of the vents. It should be strong and cool. Weak airflow might mean a blockage remains or the fan is not working correctly.
- Monitor for Leaks: Watch the unit for the first 15-30 minutes of operation. Look for any water dripping or leaking, especially from the bottom. A leak could indicate a still-clogged drain line or an improperly seated drain pan. If you see a leak, turn off the unit and recheck the drain pan and line.
- Check for Odors: The air should smell fresh and clean. If you still detect a musty smell, some mold might remain, or your drain pan/line needs further attention.
Once you confirm everything is running smoothly, you can enjoy your freshly cleaned air conditioner wall unit. It will cool your space more effectively, run more quietly, and provide cleaner air. Regular maintenance like this pays off in comfort and savings.
Frequently Asked Questions
How often should I clean my air conditioner wall unit?
You should clean your air filters every 2-4 weeks during peak use seasons. A deep cleaning of the coils, fan, and drain pan is best done annually. This prevents major dirt and mold buildup. Regular cleaning keeps your unit efficient.
Can I use water to clean the electrical parts of my AC unit?
No, you must never use water on any electrical components. Water and electricity are a dangerous mix. Always ensure the unit is unplugged. Use only dry cloths or a vacuum for parts like wiring harnesses. Only use damp cloths on the plastic casing.
What are signs my wall AC unit needs cleaning?
Signs include reduced cooling power, weak airflow, unusual noises like grinding or rattling, or a musty smell. Visible dust buildup on vents or filters also shows it is time to clean. Higher energy bills can also be a symptom.
Is it okay to use household cleaners on my AC?
You can use mild dish soap and water for the outer casing and filters. For coils and internal parts, use specialized non-rinse AC coil cleaner. Avoid strong, corrosive household cleaners like oven cleaner or abrasive cleaners. These can damage delicate components or leave harmful residues.
When should I call a professional for AC cleaning or service?
Call a professional if you cannot reach certain parts of the unit. Also, call if you suspect a major mold problem, a refrigerant leak, or if the unit is making loud, strange noises. If the unit does not cool after cleaning, professional help is necessary. They have specialized tools and training.
What causes bad smells in my AC after cleaning?
If your AC still smells bad after cleaning, it could mean mold or mildew remains in hidden spots. These are often in the coils or drain pan. A very persistent smell might also point to a clogged drain line. Ensure all moisture dries completely after cleaning to stop mold regrowth.
Conclusion
Cleaning your air conditioner wall unit is a proactive step that pays significant dividends. It goes beyond simply making your appliance look nice. Taking the time to properly clean your unit improves its cooling efficiency and extends its lifespan. More importantly, it ensures the air you breathe inside your home is clean and healthy. I hope this comprehensive guide has given you the confidence to tackle this important home maintenance task.
By following the steps for cleaning filters, deep cleaning coils and fans, and addressing the drain system, you prevent common issues like reduced airflow, bad odors, and mold growth. Remember, safety always comes first; disconnect power before you begin. Regular cleaning keeps your unit running like new. This leads to lower energy bills and a more comfortable living space. Don’t let dust and grime compromise your indoor air quality or your wallet. Take control of your home’s comfort today. Make cleaning your air conditioner wall unit a regular part of your home care routine.
- wall AC cleaning
- AC maintenance
- mini-split cleaning
- air conditioner care
- home cleaning
- indoor air quality
- DIY AC cleaning