· Home Maintenance · 19 min read
How To Clean Air Handler
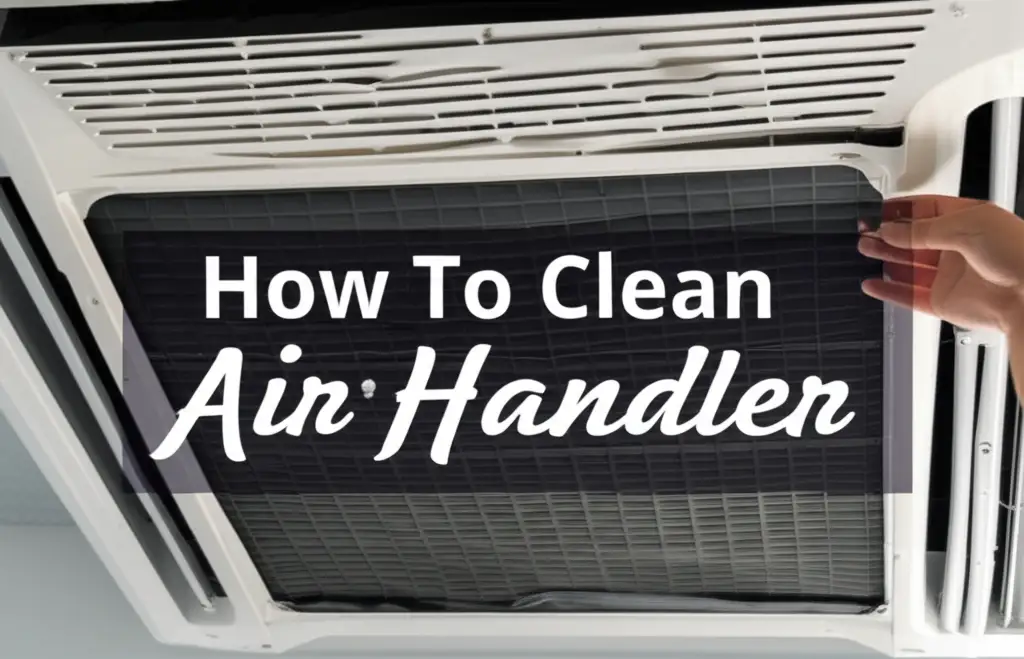
How to Clean Your Air Handler: A Simple Guide
Did you know the air you breathe at home passes through a hidden component? Your air handler is a key part of your heating, ventilation, and air conditioning (HVAC) system. It moves conditioned air throughout your house. A clean air handler is vital for good indoor air quality.
Over time, dust, dirt, and allergens build up inside the air handler. This can harm its performance and make your air unhealthy. Cleaning your air handler improves system efficiency. It also helps you save money on energy bills. In this guide, I will show you how to clean your air handler step-by-step. I will cover safety, needed tools, and the benefits of regular cleaning.
Takeaway
- Regular air handler cleaning improves indoor air quality significantly.
- Cleaning boosts your HVAC system’s efficiency and lowers energy costs.
- You can often clean your air handler yourself, saving money on service calls.
- Following proper safety steps is vital before starting any cleaning.
- Knowing when to seek professional help ensures system health and safety.
Main Query Answer
Cleaning your air handler involves turning off power, removing and replacing the air filter, cleaning the evaporator coils, drain pan, and blower fan, then reassembling and restoring power. This keeps your HVAC system running well and improves indoor air quality.
Understanding Your Air Handler: Why Cleaning Matters
Your air handler is the indoor unit of your HVAC system. It pulls in air from your home. Then, it conditions this air by heating or cooling it. After that, it pushes the fresh air through your home’s ducts. This process happens many times each day.
Many people do not realize their air handler needs regular care. Dust, dirt, and pet dander can settle inside the unit. This build-up affects how well your system works. A dirty air handler can lead to higher energy bills. It also impacts the air you and your family breathe.
Components of an Air Handler
An air handler contains several parts working together. Knowing these parts helps you understand the cleaning process. Here are the main components:
- Air Filter: This is the first line of defense. It traps dust, pollen, and other particles from the air. Regular filter checks are important. You can learn more about how to clean your air conditioner filter if you need specific guidance on that part.
- Evaporator Coil: This coil cools the air. As warm air passes over it, moisture condenses. This condensation helps remove humidity from your home. The coil can get very dirty over time.
- Condensate Drain Pan and Line: This pan collects the water from the evaporator coil. The drain line carries this water away. If it gets blocked, water can overflow. This can cause mold growth.
- Blower Motor and Fan (Squirrel Cage): This motor powers the fan. The fan pushes air through your ducts. Dirt on the fan blades reduces airflow. This makes the motor work harder.
- Ductwork Connection: This is where the air handler connects to your home’s ventilation system. The ducts carry conditioned air to each room.
The Impact of a Dirty Air Handler
A dirty air handler affects your home in many ways. First, air quality goes down. The unit circulates dust, allergens, and mold spores. This can trigger allergies or breathing problems. Second, system efficiency drops. Dirt on coils and fans makes the unit work harder. This uses more energy.
Harder work means higher electricity bills. It also shortens the life of your HVAC system. A clogged filter restricts airflow. Dirty coils cannot exchange heat properly. A dirty blower fan struggles to move air. All these issues combine to make your system less effective. Cleaning these parts is a key step in overall air conditioner cleaning. Regular cleaning prevents these problems. It keeps your home comfortable and healthy.
Preparing to Clean Your Air Handler: Safety and Supplies
Before you start any cleaning work on your air handler, safety is most important. Working with electrical appliances can be dangerous. Always take steps to protect yourself. I want you to stay safe during this process.
Gathering your tools beforehand saves time. It also makes the job easier. Having everything ready means you can focus on the cleaning steps. This section helps you prepare properly for the task ahead.
Essential Safety Precautions
Electrical shock is a real risk. Always follow these safety rules:
- Turn Off Power: This is the most vital step. Find the breaker switch that controls your air handler. It might be labeled “Furnace” or “AC Unit.” Flip it to the “off” position. If you are unsure, turn off the main breaker for your home. You should also turn off power at the outdoor unit, if applicable.
- Wear Protective Gear: Dust and cleaning agents can irritate. Put on safety glasses to protect your eyes. Wear gloves to keep your hands clean and safe from chemicals. A dust mask or respirator prevents you from breathing in dust and mold spores.
- Allow Time for Cooling: If your system was running, give it a few minutes to cool down. Coils can be cold, but motors can be warm.
- Work in a Well-Lit Area: Use a flashlight or headlamp. Good lighting helps you see dirt and small parts clearly.
- Work Carefully: Some parts are delicate. Avoid bending fins on the coil. Handle wires and connections gently.
Tools and Supplies You’ll Need
Having the right items ready simplifies the cleaning process. You likely have many of these things at home. Here is a list of what you will need:
- New Air Filter: Have the correct size replacement filter ready. This is a crucial part of maintenance. You can find specific instructions on how to clean an air conditioner filter if yours is reusable.
- Screwdriver Set: You will need both Phillips and flathead screwdrivers. These help open access panels.
- Vacuum Cleaner with Hose Attachments: A shop vac is ideal for large debris. A regular vacuum with a brush attachment also works.
- Soft Brushes: Use a soft brush, like a paint brush, for delicate areas. A stiff brush might be needed for the blower fan.
- Coil Cleaner Spray: Choose a cleaner specifically for evaporator coils. Many are no-rinse. Look for an EPA-approved product.
- Bleach (Optional): A small amount of bleach can sanitize the drain pan. Mix it with water.
- Wet/Dry Cloths or Rags: For wiping surfaces clean.
- Buckets: One for soapy water, one for rinse water, or one for collecting overflow.
- Wire Brush (for drain line): A small, flexible brush helps clear clogs.
- Measuring Tape: To check the filter size if you forget it.
- Small Mirror (Optional): Helps see hard-to-reach areas on the coils.
Gathering these items ensures you can complete the cleaning task without interruptions. This preparation is key to a successful and safe cleaning.
Step-by-Step: How to Clean Your Air Handler Components
Now that you are prepared, it is time to get your hands dirty. Cleaning the air handler involves several steps. I will guide you through each part. Take your time with each stage. This ensures a thorough and effective cleaning.
Each component plays a role in your system’s performance. Cleaning them all helps your HVAC run at its best. Remember to keep safety in mind at every step.
Turning Off Power and Accessing the Unit
The first and most important step is to cut power to the unit. Go to your home’s electrical panel. Find the circuit breaker labeled for your air handler or furnace. Flip it to the “off” position. I always double-check by trying to turn on the thermostat to ensure no power runs to the unit.
Next, you need to open the air handler unit. It usually has screws or latches on the access panels. Use your screwdriver to remove screws carefully. Some units have upper and lower panels. Remove the necessary panels to gain access to the filter, coils, and blower.
Cleaning or Replacing the Air Filter
The air filter is often located just before the air handler’s main compartment. It slides into a slot. Note the direction of the airflow arrow on the filter before removal. This arrow should point towards the air handler.
Pull out the old filter. If it is disposable, throw it away. Replace it with a new, clean filter. Make sure the new filter is the correct size. The airflow arrow on the new filter must point in the same direction as the old one. If you have a reusable filter, follow cleaning instructions specific to that type. For general advice, look into how to clean an air conditioner filter. A clean filter is vital for good airflow and trapping particles.
Cleaning the Evaporator Coils
The evaporator coils look like rows of metal fins. They sit right after the filter. These coils get dirty with dust and debris. This build-up makes it hard for the coil to cool air. This forces your system to work harder.
Use a soft brush or a vacuum cleaner with a brush attachment to gently remove loose dirt. Be careful not to bend the delicate fins. After dry cleaning, spray the coil cleaner over the fins. Follow the product’s directions carefully. Most coil cleaners are “no-rinse.” They drip into the drain pan. For more specific cleaning tips related to these components, check out our guide on how to clean air conditioner coils.
Clearing the Condensate Drain Pan and Line
Below the evaporator coils, you will find the condensate drain pan. Water from the coils collects here. Over time, algae and mold can grow in the pan. This can clog the drain line.
Remove any standing water or visible debris from the pan. You can use a wet/dry vacuum for this. Pour a mixture of 1 cup water and 1 tablespoon bleach into the pan. This kills mold and algae. Let it sit for a few minutes. Check the drain line for clogs. If the line is clogged, you can try to clear it with a thin wire brush or a shop vacuum. Connect the vacuum to the end of the drain line outside. This can pull out the clog.
Cleaning the Blower Motor and Fan
The blower fan is a large, wheel-like component. It moves the air through your ducts. Dirt on the fan blades reduces airflow significantly. This part often needs more thorough cleaning.
You might need to remove the blower assembly for a better clean. This can involve disconnecting wires and screws. Take pictures as you go to remember where everything connects. Once removed, use a stiff brush or a vacuum cleaner to remove dirt from the “squirrel cage” fan blades. These blades get very dirty. If you can, use a mild detergent and water on a rag to wipe down the blades. Let them dry fully before reassembly. Be careful not to get the motor wet.
Reassembly and Power Restoration
After cleaning all parts, reassemble the air handler. Put the blower assembly back in place. Reconnect any wires you detached. Secure all screws. Make sure the drain pan is correctly positioned. Close and secure all access panels.
Once everything is back together, go back to your electrical panel. Flip the circuit breaker for your air handler back to the “on” position. Go to your thermostat. Set your system to “fan on” first to check airflow. Then, switch it to “cool” or “heat” to test the full system operation. Listen for any strange noises. Enjoy your cleaner air and efficient system!
Maintaining Your Air Handler: Cleaning Frequency and Benefits
Cleaning your air handler is not a one-time job. Regular maintenance is crucial. It keeps your system running well for many years. It also ensures you always breathe clean air. I always tell people that prevention is better than cure. This is very true for your HVAC system.
Understanding how often to clean and what benefits you get will motivate you. It helps you stay on top of this important home task. This section covers frequency and the positive impacts of regular air handler care.
Recommended Cleaning Schedule
How often you need to clean your air handler depends on several factors. Consider these points:
- Filter Replacement: Check your air filter every month. Change it at least every 1-3 months. If you have pets, allergies, or live in a dusty area, change it more often. A clean filter prevents much of the dirt from reaching other components. This is the simplest and most important regular task.
- Coil and Drain Pan Inspection: Inspect the evaporator coils and condensate drain pan every 6-12 months. This is often done before the peak cooling season. You can do a quick check in spring and fall.
- Blower Fan Cleaning: The blower fan usually needs cleaning every 1-2 years. This part gets less direct airflow than the filter or coil. However, it collects sticky dust over time.
- Professional Cleaning: Consider a professional HVAC service every 3-5 years. They have tools for a deeper clean. They can also check refrigerant levels and electrical connections.
These are general guidelines. If you notice reduced airflow, strange smells, or higher energy bills, check your air handler sooner. For instance, if you smell musty odors, you might have mold. You may also need to check for how to clean mold around air vents which often indicates deeper issues within the system.
Health and Efficiency Benefits
Keeping your air handler clean offers many positive outcomes. These benefits impact your health, comfort, and wallet. Here are the main advantages:
- Improved Indoor Air Quality: This is a big one. A clean system filters out more dust, pollen, pet dander, and other allergens. This reduces airborne irritants in your home. You and your family will breathe easier. This is especially good for people with allergies or asthma.
- Lower Energy Bills: Dirty coils and fans make your HVAC system work harder. This uses more electricity. A clean system runs efficiently. It uses less energy to heat or cool your home. This translates directly to lower monthly energy costs.
- Extended System Lifespan: When components work too hard, they wear out faster. Regular cleaning reduces strain on the motor and other parts. This helps your air handler last longer. It delays the need for expensive repairs or early replacement.
- Better System Performance: A clean air handler delivers consistent airflow and temperature. Your home will feel more comfortable. The system will cool or heat rooms more effectively.
- Reduced Risk of Costly Repairs: Clogged drain lines can cause water damage. Dirty coils can freeze up. These issues can lead to major breakdowns. Regular cleaning helps prevent these expensive problems from happening. You can avoid emergency service calls.
Investing time in air handler maintenance pays off in the long run. It leads to a healthier home and a more reliable HVAC system.
Common Air Handler Issues and Simple Solutions
Even with regular cleaning, air handlers can face problems. Knowing common issues helps you react quickly. Many minor issues have simple solutions you can handle yourself. I want to empower you to troubleshoot effectively.
This section covers common air handler complaints. It also provides basic steps to fix them. Remember to always turn off power before investigating any issue.
Reduced Airflow
One common problem is weak airflow from your vents. This means your system is not moving enough air. Causes and solutions include:
- Clogged Air Filter: This is the most frequent cause. A dirty filter blocks air movement.
- Solution: Replace or clean your air filter immediately. I recommend checking your filter monthly.
- Dirty Blower Fan: Dust and debris on the fan blades can reduce its ability to push air.
- Solution: Clean the blower fan as outlined in the previous section. This can restore proper airflow.
- Blocked Return Vents: Furniture or curtains blocking return air vents can starve the system of air.
- Solution: Check and clear all return air vents in your home. Ensure they are not obstructed.
Strange Noises from the Unit
Unusual sounds from your air handler can be alarming. Here are some common noises and their meanings:
- Squealing or Chirping: This often points to a worn blower motor belt or a motor bearing needing lubrication.
- Solution: Turn off power. Check the belt for wear. If you can, apply a few drops of motor oil to the bearings. If the noise continues, a professional might be needed.
- Rattling or Clanking: Loose components or debris inside the unit can cause this.
- Solution: Turn off power. Inspect the access panels and duct connections. Make sure they are secure. Look inside for any loose objects or debris.
- Humming or Buzzing: This can indicate an electrical issue or a failing motor.
- Solution: If it is a loud hum, check the circuit breaker. If the motor sounds like it is struggling, it might be overheating. Call a professional for electrical issues.
Water Leaks
Seeing water around your air handler is a serious sign. It often means a clogged drain. Causes and solutions include:
- Clogged Condensate Drain Line: This is the most common reason for leaks. Algae or debris block the line, causing the drain pan to overflow.
- Solution: Clear the condensate drain line. Use a wet/dry vacuum to suction out the clog or pour a bleach solution into the pan to dissolve it.
- Cracked Drain Pan: If the pan is old, it might have cracks.
- Solution: Inspect the pan for cracks. A cracked pan usually needs replacement. This is a job for a professional.
- Frozen Evaporator Coil: If the coil is covered in ice, it means airflow is restricted or refrigerant levels are low. When it melts, it can cause overflow.
- Solution: Turn off the unit and let the coil thaw. Check and replace the air filter. If it keeps freezing, you need professional help.
By understanding these common issues, you can often solve minor problems yourself. This saves you money and keeps your system running smoothly. For persistent or complex issues, always seek expert help.
When Professional Help is Best for Your Air Handler
While many air handler cleaning and simple troubleshooting tasks are DIY-friendly, some situations call for a professional. Knowing your limits protects both you and your HVAC system. I always advise calling an expert when facing complex problems. It prevents further damage and ensures your safety.
This section helps you decide when to pick up the phone. It outlines specific scenarios where professional expertise is not just helpful but necessary.
Signs You Need a Professional HVAC Technician
Here are clear indicators that it is time to call in an expert:
- Persistent Water Leaks: If you have cleared the drain line but water keeps leaking, there might be a more serious issue. This could be a cracked pan, a deeper clog, or problems with refrigerant. Professionals can diagnose hidden leaks.
- Electrical Problems: If breakers trip often, or you smell burning plastic, it is an electrical issue. Do not touch electrical components unless you are trained. Electrical work is very dangerous for untrained individuals.
- Refrigerant Leaks: If your evaporator coil freezes over repeatedly, it could mean a refrigerant leak. Refrigerant is a chemical. It needs special handling. Only certified technicians can add or remove it safely.
- Motor or Compressor Failure: If the blower motor stops working entirely, or the outdoor compressor unit is silent, it is a major mechanical failure. These parts need expert repair or replacement. They are expensive components.
- Loud, Unusual Noises: While some noises are easy fixes, grinding, screeching, or violent banging sounds usually point to serious mechanical issues. These often require specialized tools and knowledge to fix.
- System Not Cooling or Heating Effectively: If your air handler runs but your home does not reach the set temperature, there is a core performance issue. This might involve complex diagnostics beyond basic cleaning.
- Mold Infestation: If you find extensive mold growth inside the air handler or ductwork, a simple clean might not be enough. Mold can spread and impact air quality. Professionals have specialized equipment and chemicals to treat mold thoroughly. They can also address any underlying moisture problems. Sometimes, cleaning mold around air vents needs professional intervention to ensure complete removal.
- Lack of Maintenance History: If your air handler has not been serviced in several years, a full professional tune-up is a good idea. They can inspect all components, lubricate parts, and check for wear.
Benefits of Professional HVAC Service
Hiring a professional brings several advantages:
- Expertise and Experience: Technicians have deep knowledge of HVAC systems. They can diagnose problems quickly and accurately. They also know best practices for cleaning and repair.
- Specialized Tools: Professionals have vacuum systems, coil cleaning tools, and diagnostic equipment not available to homeowners. This allows for a more thorough and effective service.
- Safety: They are trained to handle electrical components and refrigerants safely. They reduce the risk of injury or further damage to your system.
- Warranty Protection: Many HVAC warranties require professional maintenance. Skipping professional service might void your warranty.
- Long-Term Savings: While an upfront cost, professional service prevents major breakdowns. It extends the life of your unit. This saves you money on expensive replacements in the future.
Regular DIY cleaning is great for basic maintenance. However, do not hesitate to call a professional for complex issues or routine deep cleaning. It is an investment in your home’s comfort and your system’s longevity.
FAQ Section
Q1: How often should I clean my air handler’s coils?
You should inspect your air handler’s evaporator coils every 6 to 12 months. Clean them if you see visible dirt or debris. If your air filter is changed regularly, the coils might stay cleaner longer. However, a light cleaning with a coil cleaner once a year, especially before the cooling season, is a good practice to maintain efficiency.
Q2: What kind of cleaner should I use for air handler coils?
Use a coil cleaner specifically designed for HVAC evaporator coils. Many of these are “no-rinse” foam or spray products. They are safe for the coil material and drip into the drain pan. Avoid harsh chemicals or acids, as they can damage the coil fins or components. Always follow the product’s instructions.
Q3: Can a dirty air handler make me sick?
Yes, a dirty air handler can impact your health. It can circulate dust, pollen, pet dander, and even mold spores throughout your home. This can trigger allergies, asthma attacks, or other respiratory issues. A musty smell from your vents often indicates mold growth. Regular cleaning improves indoor air quality.
Q4: How long does it take to clean an air handler?
The time it takes to clean an air handler varies. A basic cleaning, including filter replacement and light coil cleaning, might take 1 to 2 hours. If you are cleaning the blower fan and condensate line, it could take 2 to 4 hours. It depends on your skill level, the unit’s accessibility, and how dirty it is.
- air handler cleaning
- HVAC maintenance
- indoor air quality
- air conditioner cleaning
- coil cleaning