· Home Maintenance · 20 min read
How To Clean Mitsubishi Mini Split
Mastering Your Mitsubishi Mini Split Cleaning for Optimal Air Quality
Do you own a Mitsubishi mini split? These systems are great for heating and cooling specific areas of your home. They give you individual control over room temperatures. However, like any air conditioning unit, your mini split needs regular cleaning. Dirt, dust, and mold can build up inside the unit. This build-up affects air quality and reduces efficiency. Ignoring this task can lead to higher energy bills and poor performance.
I know you want your home to feel comfortable and fresh. Keeping your mini split clean is a big step in that direction. This article will show you exactly how to clean your Mitsubishi mini split. We will cover everything from basic filter cleaning to deeper maintenance tasks. By the end, you will feel confident tackling this important job yourself. Let us dive in and learn how to keep your home comfortable and your air clean.
Takeaway:
- Regular cleaning improves air quality and efficiency.
- Disconnect power before starting any cleaning.
- Clean filters every few weeks during active use.
- Deep clean coils, blower wheel, and drain line annually.
- Call a professional for complex issues or if you feel unsure.
How do I clean my Mitsubishi mini split unit?
You clean your Mitsubishi mini split by first disconnecting its power. Then, you open the unit cover and remove the air filters for washing. Next, clean the evaporator coils and blower wheel with a coil cleaner and brush. Finally, clear the drain pan and line, then wipe down the exterior surfaces.
Why Regular Cleaning Matters for Your Mitsubishi Mini Split
Your Mitsubishi mini split works hard to keep your home comfortable. It pulls air from your room, cools or heats it, and then sends it back out. During this process, dust, pollen, pet dander, and other particles enter the unit. These particles collect on the filters, coils, and blower wheel. Over time, this build-up becomes a problem.
A dirty mini split cannot work as well. It has to work harder to achieve the desired temperature. This extra effort uses more electricity, increasing your energy bills. Plus, a dirty unit can blow dust and allergens back into your room. This means poorer air quality for you and your family. Regular cleaning stops these problems before they start.
Benefits of a Clean Mini Split
Cleaning your mini split offers many good things. First, it makes the air in your home healthier. When the unit is clean, it does not recirculate dust, mold spores, or other irritants. This is especially helpful for people with allergies or asthma. You breathe easier in a clean environment.
Second, a clean unit runs more efficiently. When coils and filters are free of dirt, air flows easily. The system does not need to exert as much energy to move air and change its temperature. This leads to lower utility costs for you. Third, regular cleaning makes your unit last longer. Dirt and grime can cause parts to wear out faster. Cleaning extends the life of your investment.
Signs Your Mini Split Needs Cleaning
How do you know when your mini split needs cleaning? There are several clear signs. You might notice the air coming out is not as strong as before. This often means dirty filters are blocking airflow. The unit might also smell musty or stale. This smell often points to mold or mildew growth inside the unit, especially on the coils or in the drain pan.
Another sign is poor cooling or heating performance. If your room does not reach the set temperature easily, a dirty unit could be the cause. Finally, if you hear unusual noises, it might be the blower wheel struggling with excess dust. Pay attention to these signs. They tell you it is time to give your Mitsubishi mini split some attention.
Gathering Your Tools and Safety First for Mitsubishi Mini Split Cleaning
Before you start any cleaning, you need the right supplies. Having everything ready saves you time and effort. You also need to prioritize your safety. Working with electrical appliances requires careful steps. Do not skip the safety checks. This protects you from harm.
I always gather my tools first. It makes the job flow smoothly. Plus, knowing you are safe gives you peace of mind. Let us look at what you need and the important safety rules.
Essential Cleaning Supplies
Here is a list of what you will need for cleaning your Mitsubishi mini split:
- Soft Brush or Vacuum Cleaner with Brush Attachment: For removing loose dust from filters and coils.
- Mild Dish Soap or Coil Cleaner: Dish soap is good for filters. A specific coil cleaner is best for the evaporator coils. Ensure it is safe for mini splits.
- Spray Bottle: For applying coil cleaner.
- Clean Cloths or Microfiber Towels: For wiping surfaces and drying parts.
- Bucket: To hold soapy water or rinse dirty parts.
- Protective Eyewear and Gloves: To protect your eyes and hands from dirt and cleaning solutions.
- Small Wet/Dry Vacuum (Optional): For stubborn dust or small water spills.
- Soft Bristle Brush (Toothbrush or similar): For scrubbing the blower wheel gently.
- Drain Pan Tablets (Optional): To prevent future mold growth in the drain pan.
Make sure all your cloths are clean. Dirt from one area can easily spread to another. Using a specific coil cleaner helps get the coils very clean without damage.
Prioritizing Safety Steps
Safety is the most important step before you touch your mini split. You are working with an electrical appliance. This means electricity can cause serious injury if not handled correctly. Always remember these rules:
- Disconnect Power: This is the first and most critical step. Go to your home’s circuit breaker box. Find the breaker that controls your mini split unit. Flip it to the “off” position. Do not just use the remote control to turn off the unit. The remote only puts it in standby mode. You need to cut off all power from the source.
- Wear Protective Gear: Put on your safety glasses. This protects your eyes from dust, debris, and cleaning solutions. Wear gloves to keep your hands clean and safe from chemicals.
- Work in a Well-Ventilated Area: If you are using spray cleaners, make sure the room has good airflow. Open windows if possible.
- Do Not Spray Water Directly on Electrical Components: Be very careful with liquids. Never spray water or cleaning solutions directly onto any electrical wires, circuits, or the motor. This can cause damage or electrical shock.
- Follow Product Instructions: If using a specialized coil cleaner, read its directions carefully. Use it as intended by the manufacturer.
- Handle Components Gently: Mini split parts can be delicate. Do not force anything open or pull too hard on wires.
By following these safety steps, you make sure the cleaning process is safe and effective. You protect yourself and your valuable equipment.
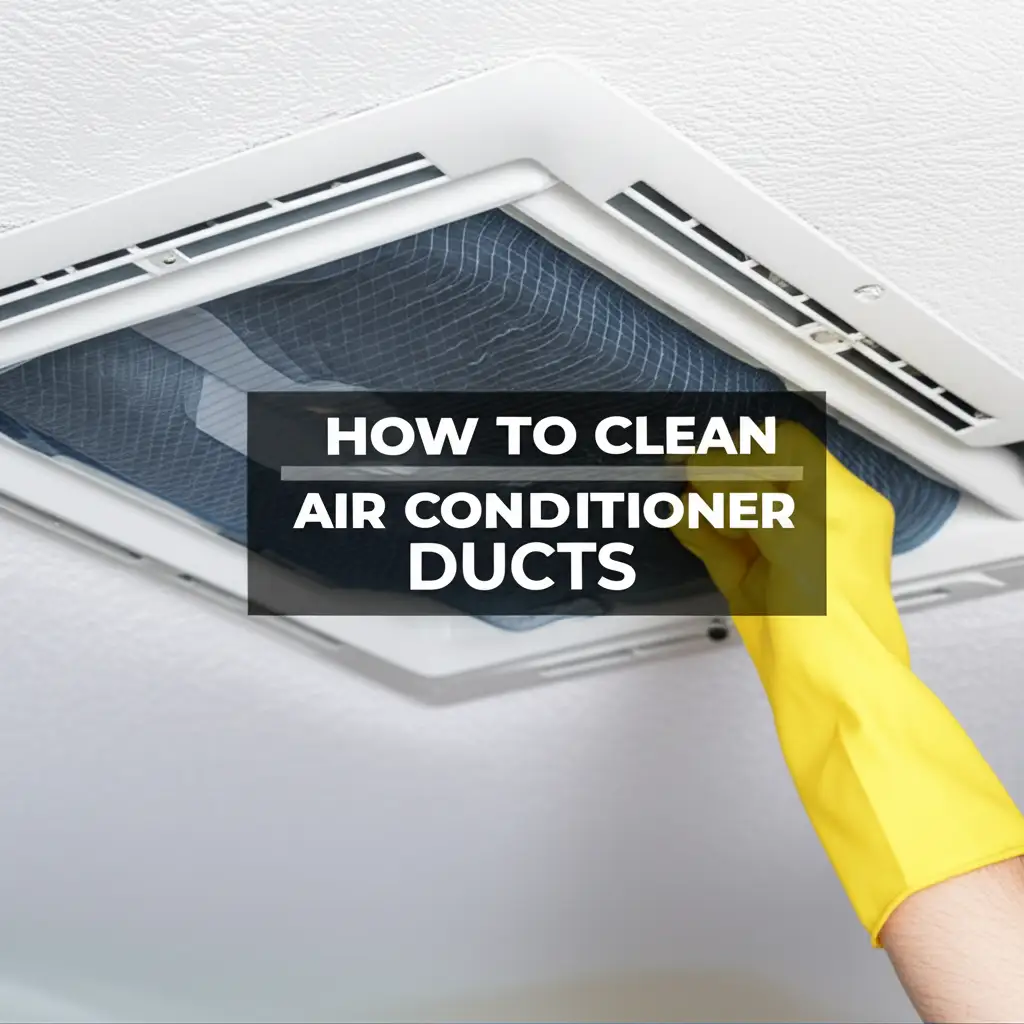
Step-by-Step Guide to Cleaning Your Mitsubishi Mini Split Filters
Cleaning the air filters is the easiest and most frequent task for your Mitsubishi mini split. These filters catch most of the dust and debris. Keeping them clean is vital for good airflow and air quality. I always start here because it makes a big difference right away. This part of the job is simple and quick.
Accessing and Removing Filters
First, make sure the power to your mini split is off at the circuit breaker. Now you can safely open the unit.
- Open the Front Panel: Locate the latches or hinges on the sides or bottom of your indoor unit. Gently lift or pull the front cover open. It should swing up easily. Most Mitsubishi models have a panel that lifts and stays open.
- Locate the Air Filters: Once the panel is open, you will see two mesh-like filters. They usually slide out from slots. Note their position and how they sit in the unit. This helps you put them back correctly later.
- Carefully Remove Filters: Gently slide each filter out. They might be dusty, so avoid shaking them too much over your floor. Take them to a sink or outdoor area for cleaning.
Some Mitsubishi models also have smaller, carbon filters or anti-allergy filters behind the main mesh ones. These are often disposable. Check your owner’s manual to see if your unit has these and if they need replacing or cleaning.
Cleaning and Drying Filters
Once you have the filters out, cleaning them is straightforward.
- Brush or Vacuum Off Loose Dust: Take the filters outside or over a trash can. Gently tap them to remove large dust clumps. You can also use a soft brush or a vacuum cleaner with a brush attachment to suck off the dust.
- Wash with Water: Place the filters under cool, running water. You can use a mild dish soap to help break down grease or stubborn grime. Gently rub the mesh with your hands or a soft brush. Make sure water flows through all the tiny holes.
- Rinse Thoroughly: Rinse the filters until all soap residue is gone and the water runs clear.
- Air Dry Completely: This step is crucial. Do not put wet filters back into the unit. Water can cause mold growth or electrical issues. Lay the filters flat on a clean towel or hang them to air dry. Make sure they are completely dry, which may take a few hours. I usually let mine dry overnight to be safe.
- Reinsert Filters: Once dry, slide the filters back into their slots in the mini split unit. Ensure they are seated correctly.
- Close the Panel: Gently close the front panel of the mini split until it latches securely.
- Restore Power: Go back to your circuit breaker and turn the power back on.
Clean your main air filters every 2-4 weeks during peak use seasons. If you have pets or allergies, you may need to clean them more often. This simple step keeps your unit running well and your air clean.
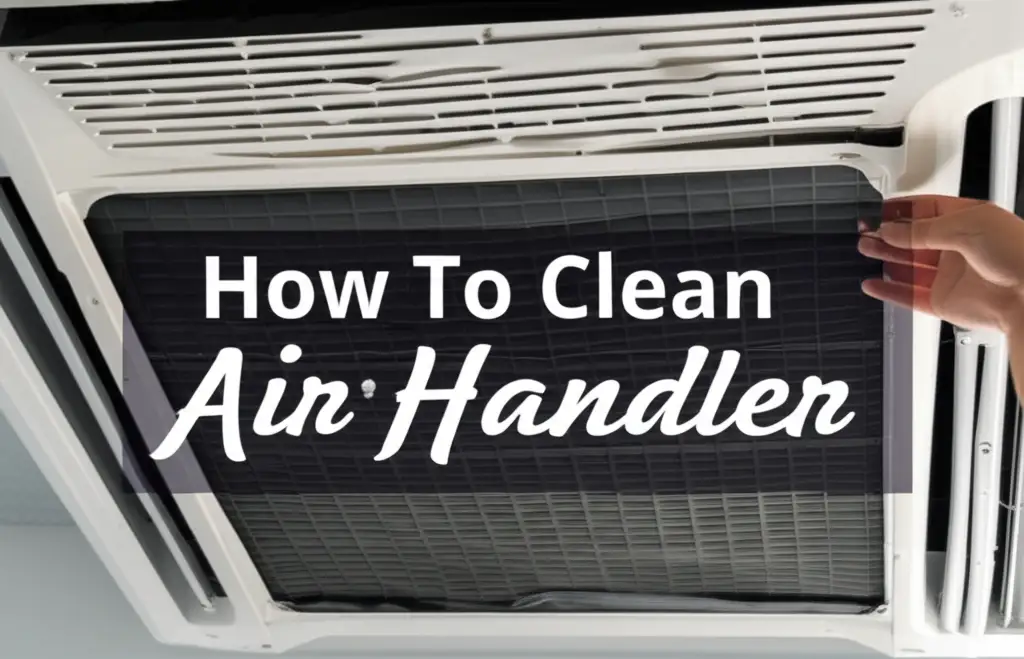
Deep Cleaning the Mitsubishi Mini Split Coils and Blower Wheel
Cleaning the filters is a good start, but dust and grime still get past them. This leads to build-up on the evaporator coils and the blower wheel. These parts are inside the unit and need a deeper clean. A dirty coil reduces heating and cooling ability. A dirty blower wheel can cause poor airflow and bad smells. I find this step makes the biggest difference in performance.
Cleaning Evaporator Coils
The evaporator coils look like metallic fins. They are where the air gets cooled or heated. Dirt and mold here can trap airflow and make the unit inefficient.
- Prepare the Area: With the power off and filters removed, look at the coils. They are located behind where the filters sit. Place old towels or a plastic sheet on the floor under the unit. This catches any drips from the cleaning solution.
- Spray Coil Cleaner: Use a non-rinse, coil cleaner specifically designed for mini splits. Shake the can well. Spray the cleaner evenly across the entire coil surface. Follow the product instructions for application. The cleaner will foam up and break down dirt, mold, and grime.
- Tip: Some cleaners recommend letting it sit for a few minutes. Others work on contact. Always read the label.
- Allow to Drip: The cleaner will turn into liquid, carrying the loosened dirt into the drain pan below. This dirty liquid will then flow out through the drain line. This is a key part of how the cleaner works. If you are also dealing with a mold issue, products like hydrogen peroxide diluted with water can sometimes help after the main cleaning, or you can use a solution of white vinegar. For persistent mold, you might explore how to clean mold with vinegar.
- Gentle Brush (Optional): If the coils are very dirty, you can gently brush them with a soft coil brush. Brush only in the direction of the fins to avoid bending them. Be very careful not to damage the delicate fins.
- Wipe Down Exterior of Coils: Use a damp cloth to wipe any residue off the front face of the coils and nearby plastic parts.
Do not use harsh chemicals like bleach on your coils. They can damage the aluminum fins.
Tackling the Blower Wheel
The blower wheel, also called a squirrel cage, is a cylindrical fan located behind the coils. It pulls air through the unit. It gets very dirty because it spins constantly, collecting dust and mold inside its many blades. This part is harder to reach but vital to clean.
- Visual Inspection: Look up into the opening where the air comes out. You will see the black, cylindrical blower wheel. It probably looks dusty or fuzzy.
- Manual Rotation: Gently turn the blower wheel by hand to expose all its sections. You will notice how much dirt is trapped within its blades.
- Cleaning the Blades: This is the most challenging part.
- Method 1 (Spray and Wipe): Spray coil cleaner onto the blades. Let it sit. Then, use a damp cloth or soft brush to carefully wipe down each blade. You can wrap a thin cloth around a stick or a flat tool to reach deeper. Rotate the wheel manually as you clean each section.
- Method 2 (Soft Brush and Vacuum): Use a soft-bristled brush (like a toothbrush) to loosen the grime on the blades. Use a small wet/dry vacuum with a narrow attachment to suck up the loosened dust. This method is often less messy.
- For a comprehensive guide, especially if you want to avoid removing the blower wheel, refer to how to clean mini-split blower wheel without removing.
- Repeat as Needed: Keep cleaning and rotating the wheel until all visible dirt is gone. This may take some time. The cleaner you get the blower wheel, the better your airflow will be.
- Final Wipe Down: After cleaning, use a clean, slightly damp cloth to wipe away any remaining cleaner or loosened debris.
Cleaning the coils and blower wheel should be done at least once a year, or more often if you use your mini split constantly or live in a dusty environment.
Maintaining the Mitsubishi Mini Split Drain Pan and Line
After the coils cool the air, they create condensation. This water drips into a drain pan and then flows out of your home through a drain line. If this system gets clogged, water can back up. This leads to leaks, water damage, and prime conditions for mold growth. Keeping the drain pan and line clear is a critical part of mini split maintenance.
I have seen many mini split problems come from a clogged drain system. It is often overlooked but very important.
Cleaning the Drain Pan
The drain pan sits directly under the evaporator coils. It collects all the condensation. Over time, mold, algae, and slime can grow in this standing water.
- Locate the Drain Pan: The drain pan is usually integrated into the unit’s design, directly beneath the coils. You may need to look closely under the coils to see it. It is usually plastic.
- Inspect for Slime and Mold: Use a flashlight to check the pan for any standing water, slime, or mold growth. You might see slimy residue built up on the bottom and sides.
- Wipe and Clean: Use a cloth soaked in warm, soapy water or a diluted bleach solution (1 part bleach to 16 parts water) to wipe down the inside of the drain pan. Be careful not to let any cleaner drip onto other parts of the unit. You can also use a mold cleaning solution here if you see significant growth.
- Use Drain Pan Tablets (Optional): After cleaning, you can place special drain pan tablets in the pan. These tablets slowly release chemicals that prevent mold and algae from growing back. Follow the product instructions for how often to replace them.
Some drain pans are hard to reach directly. In these cases, relying on the coil cleaner to flush through the system will help clean the pan indirectly.
Clearing the Drain Line
The drain line is a plastic tube that carries water from the drain pan outside. It can get clogged with slime, mold, or even insect nests. A clogged line causes water to overflow from the pan.
- Locate the Drain Line: The drain line typically exits the bottom or side of your indoor unit and runs outside. It might be a flexible clear or white tube.
- Check for Obstructions at the Exit: Go outside and find where the drain line ends. Sometimes, debris, dirt, or insects can block the opening. Clear any visible obstructions.
- Flush the Line (Optional, but Recommended): You can gently flush the drain line with a mixture of warm water and a little dish soap. You can also use distilled white vinegar. Pour the solution slowly into the drain pan if it has an accessible opening, or directly into the line if you can detach it carefully. Let it sit for about 15-20 minutes, then flush with plain water.
- Caution: Do not use high-pressure air or harsh chemicals that are not meant for AC drain lines, as they can damage the pipe.
- Use a Wet/Dry Vacuum (If Clogged): If water is overflowing from your indoor unit, the drain line is likely clogged. You can use a wet/dry vacuum to clear it.
- Go to the outdoor end of the drain line. Create a tight seal around the end of the drain line with the vacuum hose (you might need tape or a rag).
- Turn on the wet/dry vacuum for a few minutes. The suction will pull out any clogs from the line. You might hear a gurgling sound as it clears.
- For more detailed instructions on clearing drain lines, you can refer to resources like how to clean mini-split drain line or how to clean split ac drain pipe.
- Check for Leaks: After flushing or clearing, run your mini split in cooling mode for a short time to check if water is now flowing freely from the drain line outside. Make sure there are no leaks from the indoor unit.
Cleaning the drain pan and line prevents water damage and mold. It keeps your system running smoothly. Do this annually, or if you notice any strange smells or water drips.
Cleaning the Exterior and Vents of Your Mitsubishi Mini Split
Once you have finished the internal cleaning, it is time to make the outside of your Mitsubishi mini split shine. The exterior casing and air vents also collect dust and grime. Cleaning these parts improves the unit’s appearance and helps maintain good airflow. This is the simplest part of the cleaning process, but it completes the job nicely.
I always finish by cleaning the outer shell. It gives the unit a fresh look.
Wiping Down the Outer Casing
The outer casing of your mini split collects everyday household dust. This dust can make the unit look dirty. It can also impede airflow slightly if vents are covered.
- Prepare a Cleaning Solution: Mix a small amount of mild dish soap with warm water in a bucket. You can also use a gentle, all-purpose household cleaner. Avoid harsh abrasives or chemical sprays that might damage the plastic.
- Dampen a Cloth: Dip a clean, soft cloth or microfiber towel into the soapy water. Wring it out well so it is damp, not dripping wet. You do not want excess water near the unit’s electrical parts.
- Wipe the Casing: Gently wipe down all the exterior surfaces of the indoor unit. Pay attention to the top, sides, and front. Remove any dust, smudges, or dirt. If there are stubborn spots, you can use a little more pressure.
- Dry with a Clean Cloth: After cleaning, use a separate, dry cloth to wipe down the casing. This removes any soap residue and prevents water spots. Make sure the surface is completely dry.
Remember to keep water away from any openings or electrical connections. The goal is to clean the plastic shell, not to wet the internal parts.
Cleaning Air Vents and Louvers
The air vents and louvers are the movable flaps that direct airflow. They also gather dust, which can block the air coming out.
- Inspect Vents: Look at the louvers, the horizontal flaps, and any vertical air deflectors. You will likely see dust collected on their surfaces.
- Gentle Dust Removal: Use a soft, dry brush or a vacuum cleaner with a brush attachment to remove loose dust from the louvers and around the vent openings. You can manually adjust the louvers to reach different angles.
- Wipe with Damp Cloth: Dampen a clean cloth with your soapy water solution (or plain water if you prefer). Gently wipe the surfaces of the louvers and the inside edges of the vent opening. Be careful not to bend or break the louvers, as they can be delicate.
- Dry Thoroughly: Wipe down the louvers and vents with a dry cloth to remove moisture.
If your mini split has a swing function for its louvers, you can turn the unit on (after restoring power) to move the louvers to different positions, making them easier to clean. However, always turn the power off again before wiping with a damp cloth if you need to reach inside. This final cleaning step makes your unit look great and helps ensure unrestricted airflow.
When to Call a Professional for Your Mitsubishi Mini Split
While many cleaning tasks for your Mitsubishi mini split are DIY-friendly, there are times when you should call in a professional HVAC technician. Knowing your limits helps prevent damage to your unit and ensures your safety. A professional has specialized tools and knowledge for deeper cleaning and repairs.
I believe in empowering homeowners to do what they can. But I also know when to call in the experts. It saves you money and trouble in the long run.
Recognizing Limits
You should consider calling a professional if:
- You See Heavy Mold Growth: If you find extensive mold inside the unit, especially if it is deep within the coils or spreading rapidly, a professional has stronger, specialized mold-killing treatments. They can also ensure proper disposal of moldy components.
- Persistent Bad Odors: If your unit still smells bad after a thorough cleaning, it might indicate a deeper mold issue, bacterial growth, or something trapped inside that you cannot reach. Professionals have endoscopic cameras to inspect hidden areas.
- Difficult-to-Reach Areas: Some parts of the mini split, like certain sections of the blower wheel or the interior of the drain pan, can be hard to access for a complete cleaning. Professionals can often disassemble parts more safely.
- Unit Not Working Properly: If your unit is not cooling or heating effectively after cleaning, or if it is making strange noises, it might have an issue beyond just dirt. This could be a refrigerant leak, a motor problem, or an electrical fault. Cleaning will not fix these mechanical issues.
- Leaking Water After Cleaning: If your unit continues to leak water after you have cleaned the drain line, there might be a blockage deeper in the system, a crack in the drain pan, or a faulty installation.
- You Feel Uncomfortable: If you are unsure about any step, or if you feel uncomfortable handling the internal components, it is always better to call a professional. Safety comes first.
Do not try to force parts, or use tools not meant for HVAC units. This can cause costly damage.
Benefits of Professional Service
Hiring a professional for your Mitsubishi mini split offers several advantages:
- Thorough Cleaning: Professionals use high-pressure cleaning systems and specialized chemicals to deeply clean coils, blower wheels, and drain lines. They can remove grime that DIY methods might miss.
- Diagnosis of Underlying Issues: During a service visit, technicians do more than just clean. They inspect the unit for other potential problems like refrigerant levels, electrical connections, and fan motor health. They can spot minor issues before they become major breakdowns.
- Specialized Tools: They have tools like coil cleaning bags (that collect all the dirty water), professional vacuums, and diagnostic equipment. These tools ensure a clean job and accurate problem-solving.
- Warranty Protection: For newer units, professional maintenance often keeps your warranty valid. Some manufacturers require annual professional servicing.
- Extended Unit Life: Regular professional maintenance, combined with your DIY cleaning, helps your mini split last longer and run at peak performance throughout its lifespan.
- mini split cleaning
- Mitsubishi mini split
- DIY cleaning
- HVAC maintenance
- air conditioner cleaning
- home comfort