· Electronics Maintenance · 19 min read
How To Clean Airpod Microphone
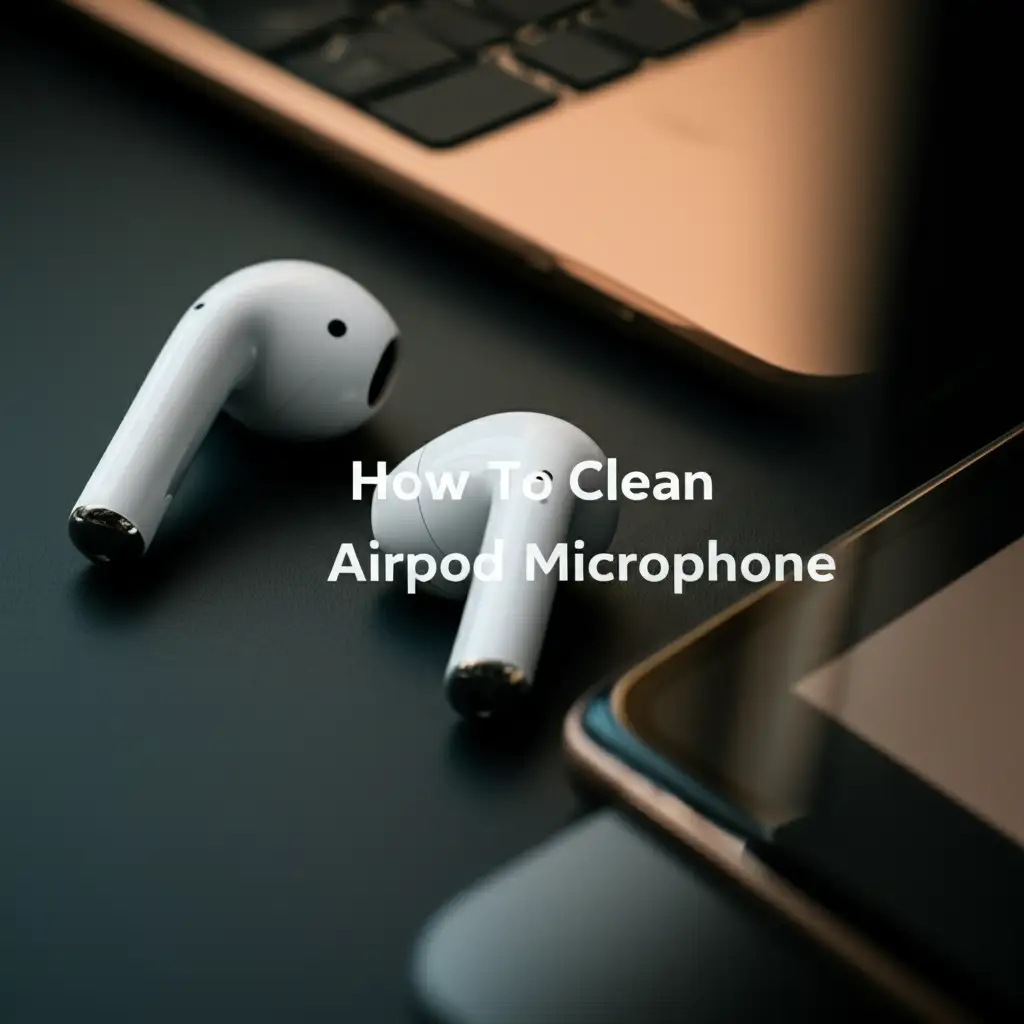
How To Clean Airpod Microphone for Clearer Calls
Have you ever wondered why your AirPod calls sound muffled? It is frustrating when friends complain they cannot hear you clearly. A dirty microphone is often the culprit. Over time, debris, earwax, and lint build up, blocking the tiny microphone holes on your AirPods.
Cleaning your AirPod microphone is easier than you think. You can restore your audio quality with simple tools and a bit of care. This guide will walk you through everything. We will cover why microphones get dirty, what tools you need, and how to perform a deep clean. Get ready for crystal-clear conversations again!
Takeaway
- Identify the problem: Muffled audio is often due to a dirty AirPod microphone.
- Gather tools: Use soft brushes, microfiber cloths, and isopropyl alcohol.
- Clean gently: Remove debris from microphone grilles without causing damage.
- Maintain regularly: Prevent buildup with consistent, gentle cleaning.
- Troubleshoot: Check settings or seek professional help if issues persist.
Clear, Concise Answer
To clean your AirPod microphone, gently wipe the microphone grilles with a dry, soft, lint-free cloth. Use a dry cotton swab or a soft-bristled brush to dislodge visible debris. For stubborn grime, lightly dampen a cloth with 70% isopropyl alcohol and wipe carefully, avoiding moisture in openings.
Understanding AirPod Microphone Location and Vulnerability
Your AirPods are small devices. They have tiny microphones on their stems or bodies. These microphones pick up your voice during calls. They also help with noise cancellation features. AirPod microphones are usually located at the very bottom of the stem for most models. AirPods Pro models also have external microphones for noise cancellation.
These small openings are prone to collecting dirt. Earwax, skin oils, lint from pockets, and dust particles accumulate easily. This buildup can block the microphone’s ability to capture sound. The result is muffled audio or a complete loss of sound input. Knowing where these microphones are helps you target your cleaning efforts.
Different AirPod models have slight variations in microphone placement. Always check your specific model. However, the general principles for cleaning apply to all. We aim to clear obstructions from these tiny grilles. This process helps your voice transmit clearly again.
Why Your AirPods Microphone Sounds Muffled
Muffled sound from your AirPods microphone is a common issue. Many factors contribute to this problem. Understanding these causes helps you clean effectively. It also helps prevent future issues. Let us explore the main reasons.
Accumulation of Earwax and Debris
Your ears produce earwax naturally. This wax can transfer to your AirPods. It gets into the microphone grilles. Over time, this earwax hardens. It forms a sticky barrier. Other small debris, like lint from your pockets, also gets trapped. Dust particles float in the air. They settle on the small openings of the microphone.
This buildup blocks sound waves from reaching the microphone. It is like having a tiny shield over the microphone. Your voice cannot pass through clearly. Regular cleaning removes these blockages. This helps your AirPods capture your voice. A clear path for sound makes your calls much better.
Moisture and Sweat Damage
Moisture is another enemy of electronics. Sweat from exercise can get into your AirPods. Rain or humidity also causes issues. Water carries dirt and minerals. When water dries, it leaves behind residues. These residues can clog the microphone grilles.
Moisture can also affect the internal components. It leads to corrosion over time. This damage might not be visible. It still impacts microphone performance. Always dry your AirPods completely after use, especially after sweating. Keeping them dry prevents moisture-related issues. This practice helps maintain sound quality.
Impact of Environmental Factors
Your environment plays a big role in AirPod cleanliness. If you use your AirPods in dusty places, they will get dirty faster. Construction sites, workshops, or even very dry, dusty homes are examples. Air pollution also contributes. Fine particles in the air can settle on your devices.
Using AirPods near food or drinks also increases risk. Tiny food particles or spills can reach the microphone. Consider where you use your AirPods most often. Adjust your cleaning frequency based on your environment. Regular cleaning is key in challenging environments.
Software Glitches and Connectivity Issues
Sometimes, the microphone problem is not dirt. It could be a software glitch. Your iPhone or iPad might have a temporary bug. This bug affects how it communicates with your AirPods. Connectivity issues also cause problems. A weak Bluetooth signal can make your voice sound choppy.
First, try basic troubleshooting for software. Restart your iPhone. Disconnect and reconnect your AirPods. Resetting your AirPods can also help. These steps fix many software-related problems. If the issue persists after these steps and cleaning, then it is likely physical dirt or hardware damage. You can also learn how to clean your iPhone microphone for overall device clarity.
Essential Tools for Cleaning AirPod Microphones
Cleaning your AirPod microphone requires specific tools. Using the wrong tools can damage your device. Always choose soft, non-abrasive items. Here is a list of what you will need. Having these ready makes the cleaning process smooth.
Soft-Bristled Brush
A soft-bristled brush is your primary tool. Think of a new, clean toothbrush. A small detailing brush also works. The bristles should be fine and gentle. You will use this brush to dislodge dry debris. This includes lint, dust, and superficial earwax.
Brush very gently over the microphone grilles. Do not push hard. The goal is to lift the dirt, not push it deeper. A soft brush is safe for delicate electronic components. It effectively removes loose particles.
Microfiber Cloth
A microfiber cloth is essential for wiping surfaces. It is lint-free and soft. Use it to wipe away dust and smudges. You can also use it to dry your AirPods after cleaning. Always use a clean microfiber cloth. Dirty cloths can scratch surfaces or leave new debris.
I find these cloths perfect for everyday wiping. They grab tiny particles without scratching. Keep one specifically for your electronics. This prevents cross-contamination from other cleaning tasks. A good quality microfiber cloth lasts a long time.
Cotton Swabs (Dry)
Dry cotton swabs are useful for precision cleaning. They fit into small crevices. You can gently roll the tip over microphone areas. This helps pick up small bits of debris. Ensure the cotton swab is dry. Wet swabs can push moisture into the device.
Choose cotton swabs with tightly wound cotton. Loose cotton can leave fibers behind. These fibers can become new obstructions. A high-quality cotton swab makes a difference. They offer control for delicate work.
Isopropyl Alcohol (70% Concentration)
Isopropyl alcohol is great for dissolving stubborn grime. Use 70% concentration. This concentration evaporates quickly. It also sanitizes surfaces. Do not use higher concentrations. They can damage plastic or rubber parts.
Never apply alcohol directly to your AirPods. Instead, lightly dampen a small part of your microfiber cloth or cotton swab. The cloth should be damp, not dripping wet. Wipe the affected area very carefully. Alcohol is excellent for cutting through earwax residue. For other AirPod areas like the mesh, a similar approach is used to clean AirPod mesh.
Toothpicks or Similar Non-Metallic Tools
Sometimes, debris is stuck deep. A wooden toothpick can help. Use it very carefully. Gently scrape away stubborn dirt. Do not use metal objects like paper clips or needles. Metal can scratch or puncture the microphone grille. It can also cause electrical shorts.
The tip of a toothpick should be fine. It needs to fit into the small openings. Work slowly and with light pressure. The goal is to lift the dirt, not dig it out. Be extra cautious when using any pointed tool. Safety is the priority to avoid damage.
Step-by-Step Guide: Cleaning AirPod Microphones Safely
Cleaning your AirPod microphones safely is crucial. Follow these steps carefully. They ensure you remove dirt without damaging your device. Let us begin the cleaning process.
Step 1: Power Down and Disconnect
Before starting, always turn off your AirPods. Place them back in their charging case. Disconnect them from your device. Go to your iPhone’s Bluetooth settings. Tap the “i” next to your AirPods. Then select “Forget This Device.”
This step prevents accidental inputs. It also reduces any risk of electrical damage. Working on a powered-off device is always safer. This prepares your AirPods for a thorough clean. Safety first is my motto for tech cleaning.
Step 2: Gentle Dry Brush Cleaning
Take your soft-bristled brush. Gently brush over the microphone grilles. These are usually located at the bottom of the stem. Also, check for smaller microphone holes on the side for noise cancellation. Use light, sweeping motions. Do not press down hard.
The goal is to dislodge loose dust and lint. Brush away from the openings. You want to push debris out, not into the microphone. This initial dry brush removes most superficial dirt. This is a very important first step.
Step 3: Removing Stubborn Debris with a Toothpick
If dry brushing does not remove all debris, use a toothpick. Hold your AirPod firmly. Carefully use the tip of the toothpick. Gently scrape around the edges of the microphone openings. Angle the toothpick to lift out any trapped wax or grime.
Be extremely gentle. Avoid pushing the toothpick deep into the holes. You can easily damage the delicate components inside. Work slowly and patiently. Repeat this process until you see the debris loosen.
Step 4: Wiping with a Microfiber Cloth
Once loose debris is gone, grab your microfiber cloth. Lightly wipe the entire surface of your AirPod. Pay special attention to the microphone areas. This removes any dust that settled during brushing or scraping. It also polishes the surface.
A clean microfiber cloth ensures a streak-free finish. It removes fingerprints and oils too. This step gives your AirPods a refreshed look. Make sure the cloth is completely dry for this step.
Step 5: Isopropyl Alcohol Application for Deep Cleaning
For stubborn grime, use 70% isopropyl alcohol. Dampen a corner of your microfiber cloth or cotton swab. Remember, only slightly damp. It should not be dripping. Gently wipe the microphone grilles and surrounding areas. The alcohol helps dissolve earwax and oil residues.
Let the alcohol evaporate fully. It dries quickly. Do not use the AirPods until they are completely dry. This prevents any moisture from getting inside. This step is effective for tough, sticky buildup.
Step 6: Final Inspection and Test
After cleaning, visually inspect your AirPods. Check all microphone grilles. Ensure they look clear and free of obstructions. Use a bright light to see clearly. You can even use your phone’s flashlight.
Once satisfied, reconnect your AirPods to your device. Make a test call to a friend or use a voice recording app. Listen for improved clarity. You should notice a significant difference. If the sound is still muffled, you might need a deeper clean or further troubleshooting.
Advanced Cleaning Techniques for Stubborn Dirt
Sometimes, standard cleaning steps are not enough. Stubborn dirt or deeply lodged debris might remain. When this happens, you need more advanced techniques. These methods require extra caution. Follow them only if basic cleaning fails.
Using Adhesive Putty or Blu-Tack
Adhesive putty, like Blu-Tack, can lift out deeply embedded dirt. Take a small piece of putty. Knead it in your fingers to make it soft and pliable. Press the putty gently over the microphone grille. Do not push it too hard into the hole.
Pull the putty away quickly. The sticky surface should pick up lint, dust, and earwax. Repeat this process several times. Use a fresh piece of putty each time. This method is surprisingly effective for tiny particles. It pulls them out without pushing them in.
Gentle Compressed Air (Caution Advised)
Compressed air can blow out dirt. If you use it, be extremely careful. Hold the can upright. Use very short, controlled bursts. Hold the AirPod at an arm’s length. Never spray compressed air directly into the microphone at close range.
High pressure can damage internal components. It can also push debris further inside. I recommend using canned air as a last resort. If you do use it, maintain a good distance. A soft brush is always safer for initial removal.
Utilizing Professional Cleaning Kits
Several companies offer specialized AirPod cleaning kits. These kits usually include fine brushes, specialized cleaning putties, and precise tools. They are designed for delicate electronics. Investing in one of these kits can be beneficial.
These kits often come with detailed instructions. They guide you through proper use. This ensures you have the right tools for the job. They also reduce the risk of damage. These kits are especially helpful for frequent AirPod users.
When to Consider Disassembly (Not Recommended for Users)
I must stress that user disassembly is not recommended. AirPods are complex devices. They are not designed for easy user repair. Attempting to open them can cause irreparable damage. You risk breaking tiny wires or connectors.
Opening your AirPods also voids your warranty. If you cannot clean the microphone with external methods, do not try to open them. It is better to seek professional help. A damaged AirPod is far worse than a dirty one.
Preventative Measures: Keeping Your AirPods Microphone Clean
Cleaning is good, but prevention is better. By adopting simple habits, you can keep your AirPod microphone clean. This extends their lifespan and maintains sound quality. Here are some easy preventative steps.
Storing AirPods in Their Case
Always store your AirPods in their charging case when not in use. The case protects them from dust, lint, and accidental damage. Pockets and bags are full of tiny particles. These can easily find their way into the microphone openings.
The case acts as a protective barrier. It also keeps your AirPods charged and ready. Make it a habit to put them away immediately. This simple step significantly reduces dirt buildup. I always put mine away when I am finished.
Regular Gentle Wiping
Make gentle wiping a routine. After each use, take a soft, dry microfiber cloth. Quickly wipe down your AirPods. Pay attention to the microphone areas and speaker mesh. This removes fresh earwax, oils, and surface dust.
This quick wipe prevents dirt from hardening. It stops buildup before it becomes a problem. Think of it like brushing your teeth daily. Small, consistent efforts make a big difference. This takes only a few seconds.
Avoiding Exposure to Dust and Liquids
Try to use your AirPods in clean environments. Avoid very dusty places if possible. If you must use them in such areas, wipe them down more frequently. Keep them away from liquids. This includes water, soda, and even excessive sweat.
If your AirPods get wet, dry them immediately. Use a soft, lint-free cloth. Do not use heat to dry them. Air dry completely before returning them to the case. Moisture contributes to dirt hardening and internal damage.
Cleaning Your Ears Regularly
This might sound obvious, but clean ears help. Excess earwax is a primary cause of dirty AirPods. Regular ear hygiene can reduce the amount of wax transferred. This means less earwax buildup on your AirPods.
You do not need to over-clean your ears. Just simple, regular hygiene helps. This is a common-sense approach. It reduces one major source of microphone clogging. Clean ears mean cleaner AirPods. For cleaning other personal items like AirPod Max cushions, similar careful practices apply.
Using Protective Covers (Optional)
Some people choose to use silicone or other protective covers for their AirPods. These covers can add a layer of protection. They might not cover the microphone directly. However, they can reduce overall exposure to dirt and impacts.
Ensure any cover you use does not obstruct the microphone. Some covers are designed with precise cutouts. Others might interfere with sound. Choose a cover that fits well and does not block audio pathways. This is an optional step, but it offers extra peace of mind.
Troubleshooting Common AirPod Microphone Issues After Cleaning
You have cleaned your AirPods thoroughly. Yet, the microphone still acts up. This can be frustrating. Do not worry. There are several troubleshooting steps you can take. These help pinpoint the actual problem.
Reconnect Your AirPods
Sometimes, the issue is a simple connection glitch. Forget your AirPods from your device’s Bluetooth settings. Then, pair them again as if they were new. This refreshes the Bluetooth connection. It can resolve minor communication errors.
I often find this simple step fixes many AirPod problems. It resets the digital handshake between devices. This is a quick and easy thing to try first. It takes only a minute or two.
Test with Another Device
Connect your AirPods to a different device. Try an iPad, another iPhone, or a Mac. Make a test call or recording on this new device. If the microphone works fine on the second device, the problem is with your primary device.
This helps isolate the issue. If it works elsewhere, check your primary device’s settings. Look for microphone permissions for apps. Also, check for software updates. This step narrows down the source of the problem.
Check AirPod Microphone Settings
Your AirPods allow you to set which AirPod acts as the microphone. Go to Settings > Bluetooth. Tap the “i” next to your AirPods. Scroll down to “Microphone.” It might be set to “Always Left,” “Always Right,” or “Automatically Switch.”
If one AirPod’s microphone is dirty or faulty, try setting it to “Always” use the other AirPod. For example, if your left AirPod mic is bad, set it to “Always Right.” This can bypass a problematic microphone. It ensures clear sound from the working one.
Restart Your Primary Device
A simple device restart can fix many software glitches. Turn off your iPhone or iPad completely. Wait a few seconds. Then, turn it back on. This clears out temporary software bugs. It often resolves minor audio or connectivity problems.
I recommend restarting your device periodically. It keeps your system running smoothly. This applies to many electronic issues, not just AirPods. It is a fundamental troubleshooting step.
Reset Your AirPods
Resetting your AirPods is a more drastic step. It returns them to factory settings. Place your AirPods in their case. Open the lid. Press and hold the button on the back of the case for about 15 seconds. The status light should flash amber, then white.
This erases all previous pairings. You will need to pair them again with your devices. A full reset can resolve persistent software issues. It addresses deep-seated bugs that simple restarts do not. Use this step when other methods fail.
When to Seek Professional Help or Replace Your AirPods
Sometimes, cleaning and troubleshooting are not enough. There comes a point when you need to consider professional help. Or, you might need to replace your AirPods entirely. Knowing when to take these steps saves you time and frustration.
Persistent Muffled Audio After All Steps
If you have tried every cleaning method and all troubleshooting steps, but your microphone still sounds muffled, it is likely a hardware issue. This means the microphone itself might be damaged internally. It could be due to impact, water damage, or a manufacturing defect.
At this point, user fixes are exhausted. You cannot repair internal components without specialized tools and knowledge. Continuing to try might cause more damage. This is the time to look for professional options.
Visible Damage to the Microphone Grille
Inspect your AirPod microphone areas closely. Do you see any visible damage? This could be a tear in the mesh, a dent, or a crack. Physical damage almost always requires professional repair or replacement. Cleaning will not fix a broken part.
Even tiny cracks can allow moisture and dirt inside. This leads to further internal issues. If you notice any physical damage, it is a clear sign. The problem is beyond a simple clean.
Contacting Apple Support
If your AirPods are still under warranty, contact Apple Support. Explain all the steps you have taken. Apple might offer a repair or replacement. They have diagnostic tools. These tools can tell if the problem is hardware-related.
Even if out of warranty, Apple offers repair services. They might charge a fee. However, a professional repair ensures proper work. It avoids further damage from DIY attempts. Always check your warranty status first.
Considering AirPod Replacement
If the repair cost is high, consider buying new AirPods. Especially if your AirPods are older models, a new pair offers improved technology. They might have better noise cancellation, longer battery life, or improved sound quality.
Compare the cost of repair versus new AirPods. Sometimes, a new purchase is more economical in the long run. This is a personal decision. It depends on your budget and how much you use your AirPods. This can be a more cost-effective option than trying to revive old, damaged ones.
Frequently Asked Questions (FAQs)
Q1: How often should I clean my AirPod microphone?
A1: The frequency depends on your usage and environment. If you use your AirPods daily or in dusty places, clean them weekly. For lighter use, cleaning every two to four weeks is usually sufficient. Regular, gentle wiping after each use is the best preventative measure. This stops dirt from building up.
Q2: Can I use rubbing alcohol instead of isopropyl alcohol?
A2: It is best to use 70% isopropyl alcohol. Rubbing alcohol can sometimes contain additives or higher water content. This could leave residue or cause slower evaporation. Isopropyl alcohol at 70% is widely recommended for electronics because it evaporates quickly and leaves no residue.
Q3: Will cleaning my AirPod microphone improve sound quality for music?
A3: Cleaning the microphone primarily improves the quality of your voice during calls or recordings. It does not directly impact the sound quality of music playback. Music playback relies on the speaker drivers. If your music sounds muffled, you might need to clean the speaker mesh.
Q4: Is it safe to use a vacuum cleaner to clean the microphone?
A4: No, do not use a vacuum cleaner. The suction power of a vacuum cleaner is too strong for delicate AirPod components. It can easily damage the microphone, speakers, or internal wiring. Stick to soft brushes and non-metallic tools. This ensures gentle and safe cleaning.
Q5: Can water damage permanently affect my AirPod microphone?
A5: Yes, significant water damage can permanently affect your AirPod microphone. Water can corrode internal components. It can also short-circuit the electronics. If your AirPods get wet, dry them thoroughly. If issues persist, the damage may be permanent.
Q6: What if my AirPods still sound muffled after cleaning and troubleshooting?
A6: If all cleaning and troubleshooting steps fail, the issue is likely hardware related. This means the microphone itself might be faulty or permanently damaged. In this situation, you should contact Apple Support for repair options. You may also consider replacing your AirPods if they are older.
Conclusion
Cleaning your AirPod microphone is a simple yet vital task. It helps maintain clear communication. It also extends the life of your beloved devices. We have covered the reasons for muffled sound and the essential tools needed. We walked through a detailed, step-by-step cleaning process. You now know how to tackle even stubborn dirt.
Remember, prevention is key. Regular wiping and proper storage keep your AirPods in top condition. If issues persist, remember the troubleshooting tips. You can confidently address most microphone problems yourself. Enjoy crystal-clear calls and never miss a word again. Keep your AirPods sounding clear!
- AirPod cleaning
- microphone cleaning
- audio quality
- tech maintenance
- Apple AirPods