· Electronics Maintenance · 20 min read
How To Clean Keyboard Without Removing Keys
Clean Your Keyboard Without Removing Keys: A Simple Guide
Have you ever looked at your computer keyboard and wondered what hidden grime lurks between the keys? Keyboards collect dust, crumbs, and oils every day. This buildup can make your keyboard look dirty and even affect its performance. It can also be a home for germs. You might think you need to pull off every key to clean it properly. But I am here to tell you that this is not true.
Cleaning your keyboard does not have to be a big chore. You can achieve a truly clean keyboard without removing keys. This guide will show you simple, effective methods. We will cover the best tools to use and easy steps to follow. You will learn how to handle dry dust and sticky spills. We will also share tips for keeping your keyboard clean in the future. Get ready to make your keyboard look new again and work better too.
Takeaway
Keeping your keyboard clean without disassembling it is easy.
- Use compressed air for loose debris.
- Wipe surfaces with microfiber cloths and gentle solutions.
- Use cleaning gels or brushes for deeper grime.
- Regular maintenance prevents buildup and prolongs keyboard life.
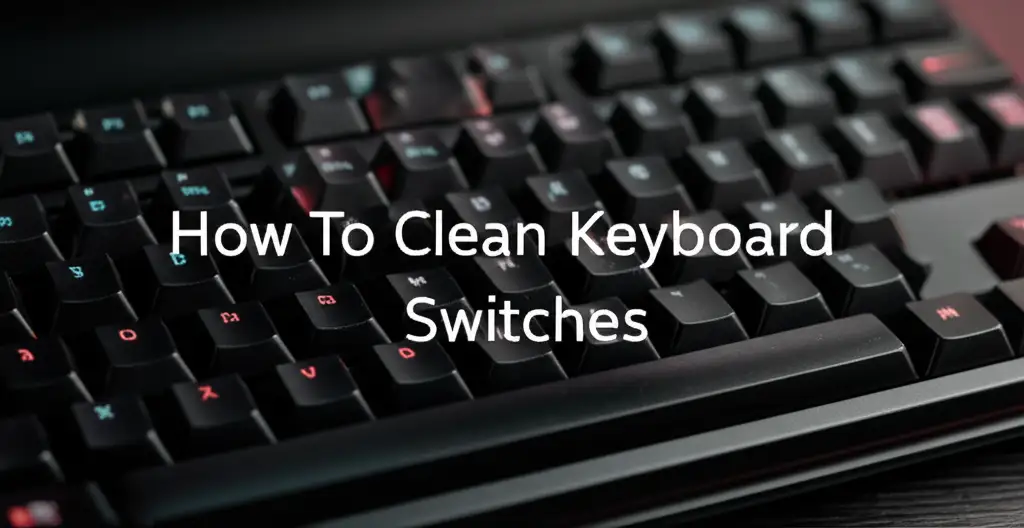
To clean a keyboard without removing keys, turn it off and upside down to shake out loose debris. Use compressed air to blow out dust and crumbs from between the keys. Wipe surfaces with a damp microfiber cloth and a mild cleaner like rubbing alcohol. Use a soft brush or cleaning gel for stubborn grime, ensuring no liquid enters the device.
Why Your Keyboard Needs Regular Cleaning
Your keyboard is one of the most used parts of your computer setup. Every time you type, small particles fall into the cracks. These particles include food crumbs, skin flakes, and dust. Over time, these things build up under and around the keys. This buildup can make keys feel sticky or unresponsive. It can also make your keyboard look very dirty.
A dirty keyboard is not just an eyesore. It is also a breeding ground for germs. Studies show keyboards can carry more bacteria than a toilet seat. This is why regular cleaning is important for your health. Cleaning your keyboard also helps it last longer. Dust and debris can damage internal components over time. Simple cleaning steps keep your device in good working order.
The Benefits of Cleaning Without Key Removal
Many people worry about damaging their keyboard when cleaning it. They think removing keys is too risky. It can be hard to put keys back correctly. Sometimes, keycaps can break during removal. This is why cleaning without removing keys is a great option. It saves time and reduces the risk of damage.
You can get excellent cleaning results without taking anything apart. This method is safer for your keyboard. It is also faster for you. I find it much more convenient to clean this way. You can easily fit it into your weekly cleaning routine. This approach keeps your keyboard hygienic and functional with minimal effort. You can also clean delicate parts like faucet aerators without removing them. This is similar to cleaning complex tech components carefully.
Essential Tools for Effortless Keyboard Cleaning
Before you start cleaning, gather the right tools. Having everything ready makes the process smooth and quick. You probably already have many of these items around your home. You do not need any special or expensive equipment to get your keyboard sparkling clean.
These tools are safe for electronics. They will help you remove dirt effectively. Using the correct tools prevents damage to your keyboard. It also makes cleaning more efficient.
Must-Have Cleaning Supplies
- Compressed Air: This is your best friend for removing loose debris. Compressed air comes in a can with a thin straw. The straw lets you aim the air right into tight spaces. It blows out dust and crumbs from under the keys. Always use compressed air in short bursts. Hold the can upright to prevent propellant from spraying out. This tool is key for getting rid of hidden particles.
- Microfiber Cloths: These cloths are very soft and absorbent. They are perfect for wiping surfaces. Microfiber cloths trap dust and dirt without scratching. You can use them dry or slightly damp. I always keep a few clean microfiber cloths handy for all my electronic cleaning needs.
- Isopropyl Alcohol (70%): This type of alcohol is safe for electronics. It evaporates quickly and leaves no residue. It is excellent for disinfecting and removing sticky grime. You can use it to dampen your microfiber cloth. Do not pour alcohol directly onto the keyboard.
- Soft Brush: A small, soft-bristled brush can help dislodge stubborn dirt. An old, clean paintbrush or a dedicated keyboard brush works well. You can gently sweep over and between keys. This helps lift out dust that compressed air might miss.
- Cleaning Slime or Gel: These gooey products are fun to use. They pick up dirt from crevices like magic. You press the gel onto the keyboard, and it molds to the shapes. When you pull it away, it takes the dirt with it. This is a great way to grab tiny particles.
These tools are simple but very effective. They will help you achieve a clean keyboard without any fuss. Knowing how to clean your keyboard without removing keys saves you time and worry. It also applies to other grimy spots, like learning how to clean vent covers without removing them.
Step-by-Step Guide: Basic Dry Cleaning for Keyboards
Dry cleaning is the first step in any keyboard cleaning routine. It focuses on removing loose dust and debris. This method is safe for all types of keyboards, including mechanical, membrane, and laptop keyboards. You should do this type of cleaning regularly. It prevents buildup and keeps your keyboard in good shape.
Always make sure your keyboard is turned off before you start. For wired keyboards, unplug them from your computer. For wireless keyboards, turn off the power switch or remove batteries. Safety is important when cleaning electronics.
Clearing Loose Debris Effectively
- Shake it Out: First, turn your keyboard upside down. Gently shake it over a trash can. This helps dislodge larger crumbs and debris. You will be surprised what falls out. Give it a few good taps to make sure everything loose comes free. This simple step makes the rest of the cleaning easier.
- Blast with Compressed Air: Take your can of compressed air. Attach the thin straw to the nozzle. Hold the can upright, about half an inch away from the keyboard. Use short, controlled bursts of air. Direct the air across the rows of keys. Move from one end to the other. Pay special attention to the gaps between keys. Angle the straw to get under the keycaps. This blows out dust and crumbs that are trapped deep inside. Avoid spraying for too long in one spot. This can cause moisture buildup.
- Brush it Off: After using compressed air, some stubborn particles might remain. Take your soft brush. Gently sweep the brush bristles over and between the keys. This helps to loosen any remaining stuck-on dust or hair. You can use a small vacuum cleaner with a brush attachment for this step. Make sure the vacuum has low suction to avoid damaging keys.
- Wipe the Surface: Finally, use a clean, dry microfiber cloth. Wipe down the entire surface of the keyboard. This removes any dust that has settled on the keycaps. It also cleans the keyboard frame. This basic dry cleaning method is quick and effective. It keeps your keyboard looking tidy day to day.
This approach ensures a thorough clean without risking damage. It is a simple, yet powerful way to maintain your device. It is much like how you might tackle cleaning a bathroom exhaust fan without removing it. You focus on accessible parts and use the right tools.
Tackling Sticky Situations: Wet Cleaning Methods
Sometimes, dry cleaning is not enough. Spills, greasy fingers, or sticky residues can leave stubborn marks on your keyboard. This is where wet cleaning methods come in handy. It is important to be careful with liquids when cleaning electronics. Always use a minimal amount of moisture. Avoid direct spraying onto the keyboard.
These methods help remove stickiness and disinfect surfaces. They make your keyboard look and feel much cleaner. They also kill germs that can accumulate on the keys. Always make sure your keyboard is unplugged and turned off before any wet cleaning.
Safe Liquid Cleaning Techniques
- Damp Microfiber Cloth with Isopropyl Alcohol: This is the most common and safest way to wet clean.
- Prepare the Cloth: Lightly dampen a clean microfiber cloth with 70% isopropyl alcohol. “Lightly dampen” means it should be moist, not dripping wet. You should not see any liquid running off the cloth.
- Wipe Keycaps: Gently wipe the top and sides of each keycap. Clean the spaces between the keys as much as possible. The alcohol helps break down oils and grime. It also disinfects the surface.
- Clean the Frame: Use the same cloth to wipe the keyboard’s frame and palm rest. This removes smudges and fingerprints.
- Dry Completely: Let the keyboard air dry completely before plugging it back in or turning it on. Alcohol evaporates quickly, but waiting a few minutes is important.
- Cotton Swabs for Tight Spots: For very stubborn grime in the crevices, cotton swabs are useful.
- Dampen Swab: Dip a cotton swab in 70% isopropyl alcohol. Squeeze out any excess liquid. The swab should be barely damp.
- Target Grime: Gently rub the swab around the edges of the keys. Focus on areas where dirt or stickiness has built up. You can also clean small gaps that the cloth cannot reach.
- Use New Swabs: Use a fresh cotton swab as needed to avoid spreading dirt.
- Keyboard Cleaning Wipes: You can buy pre-moistened cleaning wipes specifically for electronics. These wipes contain safe cleaning solutions. They are convenient for quick clean-ups. Always read the label to ensure they are safe for keyboards. These wipes are designed to leave no residue. They dry quickly.
Remember, less is more when using liquids on electronics. A small amount of moisture goes a long way. These wet cleaning methods ensure your keyboard is not only clean but also sanitized. This careful approach is similar to maintaining your window AC unit without removing it, focusing on accessible, safe cleaning.
Deep Cleaning Without Disassembly: Specialized Tools
Even after dry and wet cleaning, some stubborn dirt might remain. This is especially true for grime that has been pressed deep into the keyboard. Specialized tools can help you reach these hidden areas without needing to remove any keys. These tools are designed to grab or lift dirt from small spaces.
Using these tools can give your keyboard a truly deep clean. They are particularly useful for keyboards that have not been cleaned in a long time. They are also good for users who eat or drink around their keyboard often.
Advanced Cleaning Aids
- Cleaning Slime or Gel:
- How to Use: Take a chunk of the cleaning gel. Roll it into a ball. Gently press it onto the keyboard surface. Do not rub or spread it. Just press it down firmly so it molds into the gaps. Then, slowly peel it off. The gel will pick up dust, hair, and small crumbs. It works like a sticky trap.
- Benefits: Cleaning slime is excellent for picking up particles that compressed air misses. It is also good for getting dust off the sides of keycaps. It leaves no residue and is fun to use. Make sure to use a non-toxic, reputable brand.
- Detailing Brush or Soft Bristle Brushes:
- Purpose: These brushes have very fine, soft bristles. They are designed to get into tight spaces. You can use them to gently sweep along the edges of the keys. They dislodge stubborn dirt that is stuck in the crevices.
- Application: Brush in one direction to collect the dust. Then, use compressed air to blow away the dislodged particles. A clean, soft toothbrush can also work in a pinch.
- Vacuum Cleaner with Brush Attachment (Low Suction):
- Caution: This method needs care. Use a small handheld vacuum or a regular vacuum on its lowest suction setting. Make sure it has a soft brush attachment.
- Technique: Gently move the brush attachment over the keyboard. The suction will pull up loose debris. Do not press down hard. Avoid using high suction. High suction can pull off keycaps or damage internal components. This method is effective for drawing out dust from deeper areas.
- Blu-Tack or Poster Putty:
- Alternative Method: If you do not have cleaning gel, Blu-Tack or similar poster putty can be an alternative. Roll a piece into a string or ball. Press it onto the key gaps and pull it up. It will lift small bits of dirt. This is a good DIY solution for quick spot cleaning.
These specialized tools offer a deeper clean than basic methods. They ensure your keyboard is free from hidden grime. This keeps your device looking its best and performing well. Think of it like cleaning vertical blinds without removing them. You use the right tools to get into all the slats and keep them looking fresh.
Maintaining Keyboard Cleanliness: Prevention Tips
Cleaning your keyboard regularly is good, but prevention is even better. By adopting a few simple habits, you can greatly reduce the amount of dirt and grime that accumulates. This means less frequent deep cleaning and a consistently cleaner keyboard. Prevention also helps prolong the life of your keyboard. It keeps it hygienic and pleasant to use every day.
These tips are easy to incorporate into your daily routine. They require minimal effort but yield significant results. I follow these tips myself, and my keyboard stays much cleaner.
Simple Habits for a Cleaner Keyboard
- No Food or Drink Over the Keyboard: This is perhaps the most important rule. Eating or drinking near your keyboard is the main cause of crumbs, spills, and sticky residue. One accidental knock can lead to a sticky mess. Try to finish your meal or drink before sitting down at your computer. If you must have a drink, use a cup with a lid. Keep it away from the keyboard area.
- Wash Your Hands Regularly: Our hands pick up dirt, oils, and germs throughout the day. These can transfer directly to your keyboard keys. Washing your hands before using your computer can significantly reduce oil and grime buildup. This simple hygiene step benefits both your health and your keyboard’s cleanliness.
- Use a Keyboard Cover: A silicone keyboard cover is a cheap and effective barrier. It sits over your keys and protects them from spills, dust, and crumbs. These covers are usually transparent and do not interfere with typing. When the cover gets dirty, you can simply remove and wash it with soap and water. This is an excellent protective measure, especially for busy desks.
- Wipe Down Regularly: Do a quick wipe-down of your keyboard every few days. Use a dry microfiber cloth or a pre-moistened electronics wipe. This takes less than a minute. It removes surface dust and oils before they build up. Regular quick cleaning prevents the need for intensive deep cleaning.
- Keep Pets Away: Pet hair can be a major source of dust and debris. If you have furry friends, try to keep them off your desk. Their hair can easily get lodged under keys and cause issues. Regular grooming of your pets can also help reduce shedding around your workspace.
These preventive measures are small changes that make a big difference. They ensure your keyboard stays cleaner for longer. A clean keyboard means a healthier workspace and a more enjoyable computing experience. This proactive approach applies to many household items, like learning how to clean kitchen cabinets without removing their finish. You maintain surfaces carefully to avoid bigger cleaning jobs later.
Common Mistakes to Avoid When Cleaning Your Keyboard
Cleaning a keyboard without removing keys is straightforward, but it is still possible to make mistakes. Avoiding these common errors ensures you clean your keyboard effectively and safely. Improper cleaning can damage your device or leave it dirtier than before. Always prioritize the safety of your electronics.
Paying attention to these warnings will help you keep your keyboard in top condition. I have learned these lessons from experience. They help prevent costly repairs or replacements.
Pitfalls to Steer Clear Of
- Using Too Much Liquid: This is the most common and dangerous mistake. Never spray liquid directly onto your keyboard. Do not use cloths that are dripping wet. Excess liquid can seep under the keys and damage internal circuits. Always dampen cloths or cotton swabs very lightly. Squeeze out all excess moisture before wiping.
- Using Harsh Chemicals: Avoid cleaning agents like ammonia-based cleaners, bleach, or abrasive scrubs. These chemicals can strip protective coatings, fade keycap legends, or even melt plastic parts. Stick to 70% isopropyl alcohol or electronics-specific cleaners. They are safe and effective.
- Using Compressed Air Incorrectly: While compressed air is great, misuse can cause issues.
- Holding Can Sideways: Holding the can sideways or upside down can cause liquid propellant to spray out. This liquid can freeze components or leave residue. Always hold the can upright.
- Spraying Too Close or Too Long: Spraying too close or for too long can push dirt deeper into the keyboard. It can also create excessive pressure on sensitive components. Use short, controlled bursts from a safe distance.
- Brushing Too Roughly: While brushes are useful, do not scrub hard. Aggressive brushing can scratch keycaps or dislodge keys. Be gentle, letting the bristles do the work.
- Plugging in Before Completely Dry: Even if you use quick-drying solutions like alcohol, allow ample time for your keyboard to air dry. Plugging in a damp keyboard can cause short circuits. Wait at least 15-30 minutes after any wet cleaning. Ensure no moisture remains before reconnecting power.
- Ignoring Power Off: Always turn off and unplug your keyboard before cleaning. This prevents accidental key presses during cleaning. It also reduces the risk of electrical shock or damage from static electricity.
- Using Rough Materials: Do not use paper towels, tissues, or rough cloths. These materials can leave lint behind or scratch the keycaps. Always use soft, lint-free microfiber cloths.
By avoiding these mistakes, you can confidently clean your keyboard without any worries. Your keyboard will remain functional and clean for a long time. These principles of careful cleaning apply widely, for instance, when learning how to clean other electronics like a window AC unit without removing it.
When to Seek Professional Help or Consider Replacement
Most keyboard cleaning can be done at home with the methods described. However, there are times when your efforts might not be enough. Severe damage or deep-seated issues may require more than surface cleaning. Knowing when to stop and seek professional help or consider buying a new keyboard is important. This saves you time, frustration, and potential further damage.
Sometimes, a keyboard is beyond simple cleaning. Recognizing these situations helps you make the best decision. Do not risk damaging your computer or your keyboard further.
Signs It’s Time for More Than Home Cleaning
- Major Spills that Penetrate Deeply: If you spill a large amount of liquid, especially sugary drinks, cleaning without removing keys might not be enough. The liquid can get deep inside. It can cause sticky keys or permanent electrical damage. In such cases, professional disassembly and cleaning might be needed. Sometimes, it is beyond repair.
- Keys Not Functioning After Cleaning: If certain keys stop working or become unresponsive even after thorough cleaning, the problem might be mechanical or electrical. This is not something surface cleaning can fix. It could be a damaged key switch or circuit board.
- Persistent Odors: If your keyboard has a lingering bad smell even after cleaning, it means trapped organic matter or mold. This cannot always be removed without dismantling the device. These issues can also be a health concern.
- Visible Corrosion or Mold: If you see green or white corrosion, or visible mold growth under or around keys, it needs professional attention. These indicate significant moisture damage or hygiene issues. Trying to clean this yourself might spread spores or worsen corrosion.
- Physical Damage: If keys are broken, warped, or if the keyboard frame is cracked, cleaning will not solve these issues. These problems usually require parts replacement or a new keyboard.
- Old or Very Cheap Keyboards: For very old keyboards, or those that were inexpensive, the cost of professional repair might exceed the cost of a new one. In these cases, it often makes more financial sense to replace the keyboard.
A healthy keyboard contributes to a healthy workflow. While I love cleaning things myself, sometimes, it is best to know your limits. Consider the value of your time and the cost of the keyboard. Making the right decision can save you hassle in the long run.
FAQ Section
Q1: Is it safe to use water to clean my keyboard?
No, it is not safe to use plain water, especially in large amounts. Water can cause short circuits and damage internal electronics. Always use a solution like 70% isopropyl alcohol. Apply it to a cloth, not directly onto the keyboard. Alcohol evaporates quickly and leaves no residue.
Q2: How often should I clean my keyboard without removing keys?
For basic dry cleaning with compressed air and a wipe, aim for once a week or every two weeks. If you eat or drink near your keyboard often, clean it more frequently. For a deeper wet clean, once a month is usually enough to keep it hygienic and free from sticky buildup.
Q3: Can I use household cleaning wipes on my keyboard?
Avoid most household cleaning wipes. Many contain harsh chemicals like bleach or ammonia, which can damage keyboard finishes or keycap legends. Instead, use wipes specifically designed for electronics. These wipes contain safe, gentle solutions and are lint-free.
Q4: Will compressed air push dirt deeper into the keyboard?
If used incorrectly, compressed air can push dirt deeper. To avoid this, use short, controlled bursts. Angle the straw so the air blows dirt out, not in. Hold the can upright. This prevents propellant liquid from spraying, which could cause further issues.
Q5: What if my keys feel sticky after cleaning?
If keys remain sticky after cleaning, it means some residue is still present. Try using a cotton swab lightly dampened with 70% isopropyl alcohol. Focus on the edges of the sticky keycaps and the gaps around them. Gently rub to dissolve the stickiness. Let it dry completely.
Q6: Can cleaning my keyboard improve its performance?
Yes, cleaning can improve keyboard performance. Removing dust and debris prevents keys from sticking or becoming unresponsive. It can also help reduce the chance of internal components overheating due to dust buildup. A clean keyboard works more smoothly and reliably.
Conclusion
Cleaning your keyboard without removing keys is a practical and effective way to maintain your device. You can keep your keyboard hygienic, functional, and looking great. We explored simple dry cleaning steps using compressed air and brushes. We also covered safe wet cleaning with isopropyl alcohol and microfiber cloths. These methods tackle everything from everyday dust to sticky spills.
Remember to follow prevention tips like avoiding food over your keyboard. Also, use the right tools and avoid common cleaning mistakes. Regular cleaning not only improves your keyboard’s appearance but also extends its lifespan. It contributes to a healthier workspace for you. My aim is to make device care easy and stress-free. By following these steps, you will enjoy a cleaner, more pleasant typing experience. Start cleaning your keyboard today.
- keyboard cleaning
- computer hygiene
- tech maintenance
- dust removal

