· ATV Maintenance · 17 min read
How To Clean Atv Air Filter

Optimize Your Ride: How To Clean Your ATV Air Filter
Your ATV gives you freedom to explore challenging terrains. It performs best when all its parts work correctly. A critical component is the air filter. This small part protects your engine from dust and debris. Learning how to clean your ATV air filter properly improves your vehicle’s performance. It also extends engine life. This guide provides a complete method to keep your ATV running strong.
Takeaway
Keeping your ATV’s air filter clean is crucial for engine health and performance.
- Regularly inspect your air filter, especially after dusty rides.
- Use the correct cleaning solutions and re-oiling products for your filter type.
- Allow the filter to dry completely before re-oiling and reinstallation.
- Always check for damage and replace the filter if necessary.
- A clean filter ensures your ATV breathes easily, delivering peak power and efficiency.
Main Query Answer
To clean an ATV air filter, first remove it from the vehicle. Then, wash it with a specialized filter cleaner or mild detergent. Rinse thoroughly and allow it to air dry completely. Finally, re-oil foam filters with specific air filter oil before reinstalling. This ensures your engine gets clean air, promoting optimal performance.
Why Clean Your ATV Air Filter? Boost Performance
Maintaining your ATV’s air filter is not just a chore. It is a vital step for vehicle health. A clean air filter allows your engine to breathe. It ensures proper airflow for combustion. This directly impacts your ATV’s power and fuel efficiency.
Dirt and dust are enemies of your ATV engine. Your air filter catches these particles. It prevents them from entering the engine. Over time, the filter becomes clogged. This restricts airflow. A restricted airflow means your engine works harder. It produces less power. Fuel consumption also increases.
Ignoring a dirty air filter can lead to serious engine damage. Small particles can bypass a saturated filter. These particles cause wear and tear on internal engine parts. This reduces the lifespan of your ATV. Regular cleaning prevents these issues. It keeps your off-road adventures smooth and powerful.
Consider your ATV’s engine like a runner. If the runner cannot breathe, performance suffers. A clean air filter ensures your ATV’s engine gets clean air. This allows it to perform at its best. It helps you avoid costly repairs. It also gives you a more enjoyable ride.
Types of ATV Air Filters and Their Cleaning Needs
ATVs use different types of air filters. Knowing your filter type helps you clean it correctly. The most common types are foam, paper, and gauze (K&N style). Each material requires a specific cleaning approach. Using the wrong method can damage the filter.
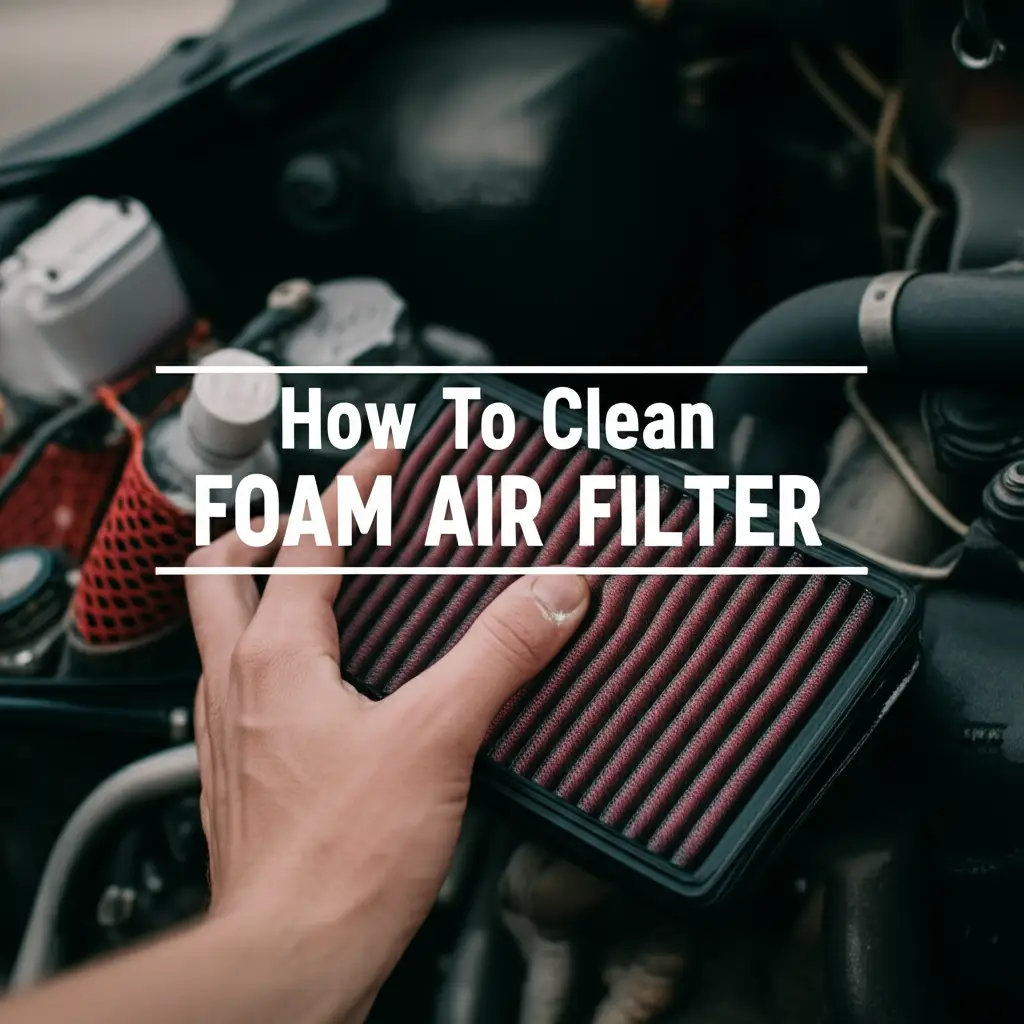
Foam Air Filters
Foam filters are common in off-road vehicles like ATVs. They offer excellent filtration in dusty conditions. They consist of one or more layers of foam. These layers trap dirt effectively. Foam filters are designed to be washable and re-usable.
Cleaning a foam air filter involves a special cleaning solution. You need to wash out dirt and old oil. Then, you rinse it clean. After drying, you must re-oil the filter. This oil helps trap fine dust particles. Learning how to clean foam air filters is essential for ATV owners. This process ensures the filter maintains its effectiveness.
Paper Air Filters
Paper filters often resemble pleated paper. They are typically found in more casual ATVs or utility vehicles. These filters are not designed for washing. Water can damage the paper elements. This makes the filter ineffective.
When a paper filter gets dirty, you usually replace it. Some people try to clean them lightly with compressed air. However, this risks tearing the paper. Even if intact, microscopic pores can become enlarged. This reduces filtration efficiency. Replacement is the safest option for paper filters.
Gauze Air Filters (K&N Style)
Gauze filters, like K&N filters, use layers of cotton gauze. They are typically oiled. These filters offer high airflow and good filtration. They are also reusable. They last a very long time if maintained properly.
Cleaning gauze filters is similar to foam filters. You use a specific cleaning solution to remove dirt and old oil. After rinsing and drying, you re-oil them with a special gauze filter oil. This process restores their filtration capabilities. Always follow the manufacturer’s instructions for these filters.
Knowing your filter type prevents damage. It also ensures optimal engine protection. Choose the right cleaning method for your ATV’s air filter. This maintains its effectiveness.
Essential Tools to Clean Your ATV Air Filter
Before you start cleaning your ATV air filter, gather all necessary tools. Having everything ready saves time. It makes the cleaning process smoother. You do not want to stop halfway through because you miss something. The right tools ensure a thorough and safe cleaning job.
Here is a list of what you will need:
- ATV Manual: Your owner’s manual shows specific filter location. It also provides removal instructions. It may suggest specific cleaning products. Always check your manual first.
- Wrench or Screwdriver Set: You will need these to remove bolts or clamps. These fasteners secure the air filter housing. Different ATVs use different fastener types.
- Gloves: Disposable or reusable gloves protect your hands. Air filter oil and cleaning solutions can be messy. They can also irritate skin.
- Cleaning Solution:
- For Foam and Gauze Filters: Use a specialized air filter cleaner or a mild degreaser. Dish soap can work in a pinch for foam, but dedicated cleaners are better. They break down filter oil and dirt effectively.
- For Paper Filters (if attempting light cleaning): A soft brush or compressed air is all you might use. Avoid water or liquid cleaners.
- Large Buckets or Tubs: You will need these for washing and rinsing the filter. Two buckets are ideal. One for the cleaning solution, one for fresh rinse water.
- Clean Rags or Shop Towels: These are useful for wiping away excess oil or dirt. They also help clean the airbox area.
- Air Filter Oil (for Foam and Gauze Filters): This is crucial. It traps fine dust particles. Do not use motor oil. Use oil specifically designed for air filters. It comes in spray or squeeze bottles.
- Paper Towels: For blotting and cleanup.
- Warm Water Source: For rinsing the filter.
- A Well-Ventilated Area: Air filter cleaning solutions can have fumes. Work outdoors or in a garage with good ventilation.
- Plastic Bag: This is for kneading oil into foam filters. It keeps your hands cleaner.
Having these items on hand makes the cleaning process efficient. It prepares you for success. For similar maintenance tasks, cleaning the air filter on a lawn mower also requires specific tools and attention to filter type. Proper preparation ensures you do the job right the first time.
Step-by-Step: Cleaning Your ATV Air Filter Properly
Cleaning your ATV air filter is a straightforward process. Following these steps ensures you clean it effectively. It also prevents damage. This comprehensive guide will help you get it done right.
Step 1: Remove the Air Filter
First, locate your ATV’s air filter housing. It is usually under the seat or in the front of the vehicle. Consult your ATV manual if you are unsure. Open the airbox cover. You might need a screwdriver or wrench. Carefully unclip or unbolt the filter. Pull the filter out gently. Avoid shaking dirt into the engine intake.
Once the dirty filter is out, immediately cover the airbox opening. Use a clean rag or a plastic bag. This prevents dirt and debris from entering the engine. The engine is vulnerable without its filter. Keep the area around the airbox clean.
Step 2: Clean the Airbox
Before cleaning the filter itself, clean the airbox. This area can accumulate dirt and dust. Use a clean rag to wipe down the inside of the airbox. Remove any loose debris. Avoid using water inside the airbox. You do not want water reaching the engine. A small brush can help with stubborn dirt. A clean airbox means your freshly cleaned filter will not get dirty immediately.
Step 3: Clean the Air Filter
The cleaning method depends on your filter type.
For Foam Air Filters:
- Initial De-dusting: Gently tap the filter against a hard surface. This removes loose dirt. Do this outdoors.
- Apply Cleaner: Place the filter in a bucket or tub. Apply a specialized foam air filter cleaner generously. You can also use a mild degreaser or dish soap. Work the cleaner into the foam by gently squeezing and kneading. Ensure the cleaner reaches all parts of the filter.
- Soak: Let the filter soak for the time specified by the cleaner. This allows the cleaner to break down old oil and dirt.
- Rinse Thoroughly: Rinse the filter under warm, running water. Squeeze the filter repeatedly until the water runs clear. Make sure all soap and cleaner are gone. No suds should remain.
- Inspect: Hold the wet filter up to a light. Check for any remaining dirt or damage. If still dirty, repeat the cleaning process. If damaged, replace it.
For Gauze (K&N) Air Filters:
- Apply Cleaner: Use a specific K&N filter cleaning solution. Spray it evenly on both sides of the filter.
- Soak: Allow the cleaner to soak for 10-15 minutes. Do not let it dry on the filter.
- Rinse Gently: Rinse the filter from the clean side out. Use low-pressure water. This pushes dirt out. Continue rinsing until water runs clear.
- Inspect: Check for cleanliness and damage. Repeat if needed.
For Paper Air Filters:
- Tap Gently: Tap the filter gently against a flat surface. This removes loose dust.
- Compressed Air (Optional): You can use low-pressure compressed air. Blow from the clean side (inside) out. Hold the nozzle at least 6 inches away. Do not use high pressure. This can damage the paper element.
- Inspect and Replace: Paper filters are generally not washable. If it still looks dirty or damaged, replace it.
Drying and Oiling Your ATV Air Filter for Protection
After cleaning, the drying and oiling steps are critical. Improper drying or incorrect oiling can severely reduce the filter’s effectiveness. It can even lead to engine damage. Take your time with these final stages.
Step 1: Drying the Air Filter Completely
This step is crucial. The filter must be completely dry before you re-oil it. Any moisture trapped in the foam or gauze will prevent the oil from adhering properly. It can also lead to mold growth. Mold can restrict airflow and introduce harmful spores into your engine.
- Air Dry: The best method is natural air drying. Place the filter in a clean, well-ventilated area. Keep it away from direct sunlight or heat sources. High heat can warp or damage the filter material.
- Time: Allow several hours, or even overnight, for complete drying. Foam filters can hold a lot of moisture. Patience is key here.
- Do Not Use Heat: Avoid using heat guns, hair dryers, or clothes dryers. These methods can damage the filter’s material. They can melt foam or cause gauze layers to separate.
- Lightly Blot: You can gently blot excess water with a clean shop towel or paper towels. Do not wring or twist foam filters too aggressively. This can tear the material.
Once the filter looks dry, feel it. It should be dry to the touch, with no damp spots. It should also feel light, as water adds weight.
Step 2: Oiling the Air Filter (For Foam and Gauze Filters)
Oiling is what makes your foam or gauze filter trap fine dirt particles. Do not skip this step. Use an air filter oil specifically designed for your filter type.
For Foam Air Filters:
- Apply Oil: Pour a small amount of foam filter oil onto the filter. You can also spray it if using a spray-on oil.
- Distribute Evenly: Place the oiled filter inside a large plastic bag. Knead the filter inside the bag. This distributes the oil evenly throughout the foam. Squeeze and work the oil into every fiber. The filter should be uniformly coated. It should be a consistent color from the oil. It should feel slightly tacky. Avoid over-oiling, as this can restrict airflow.
- Remove Excess: Gently squeeze out any excess oil. The goal is a uniform, tacky coating, not dripping wet.
- Inspect: Hold the filter up to a light. Check for any dry spots. If you see any, apply more oil and knead again.
For Gauze (K&N) Air Filters:
- Apply Oil: Use the specific K&N air filter oil that comes in a squeeze bottle or spray. Apply a thin, even bead of oil along each pleat. Do this on the clean side of the filter.
- Wait: Allow the oil to wick into the gauze for about 20 minutes. The oil will spread.
- Check for Coverage: Inspect the filter. The oil should be a consistent color throughout. If you see any white or lighter spots, apply a small amount of oil to those areas. Reapply as needed. Do not over-oil. Over-oiling can lead to oil blow-back into your throttle body.
Proper drying and careful oiling are the final crucial steps. They ensure your ATV air filter performs its job. This protection safeguards your engine from dirt and debris.
Avoid Common Mistakes When Cleaning ATV Air Filters
Cleaning your ATV air filter seems simple. However, common mistakes can harm your filter. These errors can also damage your engine. Knowing what to avoid saves you time and money. It also protects your ATV’s vital components.
Using the Wrong Cleaning Products
Never use gasoline, harsh solvents, or laundry detergent to clean foam or gauze filters. Gasoline degrades filter foam. It can also dry out or damage gauze fibers. Harsh solvents strip away essential components in the filter material. Laundry detergents often leave residues that attract dirt. Stick to specific air filter cleaners or mild dish soap for foam. Always use manufacturer-recommended products for gauze filters.
Improper Drying
Rushing the drying process is a big mistake. A damp filter will not allow oil to adhere correctly. This creates dry spots. These dry spots let dirt pass through. Using heat sources like hair dryers can melt foam. They can also damage the filter’s structure. Always air-dry the filter completely. Give it plenty of time.
Over-Oiling or Under-Oiling
Both over-oiling and under-oiling are detrimental.
- Over-oiling can restrict airflow. This chokes your engine. It reduces performance and fuel efficiency. Excess oil can also get drawn into the engine. This gums up the throttle body or sensors.
- Under-oiling means the filter will not trap fine dust. This allows abrasive particles into your engine. These particles cause premature wear. Always apply a thin, even coat. Ensure complete saturation without drips.
Using Compressed Air Incorrectly on Paper Filters
Paper filters are delicate. Blowing high-pressure compressed air directly at them can tear the paper. It can also enlarge the filter’s pores. Even if not visible, this damage reduces filtration. If you use compressed air, use low pressure. Blow from the clean side out. Keep the nozzle far from the filter. Often, just tapping a paper filter is best. Replace it if it is very dirty.
Not Inspecting for Damage
Always inspect your filter after cleaning. Look for tears, holes, or deteriorated foam/gauze. Even a small hole allows unfiltered air into the engine. If you find any damage, replace the filter immediately. A damaged filter offers no protection. It puts your engine at high risk.
By avoiding these common mistakes, you ensure your ATV air filter remains effective. You protect your engine. You also maximize your ATV’s performance and lifespan.
When to Clean or Replace Your ATV Air Filter
Knowing when to clean or replace your ATV air filter is key. It helps maintain engine health. The frequency depends on several factors. These include your riding conditions and the type of filter you use. Regular checks are always a good practice.
Factors Affecting Cleaning Frequency
- Riding Conditions: This is the biggest factor.
- Dusty/Dry Conditions: If you ride in very dusty, dry environments, clean your filter often. This could be after every few rides, or even after a single very dusty ride.
- Wet/Muddy Conditions: Mud and water can also clog filters quickly. Clean after muddy rides.
- Clean Conditions: If you ride on paved roads or in very clean areas, you can clean less often. Perhaps every 20-30 hours of riding.
- Filter Type:
- Foam/Gauze: These are reusable. Clean them regularly.
- Paper: These are generally disposable. Replace them when they are dirty.
- Engine Performance: A noticeable drop in engine power indicates a dirty filter. If your ATV feels sluggish or uses more fuel, check the filter.
Signs You Need to Clean or Replace Your Filter
Your ATV often shows signs of a dirty air filter. Pay attention to these warnings:
- Visible Dirt: The most obvious sign. If your filter looks caked with dirt, dust, or mud, it needs attention.
- Reduced Engine Power: The engine struggles to get enough air. This leads to less horsepower. Your ATV might not accelerate as quickly.
- Decreased Fuel Efficiency: A dirty filter makes the engine work harder. This uses more fuel. You will notice more frequent fill-ups.
- Rough Idling or Stalling: An engine starved for air might idle unevenly. It might even stall.
- Black Smoke from Exhaust: This can indicate a rich fuel mixture. The engine gets too much fuel and not enough air. A clogged air filter is a common cause.
- Unusual Engine Noises: You might hear whistling or sucking sounds. These indicate restricted airflow.
When to Replace Your Filter
Cleaning can extend the life of reusable filters. However, they do not last forever.
- Damage: If you find any tears, holes, or deterioration in the foam or gauze, replace the filter immediately. Even small damage compromises protection.
- Loss of Elasticity (Foam): Foam filters can become brittle or lose their flexibility over time. They will not trap dirt as effectively.
- Permanent Stains/Discoloration: If, after thorough cleaning, the filter remains discolored or stained, it might be time for a new one. Some dirt can become embedded permanently.
- Manufacturer Recommendations: Always check your ATV manual. Manufacturers often suggest replacement intervals.
A proactive approach to air filter maintenance keeps your ATV running efficiently. It ensures a long life for your engine.
Frequently Asked Questions About Cleaning ATV Air Filters
How often should I clean my ATV air filter?
The cleaning frequency depends on your riding conditions. If you ride in very dusty, dirty environments, clean it after every 1-2 rides. For less extreme conditions, every 10-20 hours of riding is a good guideline. Always inspect the filter regularly for visible dirt build-up.
Can I use dish soap to clean my ATV foam air filter?
Yes, you can use mild dish soap for foam air filters as an alternative to specialized cleaners. However, ensure it is completely rinsed out. Dedicated foam air filter cleaners are formulated to break down filter oil and dirt more effectively, and they rinse cleaner. Avoid using harsh household detergents.
What kind of oil should I use for my ATV air filter?
Always use air filter oil specifically designed for ATV or motorcycle air filters. These oils are formulated to be very sticky and trap fine dust particles. Do not use motor oil or other lubricants. Different filter types (foam vs. gauze) may require different specific air filter oils.
How do I know if my ATV air filter is damaged?
After cleaning, hold the filter up to a bright light. Look for any tears, holes, or thin spots in the material. For foam filters, check for brittleness or a loss of elasticity. Any damage means the filter cannot protect your engine. Replace it immediately if you find any flaws.
Can I clean a paper ATV air filter?
Paper ATV air filters are generally not designed for cleaning with liquids. Washing them can damage the paper elements and reduce filtration efficiency. You can gently tap them to remove loose debris or use low-pressure compressed air from the clean side out. If a paper filter is very dirty, replacement is the best option.
What happens if I don’t clean my ATV air filter?
If you do not clean your ATV air filter, it will clog with dirt and debris. This restricts airflow to the engine. Your ATV will experience reduced power, decreased fuel efficiency, and may run rough. More seriously, dirt can bypass a clogged filter and cause significant, costly damage to engine components.
Conclusion
Cleaning your ATV air filter is a simple task with big rewards. It safeguards your engine. It ensures your ATV performs at its best. We covered why a clean filter is vital, the different types of filters, and the tools you need. You now have a clear, step-by-step guide for cleaning and re-oiling your filter. We also discussed common mistakes to avoid. Finally, you understand when to clean or replace this critical component.
Regular maintenance extends your ATV’s life. It keeps you on the trails enjoying the ride. Make cleaning your ATV air filter a consistent part of your maintenance routine. A little effort now prevents major issues later. Keep your engine breathing easy. Get out there and enjoy the adventure!
- ATV air filter cleaning
- ATV maintenance
- Off-road vehicle care
- Air filter maintenance
- Cleaning guide
- Performance tips