· Maintenance · 21 min read
How To Clean Foam Air Filter
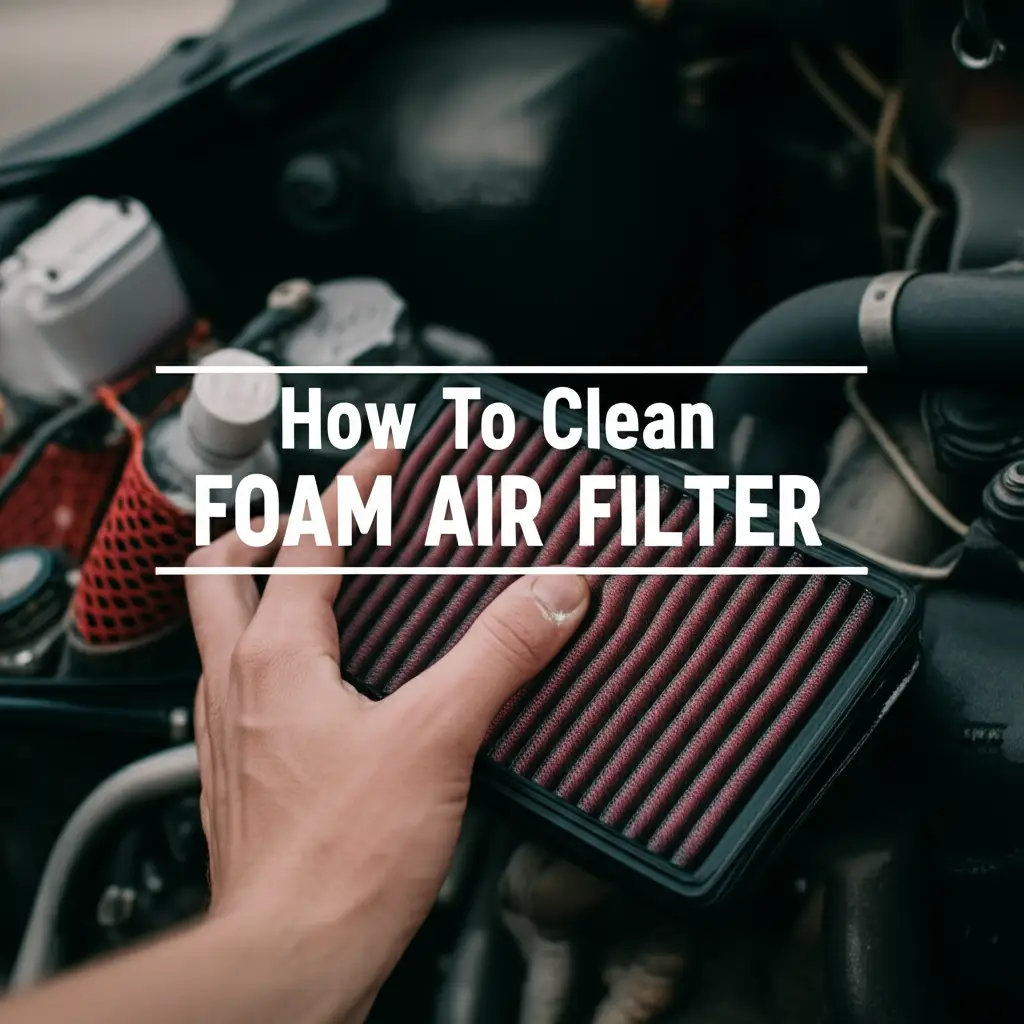
Clean Foam Air Filter: A Simple Guide
Is your engine struggling? Does your air purifier seem less effective? The answer might sit right in your air filter. Learning how to clean foam air filter components is a simple yet impactful skill. This maintenance task improves equipment performance. It also saves you money on frequent replacements.
Foam air filters are common in many machines. You find them in motorcycles, lawn mowers, and even some HVAC systems. They trap dust and debris, stopping them from entering vital parts. A dirty filter restricts airflow, forcing your equipment to work harder. This guide will walk you through the proper steps. We will cover various foam filter types. You will learn the correct tools and methods for effective cleaning. Let us keep your machines running smoothly.
Takeaway
- Improve Performance: A clean foam air filter ensures optimal airflow. This leads to better engine efficiency and overall machine performance.
- Extend Lifespan: Regular cleaning prevents dust and debris from reaching sensitive components. This protects your engine or system from premature wear.
- Save Money: Cleaning a reusable foam filter costs less than frequently buying new replacements. It is a cost-effective maintenance practice.
- Proper Drying is Key: Always ensure the filter is completely dry before reinstallation. Moisture can cause damage or reduce filtering effectiveness.
- Use Correct Cleaners: Select cleaners specific to foam air filters or mild detergents. Avoid harsh chemicals like gasoline, which can degrade the foam.
To clean a foam air filter, first remove it from the equipment. Use a specialized foam filter cleaner or mild detergent with warm water. Gently squeeze out dirt, rinse thoroughly, and allow it to air dry completely. For engine filters, re-oil if specified before reinstallation.
Why Clean Your Foam Air Filter? Unveiling the Benefits
Cleaning your foam air filter offers many benefits. It protects your equipment. It also boosts performance and saves money. Many people overlook this simple task. Yet, it directly impacts how well your machine runs. Understanding these advantages motivates regular maintenance.
A dirty filter chokes off airflow. This forces your engine or system to work harder. Imagine trying to breathe through a thick, dusty cloth. Your lungs would strain. Your engine feels the same. A clean filter allows air to flow freely. This means your equipment gets the air it needs. It runs efficiently and effectively.
Boosting Engine Performance and Fuel Efficiency
A clean foam air filter ensures a steady supply of clean air. Engines need air for combustion. If airflow is restricted, the engine does not get enough oxygen. This leads to incomplete combustion. The engine loses power. It also uses more fuel to do the same job. This reduces fuel efficiency.
Regular cleaning helps your engine breathe easy. It restores optimal airflow. This allows the engine to burn fuel more completely. You will notice better acceleration and consistent power. Your fuel tank will last longer between fill-ups. This saves you money over time.
Extending Equipment Lifespan
Dust and dirt are abrasive. When they get past a dirty filter, they enter the engine. These particles cause wear and tear on internal components. They can scratch cylinder walls or clog carburetor jets. This leads to costly repairs or premature engine failure.
A clean foam filter is a strong barrier. It captures harmful particles effectively. This keeps them out of your engine’s delicate parts. Protecting these components extends the overall lifespan of your machine. Regular cleaning is an investment in your equipment’s future. It keeps it running longer and more reliably.
Cost Savings and Environmental Benefits
Replacing air filters adds up over time. Many foam filters are reusable. Cleaning them instead of replacing them saves money. A single filter can last for years with proper care. This reduces your ongoing maintenance costs significantly.
There are also environmental benefits. Less waste goes into landfills when you clean and reuse filters. Manufacturing new filters uses resources and energy. Choosing to clean reduces your environmental footprint. You help the planet while helping your wallet. Maintaining your filters is a smart choice for everyone.
Essential Tools and Cleaning Solutions for Foam Filters
Cleaning your foam air filter requires the right tools and cleaning solutions. Using incorrect products can damage the foam. This makes the filter ineffective. It might even harm your equipment. Knowing what to use is vital for a successful cleaning.
Gather your supplies before you start. This makes the process smooth and efficient. You will need a few common items. Some items are specific to foam filter cleaning. Having everything ready prevents interruptions. It ensures a thorough job.
Necessary Tools for the Job
You will need a few basic tools for most foam filter cleaning tasks. These ensure safety and ease. Always wear protective gloves. This protects your hands from cleaning solutions and dirt. A few buckets are also very helpful. One bucket can hold the dirty cleaning solution. Another can hold clean rinse water.
You will also need absorbent towels or shop rags. These help blot excess water. They prepare the filter for drying. A soft brush, like an old toothbrush, can assist with stubborn dirt. However, be gentle. You do not want to damage the foam material. Ensure you have a clean, well-ventilated area for the process. This helps with drying.
Choosing the Right Cleaning Solutions
The most important choice is your cleaning solution. Never use gasoline or harsh solvents. These will degrade the foam material. They make it brittle and ineffective. Use products designed specifically for foam air filters. These are often called “foam filter cleaner.” They are formulated to break down dirt and oil safely.
If a specialized cleaner is unavailable, a mild household detergent can work. Dish soap is often a good option. Choose one that is free of strong dyes or perfumes. These can sometimes leave residues. Dilute the detergent with warm water. Create a soapy solution that is gentle yet effective. For re-oiling engine foam filters, you will need foam filter oil. This is a sticky, specially formulated oil. It helps trap fine dust particles. Do not use motor oil. Motor oil is too thin and will not work correctly.
Preparing Your Workspace
Before you begin cleaning, set up your workspace. Choose an area that can get wet and dirty. A utility sink or an outdoor space works well. Lay down old newspapers or a drop cloth. This protects surfaces from drips and spills. Have your buckets ready. Fill one with your chosen cleaning solution. Fill another with clean, warm water for rinsing.
Ensure good ventilation if you are working indoors. Some cleaning solutions have fumes. Proper airflow is important for your safety. Have your drying area ready too. This might be a clothesline or a clean surface where the filter can air dry undisturbed. A prepared workspace makes the cleaning process much easier and safer.
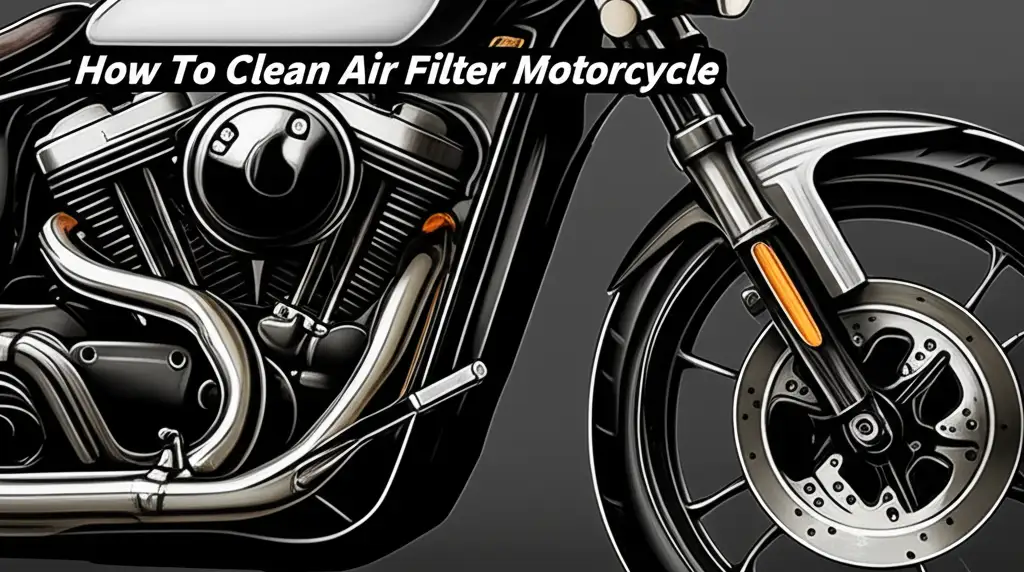
Step-by-Step Guide: Cleaning a Motorcycle Foam Air Filter
Cleaning a motorcycle foam air filter is a crucial maintenance task. It ensures your bike’s engine gets clean air. This leads to better performance and longevity. The process involves several steps. Each step must be done correctly for the best results. I will guide you through each part of the process.
Motorcycle foam air filters often use oil. This oil helps trap very fine dust particles. Cleaning these filters removes old, dirty oil and trapped debris. Then, fresh oil is applied. This keeps your engine protected.
Removing the Filter Safely
First, locate your motorcycle’s airbox. It is usually under the seat or side panel. You might need to remove a few screws or clips. Carefully take out the foam air filter. Note its orientation before removal. This helps with proper reinstallation. Some filters have a cage or frame. Separate the foam from this frame if possible. Be gentle. You do not want to tear the foam.
Once removed, inspect the filter. It will likely be coated in dirt and grime. This shows it is doing its job. Shake off any large, loose debris over a trash can. This makes the initial cleaning easier. Have your cleaning supplies ready nearby.
The Cleaning Process
Now, it is time to clean the foam. I prefer to use a specialized foam filter cleaner. These products dissolve dirt and oil efficiently. Apply the cleaner liberally to the foam. Work it into the material. You can gently massage the foam to help the cleaner penetrate. Alternatively, soak the filter in a bucket with the cleaner.
After letting it soak for a few minutes, gently squeeze the foam. Do not twist or wring it vigorously. This can tear the material. Squeeze out the dirty solution. Repeat this process until the filter looks clean. The liquid should run clear when you squeeze it. Rinse the filter thoroughly under warm, running water. Keep squeezing and rinsing until no soap or cleaner remains. The water should be perfectly clear.
Drying and Oiling the Filter
Drying is a critical step. An improperly dried filter can grow mold or restrict airflow. Squeeze out as much water as possible. Again, do not twist. Then, gently blot the filter with a clean towel. Let the filter air dry completely in a clean, dust-free area. Do not use heat, like a hairdryer. Heat can damage the foam. Patience is key here. It might take several hours or even overnight.
Once dry, it is time to re-oil. Use a specific foam air filter oil. Pour a small amount into a plastic bag with the filter. Knead the filter to distribute the oil evenly. The entire surface of the foam should be coated. The oil should be tacky but not dripping. Too much oil can restrict airflow. Too little oil will not trap fine dust. A good indicator is a uniform color across the foam.
Reinstallation for Optimal Performance
Finally, reinstall the cleaned and oiled foam filter. If you separated it from a cage, put it back together correctly. Insert the filter into the airbox. Make sure it seats properly. It should fit snugly. Ensure no gaps exist around the edges. Gaps allow unfiltered air into the engine.
Secure the airbox cover or side panel. Tighten any screws or clips you removed. Double-check everything is fastened securely. Your motorcycle is now ready to run with a clean, protected engine. This simple cleaning process maintains performance and extends your bike’s life. Following these steps ensures your ride stays smooth and powerful.
Cleaning Foam Air Filters in Lawn Mowers and Small Engines
Foam air filters are common in lawn mowers and other small engines. These include generators, tillers, and pressure washers. Keeping these filters clean is essential. It ensures your equipment starts easily and runs reliably. A dirty filter can cause rough idling or power loss. I will show you how to maintain these vital components.
Unlike motorcycle filters, many small engine foam filters do not require oiling. They function as dry filters or pre-filters. Always check your equipment’s manual. It will specify if your foam filter needs oil. Knowing the type helps with proper cleaning. Maintaining these filters extends the life of your valuable outdoor power equipment.
Understanding Your Small Engine’s Foam Filter
Small engine foam filters vary in design. Some are simple foam sleeves that fit over a paper filter. These act as pre-filters. They catch larger debris. Other small engines use only a foam element. This acts as the primary air filter. Identify your specific filter type before you begin. The cleaning method depends on this.
Pre-filters are often easier to clean. They typically get less saturated with fine dust. Primary foam filters require more thorough cleaning. They are directly responsible for filtering all incoming air. My experience suggests that understanding your filter’s role makes cleaning more effective.
Cleaning a Dry Foam Air Filter
Many lawn mower foam filters are dry type. They do not use oil. To clean these, first remove the filter from its housing. Tap it gently against a hard surface. This knocks out loose dirt and grass clippings. Use compressed air if you have it. Blow air from the inside out. This pushes trapped particles away from the foam. Keep the nozzle a few inches away to avoid damaging the foam.
If the filter is very dirty, wash it. Use warm water and a mild detergent like dish soap. Gently massage the foam. Squeeze out the dirty water. Rinse thoroughly under clean water until the water runs clear. Do not wring or twist. After washing, squeeze out excess water. Allow the filter to air dry completely. It must be bone dry before reinstallation. Moisture can promote mold or attract more dirt.
Cleaning an Oil-Wetted Foam Air Filter (If Applicable)
Some small engine foam filters, especially on older models or specific brands, might be oil-wetted. Consult your manual to confirm. If your filter uses oil, the cleaning process is similar to motorcycle filters. Remove the filter. Apply a specialized foam filter cleaner or a strong degreaser. Work it into the foam. Squeeze out the dirty solution. Rinse with warm water until clean.
Once clean, squeeze out excess water. Allow the filter to air dry completely. This is crucial for proper oil adhesion. After drying, apply a small amount of foam filter oil. Work the oil into the foam until it is evenly coated and tacky. The oil should not drip. This sticky surface helps trap fine dust effectively. For more specific guidance on these types of filters, consider reading about how to clean air filter on lawn mower.
Reinstallation and Maintenance Tips
Once your foam filter is clean and dry (and oiled, if necessary), reinstall it. Make sure it fits snugly in its housing. No gaps should allow unfiltered air past the filter. Secure the air filter cover. Check the seal to ensure it is tight. A good seal prevents dirt bypass.
Regularly check your foam air filter. For lawn mowers, check it every few uses or before each mowing season. For generators, check before significant use. The frequency depends on how dusty your environment is. A quick visual inspection can tell you if it needs cleaning. Keeping your foam air filter clean ensures your lawn mower and small engines perform at their best. They will start easier and last longer.
Maintaining HVAC and Air Purifier Foam Filters
Foam filters are not just for engines. Many home appliances use them too. HVAC systems, air purifiers, and even some vacuum cleaners feature foam filters. These filters play a vital role in indoor air quality. They trap dust, pet dander, and allergens. Regular cleaning of these filters is crucial. It keeps your home air fresh. It also ensures your appliances run efficiently.
These home foam filters generally do not use oil. They are designed for easy washing and reusability. The cleaning process is simpler than for engine filters. However, thorough drying remains paramount. I will walk you through the proper steps for these household filters.
Why Clean Household Foam Filters?
A clean HVAC or air purifier foam filter ensures good airflow. It also maintains effective particle capture. When these filters get clogged, airflow decreases. Your heating, ventilation, or air conditioning unit works harder. This increases energy consumption. It can also lead to premature wear on the system. A blocked filter can make your air conditioner work overtime, so learning how to clean air conditioner filter can save energy and repair costs.
For air purifiers, a dirty filter means less clean air. The purifier cannot remove pollutants effectively. This impacts indoor air quality. Regularly cleaning these filters helps maintain a healthy living environment. It ensures your appliances perform as intended. It also reduces your energy bills.
Cleaning Process for HVAC and Air Purifier Foam Filters
First, locate the foam filter in your appliance. For HVAC systems, it is usually in the return air duct or furnace. For air purifiers, it is typically behind a removable panel. For example, if you own a specific brand, knowing how to clean Levoit air filter or how to clean Shark air purifier filter will involve accessing its particular filter compartment or how to clean Shark air purifier filter. Turn off the appliance before removing the filter. This ensures safety. Take out the foam filter carefully.
Shake off any loose dust over a trash can or outdoors. Then, take the filter to a sink or wash tub. Use warm water and a mild dish soap. Gently rinse the filter under running water. You can also let it soak in soapy water for a few minutes. Gently rub or massage the foam to dislodge trapped dirt. Do not scrub hard or twist the foam. This can damage its structure. Continue rinsing until the water runs clear. This means all dirt and soap are gone.
Drying and Reinstallation
Drying is the most critical step for household foam filters. Squeeze out as much excess water as possible without twisting. Then, place the filter on a clean towel or drying rack. Allow it to air dry completely. This can take several hours, even overnight. Do not use heat sources like hair dryers or direct sunlight. High heat can warp or damage the foam. A fully dry filter prevents mold growth. It also ensures proper airflow upon reinstallation.
Once the filter is completely dry, place it back into your appliance. Make sure it fits securely in its designated slot. Ensure no gaps remain around the edges. Gaps allow unfiltered air to bypass the filter. Secure the panel or access door. Turn your appliance back on. You will likely notice improved airflow and cleaner air. Similarly, for other specific models like how to clean Homedics air purifier filter, the drying process is identical to maintain foam integrity. Regular cleaning, typically every 1-3 months depending on usage and environment, will keep your air fresh. It’s also important for units like how to clean Aprilaire humidifier filter or how to clean window AC unit filter, as they also affect indoor air quality or how to clean window AC unit filter.
Common Mistakes to Avoid When Cleaning Foam Filters
Cleaning foam air filters might seem straightforward. However, common mistakes can harm the filter or your equipment. Knowing these pitfalls helps you avoid them. Proper care ensures your filter performs its best. It also extends its lifespan. I have seen many filters ruined by simple errors.
Avoiding these missteps guarantees a successful cleaning. Your filter will stay effective. Your machinery will remain protected. Always pay attention to detail during the cleaning process. This prevents costly damage.
Using Harsh Chemicals or Solvents
This is arguably the most common and damaging mistake. Never use gasoline, brake cleaner, acetone, or strong degreasers. These chemicals dissolve or degrade the foam material. The foam will become brittle, crumble, or lose its ability to filter effectively. A damaged filter offers no protection to your engine or system. It might even introduce harmful residues.
Always use products specifically designed for foam air filters. Mild dish soap or a dedicated foam filter cleaner is best. These products are formulated to break down dirt and oil without harming the foam. Stick to the recommended cleaning agents. This preserves the integrity of your filter.
Improper Drying of the Filter
Drying seems simple, but it is critical. Reinstalling a wet or damp foam filter causes problems. Moisture can promote mold and mildew growth within the filter. This not only introduces spores into your air or engine but also restricts airflow. In cold weather, water can freeze, causing filter damage.
Always allow the filter to air dry completely. This means hours, possibly overnight. Do not use heat sources like hair dryers, ovens, or direct sunlight. High heat can warp, melt, or harden the foam. This destroys its porous structure. Patience is key here. A fully dry filter is essential for proper function.
Over-Oiling or Under-Oiling Engine Filters
For foam filters that require oil (common in motorcycles and some small engines), applying the correct amount is crucial. Over-oiling can restrict airflow significantly. This chokes the engine and reduces performance. It can also cause oil to drip into the carburetor or fuel injection system. This leads to rough running or fouling of spark plugs.
Under-oiling, on the other hand, leaves portions of the foam without the sticky layer needed to trap fine dust. Unfiltered particles will enter your engine, causing wear. Apply filter oil evenly and sparingly. The foam should be tacky but not saturated or dripping. Knead the oil into the foam to ensure even distribution.
Damaging the Foam Material
Foam filters are durable but not indestructible. Avoid twisting, wringing, or scrubbing the foam aggressively. These actions can tear the foam or break down its cellular structure. Once the foam is torn or compromised, it can no longer filter air effectively. Dirt will bypass the damaged area.
Handle the filter gently throughout the cleaning process. Squeeze rather than twist. Use soft hands when massaging cleaner into the foam. Be careful when removing and reinstalling the filter. Inspect it for tears or damage after cleaning. A damaged foam filter must be replaced. It cannot protect your equipment properly.
When to Replace Your Foam Air Filter
Even with proper cleaning, foam air filters do not last forever. They eventually wear out. Knowing when to replace your foam air filter is as important as knowing how to clean it. A filter that is past its prime offers little protection. It can also hinder your equipment’s performance. I will explain the signs to look for.
Replacing a worn-out filter prevents costly damage to your machinery. It ensures optimal operation. Do not wait for complete failure. Act when you see the warning signs. This proactive approach saves you money and headaches in the long run.
Visible Signs of Damage
The most obvious sign that your foam filter needs replacement is visible damage. Inspect the foam carefully after cleaning. Look for tears, holes, or cracks in the material. Even small tears can allow unfiltered air and debris to bypass the filter. This puts your engine or system at risk.
Check for signs of crumbling or flaking. If the foam feels brittle or pieces come off when you handle it, it is time for a new one. This indicates the foam material has degraded. It can no longer hold its shape or filter effectively. Discoloration that does not wash out is another sign. While some staining is normal, deep, permanent discoloration can suggest material breakdown.
Loss of Elasticity and Porosity
A healthy foam filter is soft, pliable, and somewhat stretchy. It has a sponge-like texture. Over time and with repeated cleaning cycles, the foam can lose its elasticity. It might feel stiff or hard. This loss of flexibility means the foam cannot conform well to its housing. It also reduces its ability to trap particles efficiently.
The porosity of the foam is key to its filtering ability. If the foam appears flattened, compressed, or its open-cell structure looks diminished, it is losing effectiveness. It might look denser than usual. This means airflow is restricted even when clean. A new filter will have a consistent, open-cell structure.
Decreased Performance Even After Cleaning
You have cleaned your foam air filter thoroughly. Yet, your equipment still struggles. It might show reduced power, rough idling, or excessive fuel consumption. This could indicate the foam filter is no longer effective. It might be too degraded to filter properly or maintain adequate airflow.
Sometimes, the internal structure of the foam breaks down without obvious external signs. This means it cannot capture fine particles as it should. If your machine’s performance issues persist after a proper cleaning, consider replacing the filter. It is a small investment compared to potential engine repairs.
Manufacturer’s Recommendations and Lifespan
Many manufacturers provide guidelines for filter replacement. These recommendations are based on typical usage and material lifespan. Consult your equipment’s owner’s manual. It might suggest replacing the foam filter every few years, regardless of its apparent condition.
The lifespan of a foam filter also depends on its environment. Filters in dusty, dirty conditions will wear out faster. Even with regular cleaning, constant exposure to heavy dust shortens its life. If you notice yourself cleaning the filter much more frequently than before, it might be a sign of nearing replacement. Replacing your foam filter when it shows these signs ensures your equipment continues to operate efficiently and reliably.
Frequently Asked Questions About Cleaning Foam Air Filters
How often should I clean my foam air filter?
The cleaning frequency depends on usage and environment. For motorcycles or lawn mowers in dusty conditions, clean after every 10-20 hours of use or before each major use. For HVAC or air purifier filters, inspect monthly and clean every 1-3 months. Visible dirt is always a good indicator it needs attention.
Can I use dish soap to clean a foam air filter?
Yes, mild dish soap can effectively clean foam air filters. Choose a soap free of
- foam air filter
- filter cleaning
- air filter maintenance
- motorcycle air filter
- lawn mower air filter
- HVAC filter