· Home Cleaning · 20 min read
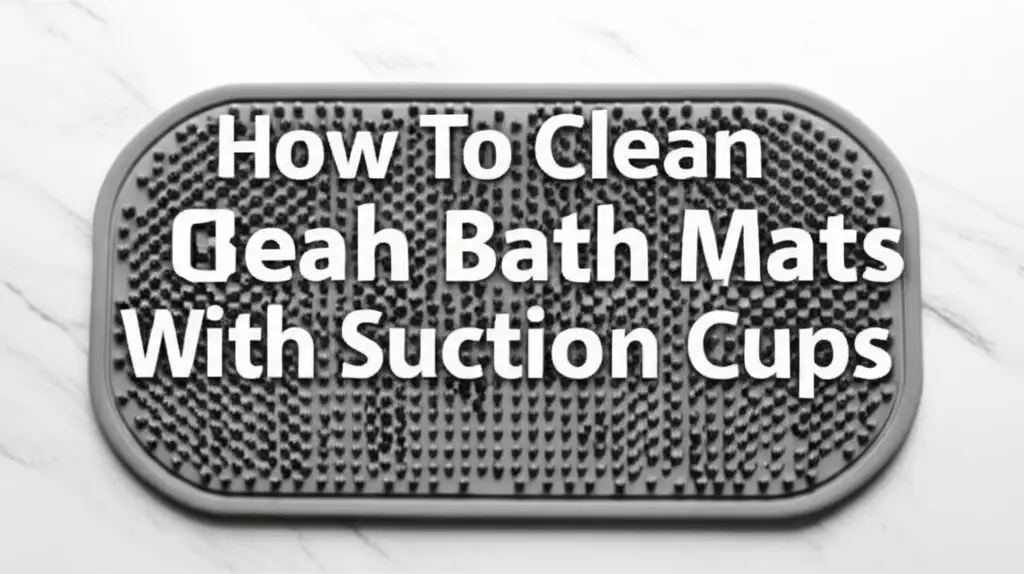
How To Clean Bath Mats With Suction Cups
It is a common sight in many bathrooms: the bath mat with suction cups. This mat provides safety and prevents slips. However, it also creates a breeding ground for mold and mildew. This happens because moisture gets trapped underneath the mat’s suction cups.
Learning how to clean bath mats with suction cups is essential. You want a fresh and sanitary bathroom. Dirt, soap scum, and body oils collect on these mats. Regular cleaning helps to extend the mat’s life. It keeps your bathroom smelling clean. This guide will show you simple ways to maintain your bath mat. You will discover effective cleaning strategies. You will learn about preventing future issues. Let’s make your bathroom a cleaner, safer place.
Takeaway:
- Regularly clean bath mats to prevent mold and mildew.
- Use machine washing or hand washing methods.
- Employ natural solutions like vinegar and baking soda for deep cleaning.
- Ensure proper drying to inhibit moisture buildup.
- Replace mats when damage or persistent issues occur.
To clean bath mats with suction cups, you must regularly remove them from the tub. Wash them by hand with soap and water or machine wash them with vinegar. Ensure you thoroughly dry the mat, especially the suction cups, after each cleaning session to prevent mold growth.
Keep Your Bathroom Safe: Cleaning Suction Cup Bath Mats
Keeping your bathroom safe means keeping your bath mat clean. Suction cup bath mats stick to the tub floor. They stop you from slipping. But water gets stuck under the cups. This trapped water leads to mold and mildew growth. Mold looks bad and smells unpleasant. It also poses health risks.
Regular cleaning makes sure your mat stays hygienic. It helps the mat last longer too. You use the bath mat every day. It collects soap scum, dead skin, and dirt. Ignoring these buildups makes your mat less effective. It also makes your bathroom feel less clean. Simple cleaning steps keep your mat doing its job well. They also keep your bathroom fresh.
Why Your Bath Mat Gets Dirty
Bath mats live in a damp environment. They collect a lot of grime quickly. Every shower or bath leaves moisture behind. This moisture finds its way under the suction cups. It also saturates the mat’s surface. Warm, wet places are perfect for mold spores to grow. They multiply fast in these conditions.
Soap scum also sticks to the mat. Body oils and dead skin cells add to the buildup. These substances feed mold and bacteria. Over time, your mat can feel slimy. It might look discolored. These signs tell you it is time to clean. A dirty mat is not effective at preventing slips.
How Often to Clean Your Bath Mat
You should clean your bath mat often. For daily use, a quick rinse after each shower helps. This removes loose soap and hair. A deeper clean is necessary once a week. This weekly cleaning prevents mold from taking hold. If you notice any slime or discoloration, clean it immediately.
Some households might need more frequent cleaning. If multiple people use the bathroom, clean the mat more often. If someone has allergies or a weakened immune system, frequent cleaning is critical. A clean mat means a healthier bathroom for everyone.
Simple Daily Care for Your Suction Cup Mat
Daily care extends the life of your bath mat. It also keeps your mat cleaner between deep washes. This simple routine takes little time. It helps prevent mold and mildew from growing quickly. You will see a big difference in how your mat looks and feels. Make these steps a habit after each shower or bath.
After you finish bathing, remove the mat from the tub. Do not leave it stuck to the tub surface. This allows air to circulate around the suction cups. It stops water from getting trapped. You want to dry both sides of the mat.
Rinsing and Hanging Your Mat
Rinse your bath mat thoroughly. Use the showerhead to wash off soap residue. Pay attention to both the top surface and the suction cup side. Make sure no soap film remains. Soap residue can become food for mold. A good rinse removes most daily grime.
Once rinsed, hang your mat to dry. Hang it over the edge of the tub or a shower curtain rod. You can also hang it outside the tub if space allows. The goal is to allow air to reach all parts. This includes the individual suction cups. Proper drying is the most important daily step. It stops moisture from lingering. Lingering moisture causes mold.
Quick Wipe-Downs
Sometimes, a quick wipe-down helps. If you see small spots or feel a slight sliminess, wipe it. Use a damp cloth with a little all-purpose cleaner. Wipe down the surface of the mat. Also, wipe the tub surface where the mat sits. This removes any film that may have transferred.
This daily attention stops dirt from building up. It makes your weekly deep cleaning easier. You will have a more hygienic shower area. A clean mat helps keep your entire bathroom fresh.
Machine Washing Your Suction Cup Mat
Machine washing is a convenient method for cleaning many bath mats. It offers a deep clean with less effort. However, check your mat’s care label first. Not all bath mats are machine washable. Some materials might degrade in a washing machine. Always follow the manufacturer’s instructions to prevent damage.
If your mat is machine washable, use the right settings. You want to protect the mat’s material and suction cups. Harsh cycles or hot water can warp the mat. They can also weaken the suction cups. A gentle approach is best for these items.
Preparing Your Mat for the Washer
Before putting your mat in the washing machine, prepare it. First, remove any loose hair or debris. Shake the mat outdoors or vacuum it lightly. This stops clogs in your washing machine. You do not want a drain full of hair. Then, unstick all suction cups from the tub.
Place the bath mat in a mesh laundry bag. This bag protects the mat during the wash cycle. It prevents the suction cups from snagging on other items. It also helps contain any loose bits of material. A laundry bag extends the life of your mat.
Washing Cycle and Detergent Choices
Use a mild detergent for washing your bath mat. Avoid harsh chemicals or bleach. Bleach can damage the mat’s material. It also weakens the suction cups. Choose a gentle cycle on your washing machine. Use cold or lukewarm water. Hot water can cause shrinkage or warping.
You can add a cup of white vinegar to the wash cycle. Vinegar helps to kill mold and mildew. It also acts as a natural deodorizer. It is a good addition for an extra clean. For more tips on using natural cleaners, read our guide on how to clean with vinegar and baking soda. Ensure you choose a slow spin cycle. This prevents excessive stretching or stress on the mat.
Drying After Machine Wash
Air drying is always the best option for bath mats with suction cups. High heat from a dryer can damage the rubber or plastic. It can make the mat warp. It can also melt the suction cups. This stops them from sticking properly. Hang your mat over a clothesline or shower rod.
Make sure both sides get full air exposure. Pay special attention to the suction cups. They need to dry completely. Trapped moisture leads to mold. If you must use a dryer, use a very low heat setting. Take the mat out while it is still damp. Then, air dry it the rest of the way. This gentle approach ensures your mat stays in good condition.
Hand Washing for Deeper Cleaning
Hand washing is a good choice for bath mats not suited for machines. It gives you more control over the cleaning process. This method ensures thorough cleaning without damage. It is also effective for mats with heavy mold or grime. You can focus on specific dirty areas. Hand washing helps preserve the mat’s material and suction cups.
This method works well for older mats. It also suits mats made from delicate materials. You can gently scrub without worrying about machine agitation. It provides a deeper clean for the tricky suction cup areas.
Supplies for Hand Washing
Gather your supplies before you start. You will need a bathtub or a large basin. A soft-bristled brush or a sponge is essential. Choose a mild dish soap or an all-purpose cleaner. White vinegar is also very helpful for this task. You might want rubber gloves to protect your hands. Have some clean towels ready for drying.
These simple tools will make your hand washing effective. They help you remove stubborn dirt. They also make sure the mat is fully disinfected. Being prepared makes the job easier and faster.
The Hand Washing Process
First, fill your tub or basin with warm water. Add a few drops of mild soap. Submerge the bath mat in the soapy water. Let it soak for 10-15 minutes. This helps loosen dirt and grime. Soaking makes scrubbing much easier. It allows the cleaning solution to penetrate.
After soaking, use your brush or sponge. Gently scrub both sides of the mat. Pay special attention to the suction cups. Grime loves to hide around their edges. Scrub the surface and the spaces between the cups. You can also use an old toothbrush for small areas. This ensures every part gets clean. Rinse the mat thoroughly under running water. Make sure no soap remains.
Using Vinegar for Disinfection
For an extra disinfection step, use white vinegar. After rinsing the soap, refill the tub with clean water. Add one cup of white vinegar. Submerge the mat again. Let it soak for another 15-30 minutes. Vinegar kills mold, mildew, and bacteria. It also removes odors.
After the vinegar soak, rinse the mat completely. Make sure the water runs clear. You want no vinegar smell remaining. This step leaves your mat fresh and germ-free. For a powerful cleaning combination, learn more about how to clean your washing machine with baking soda and vinegar. This shows how effective these natural cleaners are.
Tackling Mold and Mildew Stains
Mold and mildew are common problems for bath mats. They thrive in damp, warm environments. These fungi appear as black, pink, or green spots. They also cause a musty smell. Ignoring them can lead to larger infestations. It also makes your bathroom less hygienic. You must address mold and mildew immediately.
Prevention is always the best strategy. But if they appear, you have solutions. Using strong cleaning agents can help. Natural methods also work very well. The key is to kill the spores and remove the stains.
Identifying Mold vs. Mildew
Mold and mildew are both fungi. They look different, though. Mildew usually appears as a flat, powdery growth. It can be white, gray, or yellowish. It often grows on surfaces in humid areas. Mold, on the other hand, looks fuzzy or slimy. It comes in various colors, like black, green, or blue. Mold often grows deeper into materials.
Both cause bad odors. Both can trigger allergies. Mildew is usually easier to clean. Mold requires a more aggressive approach. Knowing the difference helps you choose the right cleaning method.
Effective Mold and Mildew Removers
For stubborn mold, you might need a stronger cleaner. A solution of bleach and water works well. Mix one part bleach with ten parts water. Apply this solution to the affected areas. Let it sit for a few minutes. Then scrub it off. Always use gloves and ensure good ventilation when using bleach.
You can also find commercial mold and mildew removers. Follow their instructions carefully. These products often contain strong chemicals. Always test them on a small, hidden area first. This prevents damage to your mat.
Natural Solutions for Mold
White vinegar is an excellent natural mold killer. It is effective for most types of mold. You can use it undiluted for severe cases. Spray the vinegar directly onto the moldy areas. Let it sit for at least an hour. Then, scrub the mat clean. Rinse it thoroughly afterward.
Baking soda also helps with mold. Mix baking soda with a little water to make a paste. Apply the paste to the moldy spots. Let it dry. Then scrub it off. Baking soda absorbs odors too. Combining vinegar and baking soda can boost cleaning power. Many household items benefit from this duo, like learning how to clean a dishwasher with vinegar and baking soda. This demonstrates the versatility of these natural cleaners.
Natural Cleaning Solutions: Vinegar and Baking Soda
Natural cleaning solutions are safe and effective. White vinegar and baking soda are powerful cleaners. They are non-toxic. They are also gentle on your bath mat’s material. These common household items disinfect, deodorize, and clean. They are a great alternative to harsh chemicals. You can use them for regular cleaning or for tackling tough stains.
Using natural products means fewer fumes in your bathroom. It is better for your skin. It is also better for the environment. These solutions break down dirt and kill germs naturally.
The Power of White Vinegar
White vinegar is an amazing cleaner. Its acetic acid content kills bacteria, mold, and mildew. It also dissolves soap scum and hard water stains. Vinegar acts as a natural deodorizer. It neutralizes unpleasant smells. It leaves a fresh, clean scent.
You can use vinegar diluted or undiluted. For general cleaning, mix equal parts vinegar and water. For tough mold, use full-strength vinegar. Spray it on and let it sit. Then, scrub and rinse. Vinegar is safe for most bath mat materials. Always ensure proper ventilation when cleaning.
Baking Soda’s Cleaning Benefits
Baking soda is another versatile natural cleaner. It is a mild abrasive. This helps to scrub away grime without scratching surfaces. Baking soda also absorbs odors. It neutralizes acidic smells. It can lift stains from fabrics.
You can sprinkle baking soda directly on a wet mat. Let it sit for a few minutes. Then, scrub with a brush or sponge. For tougher stains, make a paste with baking soda and water. Apply it to the stain. Let it sit. Then scrub. This method works well for stubborn dirt and discoloration. We know baking soda can help clean many things, like removing stains off mattresses with baking soda.
Combining for Maximum Effect
Using vinegar and baking soda together creates a powerful reaction. When mixed, they fizz and bubble. This reaction helps lift dirt and break down grime. It also enhances their cleaning power. This combination is excellent for deep cleaning. It also helps to eliminate tough odors.
First, clean the mat with baking soda. Sprinkle it on and scrub. Then, spray with white vinegar. The fizzing action will help clean deeply. Let the mixture work. Then, scrub and rinse the mat thoroughly. This combination leaves your mat super clean. It will also smell fresh.
Dealing with Stubborn Suction Cup Grime
Suction cups are tricky parts of a bath mat. They are often the dirtiest. Grime, soap scum, and mold get trapped around their edges. This buildup makes the cups less effective. It also makes the mat look dirty. Regular cleaning of these cups is important. It ensures the mat stays secure and hygienic.
You need a focused approach for these small areas. A simple rinse is often not enough. You need tools to reach into the crevices. Patience is key when cleaning individual suction cups.
Targeted Scrubbing Tools
An old toothbrush is perfect for cleaning suction cups. Its small bristles can reach into tight spots. Dip the toothbrush in soapy water. Then, scrub around each suction cup. Pay attention to the edges where they meet the mat. This is where most grime collects.
You can also use a small stiff brush. Some cleaning brushes have pointed ends. These can help dislodge stubborn dirt. Make sure the brush is not too harsh. You do not want to damage the rubber. Gentle but firm scrubbing is best.
Using Pastes for Deep Cleaning
For really stubborn grime, a paste works well. Mix baking soda with a small amount of water. Create a thick paste. Apply this paste directly to the dirty suction cups. Cover them completely. Let the paste sit for 15-30 minutes. This allows it to break down the grime.
After the paste has sat, scrub with your toothbrush. The abrasive nature of baking soda helps lift the dirt. It also absorbs odors. Once scrubbed, rinse the mat thoroughly. Make sure all paste and grime are gone. This method is very effective for dislodging tough buildup.
Soaking Suction Cups
A targeted soak can also help. If the suction cups are very dirty, soak them. Fill a small basin with warm water and white vinegar. Add a few drops of dish soap. Submerge only the suction cup side of the mat. Let it soak for an hour or more. This loosens deeply embedded grime.
After soaking, scrub the cups gently. You will find the dirt comes off much easier. This method is good for mats that have not been cleaned often. It helps to restore the stickiness of the cups. Proper cleaning helps the mat adhere safely again.
Drying and Storing Your Bath Mat Correctly
Proper drying and storage are critical for bath mats. These steps prevent mold and mildew growth. They also extend the mat’s lifespan. A poorly dried mat quickly becomes a breeding ground for fungi. Moisture is the enemy of a clean bath mat. Every cleaning session must end with thorough drying.
Do not just leave your mat in the tub. This traps moisture underneath. It creates a dark, damp environment. This is perfect for mold to flourish. Take the extra step to dry and store it correctly.
The Importance of Air Drying
Air drying is the best way to dry your bath mat. It prevents heat damage to the rubber or plastic. High heat can warp the mat. It can also cause the suction cups to lose their effectiveness. Air drying allows moisture to evaporate naturally.
After each use, and especially after cleaning, hang your mat up. Hang it over a shower rod or the side of the tub. Make sure both sides are exposed to air. Pay close attention to the suction cups. They must dry completely. If you have a clothesline, hang it outside in the sun. Sunlight helps to kill bacteria and dry fast.
Proper Storage Between Uses
Where you store your mat between uses matters. Do not leave it stuck to the tub. Peel it off after every shower or bath. Hang it to dry as described above. Once dry, you can store it outside the tub. This keeps the tub clean. It also keeps the mat dry.
Some people roll up their mat and store it. Others hang it on a hook. The key is to keep it dry and allow air circulation. A dry storage area prevents moisture buildup. This helps keep your bathroom fresh. It also ensures your mat is ready for its next use.
When to Remove and Clean Bathtub Surface
While cleaning your bath mat, clean your tub. The area under the mat can also get dirty. Soap scum and mildew build up on the tub surface. This can transfer to your mat. Clean the tub where the mat sits regularly. This helps keep your mat cleaner.
Use a general bathroom cleaner or a vinegar solution. Spray the tub surface. Wipe it clean. Rinse it well. A clean tub surface contributes to overall bathroom hygiene. This combined effort keeps your shower area pristine.
When to Replace Your Bath Mat
Even with the best cleaning routine, bath mats do not last forever. Over time, materials degrade. Suction cups lose their grip. Stains become permanent. Knowing when to replace your bath mat is important. It ensures continued safety in your bathroom. It also maintains a hygienic environment.
Ignoring signs of wear can be dangerous. A worn-out mat does not provide good traction. It can become a slip hazard. A permanently stained mat harbors bacteria. This is not good for your health.
Signs of Wear and Tear
Look for specific signs that your bath mat needs replacing. One common sign is discoloration that will not wash out. Black or pink stains might mean deep-set mold. This mold might be impossible to remove fully. Fading colors and a dull appearance also indicate age.
The material of the mat can also show wear. Cracks, tears, or brittleness mean the mat is old. The texture might become rough or excessively smooth. These changes affect the mat’s effectiveness. They also make it less comfortable.
Suction Cup Issues
The suction cups are vital for safety. If they stop sticking well, the mat is unsafe. Inspect the suction cups regularly. Are they stiff or flattened? Do they stick easily to the tub? If they slip or slide, it is time for a new mat. Worn suction cups lead to falls.
Sometimes, individual cups might break off. This makes the mat uneven. It also reduces its grip. A mat with failing suction cups cannot do its job. Replace it immediately to prevent accidents.
Persistent Odors and Hygiene Concerns
If your bath mat still smells after cleaning, it is a problem. A lingering musty odor means mold is still present. It might be deep within the mat’s material. This kind of mold can affect air quality. It can also trigger allergies.
If the mat feels slimy even after washing, replace it. This sliminess indicates bacterial growth. You cannot remove it with normal cleaning. Your health is more important than keeping an old mat. A new mat ensures a fresh, hygienic bathroom.
Frequently Asked Questions
Can I put my bath mat with suction cups in the washing machine?
Many bath mats are machine washable, but always check the care label first. Use a gentle cycle with cold or lukewarm water and mild detergent. Placing the mat in a mesh laundry bag helps protect it. Avoid hot water and harsh chemicals like bleach.
How do I get mold off my bath mat’s suction cups?
For mold on suction cups, use a solution of white vinegar. Spray it directly onto the moldy areas. Let it sit for an hour. Scrub with an old toothbrush. Rinse thoroughly. For tough mold, a baking soda paste can also be effective.
What causes bath mats to get moldy quickly?
Bath mats get moldy due to trapped moisture. Water collects under the suction cups and on the mat’s surface. Warm, damp bathroom conditions create an ideal environment for mold and mildew to grow. Not drying the mat properly after use accelerates this process.
Is it safe to use bleach on my bath mat?
Using bleach is generally not recommended for bath mats. Bleach can damage the mat’s material, weaken suction cups, and cause discoloration. Mild detergents, white vinegar, or baking soda are safer and more effective alternatives for most bath mat materials.
How often should I clean my bath mat?
You should rinse your bath mat and hang it to dry after every use. A deeper cleaning, either by hand or machine, is recommended at least once a week. If the mat sees heavy use or if you notice any sliminess or odor, clean it more frequently.
How do I dry my bath mat to prevent mold?
To prevent mold, always air dry your bath mat completely. Hang it over a shower rod or the side of the tub. Ensure both sides, especially the suction cups, get full air exposure. Avoid using a dryer with high heat, as it can damage the mat.
Conclusion
Keeping your bath mat with suction cups clean is important. It ensures safety in your bathroom. It also maintains a fresh and hygienic space. We covered many effective methods. You learned about daily care, machine washing, and hand washing. You also learned about tackling stubborn mold and grime. Natural solutions like vinegar and baking soda are powerful tools. They help you achieve a truly clean mat.
Remember, consistent effort makes a big difference. Regular rinsing and proper drying prevent many problems. Knowing when to deep clean or replace your mat keeps your bathroom at its best. A clean bath mat means a safer and more pleasant experience every day. Take these steps. Enjoy a healthier, sparkling clean bathroom. Your efforts will pay off with a mat that serves you well. Embrace these simple habits today for a cleaner home.
- bath mat cleaning
- suction cup mats
- bathroom hygiene
- mold prevention
- natural cleaning
- machine wash bath mat