· Home Cleaning · 20 min read
How To Clean Canopy Humidifier
Keep Your Air Fresh: How to Clean Your Canopy Humidifier
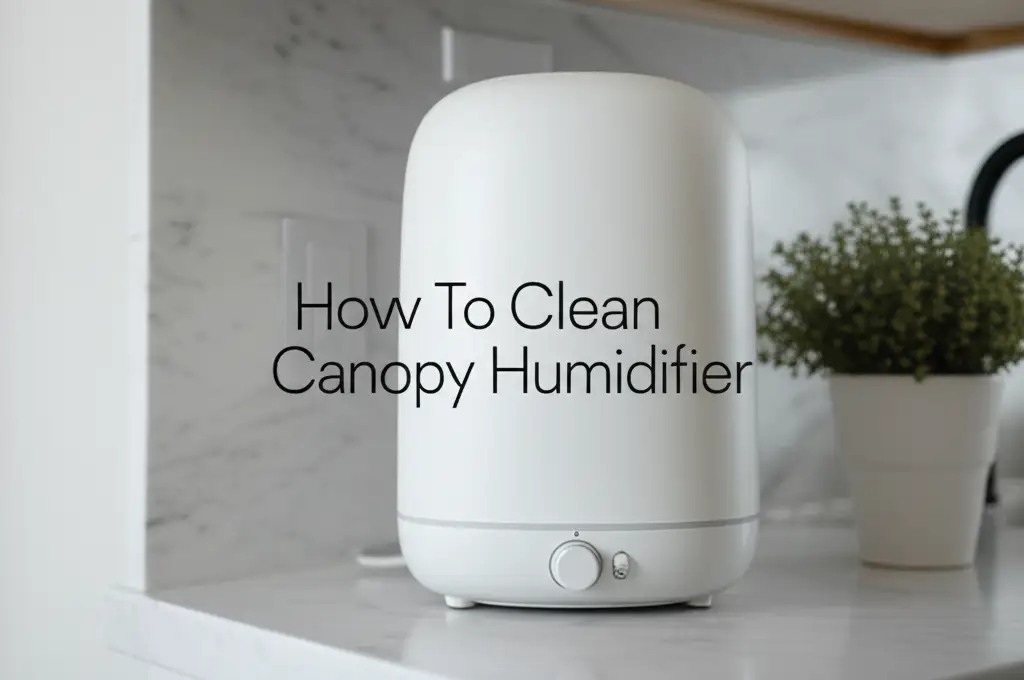
Breathing clean air is a priority for many of us. A Canopy humidifier helps you achieve optimal indoor air quality by adding moisture to dry environments. However, humidifiers work with water, and water can lead to mineral buildup and microbial growth if not managed well. Regularly cleaning your Canopy humidifier is essential for its efficient operation and for maintaining a healthy home environment. I remember when I first got my Canopy humidifier; I was so excited about the added comfort, but then I quickly realized proper cleaning was key to keeping it effective and safe.
This article provides a comprehensive guide to cleaning your Canopy humidifier. We will cover why cleaning matters, what tools you need, and detailed steps for deep cleaning and descaling. You will also learn about routine maintenance to keep your humidifier performing at its best. Finally, we address common issues and offer tips for a long-lasting unit.
Takeaway:
- Regularly clean your Canopy humidifier to prevent mold, bacteria, and mineral buildup.
- Use a simple solution of white vinegar and water for effective descaling and sanitization.
- Follow specific steps for cleaning each component, including the water tank, base, and filter.
- Perform routine maintenance to ensure fresh, clean mist daily.
To clean a Canopy humidifier, disassemble its components, empty any remaining water, and wash parts with warm, soapy water. Use a white vinegar solution to descale mineral buildup in the water tank and base. Rinse all parts thoroughly to remove residue, allow them to air dry completely, and reassemble.
Why Cleaning Your Canopy Humidifier Matters for Health and Performance
A humidifier adds moisture to your home’s air. This process involves water sitting in a tank and being dispersed into the room. Over time, water can leave behind mineral deposits. These deposits are visible as white crusty spots. They can clog the machine’s parts and reduce its efficiency. Beyond mineral buildup, still water creates an environment where mold and bacteria can grow. These microorganisms can then be released into your air along with the mist.
Breathing in mold spores or bacteria can cause respiratory issues. It can also worsen allergies or asthma symptoms. Cleaning prevents these harmful substances from spreading. It ensures your humidifier produces clean, healthy mist. A well-maintained unit also operates more effectively. It uses less energy and lasts longer. Neglecting cleaning shortens the humidifier’s lifespan. It also compromises the air quality it aims to improve. I always make sure to clean mine regularly to avoid these problems and keep my home feeling fresh. It’s similar to how you would clean a HoMedics humidifier or even a Dyson humidifier, as stagnant water issues are common across models.
Regular cleaning also protects your investment. A Canopy humidifier is a durable appliance. Proper care extends its functional life. This means you do not need to buy a new unit as often. It saves you money in the long run. Clean components ensure smooth operation. They prevent breakdowns caused by blockages or corrosion. A clean humidifier is a happy humidifier, and it contributes to a healthier living space.
Gathering Your Essential Cleaning Tools and Supplies
Before you begin cleaning your Canopy humidifier, you need to gather the right tools. Having everything ready saves time and makes the process smoother. Most of these items are common household products. You probably already have them on hand. This keeps the cleaning simple and cost-effective.
Here is what you will need:
- White Vinegar: This is your primary descaling and sanitizing agent. White vinegar is a natural acid. It breaks down mineral deposits effectively. It also kills many types of mold and bacteria.
- Mild Dish Soap: Use this for general washing of the humidifier parts. It helps remove dirt and grime. Choose a gentle soap to avoid harsh residues.
- Soft Brushes or Sponges: These are for scrubbing surfaces. A small brush, like a bottle brush or an old toothbrush, is helpful for crevices. Sponges work well for larger, flat surfaces.
- Microfiber Cloths or Paper Towels: Use these for drying parts. They absorb water well and prevent water spots. Ensure they are clean to avoid transferring dirt.
- Clean Sink or Basin: You will need a space to soak and rinse components. A kitchen sink works well.
- Gloves (Optional but Recommended): Protect your hands from vinegar and detergents.
Avoid using harsh chemicals or abrasive scrubbers. These can damage your humidifier’s plastic parts. Bleach can also be used for sanitization, but vinegar is often preferred due to its descaling properties and milder fumes. Always check your Canopy humidifier’s manual for any specific cleaning recommendations or warnings before starting. For example, some humidifiers, like a Crane humidifier, might have unique material considerations.
Step-by-Step Guide to Deep Cleaning Your Canopy Humidifier
Deep cleaning your Canopy humidifier ensures all components are free from buildup and contaminants. This process should be done every few weeks or more often with heavy use. It involves disassembling the unit and cleaning each part thoroughly. I find that following these steps makes the task manageable and effective.
First, always unplug your humidifier from the power outlet. This prevents any electrical hazards. Then, remove the water tank and empty any remaining water. Pour out any water from the base unit as well. Now, you can begin disassembling the parts according to your Canopy humidifier’s instructions. Usually, this involves separating the water tank, the top lid, the fan unit, and the filter system.
Here is a detailed breakdown of the cleaning steps:
Cleaning the Water Tank
The water tank holds the bulk of the water. It is a common place for mineral buildup and slime.
- Rinse Thoroughly: Rinse the inside of the water tank with warm water. This removes any loose debris or residue.
- Add Cleaning Solution: Fill the tank halfway with water. Then, add 1-2 cups of white vinegar. You can also add a few drops of mild dish soap.
- Soak: Swirl the solution around the tank. Let it sit for at least 30 minutes, or up to an hour. For heavy buildup, you can let it soak longer. This allows the vinegar to dissolve mineral deposits.
- Scrub: Use a soft brush or sponge to scrub the inside of the tank. Pay attention to corners and edges where residue might accumulate.
- Rinse: Rinse the tank thoroughly with clean water multiple times. Ensure all vinegar and soap residue is gone. You do not want these going into your air.
Cleaning the Base and Internal Components
The base houses the electronics and often has a reservoir where water collects before being misted. This area needs careful cleaning.
- Empty Water: Make sure all water is out of the base reservoir.
- Prepare Solution: Mix equal parts white vinegar and water in a separate container.
- Wipe Down: Dip a clean cloth or sponge in the vinegar solution. Carefully wipe all accessible internal surfaces of the base. This includes the mist outlet and any visible trays. Avoid getting liquid on the electrical components.
- Target Tough Spots: For stubborn mineral deposits, you can pour a small amount of pure white vinegar directly onto the affected area. Let it sit for 10-15 minutes. Then, gently scrub with a brush or sponge.
- Rinse Carefully: Use a damp, clean cloth to wipe down all cleaned surfaces. Do not submerge the base in water. Repeat wiping until no vinegar smell remains. This is crucial for preventing any unwanted odors during operation.
Cleaning the Top Lid and Other Removable Parts
The lid and other small parts can also collect dust and moisture.
- Wash with Soap: Wash the top lid, mist spout, and any other removable plastic parts with warm water and mild dish soap.
- Scrub Crevices: Use a small brush or an old toothbrush to clean any narrow openings or crevices.
- Rinse Thoroughly: Rinse all parts completely under running water.
- Air Dry: Place all cleaned parts on a clean towel or drying rack. Allow them to air dry completely before reassembly. This prevents mold growth. Ensuring all parts are dry is important. This is similar to the care you would take when you clean a cool mist humidifier, where air drying is always recommended to prevent dampness and mildew.
Descaling Your Canopy Humidifier for Optimal Performance
Mineral buildup, also known as scale, is a common issue for humidifiers. It comes from minerals present in your tap water. These minerals accumulate on internal surfaces, especially those in contact with water. Descaling is the process of removing this buildup. It is vital for your Canopy humidifier to function efficiently and produce clean mist. Without regular descaling, your humidifier may produce less mist, make more noise, or even stop working.
White vinegar is the best natural descaler. Its acidic nature dissolves calcium and magnesium deposits. These are the main culprits in hard water scale. I always keep a large bottle of white vinegar handy for this specific task.
Here is how to effectively descale your Canopy humidifier:
- Prepare the Descaling Solution: For the water tank, fill it halfway with warm water. Add 1 to 2 cups of white vinegar. The amount depends on the tank size and the extent of mineral buildup. For the base and smaller parts, mix equal parts white vinegar and water in a separate bowl.
- Soak the Water Tank: Pour the vinegar solution into the water tank. Swirl it around to coat all internal surfaces. Let the solution sit in the tank for at least 30 minutes. For severe scale, you can extend the soaking time to several hours or even overnight. This gives the vinegar time to break down the hard deposits.
- Clean the Base Reservoir: Empty any residual water from the base. Pour enough of your equal-parts vinegar and water solution into the base reservoir to cover the bottom. Let it sit for 20-30 minutes. This targets the areas where water often sits and evaporates, leaving scale behind.
- Scrub Away Deposits: After soaking, use a soft brush or sponge to scrub the soaked areas. You will notice the mineral deposits loosening and coming off easily. For stubborn spots, a little extra scrubbing power might be needed. Pay close attention to any heating elements or ultrasonic disks if your model has them, as scale can significantly impair their function.
- Rinse Thoroughly: This is a crucial step. Empty the vinegar solution from both the tank and the base. Rinse all components repeatedly with fresh, clean water. Continue rinsing until you can no longer detect any vinegar smell. Any residual vinegar can affect the taste or smell of the mist produced. For a completely fresh start, it’s like thoroughly rinsing out a water filter after cleaning, similar to cleaning an Aprilaire humidifier filter.
- Air Dry Completely: Lay all descaled parts on a clean towel or drying rack. Ensure they are completely dry before reassembling your humidifier. This prevents any immediate re-growth of mold or mildew in damp areas.
Performing this descaling process regularly will maintain your Canopy humidifier’s efficiency. It will also help ensure it continues to provide clean, healthy moisture to your living space. The frequency depends on your water hardness and how often you use the humidifier. I descale mine every 2-4 weeks.
Maintaining Your Canopy Humidifier: Regular Care Tips
Regular maintenance goes a long way in keeping your Canopy humidifier in top condition. It prevents the need for frequent deep cleans and ensures you always have fresh, clean air. These are simple habits you can incorporate into your routine. I have found these daily and weekly steps make a big difference in the humidifier’s performance and longevity.
Here are some key maintenance tips:
Daily Maintenance
- Refill with Fresh Water: Do not let water sit in the tank for days. Empty any old water and refill with fresh, clean water every day, especially before each use. This prevents stagnant water issues.
- Wipe Down Exterior: Quickly wipe the outside of the humidifier with a clean, damp cloth. This removes dust and prevents grime buildup.
- Check for Residue: Briefly check the base and tank for any early signs of mineral buildup or sliminess. Address them immediately if you see any.
Weekly Maintenance
- Quick Rinse: Every week, empty the water tank and rinse it thoroughly with warm water. You can also give the base a quick wipe down with a damp cloth. This removes any potential film before it hardens.
- Filter Check: Inspect your Canopy humidifier’s filter. If it looks discolored or hard, it might be time for a replacement. Canopy filters are designed to last, but usage and water quality affect their lifespan. A clogged filter reduces efficiency.
- Small Soak: For a quick refresh, add a cup of white vinegar to the water tank and let it sit for 30 minutes. Then rinse well. This helps prevent scale before it becomes a problem. This is a lighter version of the deep descaling process.
Important Considerations
- Use Filtered or Distilled Water: If your tap water is very hard, consider using filtered or distilled water. This significantly reduces mineral buildup. It extends the time between descaling cleanings. It also prolongs the life of your humidifier’s parts.
- Empty and Dry When Not in Use: If you plan not to use your humidifier for more than a day or two, empty all water. Then, dry all components thoroughly. Store them disassembled to prevent mold growth during storage.
- Place on a Stable Surface: Ensure your humidifier sits on a flat, stable, water-resistant surface. This prevents accidental spills or tip-overs.
- Avoid Essential Oils in Tank: Canopy humidifiers are designed for water, not essential oils in the main tank. Essential oils can corrode plastic parts and void your warranty. If you wish to use scents, utilize a designated aroma tray or diffuser specifically made for the humidifier.
By integrating these simple practices into your routine, you ensure your Canopy humidifier consistently delivers clean, fresh mist. Proper maintenance saves you time and effort on extensive cleaning. It also ensures the appliance remains a beneficial addition to your home’s air quality. This diligent approach is beneficial for any humidifier, including units like a Levoit 300S humidifier or even a Pure Enrichment humidifier, all of which benefit from regular, mindful care.
Troubleshooting Common Humidifier Cleaning Issues
Even with regular cleaning, you might encounter some common issues with your Canopy humidifier. Addressing these problems promptly ensures your unit continues to operate effectively and safely. I have faced some of these myself, and learning how to troubleshoot them made a big difference.
Here are some common cleaning-related issues and their solutions:
Persistent White Dust
Issue: You might notice a fine white dust settling on furniture around your humidifier. This is mineral dust. It comes from hard water minerals that are dispersed into the air with the mist. Solution: This indicates high mineral content in your tap water.
- Switch to Distilled Water: The most effective solution is to use distilled water. Distilled water contains no minerals. This completely eliminates white dust.
- Regular Descaling: Continue your regular descaling routine. Even with distilled water, some dust can still settle from the air.
- Check Filter: Ensure your Canopy filter is working properly. It helps capture some minerals before dispersal.
Mold or Mildew Smell
Issue: Your humidifier produces an earthy or musty smell. This is a clear sign of mold or mildew growth inside the unit. Solution: This requires immediate and thorough cleaning.
- Deep Clean Immediately: Perform a full deep clean as outlined in the “Step-by-Step Guide to Deep Cleaning Your Canopy Humidifier” section. Pay extra attention to all nooks and crannies.
- Use Stronger Vinegar Solution: For stubborn mold, you can increase the vinegar concentration slightly. Let it soak longer.
- Air Dry Completely: Ensure every single part is completely dry before reassembly. Any lingering moisture will encourage mold to return.
- Increase Cleaning Frequency: If mold returns quickly, increase how often you deep clean your humidifier. Daily water changes are also important. This is crucial for units like a Safety First humidifier too, as stagnant water is the primary culprit for odor.
Humidifier Not Misting Properly
Issue: Your humidifier turns on, but it produces very little or no mist. Solution: This is often due to mineral buildup interfering with the misting mechanism or a clogged filter.
- Descale Thoroughly: Focus on descaling the base, especially around any misting elements or sensors. Mineral crust can block the mist output.
- Check and Replace Filter: A clogged or old filter can restrict airflow and mist production. Check your Canopy humidifier’s filter. If it looks discolored, stiff, or has visible buildup, replace it with a new one.
- Ensure Proper Assembly: Double-check that all parts are correctly assembled. A misaligned tank or lid can prevent proper operation.
Slimy Residue
Issue: You feel a slick, slimy film inside the water tank or base. This is biofilm, a collection of bacteria. Solution:
- Aggressive Cleaning: Use a brush with a good scrubbing action to remove the slime.
- Vinegar Sanitization: Use the white vinegar solution to sanitize the surfaces. Let it sit for an hour to kill bacteria.
- Rinse Extensively: Rinse multiple times to remove all traces of the biofilm and vinegar.
- Preventive Measures: Ensure daily water changes. Always empty and dry the humidifier if you won’t use it for a day or more.
By understanding and addressing these common issues, you can maintain your Canopy humidifier’s performance. You also ensure it provides clean, healthy air for your home. Regular attention to these details will keep your humidifier running smoothly for years.
When to Replace Parts and General Humidifier Lifespan
Even with diligent cleaning and maintenance, some parts of your Canopy humidifier will need replacement over time. Understanding when to replace these components, especially the filter, is crucial for maintaining optimal performance and air quality. Knowing the general lifespan of the humidifier itself also helps you plan for future needs.
Replacing Your Canopy Humidifier Filter
The filter is perhaps the most important replaceable part in a Canopy humidifier. It plays a key role in preventing mineral dust and ensuring clean mist.
- Canopy Filter Life: Canopy humidifiers use evaporative filters designed to capture minerals from the water. The company typically recommends replacing the filter every 45-60 days, or every 2-3 months. This timeframe can vary based on your water hardness and how frequently you use the humidifier.
- Signs It Needs Replacement:
- Hardness/Stiffness: The filter becomes stiff and rigid due to accumulated minerals. It loses its soft, absorbent quality.
- Discoloration: The filter turns brown, orange, or white from mineral deposits.
- Reduced Mist Output: If your humidifier produces less mist than usual despite being clean, a clogged filter is a likely cause.
- Odor: A musty smell can sometimes indicate a filter that is past its prime and potentially growing mold.
- How to Replace: Replacing the Canopy filter is simple. Just remove the old filter from its designated slot in the base unit. Insert the new filter firmly into place. Always refer to your user manual for exact instructions specific to your model. Similar to how you would replace an AirCare humidifier filter, it’s a straightforward process designed for user convenience.
Other Replaceable Parts
While the filter is the main consumable, other parts might need attention over a longer period:
- UV Light Bulb (if applicable): Some Canopy models might incorporate a UV-C light to kill bacteria. If your model has one, check the manual for its replacement schedule, typically every 1-2 years.
- Water Tray/Base: If the plastic of the water tray or base becomes cracked, severely stained, or warped despite cleaning, it might be time to replace that specific component or the entire unit. This is less common but can happen with very hard water or improper cleaning.
General Humidifier Lifespan
The lifespan of a humidifier varies greatly depending on its quality, usage, and maintenance.
- Canopy’s Durability: Canopy humidifiers are known for their robust design and quality materials. With proper and consistent cleaning, a Canopy humidifier can last for several years, often 3-5 years or even longer.
- Factors Affecting Lifespan:
- Water Quality: Hard water accelerates mineral buildup and can shorten the life of internal components if not regularly descaled.
- Usage Frequency: A humidifier running 24/7 will naturally experience more wear and tear than one used only occasionally.
- Cleaning Routine: Regular and thorough cleaning is the single biggest factor in extending your humidifier’s life. Neglecting cleaning will significantly reduce its lifespan due to mineral corrosion and mold damage.
- When to Consider Replacement of the Unit:
- Frequent Malfunctions: If your humidifier constantly malfunctions despite cleaning and filter changes.
- Irreparable Damage: If parts are broken and cannot be replaced, or if there’s extensive cracking.
- Persistent Odor/Mold: If you cannot eliminate mold or a persistent smell, even after deep cleaning.
- Reduced Efficiency: If it no longer humidifies effectively, even with a new filter and clean components.
Investing in a good cleaning routine and timely part replacement ensures your Canopy humidifier remains a reliable source of healthy moisture for many years. It’s a small effort that yields significant benefits in air quality and appliance longevity.
Frequently Asked Questions About Cleaning Canopy Humidifiers
How often should I clean my Canopy humidifier?
You should deep clean your Canopy humidifier at least once a week, especially with daily use. For very hard water or constant use, clean it twice a week. Daily fresh water refills and quick rinses are also recommended to prevent buildup between deep cleans.
Can I use bleach to clean my Canopy humidifier?
Canopy recommends against using bleach for cleaning. Bleach can be harsh on plastic components and leaves a strong odor. White vinegar is a safer and equally effective alternative for descaling and sanitizing. Always stick to white vinegar and mild soap as preferred cleaning agents.
Why does my Canopy humidifier produce white dust?
White dust indicates minerals from your tap water are being dispersed into the air. Canopy humidifiers capture many minerals, but very hard water can still lead to some dust. Using distilled or demineralized water is the best way to eliminate white dust completely. Regular filter changes also help.
Can I put essential oils directly in my Canopy humidifier’s water tank?
No, you should not put essential oils directly into the water tank of a Canopy humidifier. Essential oils can damage the plastic components, clog the filter, or void your warranty. Canopy humidifiers typically have a separate aroma tray or essential oil diffuser feature for safe scent diffusion.
How do I know when to replace the Canopy humidifier filter?
Replace your Canopy humidifier filter every 45-60 days or when it becomes hard, discolored, or stiff with mineral buildup. Reduced mist output, even after cleaning, can also indicate a clogged filter. Regularly checking its condition ensures peak performance.
What if my humidifier still smells after cleaning?
If your humidifier still smells after cleaning, it likely means mold or bacteria remain. Perform another deep clean using a stronger vinegar solution and let it soak longer. Scrub all internal surfaces thoroughly. Ensure all parts are completely dry before reassembling. Consider using distilled water.
Conclusion
Maintaining a clean Canopy humidifier is vital for your health and the longevity of your appliance. We have explored the critical reasons why regular cleaning is necessary, from preventing harmful mold and bacteria growth to ensuring optimal performance. You now know the essential tools needed and have a detailed, step-by-step guide on how to clean Canopy humidifier thoroughly, including effective descaling techniques.
Remember, consistent daily and weekly maintenance prevents significant buildup and makes deep cleaning easier. Addressing common issues like white dust, odors, and reduced mist output promptly ensures your humidifier always operates at its best. By replacing filters as needed and understanding your unit’s lifespan, you invest in cleaner air for years to come. I hope this guide helps you keep your humidifier running efficiently.
Prioritize regular cleaning to ensure your Canopy humidifier continues to provide clean, healthy moisture to your home. Make cleaning a routine part of your home care to enjoy all the benefits of purified air. Take action today and keep your air fresh and clean!
- humidifier cleaning
- Canopy humidifier
- mold prevention
- air quality
- appliance maintenance

