· Home Cleaning · 21 min read
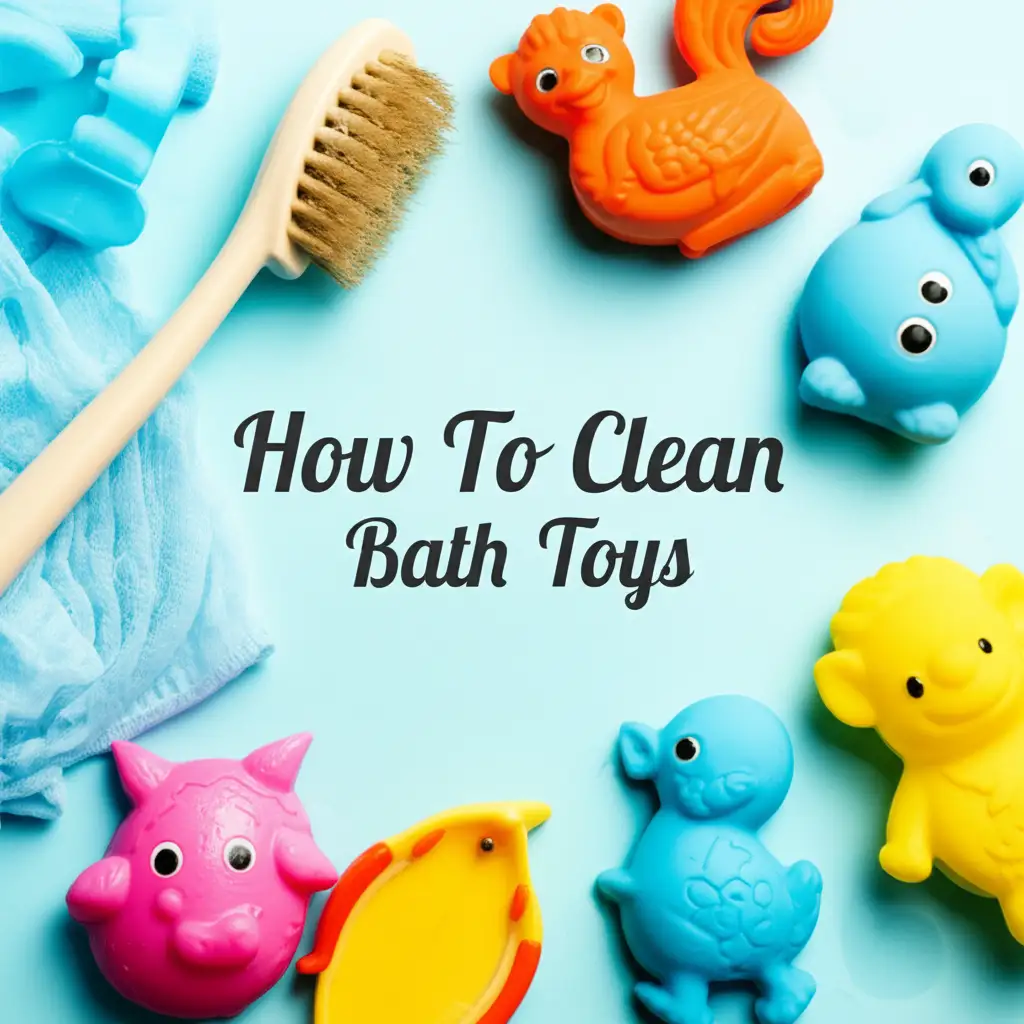
How To Clean Bath Toys
Master Cleaning Bath Toys: A Parent’s Guide
Bath time is fun for children. Little boats float and rubber ducks splash. These toys make bath time exciting. However, bath toys sit in water. Water can get inside them. This creates a damp, warm place. Mold and germs grow easily there. Cleaning bath toys is very important for your child’s health. Dirty toys can spread bacteria. They can cause skin irritation or other problems. I know this from experience. This guide helps you understand how to clean bath toys properly. We cover different toy types. We also discuss natural cleaning solutions. You will learn how to keep bath toys safe and fresh.
Takeaway
- Regularly clean bath toys to prevent mold and germ growth.
- Use natural solutions like vinegar for safe and effective cleaning.
- Clean toys based on their material: solid, squeaky, or foam.
- Dry toys completely after each use and store them properly.
- Consider sealing holes in squeaky toys to avoid water entry.
How To Clean Bath Toys
To clean bath toys, first remove any visible dirt. Soak them in a solution of warm water and white vinegar or a mild bleach solution. Scrub surfaces with a brush. Rinse toys thoroughly with clean water. Finally, dry them completely to prevent mold growth.
Understanding Why Cleaning Bath Toys Matters So Much
Many parents do not think about cleaning bath toys. They see toys floating in soapy water. They assume toys get clean during bath time. This is a common mistake. Bathwater is not clean water. It contains soap, dirt, and skin cells. This mixture creates a breeding ground for germs. Toys with holes are especially prone to problems. Water gets trapped inside these holes. It cannot drain out easily. This trapped water becomes stagnant. Mold spores thrive in damp, dark places. They love the inside of a rubber duck.
Mold can look like black spots. It can also be unseen inside toys. Breathing in mold spores can cause health issues. Children are more sensitive to mold. They might develop respiratory problems. Skin rashes or allergic reactions are also possible. Bacteria like E. coli or salmonella can also grow on toys. These bacteria come from the child’s body or the bathroom environment. Children often put bath toys in their mouths. This transfers germs directly to them. This makes regular cleaning essential. You protect your child from illness. You give them a truly clean play environment. Cleaning bath toys is a simple step. It offers big health benefits for your family.
Essential Supplies for Cleaning Bath Toys
Before you start cleaning bath toys, gather your tools. Having everything ready makes the process easy. You probably have most items in your home already. These tools help you clean toys safely and effectively. Using the right supplies ensures thorough disinfection. It also protects the toy’s material. Always read the cleaning instructions for any specific toy. Most bath toys are plastic or rubber. These materials handle common cleaning solutions well.
Here is a list of essential supplies:
- White Vinegar: This is a natural cleaner. It kills mold and bacteria. It is safe for children’s toys. Many people use it to clean the shower and prevent mold growth. How to Clean Shower with Vinegar offers more tips.
- Mild Dish Soap: A few drops of dish soap help remove grime. It is gentle on toy surfaces.
- Bleach (Optional): For very stubborn mold, a diluted bleach solution works. Use it with caution. Rinse toys very well after bleach use. Bleach can kill tough mold spores. You might use it for how to clean mold with vinegar in other areas too.
- Old Toothbrush or Small Bottle Brush: These tools reach inside holes. They scrub tight spots. A bottle brush is great for reaching deep inside toys.
- Large Basin or Bucket: You need a place to soak the toys. A clean sink also works.
- Clean Towels or Drying Rack: Toys must dry completely. This prevents new mold from growing.
- Hot Water: Warm water helps cleaning solutions work better.
- Plastic Funnel or Syringe (Optional): For filling and rinsing toys with small holes.
- Super Glue or Hot Glue Gun (Optional): To seal holes in squeaky toys. This prevents water entry. It stops mold growth inside.
Having these items ready helps you tackle any bath toy cleaning challenge. You can clean effectively and keep bath time safe for your little ones.
Cleaning Methods for Different Types of Bath Toys
Not all bath toys are the same. Their materials and designs vary. This means they need different cleaning methods. Understanding these differences helps you clean more effectively. It also prevents damage to the toys. Always separate toys by type before you begin. This makes the cleaning process more organized. Let’s look at common bath toy types and their specific cleaning needs.
Cleaning Squeaky Bath Toys (Rubber Ducks, Animals)
Squeaky toys are popular. They float and make fun sounds. However, they have a small hole at the bottom. This hole makes the squeak. It also lets water inside. This trapped water is a mold factory.
- Step 1: Squeeze Out Water. Before cleaning, squeeze each toy. Get as much old water out as you can. Black mold might come out.
- Step 2: Prepare Cleaning Solution. Mix one part white vinegar with one part hot water. For example, use one cup vinegar and one cup hot water. You can also add a few drops of dish soap.
- Step 3: Fill Toys. Submerge each toy in the solution. Squeeze it under the water. Release it slowly. This sucks the cleaning solution into the toy. Repeat this several times. Fill the toy completely.
- Step 4: Soak. Let the toys soak in the solution for 30-60 minutes. For heavily molded toys, soak them longer. You can even soak overnight.
- Step 5: Scrub and Rinse. After soaking, squeeze the toys. Push the cleaning solution out. Scrub the outside surfaces with a small brush or old toothbrush. Rinse the toys thoroughly. Repeat the squeeze-and-fill action with clean, warm water. Do this many times until only clear water comes out.
- Step 6: Dry Completely. This step is critical. Squeeze out all excess water. Place toys on a clean towel or drying rack. Position them hole-down. Let them air dry for at least 24 hours. A mesh bag hung in a dry place works well.
Cleaning Solid Plastic Bath Toys (Boats, Buckets, Cups)
Solid plastic toys are easier to clean. They do not have holes for water to enter. Mold usually grows only on the outside surface.
- Step 1: Wash with Soap and Water. Fill a basin with warm water. Add a few drops of mild dish soap. Use a sponge or cloth to wash each toy thoroughly. Scrub off any visible grime or soap scum.
- Step 2: Deep Clean (Optional). For a deeper clean, you can soak these toys. Mix one part white vinegar with two parts water. Soak toys for 15-30 minutes. This helps sanitize them.
- Step 3: Rinse Well. Rinse all toys under clean, running water. Make sure no soap residue remains.
- Step 4: Dry Thoroughly. Air dry them completely on a clean towel or drying rack. You can also wipe them dry with a clean cloth.
Cleaning Foam Bath Toys (Letters, Shapes)
Foam toys absorb water. They can also grow mold. They are often porous. This makes them a bit trickier to clean. For specific advice on these, you might find this article useful: How To Clean Foam Bath Toys.
- Step 1: Prepare Soaking Solution. Mix one part white vinegar with two parts warm water. A tablespoon of baking soda can also be added. Baking soda helps neutralize odors.
- Step 2: Submerge and Squeeze. Place foam toys into the solution. Squeeze them gently under the water. This forces the solution into the foam. Repeat several times.
- Step 3: Soak. Let the foam toys soak for 30 minutes to an hour. For heavy stains or mold, soak longer.
- Step 4: Rinse. Press and release the foam toys under clean, running water. Do this repeatedly. You want to flush out all the cleaning solution. Keep rinsing until water runs clear.
- Step 5: Squeeze Dry. Squeeze out as much water as possible from each foam toy. Press them between clean towels.
- Step 6: Air Dry. Lay the foam toys flat on a clean, dry surface. Ensure good air circulation. It might take longer for foam toys to dry completely.
Different toy types require different attention. By following these specific steps, you keep all your bath toys clean and safe for playtime.
Natural Cleaning Solutions: Vinegar and Baking Soda
When cleaning items children use, safety is paramount. Harsh chemicals worry many parents. They look for natural alternatives. White vinegar and baking soda are powerful, natural cleaners. They are also safe for children’s items. These two ingredients tackle mold, mildew, and odors. They do it without harsh fumes or residues. I often use them for general bathroom cleaning too. You can learn more about general mold cleaning with vinegar here: How to Clean Mold with Vinegar.
Using White Vinegar for Bath Toys
White vinegar is an acid. It breaks down mold and mildew. It also kills many types of bacteria. It is non-toxic. It leaves no harmful residue after rinsing. This makes it perfect for bath toys.
- For General Cleaning: Mix equal parts white vinegar and warm water. For instance, use two cups of vinegar and two cups of warm water in a basin.
- Soaking Toys: Submerge all bath toys in this solution. For squeaky toys, squeeze them repeatedly. This draws the vinegar solution inside. Let toys soak for at least 30 minutes. For very dirty toys, an overnight soak is best.
- Scrubbing: Use an old toothbrush or a small bottle brush. Scrub the outside of the toys. Pay attention to crevices and seams. For inside squeaky toys, keep squeezing them. This forces the vinegar around.
- Rinsing: Rinse toys thoroughly under running water. For squeaky toys, continue to squeeze and release them under clean water. Do this until no vinegar smell remains. Make sure clear water comes out of the holes.
Using Baking Soda for Bath Toys
Baking soda is an alkali. It is a mild abrasive. It is excellent for scrubbing away grime. It also neutralizes odors. It works well with vinegar.
- For Surface Stains: Make a paste. Mix baking soda with a little water. Apply the paste to stained areas on solid toys. Let it sit for 10-15 minutes. Scrub gently with a cloth or brush. Rinse well.
- For Odor Removal (Soaking): Add one or two tablespoons of baking soda to your vinegar and water soaking solution. The baking soda helps to lift odors. It also slightly boosts the cleaning power.
- Drying Aid: After cleaning, you can sprinkle a little dry baking soda on damp toys. This helps absorb remaining moisture. It also prevents mold. Shake it off before play.
Combining white vinegar and baking soda offers a powerful, safe cleaning method. It ensures your child’s bath toys are truly clean. These natural solutions make cleaning easy. They also give you peace of mind.
Deep Cleaning and Disinfection Strategies for Bath Toys
Sometimes regular cleaning is not enough. Toys can develop stubborn mold. Or you might want to disinfect them thoroughly. This is especially true if a child has been sick. Deep cleaning and disinfection strategies provide a more intense clean. They help eliminate persistent germs and mold spores. It is important to know when to use these methods. It is also vital to use them safely.
Using a Diluted Bleach Solution (Use with Caution)
Bleach is a very strong disinfectant. It kills mold, viruses, and bacteria. However, it is a chemical. It needs careful handling. Never mix bleach with vinegar. This creates toxic fumes.
- Preparation: Wear gloves. Work in a well-ventilated area. Open windows or turn on a fan.
- Solution Mix: Add one tablespoon of bleach to one gallon of water. Mix it well. This is a very diluted solution.
- Soaking: Submerge bath toys in this bleach solution. For squeaky toys, squeeze them to draw the solution inside.
- Soak Time: Let toys soak for no more than 10-15 minutes. Bleach can damage some materials if left too long.
- Thorough Rinsing: This is the most crucial step. Rinse toys extensively under running water. For squeaky toys, continuously squeeze and release them under clean water. Do this for several minutes. You must remove all bleach residue. Any leftover bleach is harmful.
- Air Dry: Allow toys to air dry completely.
Dishwasher Cleaning for Safe Toys
Some bath toys are dishwasher safe. This is a convenient deep cleaning method. Check the toy’s label first. If it says “dishwasher safe,” you are in luck.
- Preparation: Place solid plastic toys in a mesh laundry bag. This prevents them from flying around. Put the bag on the top rack of the dishwasher. Avoid placing toys directly on heating elements.
- Cycle Selection: Use a gentle cycle. Use a low-heat or air-dry setting. High heat can melt or warp some plastics.
- Detergent: Use your regular dishwasher detergent.
- Drying: After the cycle, remove toys. Let them air dry completely. Even a little moisture can lead to mold.
Boiling Water Method (Use with Extreme Caution)
Boiling water sterilizes toys. It kills almost all germs. This method is only for specific types of toys. Use it only for solid, heat-resistant plastic or silicone toys. Do not boil toys with holes, foam, or electronics. Boiling can warp or damage some plastics.
- Preparation: Fill a pot with water. Bring the water to a rolling boil.
- Boiling Toys: Carefully place toys into the boiling water. Use tongs.
- Boil Time: Let them boil for 3-5 minutes.
- Cooling and Drying: Carefully remove toys with tongs. Place them on a clean, heat-safe surface to cool. Once cool, ensure they are completely dry before storage.
Deep cleaning methods offer effective disinfection. Always prioritize safety. Choose the right method for your toy type. Always rinse and dry thoroughly. This ensures toys are clean and safe for your child.
Drying and Storing Bath Toys to Prevent Mold
Cleaning bath toys is only half the battle. Proper drying and storage are just as important. They are key to preventing mold and mildew. Mold loves damp, dark environments. If toys remain wet, mold quickly returns. This defeats the purpose of cleaning. Think about how you store other bathroom items. You might dry out your bath rugs or ensure your bath mats with suction cups dry fully. The same care applies to bath toys.
The Importance of Thorough Drying
Water inside or on toys creates a perfect mold habitat. Even a tiny bit of moisture can allow mold spores to grow. This is why thorough drying is not optional. It is essential.
- After Every Bath: After each bath, squeeze all water out of squeaky toys. For solid and foam toys, shake off excess water.
- Air Dry Completely: Place toys in a well-ventilated area. A mesh toy organizer or a clean, dry towel works well. Position toys so water can drain out easily. If they have holes, face the holes downward.
- Sunlight (Optional): Sunlight is a natural disinfectant. It helps dry toys faster. Place toys in direct sunlight for an hour or two. UV rays can also kill some germs. Do not leave them too long. Strong sun can fade or degrade plastic.
Smart Storage Solutions
Where you keep bath toys also affects mold growth. A damp toy basket in a dark corner is not ideal. Proper storage allows air circulation. It helps toys stay dry between uses.
- Mesh Bags or Bins: These are excellent for bath toys. They allow air to circulate around the toys. Water drains easily. Hang mesh bags on the shower wall. You can also use a plastic bin with drainage holes.
- Suction Cup Organizers: Many bath toy organizers stick to the tub wall. Choose one with good drainage. This keeps toys out of standing water.
- Dedicated Drying Area: Consider a spot outside the tub for drying. A clean shelf or a caddy where air flows freely is ideal.
- Avoid Closed Containers: Do not store damp toys in sealed plastic containers. This traps moisture. It creates a humid environment perfect for mold. Only store toys in closed containers once they are completely dry.
- Regular Cleaning of Storage: The toy storage container itself needs cleaning. Wipe it down regularly. This prevents mold from spreading from the container to the toys.
By focusing on effective drying and smart storage, you actively prevent mold. Your bath toys stay cleaner for longer. This means less work for you and healthier play for your child.
Prevention is Key: Daily Habits for Bath Toy Hygiene
The best way to deal with mold on bath toys is to prevent it. Regular cleaning is important. But daily habits make a big difference. Incorporating a few simple steps into your routine can drastically reduce mold growth. These steps minimize the conditions mold needs to thrive. It saves you time and effort in the long run. Keeping the bathroom clean in general also helps. Cleaning the bottom of the shower can contribute to a cleaner environment for toys.
Simple Daily Habits
- Squeeze and Shake After Every Bath: This is the most crucial step. As soon as bath time ends, make it a habit. Squeeze all water out of squeaky toys. Give solid and foam toys a good shake. Remove as much moisture as possible.
- Air Dry Immediately: Do not leave toys floating in bath water. Do not put them in a closed bucket right away. Place them in a mesh bag or a well-ventilated container. Let them air dry. Hang the bag on a hook outside the tub. This allows air to circulate around them.
- Store in a Dry Place: Once dry, store toys in a dry area. Avoid keeping them in a constantly damp shower caddy. A toy bin with drainage holes is better than a solid one.
- Inspect Toys Regularly: Take a quick look at your bath toys often. Look for any black spots or slime. Catching mold early makes it easier to clean.
- Replace Old or Damaged Toys: Toys do not last forever. If a toy has persistent mold that you cannot remove, throw it out. If a toy is cracked or damaged, it can harbor germs. Replace it with a new one.
Long-Term Prevention Strategies
Beyond daily habits, some long-term strategies offer extra protection.
- Seal Squeaky Toy Holes: For rubber ducks and other squeaky toys, consider sealing the hole. Use a strong, waterproof super glue or hot glue. A small drop of glue over the hole prevents water from entering. The toy will no longer squeak. But it will also never grow mold inside. This is a very effective solution.
- Choose Hole-Free Toys: When buying new bath toys, look for designs without holes. Solid plastic, silicone, or specific closed-cell foam toys are great choices. These types of toys do not trap water inside. They are much easier to keep clean.
- Wash Storage Containers: The containers where you store bath toys also need cleaning. Wipe them down with a disinfectant spray or soap and water regularly. Mold can grow on the container and then transfer to the toys.
- Use a Dehumidifier: If your bathroom is very humid, consider a small dehumidifier. Reducing overall humidity helps prevent mold growth everywhere. This includes on bath toys.
- Regular Deep Cleans: Even with daily prevention, schedule deep cleaning for toys every 1-2 weeks. This ensures any missed spots or lingering germs are addressed.
By practicing these prevention habits, you create a healthier bath time. Your children enjoy their toys without risk of mold. This proactive approach saves time and keeps toys safe.
When to Replace Bath Toys
Even with the best cleaning efforts, bath toys do not last forever. There comes a time when replacement is the safest option. Knowing when to let go of a beloved bath toy is important. It ensures continued safety for your child. Some signs clearly indicate a toy needs to be discarded. This is similar to knowing when to replace old sponges or toothbrushes. These items harbor germs over time, no matter how much you clean them.
Signs a Bath Toy Needs Replacing
- Persistent Mold: You clean the toy. You use strong methods. But mold keeps coming back very quickly. This usually means the mold is deeply embedded. It might be impossible to remove fully. If you see black mold coming out of the toy even after cleaning, it is time to say goodbye.
- Damaged or Cracked Surfaces: Over time, plastic and rubber can crack or split. Water and germs can get into these tiny cracks. These areas are impossible to clean properly. They become breeding grounds for bacteria and mold.
- Foul Odor: A bad smell from a bath toy, even after cleaning, indicates bacteria or mold growth. This odor means the toy is no longer hygienic.
- Discoloration or Slimy Texture: If the toy has permanent discoloration from mold, or feels slimy even when dry, it is likely compromised. These are signs that bacteria or mold has deeply affected the material.
- Toy Integrity Loss: Some toys lose their shape. Some become sticky. Others fall apart. This means the material is breaking down. It is no longer safe for play. Small pieces could break off, creating a choking hazard.
- Squeaky Toy that Doesn’t Squeak (and has water inside): If a squeaky toy no longer squeaks and you know water has been trapped, it is a sign of internal issues. It is likely full of mold.
Making the Decision
It can be hard to throw away a favorite toy. However, your child’s health is the priority. If a toy shows any of the signs above, it poses a health risk. It is better to replace it with a new, clean one. Consider choosing new bath toys that are easier to clean. Look for solid plastic or silicone toys without holes. You can also seal the holes of new squeaky toys right away. This prevents future mold problems. This proactive approach saves you cleaning time. It also ensures a safer bath time for your child. Discarding old, moldy toys is a simple step. It keeps your child healthy and happy during bath time.
Frequently Asked Questions About Cleaning Bath Toys
How often should I clean bath toys?
You should clean bath toys weekly with a thorough method, like a vinegar soak. After each use, always squeeze out water and allow them to air dry completely. Daily drying prevents mold and reduces the need for frequent deep cleaning.
Can I put bath toys in the dishwasher?
Yes, some bath toys are dishwasher safe. Always check the toy’s label for specific instructions. Place toys on the top rack inside a mesh bag to protect them. Use a low-heat or air-dry cycle to prevent melting or warping.
Is bleach safe for cleaning bath toys?
Bleach can be used, but with caution. Mix one tablespoon of bleach per gallon of water. Soak toys for no more than 10-15 minutes. Rinse toys extremely well afterward to remove all bleach residue. Never mix bleach with vinegar.
How do I get black mold out of bath toys?
For black mold, soak toys in a strong solution of equal parts white vinegar and hot water, possibly overnight. Squeeze the toy to draw the solution inside. Scrub externally with a brush. Rinse repeatedly with clean water until mold is gone and water runs clear.
How can I prevent mold from growing inside squeaky bath toys?
The best way to prevent mold in squeaky toys is to seal the hole. Use a small dab of waterproof super glue or hot glue to cover the hole completely. This stops water from entering. The toy will no longer squeak, but it will stay mold-free.
What are some natural alternatives for cleaning bath toys?
White vinegar is a top natural choice. Mix it with warm water for soaking and cleaning. Baking soda also works well. Use it as a paste for scrubbing or add to a vinegar soak for odor removal. Both are safe and effective.
Conclusion
Cleaning bath toys is an essential part of child safety. We have discussed why it matters so much. Mold and germs can easily grow inside these innocent-looking playthings. This can pose health risks for your children. We explored how to clean bath toys thoroughly. You now know about different methods for various toy types. We covered solid plastic toys, tricky squeaky toys, and absorbent foam toys.
Natural cleaning solutions like white vinegar and baking soda offer safe and effective alternatives to harsh chemicals. They help eliminate mold and bacteria without leaving harmful residues. We also looked at deeper disinfection strategies, like using diluted bleach, dishwashers, or even boiling water for specific toys. The most vital steps involve proper drying and smart storage solutions. Always ensure toys are completely dry after use. Store them in well-ventilated areas. Consider sealing holes in squeaky toys. Replacing toys when they show signs of damage or persistent mold is also important for ongoing safety.
By implementing these cleaning tips and prevention habits, you provide a healthier play environment. You ensure bath time remains a fun, clean, and safe experience for your little ones. Make cleaning bath toys a regular part of your household routine. Your child’s health is worth the effort.
- bath toys
- clean toys
- mold removal
- toy hygiene
- baby products
- cleaning tips