· Home Cleaning · 17 min read
How To Clean Beach Sand
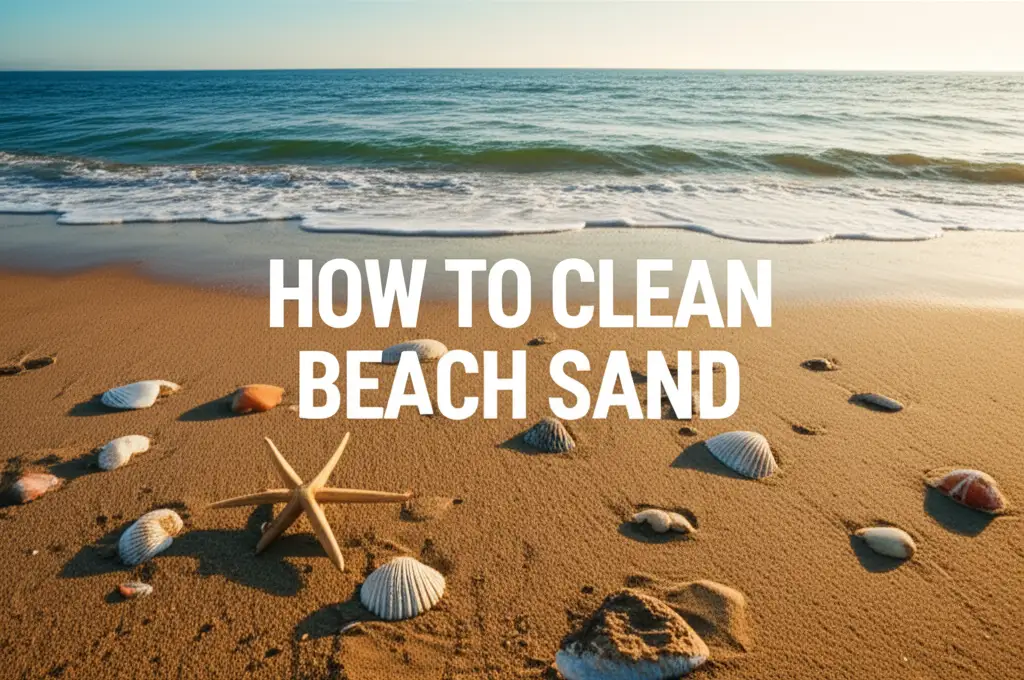
Transform Your Treasures: How to Clean Beach Sand Effectively
Beach trips create lasting memories. They also often leave you with souvenirs. A small bag of beautiful beach sand is a common keepsake. But this sand often contains more than just pretty grains. It can hold tiny shells, bits of plastic, organic matter, and salt. Learning how to clean beach sand is a simple process. It prepares your sand for various uses. This guide explores the best methods to purify your collected sand. We cover both dry and wet cleaning techniques. You will learn to make your beach sand sparkling clean.
Takeaway
- Dry Sifting: Use screens of varying mesh sizes to remove large and small debris.
- Wet Washing: Rinse sand thoroughly with water to remove fine dust, salt, and organic residue.
- Drying: Spread washed sand thinly to air dry or use low heat for faster results.
- Specific Uses: Adjust cleaning methods based on the sand’s intended purpose.
How do you clean beach sand?
To clean beach sand, first sift it dry through a series of progressively finer screens to remove large debris and small particles. Next, wash the sand thoroughly with water, rinsing until the water runs clear. Allow the purified sand to dry completely before storage or use.
Understanding Beach Sand and Its Cleaning Challenges
Beach sand appears simple. It is a mix of weathered rock and mineral particles. But it holds many hidden elements. These elements make cleaning necessary. Knowing what is in beach sand helps you clean it properly.
What Makes Beach Sand Different?
Beach sand is unique. Its composition depends on its origin. It can be quartz, shell fragments, or volcanic rock. Ocean currents and waves constantly shape these grains. This action smooths the sand. It also mixes it with ocean debris. Rivers carry minerals to the sea. The sea then deposits these at the shore. This natural process adds diversity to the sand.
Compared to other types, beach sand often contains salt. Ocean water leaves salt crystals behind. This salt can cause problems for plants. It can also corrode metal objects if sand is used near them. Sand from a beach also has different particle sizes. Some grains are very fine, like powder. Others are coarser. This variation affects how you clean the sand. For example, cleaning sandbox sand might focus more on debris from play, while beach sand needs salt removal.
Common Contaminants in Beach Sand
Beach sand collects various contaminants. These items wash ashore. They mix with the sand grains. Knowing these helps you choose the right cleaning method.
- Organic Matter: This includes seaweed, dead plant bits, tiny shells, and pieces of coral. These can decay. They cause odors and promote mold growth.
- Inorganic Debris: Small stones, pebbles, and tiny bits of glass or plastic are common. These can be sharp. They pose a safety risk for play.
- Salt: As mentioned, ocean salt remains in the sand. It is critical to remove salt for specific uses. High salt content harms plants. It can also affect concrete or craft materials.
- Fine Dust and Silt: Very fine particles stick to sand grains. They make the sand look cloudy. They can also create muddy water when wet.
- Microplastics: Tiny plastic fragments are a growing concern. These are hard to see. They are difficult to remove completely. They come from larger plastic items breaking down.
Cleaning beach sand removes these unwanted elements. It makes the sand safer. It also makes it more appealing for display or craft projects. Effective cleaning ensures your beach sand is pure and ready for its new purpose.
Essential Tools and Supplies for Cleaning Beach Sand
Cleaning beach sand becomes easy with the right tools. You do not need many specialized items. Most are found around your home. Some simple purchases make the process more efficient. Gathering everything before you start saves time.
Basic Sieving Tools
Sieving is the first step in cleaning sand. It separates larger debris from the sand. You will need a set of sieves or screens.
- Coarse Mesh Sieve: Start with a large-mesh sieve. This removes big items. Think of leaves, large shell pieces, or pebbles. A kitchen colander or garden sieve works well.
- Medium Mesh Sieve: After the coarse sieve, use a medium mesh. This catches smaller stones and shell fragments. A regular kitchen strainer is often suitable.
- Fine Mesh Sieve: This sieve removes tiny bits. It separates fine organic matter and small plastics. A flour sifter or a specialized sand sifter is good. You can also use window screen material stretched over a frame.
- Buckets or Tubs: You need at least two. One holds dirty sand. The other collects cleaned sand. Larger buckets are better for bigger sand quantities.
- Tarp or Plastic Sheet: Lay this down. It protects your work surface. It also catches any spilled sand. This makes cleanup easier.
Water and Drying Aids
Water is essential for washing sand. Proper drying ensures the sand stays clean and fresh.
- Access to Running Water: A garden hose or a large sink is ideal. You need a steady flow to rinse the sand. Warm water can help dissolve salt and dislodge dirt.
- Large Container for Washing: A five-gallon bucket or a large storage tub works. You will mix sand with water in this container.
- Drying Surface: A large, flat surface is crucial. A clean tarp, baking sheets, or old towels work. The surface should allow air circulation.
- Fans or Dehumidifier (Optional): These speed up drying. They are useful in humid climates. They prevent mold or mildew during drying.
- Oven (Optional): For quick drying of small batches, a low-temperature oven can be used. Spread sand thinly on baking sheets.
Specialized Cleaning Solutions
Most sand cleaning uses only water. For stubborn issues, you might need extra help.
- Mild Soap or Detergent: A small amount can help remove oily residues. Use dish soap or a gentle liquid soap. Always rinse thoroughly to remove all soap.
- Vinegar (White Distilled): Vinegar is an excellent natural cleaner. It helps dissolve mineral deposits. It can also neutralize odors. It is useful for sanitizing and removing stubborn salt. For more about general cleaning with vinegar, check out how to clean shower with vinegar or how to clean glass with vinegar.
- Bleach (Highly Diluted): Use bleach only for sanitizing sand for specific purposes. This is rare. A very weak solution can kill bacteria. Always rinse excessively if using bleach. Wear gloves and ensure good ventilation. Bleach can also alter sand color.
Having these tools ready makes the beach sand cleaning process smooth. You will be prepared for any type of contamination.
Step-by-Step Guide to Dry Cleaning Beach Sand
Dry cleaning beach sand is the first and often most important step. It removes large and visible impurities. This method is ideal for sand that is not heavily soiled. It works well for sand intended for dry decorative projects or terrariums. This process saves water and drying time.
Initial Sifting for Large Debris
Start with your largest mesh sieve. This step removes the most obvious contaminants. I find it easiest to do this outside.
- Spread a Tarp: Lay a clean tarp or plastic sheet on the ground. This protects your area. It also catches any sand that falls.
- Pour Sand: Carefully pour a manageable amount of beach sand onto the coarse sieve. Do not overload it. Too much sand makes sifting difficult.
- Shake and Sift: Gently shake the sieve. Use a circular motion. The sand falls through the mesh. Large debris stays in the sieve. Remove and discard any items caught in the sieve. These might include pebbles, shell pieces, or large organic matter. Repeat this until all your sand passes through the coarse sieve.
This initial pass removes big items. It makes the next steps much easier.
Fine Sifting for Smaller Particles
After the first pass, move to a finer mesh sieve. This targets smaller particles. It helps refine the sand further.
- Switch Sieves: Take the sand that passed through the coarse sieve. Transfer it to your medium-mesh sieve.
- Repeat Sifting: Shake this sieve. Again, use gentle, consistent movements. You will see smaller pieces caught this time. These can be tiny shell fragments or bits of seaweed.
- Discard and Continue: Remove these smaller pieces. Continue sifting all the sand. For an even finer clean, repeat this process with your finest mesh sieve. This removes very small organic matter. It catches tiny plastic pieces. This step is crucial for crafting or delicate projects.
Fine sifting makes sand feel smoother. It also looks cleaner. This dry method saves time compared to wet cleaning.
Magnetic Separation (Optional)
Sometimes, beach sand contains tiny metal fragments. These usually come from rust or general wear. A magnet can remove them. This step is usually only needed if you suspect metal contamination.
- Spread Sand Thinly: After fine sifting, spread the sand in a thin layer. Use a flat tray or a baking sheet.
- Use a Strong Magnet: Pass a strong magnet over the sand. Do not let the magnet touch the sand directly. Hold it slightly above the surface.
- Collect Metal: Metal particles will cling to the magnet. Gently tap the magnet over a waste bin to release the metal. Repeat this process several times. Move the magnet in different directions across the sand.
Magnetic separation ensures your sand is free of metal. This is important for sand used near electronics or in sensitive displays. Dry cleaning provides a good foundation. For truly pure sand, wet cleaning is often the next step.
Advanced Wet Cleaning Methods for Beach Sand
Wet cleaning is necessary for beach sand. It removes salt, fine dust, and deeply embedded organic matter. This method provides the cleanest sand possible. It is best for sand intended for terrariums, play areas, or sensitive craft projects. It requires more time than dry cleaning due to the drying process.
The Washing and Rinsing Technique
This is the core of wet cleaning. It involves submerging sand in water. Then you rinse it repeatedly.
- Prepare Your Setup: Get two large buckets. Use one for washing. Use the other for collecting dirty water. Place a fine-mesh sieve over the second bucket or a drain.
- Add Sand to Water: Pour your pre-sifted beach sand into the first bucket. Add plenty of water. The water should cover the sand by several inches.
- Agitate the Sand: Stir the sand vigorously. Use your hands or a sturdy stick. This action dislodges dirt, salt, and fine particles. You will see the water become cloudy. This cloudiness is dirt and salt.
- Decant Dirty Water: Carefully pour off the cloudy water. Be slow. Do not let the sand pour out with the water. Pour through your fine-mesh sieve if you fear losing sand. The sieve will catch any fine sand that escapes.
- Repeat Rinsing: Continue adding fresh water. Agitate and decant. Repeat this process many times. The goal is clear water. When the water you pour off looks clear, the sand is clean. This process ensures all soluble contaminants, especially salt, are gone. The water you use should be clean. For ideas on keeping water clean, review how to clean a water filter.
Sedimentation and Decantation
This technique is part of the washing process. It helps separate very fine particles. It also conserves sand.
- Allow Sedimentation: After agitating the sand and water, let the mixture sit. The sand grains are heavy. They will sink quickly to the bottom. Very fine silt and organic particles remain suspended.
- Pour Off Dirty Water: Once the sand has settled completely, carefully pour off the cloudy water. Do this slowly. Avoid disturbing the settled sand. This method minimizes sand loss. It ensures the removal of the lightest impurities. Repeat this several times until the water above the settled sand remains clear.
This method works well for fine sand. It prevents wasting small sand grains.
Drying and Dehumidifying Clean Sand
Proper drying prevents mold and odors. It also prepares the sand for storage or use. This is a critical step.
- Drain Excess Water: After the final rinse, let the sand drain in a fine-mesh sieve for several minutes. This removes most of the standing water.
- Spread Thinly: Spread the damp sand in a thin, even layer. Use a clean tarp, baking sheets, or old towels. The thinner the layer, the faster it dries.
- Choose a Drying Location:
- Sunlight: Direct sunlight is effective. It naturally sanitizes the sand. Spread outside on a sunny, dry day.
- Indoors with Airflow: If drying indoors, ensure good air circulation. Use fans or a dehumidifier. This prevents moisture buildup.
- Oven Drying (Small Batches): For faster drying, spread sand on baking sheets. Heat your oven to its lowest setting (around 150-200°F or 65-95°C). Leave the oven door slightly ajar. Stir the sand every 15-30 minutes. This prevents scorching. It ensures even drying. This method works for small amounts of sand.
- Check for Dryness: The sand is dry when it feels completely free of moisture. It should pour easily. There should be no clumps. Test by squeezing a handful. It should fall apart.
Drying takes time. It might take several hours or even a day. This depends on humidity and drying method. Once dry, your beach sand is clean. It is ready for its intended purpose.
Cleaning Beach Sand for Specific Uses
The way you clean beach sand depends on how you plan to use it. Different applications have different purity requirements. Understanding these needs helps you choose the right cleaning depth. This ensures your sand serves its purpose well.
Craft and Decorative Projects
For crafts, appearance is key. You want sand free of large debris and fine dust. Salt removal is also important for longevity.
- Dry Sifting is Essential: Begin with thorough dry sifting. Use coarse, medium, and fine sieves. This removes unsightly elements. It includes shells, pebbles, and organic bits.
- Optional Wet Wash: If the sand looks dull or has a dusty residue, a quick wet wash helps. Follow the washing and rinsing technique described earlier. Make sure to dry it completely afterward. This prevents mold. It also ensures colors are vibrant.
- Salt Removal: For projects sensitive to moisture or corrosion, like those involving metal or certain glues, a full wet wash is critical. This ensures all salt is dissolved and rinsed away. You can apply this knowledge to other types of cleaning, such as how to clean a sand filter for above ground pool, where purity for the system is also important.
Clean, dry sand performs best in crafts. It sticks better with glue. It also looks brighter in decorative displays.
Terrariums and Plant Displays
Sand used in terrariums or with plants needs to be very clean. It must be free of salt and organic matter. Both can harm plants.
- Thorough Wet Washing: A full wet cleaning is crucial for this use. Repeatedly wash the sand. Rinse it until the water runs completely clear. This removes all salt. It also washes away fine dust and silt.
- Remove Organic Material: Pay close attention to organic bits. Seaweed, tiny shell pieces, or wood can decay. This creates an unhealthy environment for plants. Ensure these are removed during sifting and washing. If you find any organic matter that looks like mildew, consider methods like how to clean mold with vinegar to sanitize effectively.
- Complete Drying: The sand must be bone dry before use in terrariums. Any moisture can lead to mold or rot inside a closed environment. Oven drying on low heat can be a good option for small batches. This ensures no moisture remains.
Clean sand provides a stable base for plants. It allows proper drainage. It does not introduce harmful substances.
Play Areas and Sandbox Use
Safety is the top concern for play sand. It must be free of sharp objects. It should also be non-toxic.
- Rigorous Sifting: Use multiple sieves. Remove all sharp shell fragments, glass, and plastic. Children might put sand in their mouths. So, extra care is needed.
- Sanitization (Optional but Recommended): For sandbox use, consider an extra sanitization step. After washing, you can bake the sand at a low temperature in the oven (around 200°F or 95°C for 30 minutes). This kills bacteria or tiny insects. Alternatively, you can rinse it with a very diluted bleach solution. Remember to rinse thoroughly with fresh water afterward.
- Salt Removal: While not as critical as for plants, removing salt is good. It prevents the sandbox from becoming sticky or attracting moisture. A thorough wet wash achieves this. For more specific advice on maintaining play sand, you can look into how to clean sandbox sand.
- Full Drying: Ensure the sand is completely dry before adding it to a sandbox. Damp sand encourages mold growth.
By tailoring your cleaning approach, you can ensure your beach sand is perfect for its intended use. Each application requires careful attention to specific contaminants.
Preventing Future Contamination and Storage Tips
Cleaning beach sand is an investment of time. Protecting your newly cleaned sand is important. Proper collection and storage methods prevent re-contamination. This keeps your sand pristine for longer.
Best Practices for Collecting Sand
The cleaning process starts at the beach. How you collect sand impacts its cleanliness.
- Choose Clean Areas: Look for sand away from high-traffic zones. Avoid areas near trash bins or where food waste accumulates. These spots often have more debris.
- Surface Collection: Gather sand from the top layer. Avoid digging deep. Deeper sand might contain more organic matter or dampness.
- Avoid Wet Sand: If possible, collect sand that is already dry. This reduces the initial moisture content. It also means less organic material. If you collect wet sand, be prepared for more thorough drying later.
- Preliminary Sift on Site: Bring a simple coarse sieve or colander to the beach. Do a quick preliminary sift. This removes large shells, rocks, and seaweed immediately. This significantly reduces the amount of debris you bring home.
- Use Clean Containers: Store collected sand in clean, sealed bags or containers. This prevents external contaminants from mixing with the sand.
These collection habits reduce your cleaning workload later. They ensure you start with the best possible raw material.
Proper Storage for Clean Sand
Once your beach sand is clean and dry, store it correctly. This maintains its purity.
- Airtight Containers: Use airtight containers for storage. Glass jars, plastic bins with sealing lids, or heavy-duty Ziploc bags are excellent. Airtight seals prevent dust, insects, and moisture from getting in.
- Cool, Dry Place: Store containers in a cool, dry environment. Avoid areas with high humidity. Moisture can lead to mold or clumping. Basements or garages might be too damp. A closet or pantry is often a better choice.
- Labeling: Label your containers. Include the date you cleaned the sand. Note the type of sand if you have multiple collections. This helps you keep track of your inventory.
- Avoid Contaminants: Keep clean sand away from potential sources of contamination. This includes garden soil, chemicals, or food items.
Maintaining Sand Purity Over Time
Even cleaned sand can become contaminated. A few habits help maintain its purity.
- Regular Checks: Periodically check stored sand. Look for any signs of moisture, clumping, or unusual odors. If you find any issues, re-dry the sand. You might need to re-clean small sections.
- Dedicated Tools: Use dedicated scoops or tools for your clean sand. Do not use tools that have touched dirty soil or other materials. This prevents cross-contamination.
- Closed Systems: For terrariums or displays, ensure the system is sealed properly. This protects the sand from airborne dust and moisture.
- Outdoor Sandboxes: For outdoor sandboxes, cover the sand when not in use. A secure cover keeps out leaves, animals, and rain. This significantly reduces maintenance. Re-sift sandbox sand regularly. Remove any new debris.
By following these prevention and storage tips, your clean beach sand remains beautiful. It will be ready for any project or use whenever you need it.
Troubleshooting Common Beach Sand Cleaning Issues
Even with the best practices, you might encounter challenges. Beach sand can be stubborn. Some contaminants are harder to remove than others. Knowing how to troubleshoot these issues saves time and effort.
Dealing with Stubborn Organic Matter
Organic matter includes small bits of seaweed, wood, or unidentifiable plant debris. These can cause odors or decay.
- Extended Soaking: For persistent organic bits, try soaking the sand. Use warm water. Let it sit for several hours. Sometimes, the organic matter will float. This makes it easier to skim off.
- Gentle Agitation with a Brush: After soaking, use a soft brush. Gently stir the sand in water. This helps dislodge stuck debris. A dedicated scrubbing brush can be used carefully.
- Hydrogen Peroxide (Diluted): For strong odors or suspected bacterial growth from organic matter, a very diluted hydrogen peroxide solution (3% food-grade) can help. Mix a small amount into the wash water. Rinse thoroughly afterwards. Hydrogen peroxide breaks down organic material. It also acts as a mild disinfectant. Be sure to use proper ventilation.
- Repeated Drying and Sifting: If all else fails, multiple cycles of wet washing, drying, and resifting can work. Each cycle might remove a few more stubborn pieces.
Sometimes, beach sand can harbor mold spores, especially if collected damp. If you notice a musty smell, you can use methods from how to clean mold with vinegar or a very diluted bleach solution (followed by extensive rinsing) to sanitize the sand.
- beach sand cleaning
- sand purification
- collected sand
- DIY sand cleaning
- removing impurities