· Electronics Cleaning · 13 min read
How To Clean Beats Studio 3 Headphones Properly
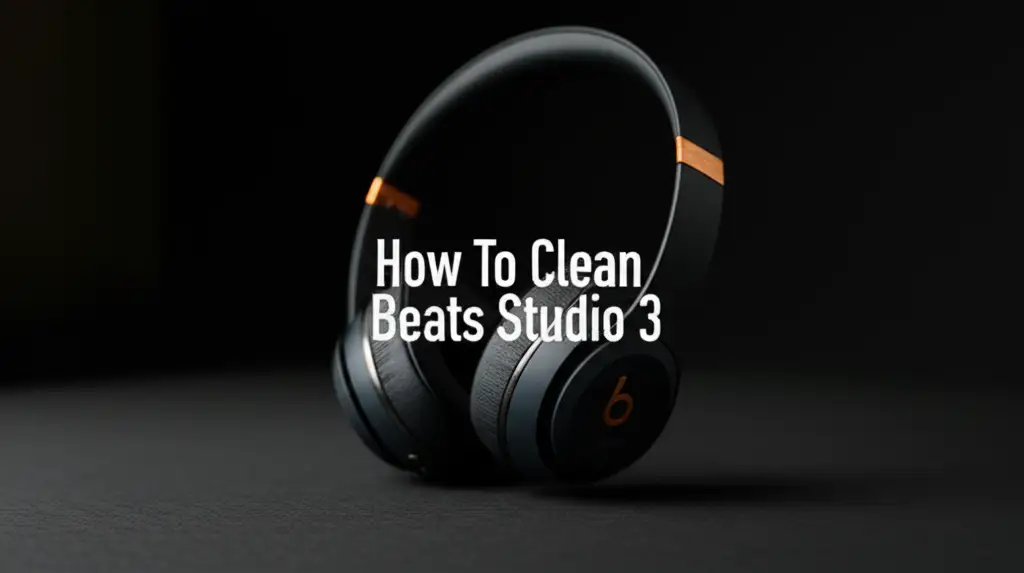
How To Clean Beats Studio 3 Headphones Properly
Your Beats Studio 3 headphones provide amazing sound. They travel with you everywhere. This means they collect sweat, dust, and grime over time. Regular cleaning keeps them looking good. It also helps them sound clear and last longer.
I often get asked how to clean Beats Studio 3 headphones without causing damage. This article shows you how to clean your Beats Studio 3 safely. We will cover materials needed, cleaning different parts, and prevention tips. This guide helps you maintain your investment.
Takeaway
Keeping your Beats Studio 3 clean is simple. Use soft, dry cloths and gentle solutions.
- Wipe surfaces regularly.
- Clean earcups and headband carefully.
- Address grime on grilles and ports.
- Ensure full drying before use or storage.
- Store them correctly to prevent buildup.
Clear, Concise Answer
To clean Beats Studio 3 headphones, use a soft, lint-free cloth dampened with a small amount of water or a mild electronics cleaner. Gently wipe the earcups, headband, and outer surfaces. Use a soft brush for grilles and ports. Always avoid harsh chemicals and excess moisture to prevent damage to internal components.
Why Cleaning Your Beats Studio 3 is Important
Cleaning your Beats Studio 3 headphones matters for several reasons. First, hygiene is very important. Headphones sit close to your skin and ears. They collect sweat, earwax, skin oils, and dirt. This buildup can create an unhealthy environment. It can lead to skin irritation or even ear infections. Keeping them clean protects your health.
Second, regular cleaning protects your investment. Beats Studio 3 headphones are high-quality items. Dirt and grime can degrade the materials over time. Earpads can crack or peel. Headbands can become sticky or discolored. Clean headphones look better and feel better to wear. They retain their value longer.
Third, cleaning helps maintain sound quality. Dust and debris can block speaker grilles. This can muffle the sound. It can also reduce the clarity of your audio. Clean grilles allow sound to pass freely. This ensures you get the best listening experience. I always notice a difference in sound clarity after a good clean. Keeping them clean means your music sounds its best every time you listen.
Lastly, consistent cleaning prevents major issues. Small amounts of dirt are easy to remove. Heavy buildup is much harder to tackle. It can also cause irreversible damage. Preventing grime means you avoid costly repairs or replacements. A little care goes a long way in extending the life of your Beats Studio 3 headphones.
Gathering Your Cleaning Essentials
Before you start cleaning your Beats Studio 3, collect the right tools. Using the correct items prevents damage. You do not need many things. Most items are common household goods. This makes cleaning easy and accessible.
First, you need a few soft, lint-free microfiber cloths. These cloths are gentle on surfaces. They will not scratch your headphones. I always keep a few on hand for all my electronics. Paper towels or rough cloths can leave fibers or scratch delicate finishes. Avoid these.
Next, you need a small bowl of clean water. This is for dampening your cloth. You can also use a mild electronics cleaning solution. Isopropyl alcohol (70%) is another good choice for disinfecting. Always apply liquid to the cloth, not directly to the headphones. Using a spray bottle can help apply a small amount. Ensure you use only a very tiny amount.
A soft-bristled brush is also helpful. An old, clean toothbrush works well. A clean paintbrush is another option. These are great for reaching small crevices. They also help remove dust from grilles and ports. You can find specific electronics cleaning brushes too.
Cotton swabs are useful for small areas. They work well for cleaning around buttons or charging ports. Avoid pushing them too hard into small openings. This can cause damage.
Finally, consider having a small amount of compressed air. This is ideal for blowing dust out of ports. Use short bursts and keep the can upright. This prevents liquid propellant from spraying onto your headphones. I find it very effective for stubborn dust. Gather all these items before you begin. This makes the cleaning process smooth.
Gentle Cleaning for Earcups and Headband
The earcups and headband are the parts that touch your skin most. They collect the most sweat and oils. Cleaning these areas needs a gentle touch. This protects the materials and prevents damage. I usually start with the earcups.
For the earpads, check if they are removable. Beats Studio 3 earpads can often be twisted off. If yours are removable, it makes cleaning easier. You can wipe them thoroughly without worrying about the speaker. If they are not removable, be extra careful around the speaker grilles.
Dampen a microfiber cloth slightly with water or a mild electronics cleaner. The cloth should be barely damp, not wet. Wring out any excess liquid. Gently wipe the surface of the earpads. Use circular motions. Focus on areas with visible grime or oil. For stubborn spots, apply a little more pressure. Do not rub too hard. This can damage the earpad material. If you have concerns about the earpad material, test a small hidden area first.
The headband also collects sweat and hair products. It can get sticky or discolored. Use the same slightly damp microfiber cloth. Wipe down the entire headband, both top and bottom. Pay attention to the padding underneath. This area can accumulate significant grime. I often find the most buildup here.
After cleaning, use a dry microfiber cloth. Wipe all cleaned areas to remove any remaining moisture. Ensure the headphones are completely dry before you wear them again. This prevents moisture from seeping into internal components. It also helps prevent odors. This step is crucial for the longevity of your headphones. Proper care for earcups and headbands makes a big difference in comfort and hygiene. You can learn more about caring for similar devices here: How To Clean Beats Studio Buds.
Cleaning the Speaker Grilles and Ports
The speaker grilles and various ports on your Beats Studio 3 require specific attention. These areas can collect dust, lint, and debris. This can block sound or interfere with charging. Cleaning them requires precision and caution. I always approach these parts with extra care.
Start with the speaker grilles under the earpads. If your earpads are removable, take them off. This gives you direct access to the grilles. Use a soft-bristled brush. Gently brush away any dust or debris from the grille mesh. Do not push hard. The goal is to lift the particles, not push them deeper. A clean, dry, soft toothbrush works well for this. I sometimes use a small, clean makeup brush.
For very stubborn dust inside the grilles, use compressed air. Hold the can upright. Use short, controlled bursts. Keep the nozzle a few inches away from the grille. This dislodges particles without damaging the delicate mesh. Avoid blowing directly onto the speaker cones. Always use short, directed bursts.
Next, focus on the charging port (USB-A to USB micro-B or USB-C depending on your model) and the audio jack. These ports attract lint from pockets and bags. First, visually inspect the ports. Use a bright light if needed. For light dust, compressed air is often enough. Use short bursts again.
For stubborn lint or debris, a toothpick or a plastic dental pick can help. Be extremely gentle. Do not use metal objects. They can short-circuit the connections or scratch the inside of the port. Carefully scrape out any visible lint. Move slowly and do not apply pressure. I have seen people damage their charging ports by being too aggressive. A cotton swab slightly dampened with isopropyl alcohol can clean the port’s outer edges. Ensure no liquid enters the port. This focused cleaning ensures proper function and connectivity.
Addressing Tough Stains and Odors
Sometimes, simple wiping is not enough. Your Beats Studio 3 might have tough stains or odors. This happens with heavy use or infrequent cleaning. Dealing with these issues requires a bit more effort. I have encountered my share of stubborn spots.
For tough stains on plastic or rubber parts, a slightly stronger approach might be needed. Mix a very small amount of mild dish soap with water. The solution should be mostly water. Dampen your microfiber cloth with this mixture. Wring it out very well. Gently dab the stained area. Do not rub vigorously. Let the solution sit for a moment. Then, wipe it away with a clean, damp cloth (water only). Follow immediately with a dry cloth. Always ensure no soap residue remains. This method can be effective for surface stains. If you are dealing with potential mold on plastic surfaces due to humidity or sweat, you can check out tips here: How To Clean Mold Off Plastic. Remember, any liquid on electronics must be minimal.
Odors often come from sweat and bacteria buildup. Regular cleaning prevents most odors. If your headphones already smell, a deeper clean helps. Wipe down all surfaces, especially the earpads and headband, with a cloth dampened with 70% isopropyl alcohol. Alcohol evaporates quickly. It also kills bacteria that cause odors. Let the headphones air dry completely in a well-ventilated area. Do not place them in direct sunlight. Sunlight can damage materials.
For very persistent odors, you can try airing them out. Place your headphones in a clean, open space for a few hours. A dry, airy spot is best. Some people use silica gel packets near their headphones (not touching) to absorb moisture and odors. Never use strong chemical cleaners or bleach. These can damage the materials. They can also leave harmful residues. Some household cleaners, like strong vinegar solutions used on walls, are far too aggressive for electronics. This is why gentle care is key for headphones, unlike robust surfaces where you might use solutions like those discussed in How To Clean Walls With Vinegar. Always choose the gentlest method first.
Proper Drying and Storage Tips
After cleaning your Beats Studio 3 headphones, proper drying is essential. Any leftover moisture can damage the internal electronics. Storing them correctly also prevents future dirt and extends their life. I always make sure my headphones are completely dry before putting them away.
After wiping down your headphones, use a separate, clean, dry microfiber cloth. Go over all the surfaces you cleaned. This absorbs any remaining moisture. Pay extra attention to seams and crevices. Liquid can hide in these spots. Gently press the cloth into padded areas to draw out dampness.
Once wiped, let your headphones air dry completely. Place them in a clean, dry, well-ventilated area. Avoid direct sunlight or extreme heat sources. Heat can warp plastic parts or damage the earpads. Leave them to dry for at least a few hours. If you used more moisture, let them dry overnight. I usually leave mine out for several hours to be safe. You want them bone dry before the next step.
Proper storage is key for long-term care. Beats Studio 3 headphones usually come with a carrying case. Always use this case when you are not using the headphones. The case protects them from dust, dirt, and accidental bumps. It also prevents lint from getting into the ports. Make sure the case itself is clean inside.
If you do not have the original case, use a clean, soft pouch. Store your headphones in a cool, dry place. Avoid leaving them in extreme temperatures, like a hot car or very cold room. These conditions can degrade battery life and material quality. Storing them properly keeps them clean between uses. It also protects them from environmental factors.
Preventing Future Buildup
Preventing dirt buildup is easier than cleaning heavy grime. A few simple habits can keep your Beats Studio 3 headphones in top condition. I always focus on prevention. This reduces the need for deep cleaning.
First, make it a habit to wipe your headphones after each use. A quick wipe with a dry microfiber cloth can remove sweat and oils. This prevents them from drying and becoming sticky. It takes only a few seconds. This small step significantly reduces buildup over time.
Second, avoid touching your headphones with dirty hands. If you are eating or working with greasy materials, clean your hands first. This prevents transferring food particles or grime to your earcups and headband. I try to be mindful of this, especially after a snack.
Third, store your headphones correctly when not in use. As mentioned, the carrying case is your best friend. It protects against dust and lint. Do not just toss them into a bag or on a dusty shelf. The case keeps them isolated from environmental dirt.
Fourth, keep your ears clean. Earwax buildup on your ears can transfer to the earpads and speaker grilles. Regular ear hygiene helps keep your headphones cleaner. This also contributes to better overall health.
Lastly, be mindful of where you use your headphones. Avoid very dusty or greasy environments if possible. If you use them in such places, plan for a quick wipe-down afterward. For example, after a workout, I always give my headphones a quick wipe to remove sweat. These simple steps make a big difference. They ensure your Beats Studio 3 headphones stay clean and perform well for many years.
FAQ Section
Q1: Can I use rubbing alcohol to clean my Beats Studio 3? A1: Yes, you can use 70% isopropyl rubbing alcohol. Dampen a microfiber cloth lightly with it. Gently wipe the surfaces. Alcohol is good for disinfecting and evaporating quickly. Avoid pouring it directly onto the headphones. Ensure no liquid gets into ports or speaker grilles.
Q2: How often should I clean my Beats Studio 3 headphones? A2: It depends on your usage. If you use them daily, a quick wipe after each use is good. A more thorough clean every week or two is ideal. For occasional users, a monthly cleaning might be enough. Regular light cleaning prevents heavy buildup.
Q3: Can I wash the earpads of my Beats Studio 3? A3: Generally, no. Most Beats Studio 3 earpads are not designed for washing. Submerging them in water can damage the internal foam or adhesive. It can also cause mold issues if not dried properly. Stick to gentle wiping with a damp cloth for cleaning.
Q4: What should I avoid using to clean my headphones? A4: Avoid harsh chemicals like bleach, abrasive cleaners, or strong solvents. Do not use paper towels or rough cloths. These can scratch surfaces. Never submerge your headphones in water. Avoid excessive moisture on any part.
Q5: My headphones smell bad. How do I get rid of the odor? A5: Odors often come from sweat and bacteria. Wipe all surfaces, especially earpads and headband, with a cloth dampened with 70% isopropyl alcohol. Let them air dry completely in a well-ventilated area. This helps kill bacteria and dissipate odors.
Conclusion
Keeping your Beats Studio 3 headphones clean is simple and very rewarding. It protects your health, preserves sound quality, and extends the life of your device. We discussed why cleaning matters and what tools you need. We covered specific steps for cleaning earcups, headbands, grilles, and ports. We also looked at how to tackle tough stains and odors. Remember to dry your headphones completely and store them properly.
I hope these steps help you keep your Beats Studio 3 in top condition. Start cleaning your Beats Studio 3 today. You will enjoy their performance for many years.
- Beats Studio 3 cleaning
- headphone maintenance
- clean headphones
- audio accessories care