· Home Appliance Maintenance · 24 min read
How To Clean Bedjet Filter
Optimize Your Sleep: How To Clean BedJet Filter
Is your BedJet not feeling as powerful as it once did? Maybe the airflow seems weaker, or you notice a dusty scent. A dirty filter is often the cause. Just like other home appliances, your BedJet needs regular maintenance to work its best. Cleaning the BedJet filter ensures fresh air delivery and extends the life of your unit. This guide will walk you through the simple steps to clean your BedJet filter. We will cover why it matters, when to do it, and how to keep your sleep system running perfectly. You will learn the specific actions needed to restore your BedJet’s performance.
Takeaway:
- Regularly clean your BedJet filter to maintain airflow and air quality.
- Dust, debris, and pet hair can clog the filter, reducing efficiency.
- The cleaning process is simple and requires only basic household items.
- A clean filter helps extend the life of your BedJet unit.
To clean your BedJet filter, first unplug the unit. Remove the filter cover and then pull out the filter. Use a vacuum or soft brush to remove loose debris. Rinse the filter under cool water if needed, using a mild soap for stubborn dirt. Allow it to air dry completely before reinstalling.
Why Cleaning Your BedJet Filter Matters for Optimal Performance
Your BedJet is a fantastic device that brings climate control directly to your bed. It provides warm or cool air for personalized comfort. At its core, the BedJet uses a powerful fan to move air. This air first passes through a filter. This filter captures dust, dander, and other airborne particles. A clean filter allows air to flow freely. This means your BedJet can deliver the desired temperature and airflow efficiently. When the filter gets dirty, air cannot pass through easily. This makes the fan work harder, which uses more energy. It also means less air reaches your bed.
A clogged filter also impacts the air quality you breathe while sleeping. The BedJet draws air from your room. If its filter is full of dust, it cannot effectively clean the air before it reaches you. This can circulate allergens and dust right into your sleep zone. Regular filter cleaning ensures you breathe cleaner air all night long. Think of it like the air filter in your furnace. A dirty furnace filter restricts airflow and can reduce the efficiency of your heating and cooling system. Similarly, a clean BedJet filter ensures the air circulating around you is fresh. Learn more about maintaining overall home air quality by checking out our guide on how to clean an air purifier filter. Keeping these filters clean is a simple step for better health.
Maintaining your BedJet filter also protects the unit itself. The fan motor works harder when the filter is clogged. This extra strain can lead to premature wear and tear. Over time, this could shorten the lifespan of your BedJet. Cleaning the filter regularly is a simple act of preventative maintenance. It helps avoid costly repairs or replacements later. Consider how much easier it is to simply clean a component than to replace an entire system. This small task protects your investment and ensures many more nights of comfortable sleep.
Understanding BedJet Filter Function
The BedJet filter acts as the unit’s lungs. It pulls in air from your room. It then traps dust, pet dander, and other tiny particles. This process prevents these particles from entering the BedJet’s internal components. It also stops them from being blown into your bedding. The filter design aims to capture these common household allergens. This makes your sleeping environment cleaner and healthier. A functional filter is essential for allergy sufferers. It helps to keep airborne irritants out of your personal space.
Benefits of Regular Maintenance
Regular filter cleaning brings many benefits. First, it ensures optimal airflow. This means you get the full heating or cooling power your BedJet offers. Second, it maintains excellent air quality around your bed. You breathe cleaner air, which is good for your health, especially if you have allergies or asthma. Third, it extends the life of your BedJet. The motor does not overwork, reducing stress on internal parts. Fourth, it saves energy. A clogged filter makes the unit work harder, consuming more power. A clean filter allows efficient operation, potentially lowering your energy bill. Just like you would clean a vacuum filter for better suction, cleaning your BedJet filter improves its overall performance. For tips on how to clean a vacuum filter, see our guide on how to clean a Dyson vacuum filter.
When and How Often to Clean Your BedJet Filter
Knowing when to clean your BedJet filter is key to maintaining its performance. The frequency depends on several factors. How often you use your BedJet is important. Daily use will require more frequent cleaning than occasional use. Your home environment also plays a big role. Homes with pets, a lot of dust, or people with allergies will need more frequent filter maintenance. Generally, BedJet recommends checking the filter every 1-2 months. You might need to clean it more often if you fall into the categories mentioned above. It is better to check it regularly than to wait until you notice a problem.
Paying attention to your BedJet’s performance can also tell you when it is time to clean the filter. If you notice a decrease in airflow, a strange smell, or the unit seems to be working harder than usual, the filter is likely clogged. The airflow might feel weak even on higher settings. You might also notice a dusty odor coming from the unit. These are clear signs that the filter needs your immediate attention. Do not ignore these warnings. Addressing them quickly prevents further issues and restores your BedJet’s comfort delivery. Consider how you would clean an air conditioner filter if you notice reduced airflow and odors. Similarly, your BedJet needs similar attention. Learn more about maintaining other air-related filters with our guide on how to clean an air conditioner filter.
Another good habit is to simply visually inspect the filter. When you check it every month or two, you can see if it looks dirty. Is it covered in a layer of dust, lint, or pet hair? If so, it is time for a cleaning. Some people set a reminder on their phone or calendar. This helps ensure they do not forget this important task. It becomes a routine, just like changing your bed sheets. A consistent schedule helps keep your BedJet running smoothly. This proactive approach prevents performance issues before they even start. Remember, a little effort now saves you from bigger problems later.
Signs Your Filter Needs Attention
Several signs indicate your BedJet filter needs cleaning. First, you might feel reduced airflow from the nozzle. The air might not feel as strong as before, even when the unit is on a high setting. Second, you might hear the BedJet fan working harder. It may sound louder or produce a strained humming noise. This means the motor is struggling to push air through a clogged filter. Third, you might notice an odd smell. Dust and accumulated debris can produce a musty or stale odor. This smell then gets blown into your bed. Fourth, the temperature control might feel less effective. The unit struggles to deliver the desired heating or cooling because of limited air movement. If you experience any of these signs, clean your filter right away.
Recommended Cleaning Schedule
BedJet suggests inspecting your filter every 1 to 2 months. This is a good baseline. However, adjust this frequency based on your lifestyle. If you have pets that shed, clean the filter monthly. If you have allergies, a monthly cleaning is also a good idea to maintain air quality. If you live in a dusty environment, clean it more often. For seasonal use, clean it before storing the unit and again before using it for the new season. Make filter cleaning a part of your regular home maintenance routine. This proactive approach keeps your BedJet operating at its peak.
Gathering Your Tools: What You Need to Clean a BedJet Filter
Cleaning your BedJet filter does not require many special tools. You likely have most of the necessary items already in your home. Having the right supplies ready makes the process quick and easy. This preparation step ensures you can complete the cleaning effectively without interruptions. A simple setup makes maintenance less of a chore. We are aiming for a hassle-free experience here. Make sure you gather everything before you start. This saves time and ensures you do the job right the first time.
First, you will need a small vacuum cleaner with a brush attachment, or simply a soft-bristled brush. This is for removing loose dust and debris. A vacuum is very effective for getting rid of surface grime. If you do not have a vacuum, a soft brush works well too. Just make sure the bristles are gentle enough not to damage the filter material. You do not want to push the dirt deeper into the filter mesh. The goal is to lift it away. For general air filters, a vacuum often does the trick too. For instance, knowing how to properly clean a furnace filter with a vacuum can extend its life and improve air quality throughout your home. Check out our guide on how to clean a furnace filter for more details.
Next, you will need access to a sink with cool running water. This is for rinsing the filter if it needs a deeper clean. A gentle stream of water helps flush out embedded particles. You might also want a mild liquid soap, like dish soap, for tougher grime. Just a small drop is enough. Avoid harsh chemicals or abrasive cleaners. These can damage the delicate filter material. A gentle approach is always best for filter longevity. You also need a clean, dry towel. This is for gently blotting the filter after rinsing. It helps speed up the drying process. Do not use paper towels as they can leave lint behind.
Finally, you will need a well-ventilated area for the filter to air dry completely. This could be a countertop, a drying rack, or even outdoors on a non-windy day. Proper drying is crucial. A damp filter can grow mold or mildew, which you do not want circulating in your bed. Make sure the area is clean and dust-free. This prevents the freshly cleaned filter from picking up new dirt. Having all these items ready before you start will make the cleaning process smooth and efficient.
Essential Supplies for Filter Care
Gather these simple items before you begin:
- Small vacuum cleaner with a brush attachment or a soft-bristled brush: For dry cleaning and removing loose debris.
- Access to a sink with cool running water: For rinsing the filter.
- Mild liquid soap (optional, e.g., dish soap): For deeper cleaning of stubborn grime.
- Clean, dry towel: To blot excess water from the filter.
- A clean, well-ventilated area: For the filter to air dry completely.
Do not use harsh chemicals. Avoid abrasive sponges or brushes. These can damage the filter material. Simple tools are often the most effective. This minimal set of supplies ensures you can properly clean the filter without causing any damage.
Step-by-Step Guide: How to Clean a BedJet Filter
Cleaning your BedJet filter is a straightforward process. Following these steps will ensure you do it correctly and safely. I will guide you through each part, from preparing your unit to reinstalling the clean filter. Taking your time with each step ensures the best outcome. You want your BedJet to return to its peak performance. Let’s get your BedJet blowing fresh, clean air again. This process is designed to be simple and effective for every BedJet owner.
Removing the Filter Safely
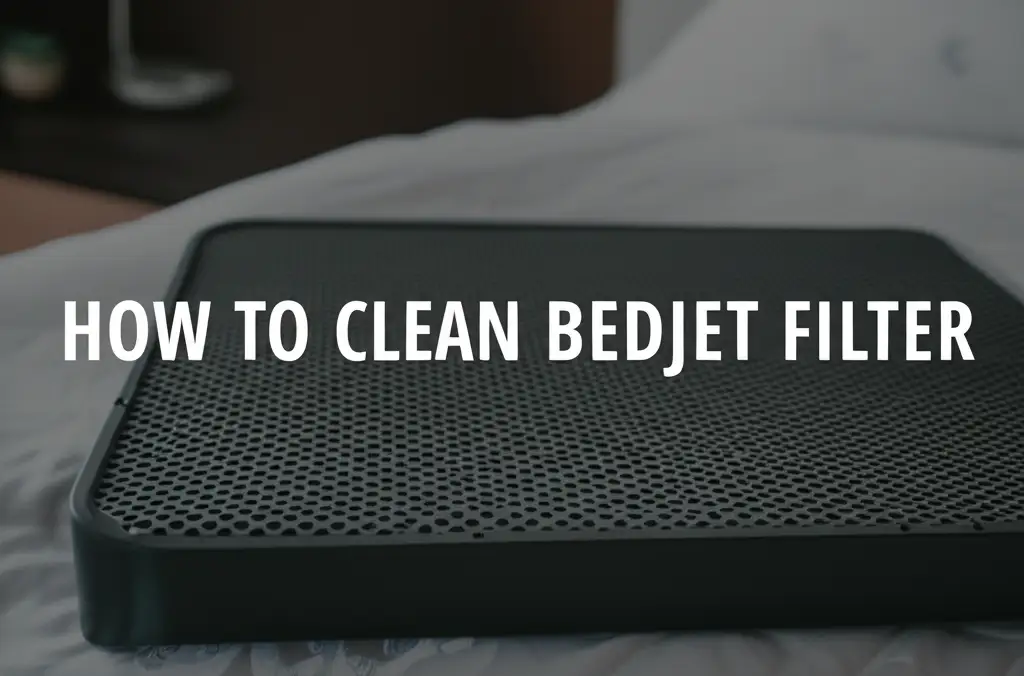
First, unplug your BedJet unit from the wall outlet. Safety is paramount. You do not want the unit accidentally turning on while you are working on it. Once unplugged, locate the filter cover. The BedJet filter is typically located on the underside or rear of the main unit. Consult your BedJet user manual if you have trouble finding it. The cover usually has a small latch or tabs you can press or slide. Gently open or remove the filter cover. Once the cover is off, you will see the filter. It is usually a rectangular piece of mesh material. Carefully pull the filter straight out from its slot. Handle it by its edges if possible to avoid transferring more oil or dirt from your hands.
Cleaning the Filter (Dry and Wet Methods)
Now that you have the filter out, you can clean it. There are two main methods: dry cleaning and wet cleaning.
Dry Cleaning (Recommended for light dust):
- Use a vacuum: Take your small vacuum with a brush attachment. Gently vacuum both sides of the filter. Move the brush attachment over the filter surface. This removes loose dust, lint, and pet hair. Make sure to get into all the crevices. This is often enough for regular maintenance.
- Use a soft brush: If you do not have a vacuum, use a clean, soft-bristled brush. Gently brush off the dust from both sides of the filter. Work over a trash can to catch the debris.
Wet Cleaning (For heavier dirt or odors):
- Rinse under water: If the filter is very dirty, has stubborn grime, or smells musty, you can rinse it. Hold the filter under cool, running water. Let the water flow through the mesh from the cleaner side to the dirtier side. This helps push debris out.
- Add mild soap (optional): For tough dirt, put a small drop of mild liquid soap (like dish soap) on your hands. Gently rub it onto the filter, creating a light lather. Work it through the mesh with your fingertips.
- Rinse thoroughly: Rinse the filter again under cool water. Make sure all soap residue is gone. Soap left on the filter can attract more dust later or create an odor. The water should run clear.
For filters that are designed to be washed, a good rinse is key. Just like cleaning a Roomba filter after it has picked up a lot of dust, a proper wash can restore its effectiveness. You can learn more about general washable filter care by reading our guide on how to clean a Roomba filter.
Drying and Reinstalling the Filter
This step is critical. The filter must be completely dry before you put it back.
- Blot excess water: After rinsing, gently shake off excess water. Then, place the filter on a clean, dry towel. Gently blot both sides with another part of the towel. Do not wring or twist the filter, as this can damage its structure.
- Air dry completely: Place the filter in a clean, well-ventilated area. Lay it flat or stand it on its edge if it is stable. Let it air dry completely. This can take several hours, depending on humidity and airflow. Do not use a hair dryer or any heat source. Heat can warp or damage the filter material. Do not reinstall a damp filter. A damp filter can promote mold or mildew growth inside your BedJet unit. This will lead to bad odors and potential health issues.
- Reinstall the filter: Once the filter is thoroughly dry, slide it back into its slot in the BedJet unit. Make sure it seats properly and fits snugly.
- Replace the cover: Close the filter cover securely. Ensure any latches or tabs click into place.
- Plug in and test: Finally, plug your BedJet back into the wall outlet. Turn it on and test it. You should notice improved airflow and perhaps a quieter operation.
You have now successfully cleaned your BedJet filter! This simple maintenance ensures your unit continues to provide comfortable, clean air for your best sleep.
Common Mistakes to Avoid When Cleaning Your BedJet Filter
While cleaning your BedJet filter is simple, it is easy to make common mistakes that can reduce its effectiveness or even damage the unit. Knowing what to avoid is as important as knowing what to do. I have seen many people unknowingly compromise their appliances by making these errors. My goal is to help you bypass these pitfalls and ensure your BedJet continues to run smoothly for years. Avoiding these missteps guarantees a proper, long-lasting clean.
Protecting Your Filter from Damage
One of the biggest mistakes is using harsh cleaning agents or abrasive tools. The BedJet filter is a delicate mesh material. Using strong chemical cleaners like bleach, ammonia, or even harsh spray cleaners can break down the filter fibers. This reduces its ability to trap particles. It can also leave behind chemical residues that you will then breathe in. Similarly, scrubbing with a stiff brush or abrasive sponge can tear the mesh. This creates holes that allow dust to pass through. Always stick to mild soap and soft brushes or vacuum attachments. Treat the filter gently, just like you would a delicate fabric. Avoid any aggressive scrubbing or twisting motions, especially if you are wet cleaning it.
Another mistake is forgetting to unplug the unit. This is a safety hazard. Working on an appliance that is still powered can lead to electric shock or accidental startup. Always unplug your BedJet before you even touch the filter cover. This ensures your safety and prevents any damage to the unit during the removal and reinstallation process. It is a simple step that is often overlooked in the rush to get the job done. Make it a habit for all appliance maintenance. If you are cleaning any electronic device, like a Shark vacuum filter, always ensure it is powered off and unplugged first. This rule applies universally. Our guide on how to clean a Shark filter offers similar safety advice for other home appliances.
Ensuring Proper Drying
The most critical mistake is reinstalling a damp filter. This might seem minor, but it has significant consequences. A wet or even slightly damp filter creates a perfect breeding ground for mold and mildew inside your BedJet unit. Mold not only produces unpleasant, musty odors that will blow directly into your bed, but it can also release spores that are harmful to breathe. This negates the air quality benefits of cleaning the filter. Always allow the filter to air dry completely. This means several hours, or even overnight, depending on humidity levels. Patience is key here. Never use heat sources like hair dryers, ovens, or direct sunlight. High heat can warp the filter frame or melt the filter material, rendering it useless. Place it in a well-ventilated, room-temperature area away from direct heat. It should feel completely dry to the touch before you put it back.
Another oversight is not cleaning the area around the filter slot before reinstallation. Even if your filter is spotless, if the area where it sits is full of dust bunnies, the “clean” air will immediately pick them up. Use a damp cloth to wipe down the inside of the filter compartment. A quick wipe-down ensures the entire system is clean. This prevents immediate re-contamination of your freshly cleaned filter. These small details make a big difference in maintaining optimal BedJet performance and air quality.
Beyond Cleaning: When to Replace Your BedJet Filter
While regular cleaning can significantly extend the life of your BedJet filter, filters do not last forever. Like any other filter, such as a water filter or an espresso filter, it has a finite lifespan. Over time, even with diligent cleaning, the filter material will degrade. It will become less effective at capturing particles. Knowing when to replace your BedJet filter is just as important as knowing how to clean it. This step ensures your BedJet continues to perform at its best, providing you with clean, comfortable air night after night. I have seen filters that look clean but perform poorly due to age and wear.
Assessing Filter Wear and Tear
The BedJet filter is designed to be durable, but continuous use and repeated cleaning cycles will eventually take their toll. You should visually inspect your filter for signs of damage or excessive wear during each cleaning session. Look for any tears, holes, or fraying in the mesh material. Even small tears can allow significant amounts of dust and allergens to pass through, bypassing the filter’s purpose. Also, check if the filter frame is bent or warped. A warped frame might prevent the filter from seating properly, creating gaps for unfiltered air to enter. If the filter looks brittle, discolored, or has permanent stains that do not come out with washing, it is likely time for a replacement.
Another indicator is persistent odor, even after a thorough cleaning. If you continue to notice a musty or stale smell emanating from your BedJet, it could mean that microbial growth or deep-seated odors have permanently embedded themselves in the filter material. At this point, no amount of cleaning will fully resolve the issue. Similarly, if you find that your BedJet’s airflow remains weak despite a freshly cleaned filter, it is a strong sign that the filter’s filtering capacity has diminished. The fibers might be too clogged on a microscopic level to effectively allow air through, even if it appears clean to the naked eye. In these cases, a new filter is the best solution to restore optimal performance.
Sourcing Replacement Filters
When it is time for a replacement, it is crucial to purchase an authentic BedJet brand filter. Using generic or non-approved filters can lead to several problems. First, they might not fit correctly, creating air bypasses that defeat the purpose of the filter. Second, the material quality might be inferior, offering less effective filtration or degrading more quickly. Third, using non-approved parts could potentially void your BedJet’s warranty. You can typically buy replacement filters directly from the BedJet official website. They also sell them through authorized retailers. Check your BedJet user manual for specific part numbers or recommendations. It is always a good idea to have a spare filter on hand, especially if you live in a dusty environment or have pets. This ensures you can quickly replace a worn-out filter without any downtime for your beloved sleep system. Thinking about the life of other filters, for example, a water filter needs replacement, not just cleaning, when it stops performing. You can find more information on how to clean a water filter, but remember there comes a time for full replacement.
BedJet filters are typically designed to last between 6 to 12 months with regular cleaning, depending on usage and environmental factors. Always refer to the manufacturer’s guidelines for the most accurate replacement intervals. Investing in a new filter when needed is a small cost compared to the comfort and clean air your BedJet provides.
Optimizing BedJet Performance: General Maintenance Tips
Cleaning the filter is a crucial part of BedJet maintenance. However, keeping your unit running at its best involves a few other simple habits. Just like maintaining other household appliances, a little overall care goes a long way. These general tips complement your filter cleaning routine. They ensure your BedJet provides consistent comfort and a long lifespan. I find that a holistic approach to appliance care always yields the best results.
Keeping Your BedJet Unit Clean
Beyond the filter, the BedJet unit itself can accumulate dust and debris. Regularly wipe down the exterior of your BedJet. Use a soft, damp cloth. Pay attention to the air intake and exhaust vents. Dust can settle on these surfaces and eventually get pulled into the unit, contributing to filter clogs. Make sure the cloth is only damp, not dripping wet. Excess moisture can damage electronic components. Avoid spraying cleaners directly onto the unit. Instead, spray the cleaner onto the cloth first. This simple cleaning prevents dust buildup and keeps your BedJet looking new. It also reduces the amount of dust that reaches the filter in the first place.
Also, check the hose and nozzle for any blockages. The hose connects the BedJet unit to your bed. Lint, pet hair, or even small toys can sometimes get lodged inside. This can restrict airflow. Disconnect the hose from the unit and the nozzle from your bed occasionally. Look inside with a flashlight. If you see blockages, carefully remove them. A flexible brush or a vacuum cleaner hose can help. Ensure the hose is clear and unobstructed. This ensures maximum air delivery to your bedding.
Maximizing Airflow
Proper placement of your BedJet unit is also important for optimal airflow. Ensure the BedJet unit is placed on a flat, stable surface. It should be away from walls or furniture that could block its air intake or exhaust vents. Leave adequate space around the unit, at least 6-12 inches on all sides. This allows the unit to draw in and expel air efficiently. Do not place anything on top of or too close to the BedJet. Blocking the vents makes the unit work harder. It can also cause overheating. Correct placement ensures consistent performance and extends the unit’s life.
Consider the cleanliness of your bedding as well. While the BedJet filter cleans the air before it enters your bed, dirty sheets or blankets can contribute to the dust and dander that eventually gets pulled into the BedJet unit. Regularly washing your sheets and bedding reduces the overall dust load in your sleep environment. This means less dust for your BedJet filter to capture. A clean bed and a clean BedJet unit work together to create the ultimate sleep sanctuary. By combining regular filter cleaning with these general maintenance tips, you ensure your BedJet provides a consistently comfortable and healthy sleep experience.
FAQ Section
How often should I clean my BedJet filter?
You should inspect your BedJet filter every 1 to 2 months. If you have pets, allergies, or live in a dusty environment, clean it monthly. Regular visual checks will show you if it is accumulating excessive dust and needs attention sooner.
Can I wash my BedJet filter in a washing machine?
No, you cannot wash the BedJet filter in a washing machine. The harsh agitation and detergents can damage the delicate filter material. Always clean it by hand using a vacuum, soft brush, or gentle rinsing with cool water and mild soap, as described in the guide.
What happens if I don’t clean my BedJet filter?
If you do not clean your BedJet filter, its performance will suffer. Airflow will decrease, the unit will work harder and use more energy, and the air quality it delivers will worsen. Over time, a clogged filter can also shorten the lifespan of your BedJet unit.
Is the BedJet filter washable or replaceable?
The BedJet filter is both washable and replaceable. You can clean it multiple times by following the dry and wet cleaning methods. However, it will eventually wear out and need replacement, typically every 6 to 12 months, depending on use and maintenance.
What does the BedJet filter do for the unit?
The BedJet filter cleans the air that enters the unit. It traps dust, pet dander, and other airborne particles. This ensures that the air blown into your bed is clean. It also protects the internal components of the BedJet from accumulating dust, helping the unit function efficiently.
Can I use any filter as a replacement?
No, you should only use official BedJet brand replacement filters. Generic filters may not fit properly or provide adequate filtration. Using non-approved parts could also void your warranty and lead to suboptimal performance of your unit.
Conclusion
Cleaning your BedJet filter is a simple yet essential task. It keeps your personalized climate comfort system running at its best. We have walked through the easy steps involved. You now know how to remove, clean, dry, and reinstall your BedJet filter. We also covered the importance of this maintenance. A clean filter ensures strong airflow. It also provides clean air for you to breathe while you sleep. This simple act helps extend the life of your BedJet. It protects your investment.
Remember to make filter cleaning a regular part of your home maintenance routine. Check it every month or two, especially if you have pets or allergies. Avoid common mistakes like using harsh chemicals or reinstalling a damp filter. By following these guidelines, you ensure your BedJet continues to deliver optimal comfort and air quality. Do not let a dirty filter diminish your sleep experience. Take action today. Start cleaning your BedJet filter now to enjoy refreshing, pure air every night.
- BedJet Maintenance
- Air Filter Cleaning
- Sleep Comfort
- Home Air Quality

