· Home Appliance Maintenance · 16 min read
How To Clean Roomba Filter
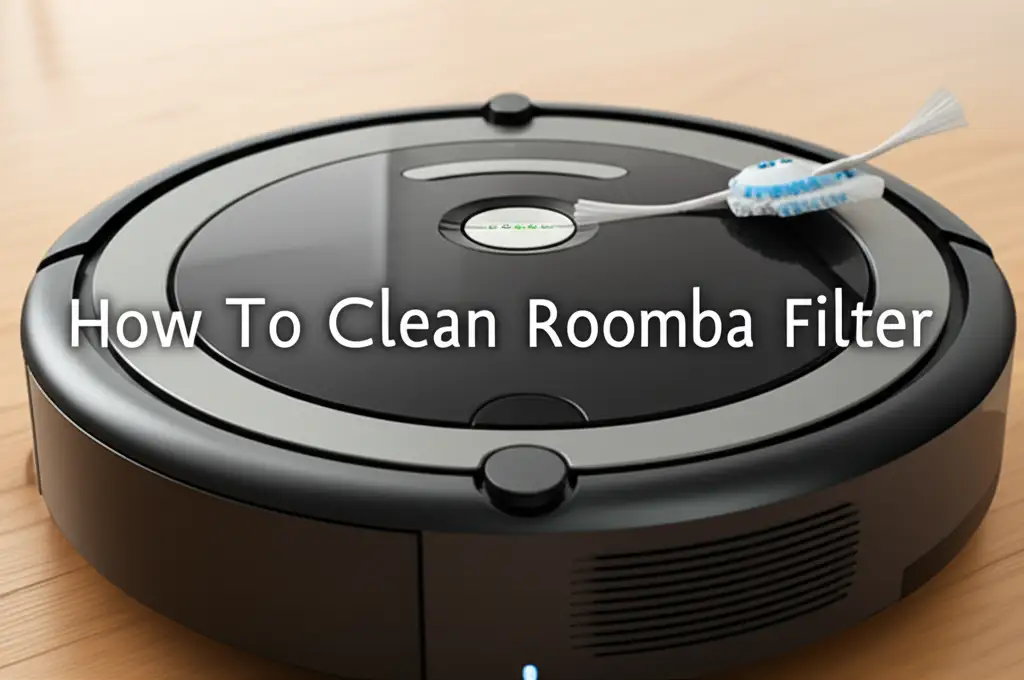
Keep Your Home Clean: How To Clean Roomba Filter
Has your Roomba started leaving dust trails? Do you notice it just isn’t picking up dirt like it used to? A dirty filter is often the reason. Robot vacuums are amazing helpers. They keep our floors neat with minimal effort. However, these machines need some care themselves. Knowing how to clean Roomba filter properly is a key part of this care. A clean filter helps your Roomba work its best. It also ensures your home stays truly clean.
A clogged filter hurts your Roomba’s performance. It restricts airflow, reducing suction power. This means more dirt stays on your floor. It can also push dust back into the air. This is bad for air quality, especially for allergy sufferers. Regular filter cleaning prevents these problems. It keeps your Roomba efficient. It also helps it last longer. In this article, I will guide you through the simple steps. You will learn to clean your Roomba filter. We will cover different filter types. We will also discuss when to replace them. Let’s make sure your Roomba always runs like new.
Takeaway:
- Regularly clean your Roomba filter to maintain powerful suction.
- Match your cleaning method to your specific Roomba filter type.
- Replace filters every 2-3 months or when visibly damaged.
- Never wash most Roomba filters with water; they are not designed for it.
- Integrate filter cleaning into your routine for consistent performance.
Clear, Concise Answer:
To clean a Roomba filter, remove it from the dust bin. Tap it against a trash can to dislodge large debris. Use a small cleaning brush to gently remove remaining dust from the pleats. Reinsert the dry filter into the dust bin. Avoid washing Roomba filters with water as most models are not water-safe.
Understanding Your Roomba’s Filtration System
Your Roomba does more than just vacuum. It also helps improve your indoor air quality. The filter inside your Roomba plays a big role in this. It captures tiny dust particles. It traps allergens and pet dander. This prevents them from recirculating into your home’s air. The type of filter your Roomba has affects its cleaning ability. Different Roomba models use different filter designs. Knowing your filter type helps you clean it correctly.
Older Roomba models might use a basic AeroVac filter. These are often flat and made of a pleated material. They do a good job with everyday dust. Newer models, especially those for pet owners or allergy sufferers, use High-Efficiency or HEPA-style filters. These filters have more pleats. They can capture 99% of particles as small as 0.3 microns. This includes pollen, mold, and dust mite allergens. You can usually find the filter type information in your Roomba’s manual. It is also often printed on the filter itself. Look for terms like “High-Efficiency” or a HEPA symbol.
The filter sits inside the dust bin. When your Roomba vacuums, air flows into the bin. It passes through the filter before exiting. The filter traps dirt and debris. Over time, this trapped material builds up. This buildup clogs the filter. A clogged filter reduces airflow. This makes your Roomba work harder. It also loses suction power. This means less dirt gets picked up. Recognizing your filter type is the first step in effective cleaning. It ensures you use the right method. This keeps your Roomba working efficiently.
Why Regular Roomba Filter Cleaning is Essential
Cleaning your Roomba filter is not just a suggestion. It is a critical part of maintaining your robot vacuum. Think of the filter as your Roomba’s lungs. Just like our lungs need clean air to function, your Roomba needs a clean filter. When the filter becomes clogged, many problems arise. Your Roomba cannot breathe properly. This impacts its ability to clean your floors effectively.
First, a dirty filter severely reduces suction power. Your Roomba will struggle to pick up pet hair. It will leave behind fine dust particles. It might even push some dust back into the air. This defeats the purpose of having a robot vacuum. You want your floors truly clean. A clean filter ensures maximum suction. It allows your Roomba to capture all the dirt. This means cleaner floors with every run. I always make sure my filter is clear before a cleaning cycle.
Second, a clogged filter can shorten your Roomba’s lifespan. When airflow is restricted, the motor works harder. It overheats more easily. This extra strain can lead to premature wear and tear. It can even cause the motor to fail. Replacing a motor or buying a new Roomba is expensive. Regular filter cleaning is a simple preventative measure. It saves you money in the long run. It helps your Roomba last for years.
Third, a clean filter is vital for your indoor air quality. As mentioned, filters trap allergens and dust. If the filter is full, it cannot trap more. Instead, it might release trapped particles. This is especially problematic for people with allergies or asthma. A clean filter ensures your Roomba captures these irritants. It keeps your home’s air fresh and clean. This is important for everyone’s health. Taking a few minutes to clean your filter makes a big difference. It keeps your Roomba running well. It also keeps your home healthy.
Necessary Tools for Roomba Filter Maintenance
Before you start cleaning your Roomba filter, gather a few simple tools. You likely already have most of these items at home. Having them ready makes the cleaning process quick and easy. You do not need any special or expensive equipment. These basic tools help you remove dust and debris effectively.
The most important tool is a small cleaning brush. Many Roomba models come with a small cleaning tool. This often includes a comb for hair and a brush for filters. If you do not have one, a clean paintbrush or a stiff-bristled toothbrush works well. The bristles get into the filter pleats. They help dislodge trapped dust and dirt. Make sure the brush is dry and clean. You do not want to introduce moisture or new dirt to your filter.
Next, you will need a garbage can or waste bin. You will be tapping the filter to remove debris. Doing this over a trash can prevents dust from spreading. It keeps your cleaning area tidy. You can also place an old newspaper or towel down. This catches any stray dust. This makes cleanup easier after you finish.
Compressed air is an optional but helpful tool. It can blow out stubborn dust from deep within the filter pleats. Use compressed air carefully. Hold the can upright. Use short bursts. Keep the nozzle a few inches away from the filter. You do not want to damage the filter material. Too much pressure can tear delicate pleats. I use compressed air rarely. Only when the brush cannot get everything. Remember, Roomba filters are delicate.
Finally, a microfiber cloth can be useful. You can use it to wipe down the dust bin itself. You can also wipe the area where the filter sits. This ensures no residual dust gets back into the Roomba. These simple tools ensure a thorough and safe cleaning process. They help you maintain your Roomba filter effectively.
Step-by-Step Guide to Cleaning a Standard Roomba Filter
Cleaning your Roomba filter is a straightforward process. You should aim to do this after every few cleaning cycles. For pet owners, cleaning the filter after every run is ideal. Follow these steps for most standard Roomba models. This process will keep your filter clear and your Roomba efficient.
Step 1: Remove the Dust Bin First, turn your Roomba over. Locate the dust bin. It usually has a release button or latch. Press this button to detach the bin from the robot. Gently pull the bin out. Be careful not to spill any debris from inside. You want to keep your cleaning area clean.
Step 2: Empty the Dust Bin Take the dust bin to a garbage can. Open the bin door or flap. Dump all the collected dirt and debris into the trash. Shake the bin gently to empty it completely. You can also wipe the inside of the bin with a dry cloth. This removes any clinging dust. For a more thorough cleaning of this part, you can check out our guide on how to clean Roomba dust bin.
Step 3: Remove the Filter The filter is typically located in a slot on the side or top of the dust bin. It often has a small tab or handle. Pull the tab to slide the filter out of its compartment. Handle the filter by its plastic frame. Avoid touching the filter material itself too much. This prevents oils from your skin transferring to the filter.
Step 4: Tap the Filter to Remove Loose Debris Hold the filter over the trash can. Gently tap the filter firmly against the inside of the can. This dislodges trapped dust and hair. You will see a surprising amount of dirt fall out. Tap it from all sides. Continue tapping until most visible debris is gone. Do not tap too hard. You might damage the filter frame or pleats.
Step 5: Brush the Filter Pleats Use your small cleaning brush or a dry paintbrush. Gently brush along the filter’s pleats. Move the brush in short, light strokes. Work from top to bottom. This removes fine dust stuck deep within the folds. Pay attention to corners and edges. These areas often collect more dirt. Brush until the filter looks visibly cleaner. Ensure no large dust bunnies remain.
Step 6: Reinstall the Filter and Dust Bin Once the filter is clean and dry, slide it back into its slot in the dust bin. Make sure it clicks securely into place. Then, slide the dust bin back into your Roomba. Push it firmly until it locks. You will usually hear a click. Now your Roomba is ready for its next cleaning mission. This regular process ensures your Roomba works efficiently.
Advanced Techniques for Deep Cleaning Roomba Filters
Sometimes, simple tapping and brushing are not enough. Over time, very fine particles can embed themselves deeply into the filter material. This is especially true for pet owners or homes with high dust levels. When your filter feels less effective even after a regular clean, you might need advanced techniques. However, it is crucial to remember a key point: most Roomba filters are not washable. Applying water can ruin them.
One effective advanced technique is using compressed air. As mentioned before, compressed air can dislodge deeply embedded dust. Take your removed filter outdoors or to a well-ventilated area. Hold the filter by its plastic frame. Spray short bursts of compressed air from one side. Aim the air from the inside of the filter outwards. This pushes trapped dust out through the pleats. Keep the can upright to prevent propellant from spraying on the filter. Be gentle with the air pressure. Too much force can tear the filter paper. I find this method works wonders for stubborn dust. It really gets the filter looking fresh.
Another option is to gently vacuum the filter. Use a handheld vacuum or a vacuum cleaner hose attachment. Set the suction to a low setting. Carefully run the vacuum nozzle over the filter pleats. This can pull out deeply embedded dust. Be extremely careful not to touch the filter material with the vacuum nozzle. The suction could tear the delicate pleats. This method is best for high-efficiency filters. These filters have many pleats that can hold a lot of fine dust. This is similar to how you might clean a Dyson vacuum filter. However, always remember the washability difference. Dyson filters are often washable, but Roomba filters typically are not.
It is vital to reiterate: Do not wash your Roomba filter with water. Most Roomba filters are made of paper or similar materials. These materials break down or lose their filtering ability when wet. Water can also cause mold growth inside the filter. This would release unpleasant odors and unhealthy spores into your home. If your filter is heavily soiled and these advanced dry methods do not work, it is time for a replacement. A clean filter is important for your Roomba’s performance. It ensures clean air in your home.
When to Replace Your Roomba Filter
Cleaning your Roomba filter regularly extends its life. However, filters do not last forever. They are consumable parts. Over time, even with proper cleaning, filters wear out. Their effectiveness decreases. Knowing when to replace your Roomba filter is as important as cleaning it. Ignoring a worn-out filter will compromise your Roomba’s cleaning performance. It also harms your home’s air quality.
There are clear signs that your Roomba filter needs replacement. The most obvious sign is reduced suction power. If your Roomba leaves more dirt behind, even after you clean the filter, it is a sign. The filter material might be permanently clogged or damaged. Another sign is visible damage. Check the filter for tears or holes in the pleated material. If the plastic frame is cracked, the filter will not fit correctly. It will not seal properly. This allows unfiltered air to bypass the filter.
Unpleasant odors coming from your Roomba can also indicate a filter problem. If the filter has accumulated too much pet dander or other organic matter, it can start to smell. This smell will get pushed into your home. A new filter can eliminate this issue. Additionally, a filter that looks permanently discolored or grey, even after cleaning, may be at the end of its life. Its pores are likely saturated with microscopic particles.
Manufacturers recommend replacing Roomba filters every 2 to 3 months. This recommendation is based on average household use. If you have pets or allergies, or use your Roomba daily, you might need to replace it more often. I personally replace mine every two months. This ensures peak performance. You can buy replacement filters online or from iRobot retailers. Always use genuine Roomba filters. Generic filters might not fit correctly. They might not offer the same filtration efficiency. Keep a spare filter on hand. This makes replacement easy when needed. Replacing the filter is a simple step. It keeps your Roomba working like new.
Integrating Filter Cleaning into Your Roomba Routine
Making filter cleaning a regular habit is easy. It requires just a few minutes of your time. This small effort yields big rewards. It keeps your Roomba working at its best. It also helps your home stay cleaner and healthier. I always recommend incorporating this into your general Roomba maintenance schedule. Consistency is key for optimal performance.
Here is a simple routine you can follow:
- After every few cleaning cycles (or daily for pet owners):
- Remove the dust bin.
- Empty the dust bin into the trash.
- Remove the filter.
- Tap the filter firmly against the inside of the trash can. This removes loose dust and hair.
- Reinstall the filter and dust bin.
This quick tap-out method is fast. It prevents major buildup. It helps maintain good suction for daily cleaning.
Weekly or Bi-Weekly (depending on usage):
- Perform the daily steps.
- Use the small cleaning brush. Gently brush out the filter pleats.
- Consider using compressed air if needed (outdoors or in a well-ventilated area).
- Wipe down the inside of the dust bin.
- While you are cleaning the filter, it is a great time to check other Roomba components. Clean the main brushes. Wipe down the charging contacts. Ensuring how to clean Roomba charging contacts is equally important for your robot’s overall health.
Every 2-3 months (or as needed):
- Replace the filter with a new one. Even with diligent cleaning, filters wear out. Replacing them ensures continued high performance.
Establishing this routine makes Roomba maintenance simple. You will notice a difference in your Roomba’s cleaning power. Your floors will be cleaner. Your air quality will improve. A well-maintained Roomba is a happy Roomba. It will serve you well for many years. It is a smart investment in your home’s cleanliness.
Frequently Asked Questions About Roomba Filter Cleaning
Can I wash my Roomba filter with water?
No, most Roomba filters are not washable. They are typically made of paper or delicate synthetic materials that degrade when wet. Washing them can ruin the filter’s ability to trap particles and may promote mold growth. Always use dry cleaning methods.
How often should I clean my Roomba filter?
You should empty and tap out your Roomba filter after every 1-3 cleaning cycles, or daily if you have pets. Perform a more thorough brush cleaning weekly or bi-weekly. This prevents significant dust buildup and maintains suction power.
How do I know if my Roomba filter needs to be replaced?
Replace your Roomba filter if you notice reduced suction power even after cleaning, visible tears or holes in the filter material, persistent odors, or if it looks permanently discolored and grey. Most manufacturers recommend replacement every 2-3 months.
Where can I buy replacement Roomba filters?
You can buy replacement Roomba filters directly from iRobot’s official website. They are also available from various online retailers like Amazon, and at electronics or department stores. Always check the compatibility with your specific Roomba model.
Does cleaning the filter improve Roomba suction?
Yes, absolutely. A clean filter allows air to flow freely through your Roomba, maximizing its suction power. A clogged filter restricts airflow, forcing the motor to work harder and significantly reducing the Roomba’s ability to pick up dirt and debris.
What happens if I don’t clean my Roomba filter?
If you do not clean your Roomba filter, it will become clogged with dust and debris. This leads to greatly reduced suction, inefficient cleaning, and potentially pushing dust back into your home’s air. It can also strain the Roomba’s motor, shortening its lifespan.
Conclusion: Keep Your Roomba Running Strong
Maintaining your Roomba’s filter is a simple task. Yet, it makes a huge difference. You have learned the importance of a clean filter. It affects your Roomba’s performance. It impacts your home’s air quality. We covered how to clean Roomba filter step by step. We discussed different filter types. We also looked at advanced cleaning methods. Most importantly, we stressed why you should never wash Roomba filters with water.
Regular filter maintenance helps your Roomba last longer. It saves you money on repairs or replacements. It ensures your floors are truly clean. It helps reduce allergens in your home. By dedicating a few minutes each week, you keep your Roomba in top condition. This small effort enhances your daily cleaning experience. It helps you enjoy a cleaner, healthier living space.
Now you have all the knowledge. You can confidently maintain your Roomba filter. Make filter cleaning a regular part of your home care routine. Your Roomba will thank you with superior cleaning power. You will enjoy a consistently spotless home. Start cleaning your Roomba filter today. Experience the difference a well-maintained robot vacuum makes.
- Roomba maintenance
- robot vacuum cleaning
- air filter care
- home cleaning tips