· Food Preparation · 14 min read
How To Clean Beef Ribs
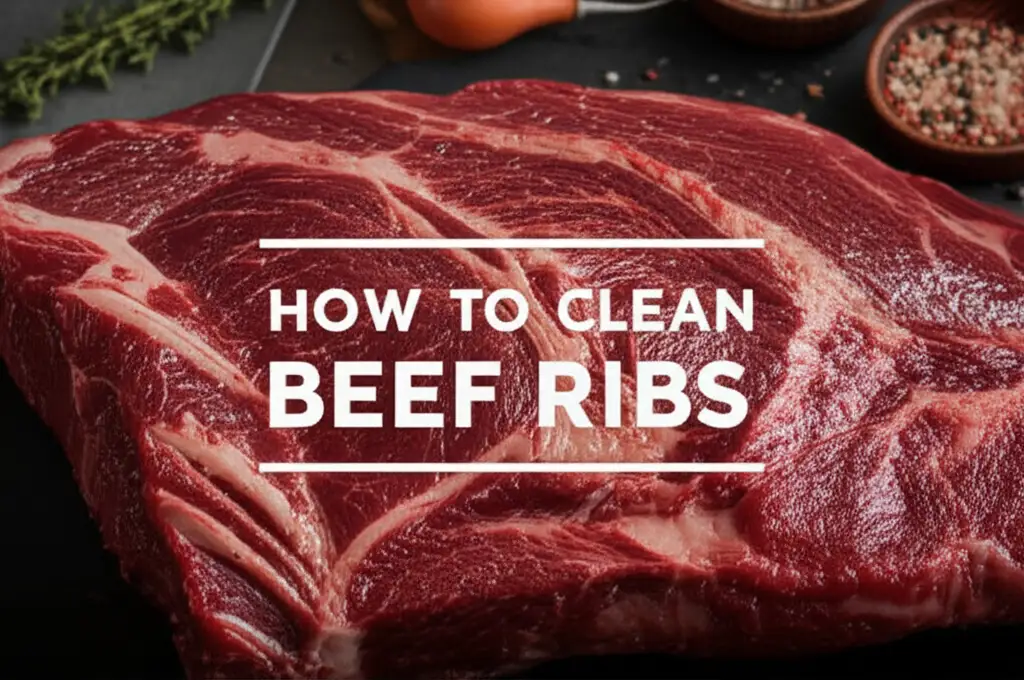
Learn How to Clean Beef Ribs for Perfect Results
Preparing beef ribs correctly is the first step to a truly delicious meal. Many home cooks wonder about the best way to clean beef ribs before cooking. This initial preparation makes a big difference in the final taste and texture. I want to show you simple steps to get your ribs ready.
This guide will walk you through rinsing, membrane removal, and trimming fat. We will also cover important food safety practices. By the end, you will feel confident to prepare your beef ribs like a pro. Get ready to cook the best ribs you have ever made.
Takeaway:
- Rinse ribs briefly under cold water.
- Remove the tough membrane from the bone side.
- Trim excess hard fat for better flavor and texture.
- Pat ribs completely dry before seasoning.
- Practice strict food safety to avoid contamination.
To clean beef ribs, rinse them briefly under cold water, then carefully remove the thin, tough membrane from the bone side. Next, trim any large pockets of hard fat or ragged edges. Finally, pat the ribs thoroughly dry with paper towels to prepare them for seasoning and cooking.
Why Cleaning Beef Ribs Matters for Taste and Safety
Cleaning beef ribs properly sets the stage for a great meal. This process is about more than just hygiene. It also improves the texture and flavor of the cooked ribs. When you clean beef ribs, you remove things that can make them tough or greasy.
First, removing the membrane on the back of the ribs is very important. This membrane, often called silver skin, does not break down during cooking. It creates a chewy, unpleasant barrier. Without removing it, your ribs will not be as tender as they could be. The membrane also prevents rubs and marinades from soaking into the meat.
Second, trimming excess fat helps control the richness of the ribs. Some fat is good for flavor and moisture, but too much can make the ribs greasy. Hard, thick fat layers do not render well during cooking. They can leave a rubbery texture. Removing these fatty parts ensures a more enjoyable eating experience. It helps the meat cook evenly.
Lastly, proper cleaning contributes to food safety. While rinsing meat is debated, quick rinsing helps remove bone fragments or loose bits from butchering. More importantly, patting the ribs dry helps seasonings stick. This step ensures a crispy bark and better flavor development. Overall, a clean rib rack means a safer and tastier dish for everyone.
Essential Tools for Preparing Beef Ribs
Getting your tools ready before you start cleaning beef ribs makes the job easier. Having the right equipment at hand saves time and effort. You likely have most of these items in your kitchen already. I always make sure these things are within reach before I touch the ribs.
You will need a sturdy cutting board. Choose one that is large enough to hold the entire rack of ribs comfortably. Plastic or composite boards are ideal because they are easy to clean and sanitize after handling raw meat. Wood boards are also fine, but ensure they are properly cleaned and disinfected.
A sharp knife is crucial for trimming. A boning knife or a sharp chef’s knife works best. A sharp knife helps you make clean cuts and remove the membrane without tearing the meat. A dull knife makes the job harder and less safe. If your knife is not sharp, take a moment to sharpen it first.
Paper towels are essential for patting the ribs dry. They absorb moisture very well. You will use many of them, so have a fresh roll ready. You might also want a few small bowls or a tray for discarded fat and membrane. This keeps your workspace tidy. Disposable gloves are optional but highly recommended. They keep your hands clean and reduce direct contact with raw meat. This helps prevent cross-contamination in your kitchen.
Step-by-Step Guide: How to Clean Beef Ribs
Cleaning beef ribs involves a few simple, yet critical, steps. Follow these instructions closely for the best results. I find that breaking down the process makes it much easier to manage.
Rinsing Your Beef Ribs Correctly
Start by rinsing the beef ribs under cold running water. This step helps remove any bone fragments or loose particles from butchering. Be quick about it. You do not want the meat to soak up too much water. I usually rinse both sides of the rack.
Place the ribs in your clean sink. Use a gentle stream of cold water. Make sure the water runs over all surfaces of the ribs. This quick wash helps ensure the ribs are free of any debris. It prepares them for the next steps. Some people skip rinsing raw meat, but I prefer a quick rinse to feel sure.
After rinsing, immediately place the ribs on a clean cutting board. This prevents water from spreading. Do not let the ribs sit in the sink or on the counter while wet. This can create a messy situation. You are now ready to dry them off and move to the next important step.
Removing the Membrane (Silver Skin)
Removing the membrane is perhaps the most important part of cleaning beef ribs. This tough, thin layer covers the bone side of the ribs. It does not break down during cooking. If you leave it on, your ribs will be chewy and less enjoyable. This membrane also stops flavor from reaching the meat.
To remove it, start by finding an edge of the membrane. Often, it is easiest to start at one corner of the rack. Use a butter knife or a spoon handle to gently pry up a small section of the membrane. Slide the knife under the membrane, separating it from the bone. Once you have a small piece lifted, grab it with a paper towel. The paper towel helps you get a firm grip. The membrane is often slippery.
With a firm grip, slowly pull the membrane away from the bones. Pull it towards the opposite end of the rack. It should peel off in one large piece, or at least a few large pieces. If it tears, just find another loose edge and continue pulling. This step takes a little practice but becomes easy over time. Discard the membrane once it is removed. Your ribs are now ready for better flavor absorption.
Trimming Excess Fat and Ragged Edges
After removing the membrane, inspect your beef ribs for excess fat. While some fat adds flavor and moisture, too much can make the ribs greasy. Look for thick pockets of hard fat, especially on the top side of the ribs. This type of fat does not render well during cooking.
Use your sharp knife to carefully trim away these large fat deposits. Aim to leave about a quarter-inch of fat covering the meat. This amount provides enough moisture and flavor without being overwhelming. Also, look for any ragged edges or loose bits of meat. These can burn during cooking. Trim them off for a cleaner presentation and more even cooking.
Be careful not to cut too deep into the meat. You want to remove only the excess fat and stray pieces. This trimming helps the ribs cook more evenly. It also allows your seasonings to stick directly to the meat. A well-trimmed rack looks better and tastes better. It sets the stage for a perfect cook.
Patting Dry for Flavor and Crispy Bark
The final step in cleaning beef ribs is patting them completely dry. This step is often overlooked, but it is very important. Moisture on the surface of the meat prevents seasonings from sticking. It also makes it harder to achieve a nice, crispy bark during cooking.
Grab a generous amount of paper towels. Firmly pat down all surfaces of the beef ribs. Make sure to get into all the nooks and crannies. Pay extra attention to the bone side where the membrane was removed. You want the surface to feel completely dry to the touch. I usually go over the ribs a few times with fresh paper towels.
A dry surface helps your rub adhere better. It creates a better crust. This process is crucial for smoking or grilling ribs. The dry surface allows the heat to work directly on the meat and seasoning. It promotes the Maillard reaction, which is responsible for rich, deep flavors. Once your ribs are thoroughly dry, they are ready for seasoning and your preferred cooking method.
Maintaining Food Safety When Handling Raw Meat
Handling raw beef ribs requires careful attention to food safety. This protects you and your family from foodborne illnesses. Cross-contamination is a major concern when working with raw meat. I always follow strict rules to keep my kitchen safe.
First, wash your hands thoroughly before and after touching raw meat. Use warm water and soap, scrubbing for at least 20 seconds. This simple step removes bacteria from your hands. It prevents spreading germs to other surfaces. Keep your hands clean throughout the preparation process.
Second, use separate cutting boards and utensils for raw meat. I have a designated cutting board for meat only. Do not use the same board for vegetables or other foods that will not be cooked. If you must use the same board, wash it thoroughly with hot, soapy water and sanitize it before using it for other items. This prevents bacteria from transferring. For more general advice on cleaning raw meat surfaces, you might find tips on how to clean ground beef helpful, as many principles apply.
Clean and sanitize all surfaces that come into contact with raw meat. This includes countertops, sinks, and any dishes or tools. A solution of mild bleach and water, or a commercial kitchen sanitizer, works well. Wipe down everything after you finish cleaning the ribs. For instance, cleaning a kitchen work surface after preparing ribs might involve techniques similar to those found for how to clean ribs with vinegar, though not directly on the meat itself.
Finally, keep raw meat separate from other foods in your refrigerator. Store raw ribs on the bottom shelf to prevent juices from dripping onto other items. Cook ribs to the safe internal temperature. These practices ensure your meal is not only delicious but also safe to eat. Similar principles apply to other meats, like when you need to understand how to clean beef tripe or how to clean beef tongue.
Common Mistakes to Avoid When Cleaning Beef Ribs
Even with simple steps, it is easy to make mistakes when cleaning beef ribs. Avoiding these common pitfalls will ensure your ribs turn out perfectly. I have seen these errors happen many times, and they can impact your final dish.
One common mistake is over-rinsing the ribs. While a quick rinse is fine, prolonged rinsing under water can make the meat absorb too much moisture. This extra water dilutes flavors. It also makes it harder to get a good crust when cooking. A quick pass under cold water is all you need. Do not let the ribs soak.
Another frequent error is not removing the membrane completely. Many people skip this step, thinking it is too difficult. But leaving the silver skin on results in tough, chewy ribs. It also prevents your seasonings from reaching the meat. Take the time to peel it off entirely. It truly makes a significant difference in tenderness.
Failing to trim enough excess fat is also a mistake. While some fat is good, leaving large, hard chunks makes the ribs greasy. These thick fat layers do not render down properly during cooking. They can leave unpleasant chewy bits. Trim them down to about a quarter-inch for a better eating experience.
Lastly, not patting the ribs thoroughly dry is a common oversight. Any moisture on the surface will create steam when cooking. This prevents the formation of a delicious, crispy bark. It also stops rubs from sticking well. Always use plenty of paper towels to ensure the ribs are bone dry before applying any seasoning. Avoiding these mistakes will greatly improve your beef rib cooking.
Beyond Cleaning: Seasoning and Resting Ribs
Once your beef ribs are perfectly clean, the next steps are seasoning and resting. These actions are just as important as the cleaning process. They contribute greatly to the final flavor and tenderness of your ribs. I never rush these final stages.
After patting the ribs dry, it is time for seasoning. Apply your chosen dry rub generously to all surfaces of the ribs. Make sure to coat both the meat side and the bone side. Gently press the rub into the meat to help it adhere. The dry surface, achieved by proper cleaning, ensures the rub sticks well. This creates a flavorful crust during cooking.
Some people prefer to let the seasoned ribs rest in the refrigerator for a few hours, or even overnight. This allows the rub to penetrate deeper into the meat. It also helps the surface dry out a bit more, which can improve bark formation. If you have the time, this extra step is worth it. Cover the ribs loosely with plastic wrap during this resting period.
After cooking, it is crucial to rest the ribs before slicing. This allows the juices inside the meat to redistribute. If you cut into the ribs too soon, the juices will run out, leaving the meat dry. Let the cooked ribs rest, loosely tented with foil, for at least 15-20 minutes. This final resting period ensures every bite is juicy and tender.
Frequently Asked Questions About Cleaning Beef Ribs
Do you rinse beef ribs before cooking?
Yes, a quick rinse under cold water helps remove any bone fragments or loose debris from the ribs. Be brief to avoid soaking the meat. Immediately pat the ribs completely dry with paper towels after rinsing. This prevents extra moisture from affecting the cooking process and seasoning adhesion.
Why do you remove the membrane from beef ribs?
You remove the membrane, or silver skin, because it is very tough and chewy. It does not tenderize during cooking and creates an unpleasant texture. Removing it also allows your seasonings and smoke flavors to penetrate the meat more effectively. This results in a more tender and flavorful rib.
How much fat should I trim from beef ribs?
Aim to trim large, hard pockets of fat, leaving about a quarter-inch of fat evenly distributed over the meat. Some fat adds flavor and moisture. However, too much can make the ribs greasy and prevent even cooking. Use a sharp knife for precise trimming.
Can I clean beef ribs with vinegar?
No, you should not use vinegar to clean the beef ribs themselves for consumption. Vinegar is not necessary for food safety when preparing raw meat. It can alter the flavor and texture of the meat. Use cold water for rinsing and focus on membrane removal and fat trimming for proper preparation.
What happens if I do not dry the ribs after rinsing?
If you do not dry the ribs thoroughly after rinsing, moisture on the surface will create steam during cooking. This prevents the formation of a desirable crispy bark or crust. It also makes it harder for rubs and seasonings to stick properly to the meat. Always pat them completely dry.
Is it okay to leave some small bits of membrane on the ribs?
While it is best to remove as much of the membrane as possible, tiny, stubborn bits that are difficult to remove will not significantly impact the final texture. Focus on getting the majority of the larger membrane pieces off. The goal is to avoid large sections that make the ribs chewy.
Conclusion: Master the Art of Cleaning Beef Ribs
Cleaning beef ribs is a simple process that makes a huge difference in your cooking results. By following these steps, you prepare your ribs for maximum flavor and tenderness. You have learned the importance of a quick rinse and how to effectively remove that stubborn membrane. You also know how to trim excess fat and the critical step of patting the ribs completely dry.
These basic preparation steps ensure your seasonings stick and the meat cooks evenly. Remember the importance of food safety when handling raw meat. Keep your workspace clean, wash your hands, and prevent cross-contamination. Mastering how to clean beef ribs means you are on your way to truly exceptional barbecue. Get ready to impress your friends and family with ribs that are both delicious and perfectly cooked every time. Your journey to perfect beef ribs starts with proper cleaning.
- beef ribs
- clean meat
- rib preparation
- food safety
- cooking tips

