· Food Preparation · 17 min read
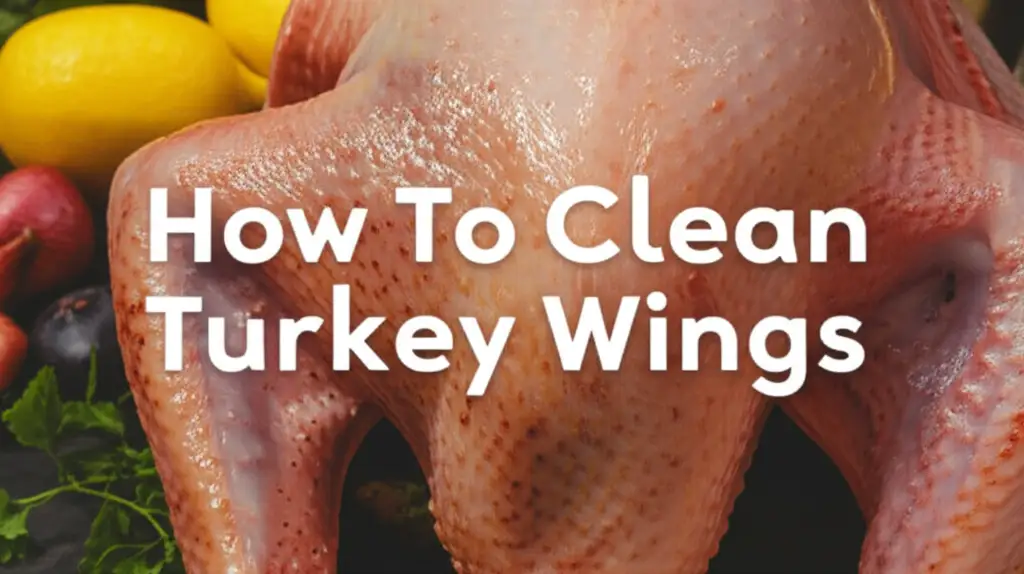
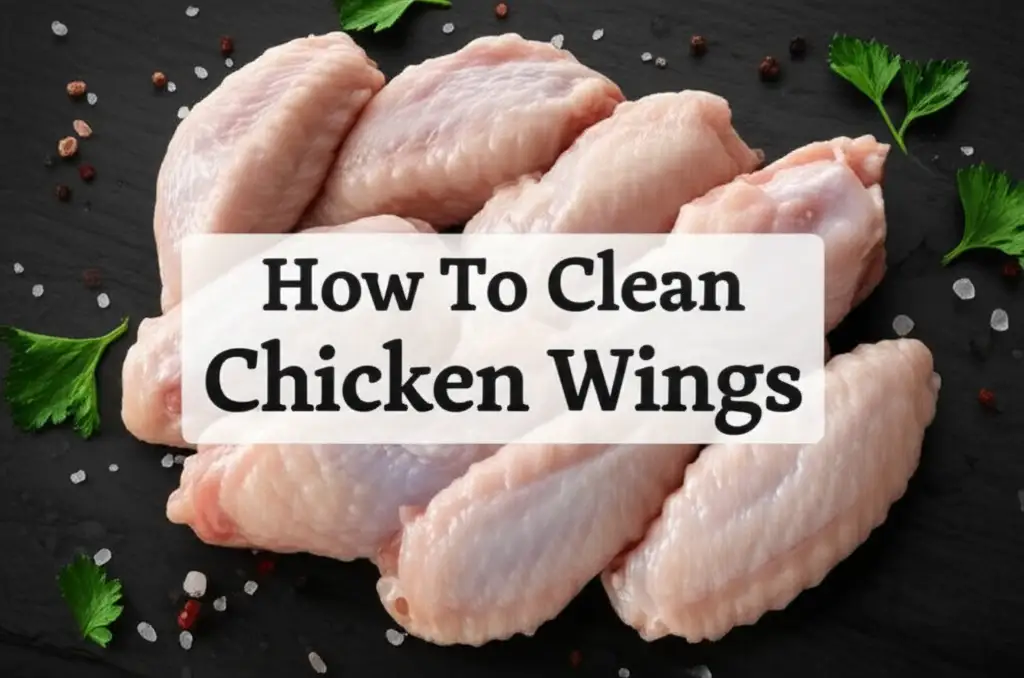
How To Clean Chicken Wings
Unveiling the Secrets to Perfectly Clean Chicken Wings
Imagine biting into a perfectly crispy, juicy chicken wing. It tastes amazing. A great wing starts with proper preparation. Knowing how to clean chicken wings correctly is a key step. This process ensures both safety and the best flavor.
Many people wonder about handling raw poultry. You might worry about germs. You might also want the wings to cook evenly. This article helps you understand each part of cleaning wings. We will cover important steps. We will also discuss common mistakes to avoid. My goal is to make sure your wings are safe and delicious every time. Get ready to master the art of preparing chicken wings for cooking. Let’s get started.
Takeaway
To clean chicken wings properly, focus on these key steps:
- Inspect and Trim: Look for feathers or excess fat, and remove them.
- Rinse Carefully: Briefly rinse under cold water, but avoid splashing.
- Pat Dry Thoroughly: Use paper towels to remove all surface moisture.
- Sanitize Your Area: Immediately clean all surfaces and tools that touched raw chicken.
- Wash Hands: Always wash your hands well with soap and water after handling raw poultry.
Main Query Answer
Cleaning chicken wings involves inspecting them for impurities, trimming excess fat and any remaining feathers, and then patting them completely dry with paper towels. While some people briefly rinse them, the most critical step is ensuring thorough drying for crispiness and immediately sanitizing all contact surfaces for food safety.
Why Cleaning Chicken Wings Matters for Safety and Taste
Cleaning chicken wings before cooking is important. It is not just about making them look nice. This step protects your health. It also helps your wings taste better. We handle raw meat, so we must be careful.
Raw chicken can carry harmful bacteria. These bacteria include Salmonella and Campylobacter. If these germs get on other foods or surfaces, they can make people sick. This is called cross-contamination. A proper cleaning routine helps stop germs from spreading. It keeps your kitchen and your family safe. I always think of it as setting a good foundation for a healthy meal.
Understanding Foodborne Illness Risks
Raw chicken often carries bacteria. These bacteria live on the surface of the meat. Eating food with these bacteria causes food poisoning. Symptoms include stomach pain, vomiting, and diarrhea. In some cases, food poisoning can be severe. This is why handling raw chicken needs care. We must prevent bacteria from spreading to ready-to-eat foods. We also need to stop it from spreading to clean surfaces. Always keep raw chicken separate from other foods.
Proper cleaning minimizes these risks. It means preparing your workspace before you start. It also means cleaning up thoroughly afterwards. These simple steps make a big difference. They ensure your meal is safe to eat. My family’s health is always my top priority in the kitchen.
Enhancing Flavor and Texture
Cleaning wings does more than just ensure safety. It also makes your wings taste better. Excess fat can make wings greasy. Skin that is not dry enough will not crisp up. Removing loose feathers means a smoother bite.
Trimming extra fat helps the wings cook evenly. It also stops them from becoming too oily. Patting the wings dry is very important. Dry skin gets crispy when it cooks. Wet skin tends to steam instead of crisp. I find this simple drying step makes the biggest difference in texture. It gives you that satisfying crunch. A well-prepared wing also absorbs marinades and seasonings better. This leads to deeper, more enjoyable flavors.
Essential Tools and Setup for Cleaning Chicken Wings
Getting ready before you start cleaning chicken wings saves time. It also makes the process safer. You need the right tools. You also need a clean space. Being organized helps prevent any problems.
A clear workspace means less chance for germs to spread. Having everything within reach avoids searching. This prevents you from touching other things with contaminated hands. Think of it as preparing your cooking zone. I always lay out my items first. This way, the process flows smoothly.
Gathering Your Supplies
You do not need many tools to clean chicken wings. A few basic items are enough. Gather these before you start working. This includes a clean cutting board. Use one specifically for raw meat. Do not use this board for vegetables or ready-to-eat foods. You will also need a sharp knife or kitchen shears. These help trim fat and skin.
Paper towels are essential for drying the wings. They also help clean up spills. Have a bowl ready for discarded fat and feathers. Keep a separate bowl for the cleaned wings. Finally, have soap and water ready for hand washing. You will also need a disinfectant spray or solution for surfaces. These supplies make the cleaning process efficient and safe.
Setting Up a Clean Workspace
A clean workspace is vital when handling raw chicken. First, clear your counter. Make sure it is free of other food items. Lay down old newspapers or a large cutting board. This protects your counter from raw chicken juices. Some people use a dedicated plastic cutting board. It is easy to sanitize later.
Keep a separate area for clean items. Your bowl for cleaned wings should sit there. Place your tools like knife and shears close by. But keep them on the raw chicken side. This setup prevents cross-contamination. It defines your “raw chicken zone.” I find this system helps me stay organized. It also reminds me where germs might be. Always ensure your setup promotes a safe flow from raw to clean.
Step-by-Step Guide: How to Clean Chicken Wings Properly
Now we get into the main part. Cleaning chicken wings involves a few clear steps. Follow these steps carefully. This ensures your wings are safe. It also gets them ready for cooking. My goal is to make this process simple for you.
Each step builds on the last. Starting with inspection helps you know what you need to do. Trimming makes the wings look better and cook better. Rinsing and drying are critical for food safety and texture. I follow this routine every time I prepare wings. It works well.
Inspecting and Trimming
Start by taking the chicken wings out of their package. Place them on your dedicated cutting board. Look closely at each wing. You might see small, stiff feathers. These are often called pin feathers. Pull them out with your fingers or clean tweezers. They are safe to eat, but most people prefer to remove them.
Next, look for excess fat. Chicken wings can have pockets of soft, yellow fat. This fat does not render well during cooking. It can make the wings greasy. Use a sharp knife or kitchen shears to trim these fatty parts. You do not need to remove all fat. Just cut off the large, floppy pieces. This step helps the wings cook more evenly. It also leads to a crispier result.
Rinsing Raw Chicken Wings
The topic of rinsing raw chicken is often discussed. Some food safety experts advise against it. They say rinsing can spread germs through splashing. These splashes can land on counters, other foods, and clean dishes. However, some people still prefer to rinse for peace of mind.
If you choose to rinse, do it very carefully. Place the wings in a colander in the sink. Use cold running water. Rinse each wing briefly. Do not let the water splash around. Turn off the faucet gently. Do not let water spray across your kitchen. I sometimes rinse quickly, but I am very careful about splashing. The most important step after any rinse is drying the wings completely.
Drying for Crispy Results
Drying chicken wings is a very important step. It helps the skin get crispy when you cook it. Wet skin will steam first. It will not get that nice crunch. Take a few sheets of paper towel. Place a few wings on them. Pat the top of the wings firmly. Then flip them over. Pat the other side dry.
Make sure every part of the wing is dry. This includes the tips and joints. You might need to use fresh paper towels for each batch of wings. This step removes surface moisture. It helps achieve a golden, crispy skin. I often let my wings air dry in the fridge for an hour after patting them. This extra step removes even more moisture. It gives truly restaurant-quality crispiness.
Beyond the Basics: Advanced Tips for Cleaning Chicken Wings
Once you master the basic cleaning steps, you can try more advanced tips. These tips help you get even better results. They focus on tiny details that make a big difference. These details include removing tiny feathers. They also include specific ways to trim fat.
These extra steps are not hard. They just require a bit more attention. I find they are worth the effort. They lead to wings that are cleaner and more appealing. They also cook to perfection. Let’s look at how to refine your chicken wing cleaning skills.
Dealing with Pin Feathers
Pin feathers are small, undeveloped feathers. They are often stuck in the skin of chicken wings. They can be hard to see. If you miss them, they can make your cooked wings less enjoyable. You do not want to bite into a feather. You can remove these tiny feathers easily.
Use a pair of clean tweezers. Kitchen tweezers work best for this job. Grab each pin feather close to the skin. Pull it out firmly. You can also use clean pliers if the feathers are stubborn. Some people even use a small, clean, blunt knife to scrape them off. Another method is to lightly singe the wing over a flame. A kitchen torch works well. Be very careful if you use a flame. This burns off the tiny hairs and feathers. This small step makes a big difference in the final product’s appearance and texture.
Fat Trimming Techniques
Chicken wings can have different amounts of fat. Some have small pockets, others have more. Trimming fat helps with texture. It also reduces grease. You want some fat for flavor. But too much can make the wings soggy.
Use sharp kitchen shears or a small, sharp knife. Look for any loose, flabby pieces of fat. These are usually yellow. Cut these pieces away carefully. You can also separate the wing into sections. This makes trimming easier. The “drumette” is the part that looks like a small drumstick. The “flat” is the middle section. The “wingtip” is the pointy end. Some people remove the wingtip entirely. It has little meat. It can burn easily. Trim the fat close to the meat but do not cut into the muscle. This prepares your wings for optimal cooking. It also ensures a crispier outcome.
Post-Cleaning Hygiene: Sanitizing Your Kitchen After Raw Chicken
Cleaning the chicken wings is only half the battle. After you handle raw poultry, you must clean your kitchen well. This step is critical for preventing the spread of germs. It protects everyone who eats food from your kitchen. Always assume that raw chicken has left invisible germs behind.
Do not skip this part. It is just as important as the cleaning steps for the wings themselves. I always make sure to clean everything. This includes surfaces, utensils, and my hands. It gives me peace of mind. Let’s look at how to properly sanitize your kitchen after handling raw chicken.
Cleaning Surfaces and Utensils
Any surface or utensil that touched raw chicken must be cleaned. This includes your cutting board, knife, and any bowls. Start by washing these items with hot, soapy water. Scrub them well to remove any visible food bits. Then, rinse them thoroughly.
For added safety, sanitize them. You can use a diluted bleach solution (1 tablespoon of bleach per gallon of water). Spray it on surfaces and let it sit for a few minutes. Then wipe it off. Or, use a commercial kitchen disinfectant spray. Follow the product instructions. For cutting boards, especially plastic ones, running them through a dishwasher on a hot cycle is effective. Remember to clean the sink too. Raw chicken juice often splashes into the sink. Learn how to clean your sink after raw chicken properly to ensure no germs remain. Make sure all items are completely dry before putting them away.
Hand Washing Protocol
Washing your hands is the most important step. Do it immediately after you touch raw chicken. Do it before you touch anything else in the kitchen. This includes cabinets, spice jars, or the faucet handle. Germs spread easily from hands.
Use warm water and soap. Lather your hands well. Scrub for at least 20 seconds. Make sure to get between your fingers and under your nails. Sing a short song to yourself to time it. Rinse your hands thoroughly under running water. Dry your hands with a clean towel or paper towel. Repeat this process often. Wash your hands before and after handling the raw chicken. Wash them again before you touch cooked food. This simple habit protects everyone. It is a key part of safe food handling.
Common Mistakes to Avoid When Cleaning Chicken Wings
When cleaning chicken wings, some common errors can happen. Avoiding these mistakes is important. It helps keep your kitchen safe. It also helps your wings turn out great. I have seen many people make these errors. Learning from them can save you trouble.
These errors often involve spreading germs or affecting the wing’s texture. Paying attention to these points will improve your process. It makes your cooking experience better. Let’s look at what not to do.
Over-Rinsing and Splashing
One common mistake is over-rinsing raw chicken. Many people think more rinsing makes it cleaner. But it actually increases the risk of spreading bacteria. Water splashes off the chicken. These splashes carry germs to nearby surfaces. This includes your counter, walls, and even clean dishes. You may also splash germs onto yourself.
If you choose to rinse, do it gently. Keep the water flow low. Hold the wings close to the sink basin. Do not let water spray widely. After rinsing, immediately clean and sanitize your sink area. It is more important to dry the wings well than to rinse them for a long time. The heat from cooking kills bacteria. Avoid creating a germy mist in your kitchen.
Skipping Sanitization Steps
Another big mistake is not cleaning up well after handling raw chicken. Many people wash their hands. But they forget about the surfaces. They might not clean their cutting board enough. They might leave chicken juices on the counter. This lets germs stay in your kitchen.
These leftover germs can contaminate other foods. They can also get on clean dishes or utensils. Always clean all items that touched raw chicken. This includes the sink. It includes your knives and bowls. Make sure to use a disinfectant. This kills the bacteria. Failing to sanitize creates a dangerous environment. It puts your family at risk of foodborne illness. Remember that cleaning dishes that touched raw chicken needs special care. Learn how to clean dishes that touched raw chicken effectively to prevent cross-contamination.
Special Considerations: Using Lemon or Vinegar for Chicken Wings
You might have heard about using lemon juice or vinegar to clean chicken. Some people believe these ingredients help remove odors or “clean” the meat more. This practice is common in some cultures. However, it is important to understand what they do. It is also important to know what they do not do.
These acidic liquids do not effectively kill bacteria on chicken. They can change the texture or flavor of the meat. They can also make the raw chicken look white. This might make you think it is cleaner. Let’s explore these common practices and their actual effects.
Lemon Juice for Cleaning Chicken Wings
Some people rub lemon slices on chicken wings. They might also squeeze lemon juice over them. The belief is that lemon cleans the chicken. Lemon does have a fresh scent. It can help reduce strong odors. It also makes the chicken look brighter. This can give the impression of cleanliness.
However, lemon juice does not kill bacteria effectively on raw chicken. Bacteria are deeply embedded in the meat. A quick wash with lemon will not remove them. The acidity can start to “cook” the outside of the chicken slightly. This is similar to ceviche. This process is called denaturation. It does not make the chicken safe from harmful bacteria. The only way to kill bacteria is by cooking the chicken to the correct internal temperature. If you want to flavor your chicken with lemon, that’s fine. But do not rely on it for sanitization. You can learn more about how to clean chicken with lemon in a broader context.
Vinegar for Cleaning Chicken Wings
Vinegar is another common household item used for cleaning. It is acidic like lemon juice. Some cooks use vinegar to wash raw chicken. They believe it kills germs or tenderizes the meat. Vinegar can kill some bacteria on surfaces. However, it is not strong enough to make raw chicken safe.
Like lemon, vinegar affects the chicken’s surface appearance. It may make the chicken look less slimy. It can also change the color of the skin. But it does not remove or destroy foodborne pathogens. These germs need very high heat to be killed. Using vinegar can also leave a taste on your wings. This might not be what you want. Focus on proper trimming, drying, and cooking. These are the real keys to safe and tasty wings. Do not use vinegar as a substitute for proper cooking.
FAQ Section
Q1: Do I really need to wash chicken wings before cooking?
Most food safety experts advise against washing raw chicken. This is because washing can spread bacteria through splashes. These germs can land on kitchen surfaces, utensils, and other foods. Instead of washing, focus on trimming any unwanted parts and then patting the wings very dry. Cooking the wings to a safe internal temperature kills all harmful bacteria.
Q2: How do I remove feathers from chicken wings?
You can remove small pin feathers from chicken wings using clean tweezers. Grab each feather firmly near the skin and pull it out. Another option is to gently singe the wings over a low flame, like from a gas burner or kitchen torch. Be very careful if using a flame. This burns off any remaining tiny hairs or feathers.
Q3: Is it okay to use soap to clean chicken wings?
No, you should never use soap or dish detergent to clean raw chicken wings. Soap is not meant for food consumption. It can leave residues on the meat. These residues can be harmful or affect the taste. The best way to “clean” raw chicken is by trimming, drying, and then cooking it thoroughly. For cleaning surfaces after handling chicken, soap and water followed by a disinfectant are correct.
Q4: How long can cleaned chicken wings stay in the fridge?
After cleaning, you can store fresh chicken wings in the refrigerator for one to two days. Place them in a clean, airtight container or a sealed plastic bag. Put them on the lowest shelf of your fridge. This prevents any raw juices from dripping onto other foods. If you plan to cook them later than two days, freeze them.
Q5: What is the best way to dry chicken wings?
The best way to dry chicken wings is by using paper towels. Place the wings on several layers of paper towels. Then, gently pat the top surfaces dry with more paper towels. Flip the wings over and repeat. Ensure every part of the wing, including the tips and joints, is completely dry. This step is crucial for achieving crispy skin when cooked.
Q6: Can I clean frozen chicken wings?
You should thaw frozen chicken wings completely before cleaning them. Cleaning partially frozen wings is difficult. The cold temperature also makes it harder to properly trim or dry them. Thaw frozen wings safely in the refrigerator overnight. You can also thaw them in a sealed bag under cold running water. Do not thaw them at room temperature.
Conclusion
Learning how to clean chicken wings properly is a skill. It greatly improves your cooking. It also boosts your confidence in the kitchen. We have covered key steps. These include inspecting, trimming, and drying your wings. We also discussed crucial kitchen hygiene. Remember, food safety is always first.
By following these simple, direct methods, you ensure delicious and safe meals. You create crispy, flavorful wings every time. My hope is that these tips make your cooking experience easier. You are now ready to tackle any chicken wing recipe. So, gather your tools. Get your wings ready. Start cooking those amazing chicken wings today! Enjoy the journey.
- chicken wings
- food safety
- kitchen hygiene
- poultry preparation
- cleaning raw chicken