· Kitchen Cleaning Tips · 15 min read
How To Clean Beets For Juicing

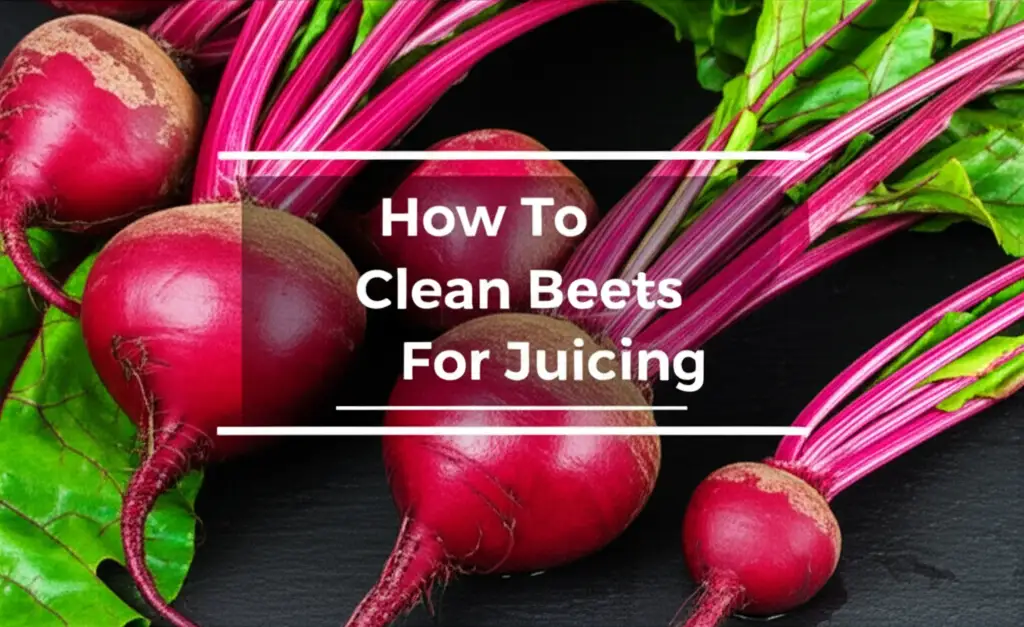
Unlock Pure Juice: How To Clean Beets For Juicing
Imagine a glass of vibrant, nutrient-rich beet juice. It looks so good. Getting there means starting with clean beets. Knowing how to clean beets for juicing properly is key. This step ensures your juice tastes amazing. It also makes your juice safe to drink. This article guides you through the process. We cover everything from initial rinse to final prep. You will learn easy steps to achieve clean beets.
Takeaway
- Thoroughly wash beets under cold running water.
- Use a stiff brush to scrub away all dirt.
- Trim greens and root ends before juicing.
- Consider peeling for smoother juice.
To clean beets for juicing, first rinse them well under cold running water. Then, scrub the beets with a stiff brush to remove all visible dirt and debris. Trim off the greens and the root end before you juice them. This ensures you get clean, pure beet juice every time.
Why Cleaning Beets Matters For Juicing
Cleaning beets properly is not just an option; it is a must. Beets grow in the ground. This means they often come with soil. Soil contains bacteria and other impurities. You do not want these in your juice.
Thorough cleaning removes dirt. It also helps wash away possible pesticides. This gives you a cleaner, safer drink. When beets are dirty, they can spoil the taste of your juice. The earthy flavor can become too strong or unpleasant. A good clean ensures a fresh, pure taste. It protects your health.
Dirty beets can also clog your juicer. This makes the machine work harder. It can also reduce its lifespan. Cleaning your beets makes juicing easier. It makes the process more efficient. This small step leads to a much better juicing experience. It also gives you a healthier final product.
Essential Tools For Cleaning Beets
Cleaning beets requires some simple tools. You likely already have most of these items in your kitchen. Having the right equipment makes the job easy. It also makes it more effective. Let’s look at what you need.
First, get a good quality vegetable brush. This brush needs firm bristles. It helps remove stubborn dirt from the beet’s skin. A soft sponge will not be enough for this task. Make sure your brush is clean before you use it. Just like you clean your kitchen tools, keeping this brush clean is important. You can learn about maintaining kitchen cleanliness, such as how to clean a filter in a dishwasher, to keep all your tools in good shape.
Next, you need a colander or a large bowl. This helps rinse the beets easily. It allows water to drain away. A clean cutting board is also essential. This provides a stable surface for trimming. Use a sharp paring knife or a vegetable peeler. These help you trim the ends and peel the beets if needed. Finally, wear a pair of kitchen gloves if you want to avoid stains. Beet juice can stain hands easily. Having these tools ready saves time and effort.
Step-by-Step Guide To Cleaning Beets
Cleaning beets for juicing is a straightforward process. Following these steps ensures your beets are ready for the juicer. Each step helps remove impurities. We aim for a pure, clean juice.
Initial Rinse Under Cold Water
Start by placing your beets under cold running water. Do not use hot water. Hot water can start to cook the beets. It also makes them lose some nutrients. Hold each beet under the tap. Let the water run over its surface. This first rinse helps loosen large clumps of dirt. You will see soil washing away. This prepares the beets for deeper cleaning.
Turn the beet around slowly. Make sure water touches all parts. Pay attention to any crevices. Dirt hides in these spots. This initial step is quick but important. It removes the surface layer of grime.
Scrubbing Away Dirt and Debris
Now, take your stiff vegetable brush. Begin to scrub each beet thoroughly. Use firm but gentle pressure. You want to remove all visible dirt. Focus on the skin. Work the brush over the entire surface. This includes the top and bottom.
The bristles get into small indentations. They lift away trapped soil. You might see muddy water running off. Keep scrubbing until the water runs clear. This step is crucial for cleanliness. It makes sure no soil makes it into your juice. Think of it like deep cleaning any stubborn surface, where dirt gets stuck. Sometimes, dirt can be as tough to remove as sediment from a well. Be patient and scrub well.
Trimming the Beet Greens and Root End
After scrubbing, it is time to trim the beets. Use your sharp paring knife or a chef’s knife. First, cut off the beet greens. Leave about an inch of stem attached to the beet. This helps prevent bleeding when you cut. The greens are edible and nutritious. You can juice them separately or save them for cooking.
Next, trim the root end. This is the thin, stringy part at the bottom. Cut off just enough to remove the stringy bits. You want to keep as much of the edible beet as possible. These trimmed parts are usually discarded. They do not add much to your juice.
To Peel or Not to Peel: Considerations
Deciding whether to peel beets depends on your preference. Beet skin contains many nutrients. It also adds a more earthy flavor to the juice. If you prefer to keep the skin, ensure you have scrubbed it very well. A very thorough scrub is vital here.
If you want a smoother, less earthy juice, peel the beets. Use a vegetable peeler for this. Peel the skin off after scrubbing and trimming. Be careful not to peel too much of the beet flesh. Peeling removes pesticides more effectively if you are concerned about them. However, it does remove some fiber and nutrients found in the skin. The choice is yours. Both methods result in good juice.
Final Rinse and Inspection
After scrubbing, trimming, and possibly peeling, give the beets a final rinse. Place them back under cold running water. Rinse them quickly. This removes any small pieces of dirt or skin that might remain. It ensures everything is sparkling clean.
Inspect each beet one last time. Look for any missed spots of dirt. Check for bruised areas. If you find any, either re-scrub or trim them off. Your beets are now ready for the juicer. You have prepared them well. This final check gives you confidence in your clean beets.
Cleaning Organic vs. Conventional Beets
The way you clean beets can change slightly based on if they are organic or conventional. Both types need thorough cleaning. Yet, there are some differences in concern. Understanding these helps you make choices for your juicing.
Organic beets grow without synthetic pesticides or fertilizers. This does not mean they are dirt-free. They still come from the ground. So, organic beets will have soil attached. You must scrub them just as carefully. The main benefit is less worry about chemical residues. You still need to remove all visible dirt and grime. Many people choose organic for peace of mind regarding chemical exposure.
Conventional beets may have been treated with pesticides. These chemicals can remain on the skin. Washing and scrubbing are even more important for conventional beets. A thorough scrub helps remove these surface residues. Many people choose to peel conventional beets. This adds another layer of protection. Peeling removes the outer skin layer where residues often concentrate. Whether organic or conventional, the goal is always clean beets. Your cleaning method should match your source and concerns.
Handling Beet Greens and Stems
Beet greens are not just decoration; they are edible. Many people discard them. However, beet greens are packed with nutrients. They contain vitamins K, A, and C. They also offer iron and calcium. Juicing them along with the beets is a great option. If you choose to juice the greens, they need cleaning too.
First, separate the greens from the beet root. Do this before you start cleaning the root. Inspect the greens for any wilted or yellowing leaves. Discard these. They will not taste good. Rinse the healthy greens under cold running water. You can do this in a colander. Gently rub the leaves with your hands. This helps remove dirt. Pay attention to the creases. Dirt often hides there.
You can also use a large bowl filled with cold water. Submerge the greens. Swish them around gently. Lift them out and drain the water. Repeat this process until the water stays clear. This removes any grit. The stems can also be juiced. They add a bit of bitterness but are nutritious. Your beet greens are now ready to be juiced or cooked. They are a valuable part of the beet plant.
Preventing Beet Juice Stains
Beet juice is famous for its vibrant color. This color is great in a glass, but not on your clothes or countertops. Beet juice stains very easily. Taking simple precautions prevents a big mess. You can enjoy your juicing without worry.
First, consider wearing an apron. This protects your clothing from splashes. Even a tiny drop of beet juice can leave a bright pink mark. If you do not have an apron, wear old clothes. Dark-colored clothes are also a good choice. They hide stains better.
Next, protect your work surfaces. Use a cutting board. Place paper towels or a silicone mat under your juicer. This catches any drips. If you get beet juice on your counter, wipe it immediately. Use a damp cloth. For stubborn stains, a mixture of baking soda and water can help. Or, a splash of white vinegar often works wonders on fresh stains. Remember, time is key. The faster you clean up spills, the less likely they are to set. You can use similar methods to clean stubborn stains on other surfaces, like how to clean mold with vinegar, showcasing vinegar’s versatility. Taking these steps makes your juicing experience more pleasant.
Storing Cleaned Beets
After you clean your beets, you might not use all of them at once. Proper storage helps keep them fresh. It preserves their nutrients. Storing cleaned beets is different from storing uncleaned ones. Knowing the best method saves time later.
First, make sure the beets are completely dry. Use a clean towel or paper towels to pat them dry. Excess moisture promotes spoilage. If you plan to juice them soon, within a day or two, place them in an airtight container. You can also put them in a zip-top bag. Store this in the crisper drawer of your refrigerator. This helps maintain freshness.
For longer storage, up to a week, you can wrap each beet in a damp paper towel. Then place them in a plastic bag. The slight dampness helps prevent dehydration. Do not wash beets before storing if you plan to keep them for more than a week. The dirt acts as a protective layer. Always wash them right before use. Proper storage ensures your cleaned beets remain ready for your next juicing session.
Troubleshooting Common Beet Cleaning Issues
Sometimes, cleaning beets presents small challenges. You might encounter extra stubborn dirt or worry about certain aspects. Addressing these issues makes your cleaning routine smoother. We want your beets to be perfect for juicing.
One common issue is extremely muddy beets. If your beets are covered in thick clay, a simple rinse might not be enough. Try soaking them first. Place the muddy beets in a basin of cold water for 5-10 minutes. This softens the mud. It makes it easier to scrub off. After soaking, proceed with the regular scrubbing. This pre-soak step saves effort.
Another concern is tiny roots or hairs. Some beets have many small, hair-like roots. These can be hard to clean. Use your vegetable brush vigorously. If some remain, you can gently scrape them off with a paring knife. This ensures a clean surface. For older beets, the skin might be tougher. If scrubbing does not get them clean enough, consider peeling them. Peeling removes any lingering imperfections. Even for surfaces, difficult stains can require specific cleaning solutions. Just as you might need to know how to clean the bottom of a pan with stuck-on food, beets sometimes need extra effort. These solutions help ensure your beets are truly clean.
Benefits of Juicing Beets
You put effort into cleaning your beets. Understanding the benefits of juicing them makes it worthwhile. Beets are a powerhouse of nutrition. They offer many advantages for your health. This root vegetable is more than just colorful.
Beets are rich in vitamins and minerals. They contain folate, manganese, potassium, and vitamin C. They also offer dietary fiber. Juicing beets concentrates these nutrients. This makes them easier for your body to absorb. Beets are known for their nitrates. These natural compounds convert into nitric oxide in your body. Nitric oxide helps relax blood vessels. This can support healthy blood pressure levels. Many athletes use beet juice. It helps improve stamina. It helps blood flow more efficiently.
Beets also contain powerful antioxidants. These compounds help fight cell damage. They support overall health. Drinking beet juice regularly can boost your energy. It can improve your circulation. It can also help detoxify your liver. After all your cleaning work, enjoying these benefits is the best reward. You made a pure, healthy drink.
Post-Juicing Clean-up and Hygiene
After you finish juicing your carefully cleaned beets, the work is not over. Proper post-juicing clean-up is vital. It maintains your kitchen hygiene. It also keeps your juicer in good working order. A clean juicer performs better. It lasts longer.
First, disassemble your juicer immediately. Do not let pulp dry inside. Dried beet pulp is much harder to remove. Rinse all parts under running water. Use a small brush, often provided with the juicer, for the mesh screen. This screen collects fine pulp. It needs thorough cleaning. Any leftover residue can encourage mold growth. This is similar to how mold can grow in damp places like under a sink, and knowing how to clean mold under a sink helps prevent such issues in your home.
Wash all removable parts with warm soapy water. Use a dishcloth or sponge. Rinse them well. Let them air dry completely. Or, dry them with a clean towel. A dry juicer prevents bacterial growth. Wipe down your countertops. Check for any beet juice splashes. Clean cutting boards and knives with soap and water. This prevents cross-contamination. Maintaining a clean workspace is just as important as cleaning the beets themselves. This final cleaning step ensures safety and longevity for your equipment.
FAQ Section
Why do beets need so much cleaning before juicing?
Beets grow underground. They often have a lot of dirt and soil attached. This soil can contain bacteria, pesticides, and other impurities. Thorough cleaning removes these contaminants. It ensures your juice is pure, safe, and tastes good.
Can I juice beets without peeling them?
Yes, you can juice beets without peeling them. The skin contains nutrients. It also adds a more earthy flavor. If you choose not to peel, make sure to scrub the beets very well with a stiff vegetable brush. This removes all dirt from the skin.
What are the dark spots on my beets? Are they safe?
Dark spots on beets usually indicate dirt or minor blemishes. Scrub them thoroughly with a brush. If the spots are deep or look like mold, cut them out. Small surface blemishes are usually harmless. Always remove anything suspicious.
How do I remove beet stains from my cutting board?
For fresh beet stains on a cutting board, wipe immediately with a damp cloth. For set stains, try sprinkling baking soda on the stain. Add a few drops of water to make a paste. Let it sit for 15-30 minutes, then scrub and rinse. Lemon juice or white vinegar can also help.
Can I juice the beet greens and stems along with the root?
Yes, you can absolutely juice beet greens and stems. They are highly nutritious. They contain vitamins and minerals. Make sure to wash them thoroughly first, just like the beet root. They add an earthy, slightly bitter taste to the juice.
How long do cleaned beets last in the refrigerator?
Cleaned beets can last for about 3-5 days in the refrigerator. Store them in an airtight container or a zip-top bag. Make sure they are completely dry before storing them. Excess moisture will make them spoil faster.
Conclusion
Learning how to clean beets for juicing is a skill worth having. It makes your homemade juice safer. It also makes it taste better. We covered every step, from the initial rinse to the final inspection. You now know how to handle different types of beets. You also know how to manage those useful greens.
Remember, starting with clean ingredients is fundamental for good health. Your efforts in cleaning beets pay off in a vibrant, nutritious drink. This simple preparation step makes a big difference. Now you can make delicious beet juice with confidence. So, grab your beets and your brush. Get ready to juice. Start enjoying the many benefits of this amazing root vegetable today.
```json
{
  "publishDate": "2025-07-13T00:00:00Z",
  "title": "How To Clean Beets For Juicing",
  "excerpt": "Learn how to clean beets for juicing effectively. Remove dirt, pesticides, and improve your juice's purity with simple steps.",
  "image": "https://res.cloudinary.com/dky6urpy2/image/upload/v1752316378/blog_image_1752316378_buvaeh.webp",
  "category": "Kitchen Cleaning Tips",
  "tags": [
    "beets",
    "juicing",
    "cleaning beets",
    "food preparation",
    "healthy juicing"
  ],
  "metadata": {
    "canonical": "https://www.beacleaner.com/how-to-clean-beets-for-juicing"
  }
}- beets
- juicing
- cleaning beets
- food preparation
- healthy juicing


